Delightful Assorted Dessert Mini Treats: a Bite-Sized Bliss
- Sweet Beginnings: Make Assorted Dessert Mini Treats That Wow
- Dessert Delight: A Tasty Overview
- The Sweet Perks: Benefits of Mini Treats
- Essential Ingredients Guide for Delightful Assorted Dessert Mini Treats
- Essential Cooking Preparation and Techniques
- Pro Tips & Secrets to Mastering Mini Treats
- Perfect Presentation for Your Bite-Sized Desserts
- Storage & Make-Ahead Tips
- Creative Variations to Spice It Up
- Complete Nutrition Guide
- Frequently Asked Questions
- 📝 Recipe Card
Sweet Beginnings: Make Assorted Dessert Mini Treats That Wow
Oh my gosh, i remember the first time i hosted a gathering and decided to make assorted dessert mini treats .
My friends were all about those huge slices of cake, but me? i wanted to bring something different to the table.
I thought, why not whip up an array of bite sized desserts ? i was kinda nervous, but the look on everyone’s faces as they tasted those little confections was priceless.
There i was, the hero of the dessert table, and my sweet tooth was doing a happy dance! so, if you’re looking to impress or just want something delightful to enjoy, let’s dive into this!
Dessert Delight: A Tasty Overview
These mini dessert recipes might seem like a modern trend, but let’s take a step back. mini treats date way back think of classic cheesecake bites or tiny tarts that have been around at celebrations forever.
People have always found joy in cute, shareable sweets. they’re versatile and can cater to a whole variety of tastes.
Trust me, if you’re heading for a party, these sweet gems will definitely shine.
Now, onto the nitty gritty! preparing this sweet assortment takes some time but isn’t overly complicated. it requires about 30 minutes of active prep time and another 30 minutes in the oven.
Don’t forget an hour to chill you want those flavors to meld! all in, you're looking at about 2 hours . it'll be well worth it, as you'll yield about 24 little delights!
And let’s talk about costs. depending on where you live and if you have some ingredients on hand, this could range from $15 to $25 for everything.
That’s like getting a fancy dessert platter at a bakery but for a fraction of the cost, my friend!
The Sweet Perks: Benefits of Mini Treats
Now you might be wondering, why go through all this trouble? Well, here’s why these mini dessert recipes are the real deal:
Health ier Choices : Unlike some hefty slices of cake, these treats are portion controlled. Each one is like a little whisper of sweetness perfect for those sweet tooth cravings without overdoing it!
Flexibility and fun : you can get creative! want a fresh twist? try a refreshing lemon tart instead of the same old chocolate options.
Whip up a chocolate mousse recipe for those days when indulgence calls your name.
Perfect for every occasion : whether it’s a birthday bash, a holiday gathering, or just a tuesday and you’re feeling fancy, these tiny treats fit right in.
Top them with fresh berries or serve them on a beautiful platter for an elegant touch.
Unique Flavor Combinations : With assorted mini cakes and various flavors, you can cater to everyone. You can have the richness of indulgent chocolate desserts , the tang of lemon, and creamy cheesecakes all on one table!
So, are you ready to dive into the ingredient list? Let’s gather what you need for these delightful creations!
Essential Ingredients Guide for Delightful Assorted Dessert Mini Treats
When you're on a mission to make assorted dessert mini treats , you gotta start with the right ingredients. i mean, nothing's worse than whipping up these elegant mini treats only to realize you’ve got the cheap stuff.
So let’s break down the essential ingredients that’ll take your bite sized desserts from zero to hero.
Premium Core Components
First things first, let’s get specific about what you need. Here’s a handy list for detailed measurements (both US & metric) so there’s no guesswork:
- Heavy Cream : 1 cup (240 ml)
- Semisweet Chocolate : 4 oz (113 g)
- Granulated Sugar : 2 tbsp (30 g)
- All-Purpose Flour : 1 cup (120 g)
You want to look for quality indicators too. like, if your chocolate isn’t shiny or it smells like cardboard, step away! fresh ingredients mean better flavor.
Storage is key, so keep your flour in a cool, dry place. unopened, it’ll last about a year, but opened? try to use it within six months.
Freshness tips? When you’re grabbing produce like lemons, look for ones that are firm and shiny. They’ll pack a juicy punch for your zesty lemon tartlets !
Signature Seasoning Blend
Let’s jazz up those treats with a signature seasoning blend . everyone knows that the right spices can elevate anything from mini tart recipes to vanilla cheesecake bites .
Think outside the box here:
- Essential Spice Combinations : A hint of cinnamon can add warmth to your chocolate dessert cups .
- Herb Selections : A sprig of mint with chocolate? Absolute heaven! Pair it well.
- Flavor Enhancers : A splash of vanilla extract can transform your cheesecake game. Trust me on this!
Don’t forget about regional flavors. If you want to add a southern twist, try incorporating some pecans into your treats!
Smart Substitutions
Sometimes you might run out of an ingredient or you may have a dietary restriction to consider. So, keep some smart substitutions in your back pocket:
- Common Alternatives : No heavy cream? Use coconut cream for a fantastic guilt free mini dessert . Boom.
- Dietary Modifications : Swap out granulated sugar for stevia if you’re counting carbs.
- Emergency Replacements : Out of eggs? You can use unsweetened applesauce as a binder.
- Seasonal Options : Using fresh berries in summer? Awesome! They’ll make your dessert platters pop even more.
Kitchen Equipment Essentials
Now, let’s chat about the kitchen equipment essentials . You don’t need a fancy schmancy kitchen to make these treats, but some tools will save you time:
- Must Have Tools : Mixing bowls and a whisk are non-negotiable. An electric mixer will make whipping cream a breeze.
- Alternative Equipment Options : Don’t have a muffin tin? Use silicone molds!
- Preparation Tips : Always measure ingredients before you start; it avoids that pesky “oops” moment.
- Storage Solutions : Use airtight containers for any leftovers (if there are any after a party, of course!).
Let’s not forget the fun part: assembling your mini creations! Once you’ve got all your base ingredients prepped and ready, it’s time to unleash your inner dessert artist.
Keep it light, keep it fun, and embrace the mess! after all, cooking should be a joyful experience, not a chore.
By using the right ingredients, tools, and a sprinkle of creativity, you’ll master these delightful sweets in no time. now, let’s dive into the exciting step-by-step instructions for making these scrumptious assorted dessert mini treats!
Essential Cooking Preparation and Techniques

When you’re diving into the world of professional cooking, especially when you’re all about making assorted dessert mini treats , there’s a vibe you gotta embrace.
It’s a mix of passion, precision, and a whole lotta fun. so, let’s break it down together, step-by-step!
Essential Preparation Steps
Mise en place is the fancy term for having everything ready before you start cooking. trust me, it makes a world of difference.
Measure your ingredients beforehand. i can’t tell you how many times i’ve been knee deep in flour, only to realize i forgot to whisk the eggs! it’s a game changer when everything’s prepped.
Time management is crucial. set a timer on your phone for each part of the process. for instance, give yourself 30 minutes to whip up those chocolate mousse cups.
You’ll feel like a kitchen superstar when you check everything off your list!
Get your workspace organized. keep your tools within reach so you don’t waste time hunting down a whisk. safety is non-negotiable, too! remember to keep a damp towel handy to wipe down grimy hands.
And always, always, be cautious with that knife when you’re chopping toppings.
step-by-step Process
All right, let’s break this down further into clear instructions.
For the chocolate mousse cups, melt your 4 oz of semisweet chocolate over a double boiler. it’s crucial to keep an eye on it.
You don’t wanna scorch that chocolate. use a thermometer if you have one keep it around 100° f .
When it comes to timing, consider this: you’ll be beating those egg whites until they hit stiff peaks —you want that dreamy texture. Fold in gently to combine with the whipped cream.
Now for doneness. When your mousse is set after an hour, it should hold its shape but be soft and airy. You’ll just know it’s right when you taste it!
Expert Techniques
Let’s talk a bit about those pro techniques that elevate your dessert game. the secret to killer cheesecake bites? overmixing is a no-go! the goal is light, airy bites.
I’ve learned that the hard way after creating a dense brick that even my dog wouldn’t touch.
Keep an eye out for quality checkpoints. after chilling those lemon tartlets for 10- 12 minutes , check for that slight jiggle in the center.
It’s gotta be set but not firm, like a good friend who’s a little unpredictable.
If things go awry maybe the lemon filling is too tart or the mousse isn’t sweet enough don’t panic! adjust those flavors as you go.
A little sugar here, a little vanilla there, and you’ll be back on track.
Success Strategies
Now, let’s avoid rookie mistakes. always taste your desserts as you go. it’s the best part, right? if your cheesecake bites need a little sweetness boost, add a sprinkle more sugar before it’s too late.
Quality assurance? Invest in good ingredients. Fresh lemons for your lemon tart and the best chocolate you can find will make all the difference. Trust me, you’ll notice!
And if you’re short on time, consider make-ahead options . you can make these mini treats a day or two in advance.
Just keep them chillin’ in the fridge. they’ll be ready to wow when it’s party time or just a cozy night in.
So, remember, cooking is a journey. Enjoy the process of creating bite sized desserts that satisfy those sweet tooth cravings . With a little skill, precision, and dash of fun, you’ll quickly elevate your dessert game to pro status!
Additional Information
I could go on and on about mini dessert recipes and creative dessert ideas , but let’s save that for later.
Trust me, there’s a world of delightful sweets waiting for you to discover! get those whisking muscles warmed up adventure in the kitchen awaits!
Pro Tips & Secrets to Mastering Mini Treats
Hey there, dessert lovers! if you're itching to make assorted dessert mini treats , you're in the right place. now, let's dish some pro tips and secrets i've picked up along the way.
First off, time saving techniques are your best friends. prepping components ahead of time helps a ton. for example, whip your cream the night before, refrigerate it, and boom! you're halfway done when it’s showtime.
Speaking of the show, don’t skip on flavor enhancement tips . a dash of vanilla or a pinch of sea salt can elevate your cookies or tartlets to a whole new level.
And if you’re feeling adventurous, mix up your flavor pairings. chocolate mousse with a hint of mint ? yes, please!
When it comes to presentation, keep it simple yet elegant. a little garnish advice goes a long way. fresh berries or a drizzle of chocolate will take your mini dessert recipes from ‘blah’ to ‘wow’.
Remember, your treats are not just desserts; they’re mini masterpieces.
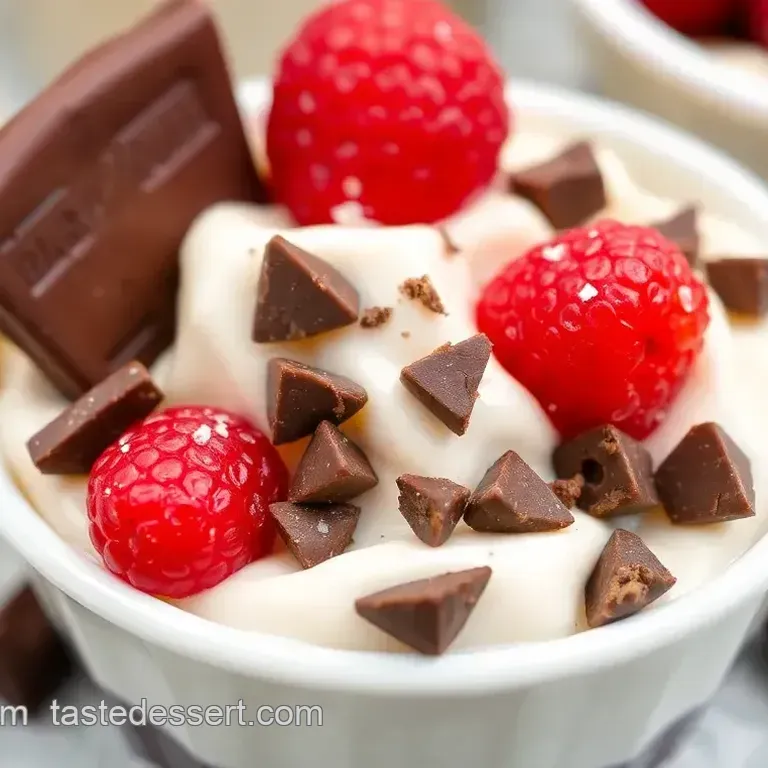
Perfect Presentation for Your Bite Sized Desserts
Now let’s dive into how to make those mini treats look as good as they taste! plating techniques can be surprisingly fun.
Use a small offset spatula to create layers in your presentation. for example, layering cheesecake bites with berries can add that wow factor.
And don’t forget about color combinations ! bright, colorful items like fresh strawberries against creamy vanilla make for beautiful visuals.
Here’s a quick tip: visual appeal tips can transform even the simplest desserts. keep your plates clean, and arrange your dessert platter with care.
You want to lead your guests' eyes straight to those chocolate dessert cups or lemon dessert recipes . trust me, we eat with our eyes first!
Storage & make-ahead Tips
Alright, let's talk about the practical stuff. if you’re planning to make assorted dessert mini treats ahead of time, storage is key.
Store your lovely creations in airtight containers. if it's whipped cream or anything creamy, make sure to keep it chilled freshness duration is vital for these treats.
Those mini tart recipes will taste best within a few days. just grab your containers and store 'em in the fridge!
As for reheating instructions , most of these bite sized desserts are best enjoyed chilled. if you’ve made something like a chocolate mousse recipe , there’s no need to reheat just take it out and enjoy.
Easy peasy!
Creative Variations to Spice It Up
Now, let’s get creative! there’s no limit when it comes to flavor adaptations . try mighty lemon tartlets with a twist by throwing in some berries or mixing up your cheesecake with a chocolate drizzle.
Have a seasonal celebration coming up? you can add pumpkin to those cheesecake treats for fall vibes.
For those with special diets, don’t fret! there are ample dietary modifications available. coconut cream in place of heavy cream gives you those guilt free mini desserts without sacrificing flavor.
And if you're dealing with gluten sensitivities, switch to gluten-free flour for that tart crust.
Complete Nutrition Guide
Let’s get down to the nitty gritty the detailed breakdown of what these delightful sweets entail. knowing how many calories and nutrients are packed into each treat is so helpful, especially if you’re watching what you eat.
These beauties sit at around 180 calories each, so it’s all about moderation!
Plus, each mini treat brings its own health benefits . for example, those refreshing lemon tarts not only taste great but offer some vitamin c! when you’re enjoying your desserts, remember to be mindful of portion guidance .
Just because they’re bite sized doesn’t mean you can’t share a few with friends!
So, whether you’re hosting a gathering or just indulging in a sweet escape, don’t forget: these assorted dessert mini treats are the perfect addition to any occasion.
They bring together unique flavors and textures that’ll satisfy your sweet tooth cravings without overdoing it. go on, gather your ingredients, and have some fun.
I can't wait to hear how yours turn out!
Frequently Asked Questions
What are some tips to successfully make assorted dessert mini treats?
To successfully make assorted dessert mini treats, chill all ingredients before use, especially heavy cream, to ensure optimal whipping. Take care not to overmix when combining whipped ingredients, and use a piping bag for neat filling, especially for the chocolate mousse cups.
Lastly, taste your mixtures as you go to adjust sweetness to your preference.
Can I make assorted dessert mini treats ahead of time?
Yes, you can prepare assorted dessert mini treats ahead of time! The chocolate mousse can be made a day in advance, and both the lemon tartlets and cheesecake bites can be stored in the refrigerator for 1-2 days before serving. Just ensure they’re covered properly to maintain freshness.
How long do the assorted dessert mini treats last in storage?
The assorted dessert mini treats can last in the refrigerator for up to 3 days. Make sure to store them in airtight containers to prevent them from drying out or absorbing other odors. It's best to consume them fresh, but they will keep well for a short period if stored correctly.
What are some variations I can try when I make assorted dessert mini treats?
When making assorted dessert mini treats, you can experiment with flavors by adding fruits like raspberries or citrus to the mousse or changing the juice in the lemon tartlets to lime or orange. You could also make a chocolate cheesecake version by adding cocoa powder to the cheesecake mixture for a delightful twist!
Are there any substitutions I can make in the ingredients for the assorted dessert mini treats?
Absolutely! For a dairy-free option, you can substitute heavy cream with coconut cream, and for those with gluten sensitivities, using gluten-free flour in the tart crust is a great idea. You can also replace granulated sugar with natural sweeteners like honey or agave for a healthier alternative.
What should I serve with assorted dessert mini treats?
Your assorted dessert mini treats pair wonderfully with a scoop of vanilla ice cream or a rich dark coffee. For a refreshing complement, consider serving them alongside a light fruit salad or herbal tea to balance the sweetness. These combinations can enhance the overall dessert experience!
Make Assorted Dessert Mini Treats

