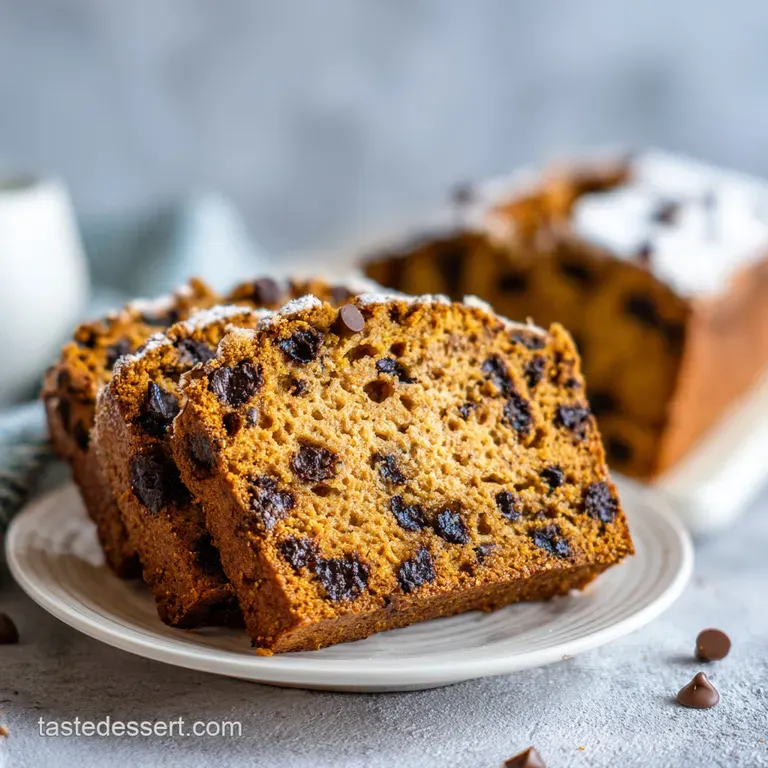
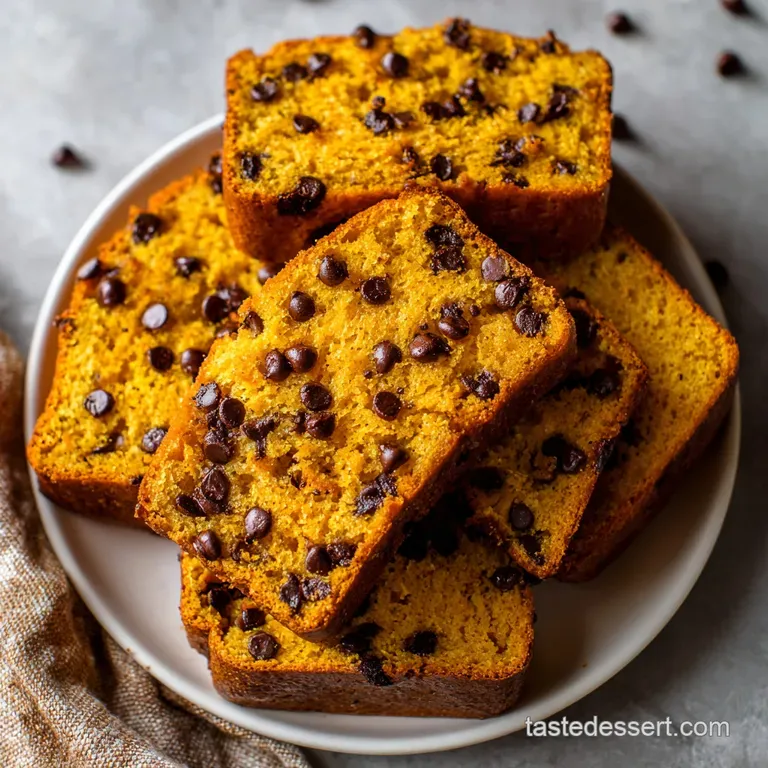
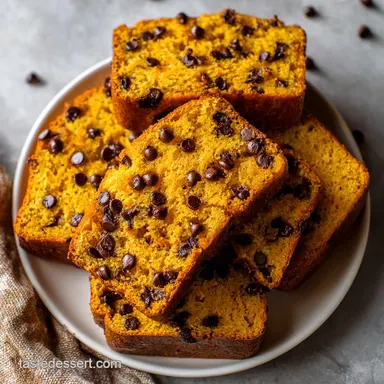
Best Chocolate Chip Pumpkin Bread: Moist and Spiced
- Time: Active 15 minutes, Passive 60 minutes, Total 75 minutes
- Flavor/Texture Hook: Velvety pumpkin crumb with molten chocolate pockets
- Perfect for: Holiday gifting, cozy autumn brunches, or beginner bakers
- Bake the Best Chocolate Chip Pumpkin Bread
- Precision Timing and Temperature Guides
- What Makes This Loaf Velvety
- Selecting the Finest Pantry Staples
- Tools for a Flawless Bake
- Step by Step Baking Method
- Solving Common Loaf Failures
- Flavor Variations and Dietary Swaps
- Pumpkin Bread Myths
- Storing and Freezing Your Slices
- Perfect Pairings for Warm Loaves
- Recipe FAQs
- 📝 Recipe Card
Bake the Best Chocolate Chip Pumpkin Bread
Imagine walking into your kitchen and being hit by a wave of warm cinnamon, earthy nutmeg, and the sweet, caramelized scent of toasted pumpkin. There is something truly magical about the way a loaf of pumpkin bread transforms a house into a home during the colder months.
I remember the first time I pulled this specific version out of the oven the top had a slight sugary crunch, the chocolate chips were still shimmering and soft, and the aroma was so intense it felt like a warm hug.
The beauty of this recipe lies in its simplicity. We are looking for a quick win here, something that doesn't require a stand mixer or hours of proofing, but still delivers that high end bakery result.
You want a loaf that is dense enough to hold its shape when sliced but light enough to feel like a treat rather than a brick. It is the kind of recipe you'll find yourself making on a rainy Tuesday just because you need that sensory comfort.
We are going to focus on a few key techniques that prevent the common pitfalls of quick breads, like a gummy bottom or a sunken middle. By the time we are done, you'll have a loaf that is structurally sound and bursting with autumnal spice.
It is about creating those delightful homemade sweets that make memories, and trust me, this one is a keeper.
Precision Timing and Temperature Guides
To get that ideal rise and a crumb that isn't overly wet, we need to be precise. Temperature is our best friend in baking. If your oven is too cool, the bread will take forever to cook, leading to a dry exterior before the middle is set.
If it is too hot, the top will brown too quickly, leaving you with raw batter in the center. We are aiming for the sweet spot where the heat penetrates the dense pumpkin batter at a steady pace.
Baking is a game of patience, especially when dealing with high moisture ingredients like pumpkin puree. You might be tempted to pull it out early when the top looks golden and "done," but the 60 minute mark is usually the threshold for a fully set interior.
Let's look at how this breaks down based on your specific needs for the day.
| Servings | Ingredient Adjustments | Pan Size | Cook Time |
|---|---|---|---|
| 6 people | Halve all ingredients; use 1 egg | 8x4-inch loaf pan | 45-50 minutes |
| 12 people | Standard recipe (1x) | 9x5-inch loaf pan | 60 minutes |
| 24 people | Double recipe (2x) | Two 9x5-inch pans | 60-65 minutes |
When you are doubling the recipe for a crowd or a bake sale, don't try to cram it all into one massive pan. Using two standard 9x5-inch pans ensures even heat distribution. You'll find that the bake time only increases by a few minutes because the oven has to work a bit harder to maintain the temperature with more mass inside.
Just keep an eye on the color and use the toothpick test.
What Makes This Loaf Velvety
The science of a great quick bread is all about moisture management and aeration. Unlike a cake where we want a fine, airy crumb, a pumpkin loaf needs a bit of weight to feel authentic. However, we don't want it to be sodden.
By using oil, we ensure the flour proteins are coated in fat, which inhibits gluten development and results in a more tender bite.
- Hygroscopic Balance: Using both granulated and brown sugar pulls moisture from the air and the pumpkin, keeping the bread moist for days.
- Fat Suspension: The neutral oil stays liquid at room temperature, unlike butter, which means the bread stays soft even after it has cooled completely.
- Starch Gelatinization: The high temperature allows the starches in the flour to set around the pumpkin fibers, creating a sturdy but soft lattice.
- Chemical Leavening: Baking soda reacts with the acidic components in the pumpkin and brown sugar to create immediate lift the moment it hits the heat.
| Ingredient | Science Role | Pro Secret |
|---|---|---|
| Pumpkin Puree | Moisture & Structure | Use "Pure Pumpkin," not "Pie Filling" for control. |
| Baking Soda | Leavening & Browning | Sift it with flour to avoid bitter clumps. |
| Neutral Oil | Tenderness | Use Grapeseed or Canola for a clean flavor. |
| Brown Sugar | Moisture & Depth | Pack it tight to ensure the molasses content is high. |
One thing I've learned is that moisture control is as vital here as it is when making my ultimate Funfetti Cake, where the ratio of fat to flour determines whether the cake is light or crumbly. In this pumpkin bread, the puree acts as a primary liquid, so we don't need additional milk or water.
Selecting the Finest Pantry Staples
Quality ingredients make a huge difference in the final flavor profile. For the flour, a standard all purpose works best because it has the right protein content to support the heavy mix ins like chocolate chips without becoming tough.
I always suggest weighing your flour if you have a scale (220g), as it is the most common variable that ruins a bake.
- 1.75 cups (220g) All purpose flour: Why this? Provides the structural backbone without making the bread too "bready" or tough.
- 1 tsp Baking soda: Why this? The heavy lifter that reacts with acid to give us that beautiful rise.
- 0.5 tsp Salt: Why this? Sharpens the sweetness and makes the spices pop on your tongue.
- 2 tsp Pumpkin pie spice: Why this? A pre mixed blend of ginger, cloves, and allspice for classic warmth.
- 1 tsp Ground cinnamon: Why this? Boosts the spice profile for that signature fall aroma.
- 1 cup (225g) Pumpkin puree: Why this? Adds vitamins, moisture, and that gorgeous orange hue.
- 0.5 cup (100g) Granulated white sugar: Why this? Helps create those slightly crisp, golden edges.
- 0.5 cup (100g) Packed light brown sugar: Why this? Adds a hint of caramel and extra moisture.
- 0.5 cup (120ml) Neutral oil: Why this? Keeps the crumb velvety even after several days on the counter.
- 2 Large eggs: Why this? Bind everything together and provide a bit of leavening.
- 1 tsp Pure vanilla extract: Why this? Rounds out the spices with a floral, sweet finish.
- 1 cup (170g) Semisweet chocolate chips: Why this? Provides rich pockets of flavor that contrast the earthy pumpkin.
| Original Ingredient | Substitute | Why It Works |
|---|---|---|
| Neutral Oil | Melted Coconut Oil | Adds a subtle tropical note; results in a slightly firmer loaf. |
| Semi sweet Chips | Dark Chocolate Chunks | Less sweet, more intense cocoa flavor. Note: Will melt into larger pools. |
| Pumpkin Pie Spice | Cinnamon + Ginger + Nutmeg | A DIY blend works if you don't have the pre mixed jar. |
| Light Brown Sugar | Dark Brown Sugar | Increases the molasses flavor and makes the bread darker. |
Tools for a Flawless Bake
You don't need a lot of fancy gear for this, which is part of the charm. A good 9x5-inch loaf pan is the most important piece. I prefer light colored metal pans because they conduct heat more evenly than glass or dark non stick pans.
Glass pans tend to hold heat too long, which can cause the edges of your bread to overcook before the middle is ready.
A whisk and a sturdy silicone spatula are your primary mixing tools. The whisk is used for the wet ingredients to ensure the eggs and sugars are completely emulsified. Once the dry ingredients go in, switch to the spatula.
A spatula allows you to "fold," which is a gentle motion that combines ingredients without knocking out all the air or over working the gluten. You also want a wire cooling rack; leaving the bread in the pan for too long after baking creates steam, which leads to a soggy bottom.
Chef Tip: If you only have an 8x4-inch pan, you can still make this! Just fill it 3/4 of the way up and use the leftover batter for 2-3 muffins. This prevents the loaf from overflowing and making a mess in your oven.
step-by-step Baking Method
- Heat the oven to 350°F (175°C). Grease your 9x5-inch pan and line it with parchment paper. Note: The parchment "sling" makes it much easier to lift the bread out later.
- Whisk the pumpkin, sugars, oil, eggs, and vanilla in a large bowl. Whisk for 60 seconds until the mixture looks glossy and smooth.
- Combine the flour, baking soda, salt, and spices in a separate bowl. Set aside 1 tablespoon of this dry mix.
- Toss your chocolate chips in that reserved tablespoon of flour. Note: This prevents the chips from sinking to the bottom of the pan.
- Fold the dry ingredients into the wet ones using your spatula. Stop as soon as you see no more white streaks of flour.
- Incorporate the coated chocolate chips gently into the batter. Do not over mix at this stage.
- Transfer the batter into the pan and smooth the top. Scatter a few extra chips on top for a professional look.
- Bake for 60 minutes. Check doneness by inserting a toothpick; it should come out clean or with just a few dry crumbs.
- Cool in the pan for 10 minutes. Transfer to a wire rack to finish cooling completely.
Solving Common Loaf Failures
Even the best bakers run into trouble sometimes. The most frequent issue with pumpkin bread is a sunken center. This usually happens for two reasons: either the bread was pulled out too early, or there was too much leavening agent.
If your oven temperature is off, the bread might look done on the outside while the internal structure hasn't set yet. Once you pull it out, the trapped steam collapses the weak center.
Another common headache is the "gummy layer" at the bottom. This is often caused by under mixing the pumpkin and oil or over mixing once the flour is added. If the flour is worked too much, it develops gluten that traps moisture in a dense, rubbery way.
It is a delicate balance you want to ensure the wet ingredients are a perfect emulsion before the flour ever touches the bowl.
Why Your Bread Sinks
If your loaf looks like a valley once it cools, it likely needed another 5 minutes in the oven. Always use a wooden skewer or toothpick and aim for the very center. If it comes out with wet batter, it's not ready.
If it comes out with just a smear of melted chocolate, that's fine just make sure it's not raw pumpkin mix.
| Problem | Root Cause | Solution |
|---|---|---|
| Sunken Center | Underbaked or too much soda | Bake 5 mins longer; level your measuring spoons. |
| Dry Crumb | Too much flour | Use the "spoon and level" method for measuring flour. |
| Chips at Bottom | Heavy chips/thin batter | Toss chips in flour before adding to the mix. |
Common Mistakes Checklist
- ✓ Don't use a cold egg; let it sit at room temperature for 20 minutes for better emulsification.
- ✓ Never skip the parchment paper; it prevents the bottom from getting too dark.
- ✓ Check your baking soda's expiration date; old soda won't give you the lift you need.
- ✓ Avoid opening the oven door during the first 40 minutes of baking.
- ✓ Let the loaf cool completely before slicing to ensure the crumb "sets."
Flavor Variations and Dietary Swaps
This bread is a canvas for your favorite additions. While chocolate chips are the classic choice, you can easily swap them for toasted walnuts or pecans for a bit of crunch. If you want a deeper, more sophisticated flavor, try adding half a teaspoon of espresso powder to the dry ingredients.
It doesn't make the bread taste like coffee, but it intensifies the chocolate and the pumpkin spice.
If you are looking to scale the recipe down, you can easily halve the ingredients. For the eggs, simply whisk one egg and use half of it by weight or volume. If you are doubling the recipe to freeze one for later, remember that spices can sometimes lose their "punch" in the freezer, so I like to add an extra 1/4 teaspoon of cinnamon to the batch intended for the long haul.
| Method | Time | Texture | Best For |
|---|---|---|---|
| Oven (Fresh) | 60 minutes | Crispy crust, soft middle | Serving guests immediately. |
| Microwave (Reheat) | 15-20 seconds | Very soft, molten chips | A quick morning snack. |
| Toaster Oven | 2-3 minutes | Crunchy edges, warm center | Enhancing day old slices. |
Pumpkin Bread Myths
One common myth is that you must use butter for a "rich" bread. In reality, oil provides a much better texture for quick breads that are meant to be eaten over several days. Butter contains water and milk solids that can actually make the bread feel dryer once it reaches room temperature.
Oil is 100% fat, which creates a protective barrier around the flour, ensuring a velvety mouthfeel every time.
Another misconception is that more pumpkin equals a more moist bread. If you add too much puree, the ratio of liquid to flour becomes lopsided, and the bread will never fully "bake through." It ends up with a custard like, gummy texture in the middle that won't hold its shape.
Stick to the 1 cup measurement for the best results; it is the perfect amount of moisture for the 1.75 cups of flour.
Storing and Freezing Your Slices
Once your bread is completely cool, store it in an airtight container at room temperature. It will stay fresh and moist for up to 4 days. In fact, many people (myself included) think it tastes even better on day two, as the spices have had time to meld with the pumpkin. Proper reheating is just as vital as it is for Chocolate Chip Bagels, so if it starts to feel a little firm after a few days, a quick 10 second zap in the microwave will bring that "fresh baked" softness right back.
To freeze, wrap the entire loaf (or individual slices) tightly in plastic wrap, then place it in a heavy duty freezer bag. It will keep beautifully for up to 3 months. To thaw, just leave it on the counter for a few hours. For a zero waste tip: if you have a few slices that have gone truly stale, don't toss them!
They make the most incredible pumpkin bread French toast you've ever had. Just dip them in a standard egg and milk wash and fry them up in a pan with a little butter.
Perfect Pairings for Warm Loaves
Serving this bread is all about enhancing those cozy vibes. A thick slice is wonderful on its own, but you can take it to the next level with a smear of salted maple butter. Simply whip a bit of maple syrup and a pinch of flaky sea salt into softened butter.
The salt cuts through the richness of the chocolate and makes the pumpkin flavor shine.
If you are serving this as part of a larger brunch, it pairs beautifully with something light and acidic, like a fresh fruit salad or a Greek yogurt parfait. The contrast between the dense, spicy bread and the bright fruit is refreshing.
For a real treat, serve it alongside a steaming cup of coffee or a spicy chai latte. The tannins in the tea or coffee are a natural match for the cinnamon and cloves in the bread. It is these simple homemade sweets that really make an afternoon special.

Recipe FAQs
Do chocolate chips go well in pumpkin bread?
Yes, they add a perfect balance to the spiced pumpkin base. The sweetness of the semisweet chocolate complements the earthiness of the pumpkin puree beautifully.
What are common pumpkin bread mistakes?
Overmixing the batter is the biggest error. You should gently fold the ingredients together until no white streaks remain to ensure your bread stays tender rather than dense.
How to get chocolate chips to not sink in pumpkin bread?
Toss the chips in one tablespoon of your dry flour mixture before adding them to the batter. This light coating creates friction that holds them in place during the bake.
Is it better to use butter or oil in pumpkin bread?
Use oil for a superior, moist texture. Oil remains liquid at room temperature, which keeps this bread soft for days, unlike butter which can firm up and make the crumb feel denser.
How to know when the pumpkin bread is finished baking?
Insert a toothpick into the center of the loaf. If it comes out clean with no raw batter attached after 60 minutes, the bread is perfectly baked.
How to store pumpkin bread to keep it moist?
Keep it in an airtight container at room temperature. It stays fresh for up to 4 days, and if you enjoyed mastering this quick bread method, you can apply similar storage logic to our quick treat recipes to maintain peak softness.
Is it necessary to use parchment paper?
Yes, lining the pan with parchment paper prevents sticking and ensures easy removal. Leaving an overhang on the sides creates a handle that allows you to lift the loaf out safely once it cools.
Best Chocolate Chip Pumpkin Bread
Ingredients:
Instructions:
Nutrition Facts:
| Calories | 298 kcal |
|---|---|
| Protein | 3.7 g |
| Fat | 14.4 g |
| Carbs | 41.4 g |
| Fiber | 1.9 g |
| Sugar | 25 g |
| Sodium | 197 mg |
