Black and White Cookies: Authentic Deli Style
- Time: Active 20 minutes, Passive 15 minutes, Total 35 minutes
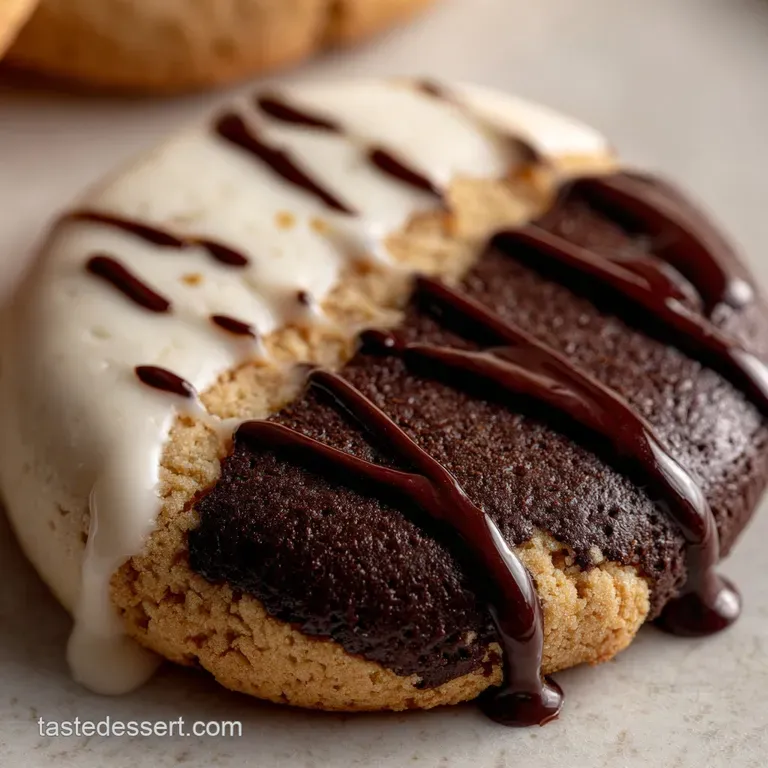
- Flavor/Texture Hook: Zesty lemon vanilla base with a glossy, chocolate vanilla shatter
- Perfect for: Nostalgic cravings, bake sales, or a fancy weekend project
- Crafting the Iconic Deli Style Black and White Cookies
- Essential Specs for Baking This Manhattan Classic
- Selecting Budget Friendly Ingredients for the Perfect Crumb
- The Minimalist Tool Kit for Smooth Cookie Glazing
- Step by Step Method for a Velvety Cake Texture
- Fixing Common Baking Flaws for Professional Looking Cookies
- Clever Variations to Personalize Your Two Tone Treats
- Keeping Your Cookies Fresh and Minimizing Kitchen Waste
- Styling Your Cookies for That High End Bakery Look
- Myths About the Manhattan Half Moon
- Recipe FAQs
- 📝 Recipe Card
Crafting the Iconic Deli Style Black and White Cookies
Picture this: you're walking down a brisk New York City street, and the aroma of toasted sugar and yeast wafts from a corner deli. You spot them in the glass case - those oversized, perfectly symmetrical rounds with a clean line dividing dark and light.
I remember my first real one; the way the icing didn't just melt, but had a distinct shatter when I bit into it, followed by a base so velvety it felt more like a muffin top than a cookie.
That contrast is what we are chasing today. It is not just about the look, it is about that specific "half moon" experience. For a long time, I struggled with cookies that were too dry or icing that stayed tacky and messy.
After a lot of trial and error in my own kitchen, I figured out that the secret isn't a fancy bakery oven - it's all about the hydration and the temperature of your glaze.
We're going to make a batch that rivals the famous jewish black and white cookie recipe styles you find in the Upper West Side, but on a home cook's budget. You don't need a professional pastry kit to get that razor sharp line between the chocolate and vanilla.
Trust me, once you see that glossy finish set up on your counter, you'll never want to pay five dollars for a single cookie again. Right then, let's get into the details.
Essential Specs for Baking This Manhattan Classic
The Physics of the Flat Base: Using a combination of baking powder and baking soda creates a dual action lift that ensures the cookies puff up into a soft mound while keeping the bottom perfectly flat for icing.
This chemical reaction, paired with the acidity of the sour cream, results in a fine, tight crumb that holds its shape.
- Acidic Activation: The sour cream provides the necessary acid to react with the baking soda, creating immediate carbon dioxide bubbles for a light texture.
- Protein Balancing: Mixing cake flour with all purpose flour lowers the overall gluten content, preventing the "breadiness" that ruins many homemade versions.
- Fat Emulsification: Room temperature eggs and butter bond more effectively, creating a stable emulsion that traps air during the creaming process.
- Inversion Icing: Adding corn syrup to the glaze prevents sugar crystallization, which is why the icing stays glossy instead of turning dull and grainy.
| Method | Time | Texture | Best For |
|---|---|---|---|
| Traditional Oven | 15 minutes | Soft, uniform crumb with a golden bottom | Authentic deli results |
| Stovetop "Pan Bake" | 20 minutes | Denser, slightly crisper bottom | Small batches without an oven |
| Toaster Oven | 12 minutes | Faster browning, may need rotating | Quick cravings for two people |
Choosing your method depends on your kitchen setup, but the traditional oven is the gold standard for getting that specific cake like lift. If you find yourself in a pinch, the stovetop method works by using a heavy bottomed skillet and a tight fitting lid to create a mini oven environment, though you'll miss out on some of the aeration. For another nostalgic treat that relies on a specific texture, you might enjoy making this Classic Ice Cream Sandwiches recipe which also handles freezing exceptionally well.
| Component | Science Role | Pro Secret |
|---|---|---|
| Cake Flour (150g) | Reduces gluten | Sift it twice to ensure zero clumps in the batter. |
| Full fat Sour Cream (60g) | Adds moisture/fat | Never use low-fat; the fat stabilizes the crumb. |
| Dutch processed Cocoa (25g) | Neutral pH flavor | Bloom it in the boiling water for a deeper color. |
| Lemon Extract (0.5 tsp) | Brightness | It cuts through the sugar and defines the NYC flavor. |
Selecting Budget Friendly Ingredients for the Perfect Crumb
You don't need to shop at a high end specialty store for this black and white cookies nyc recipe. Most of these are pantry staples, and I've found that store brand versions often perform just as well as the name brands.
- 1 cup (225g) unsalted butter, softened: Use a standard grocery store block. Why this? Provides the foundational fat for a rich, tender crumb.
- 1 cup (200g) granulated white sugar: Standard beet or cane sugar is fine.
- 2 large eggs, room temperature: Essential for a smooth batter.
- 1/2 cup (120ml) whole milk: Adds liquid without making the batter too thin.
- 1/4 cup (60g) full fat sour cream: Greek yogurt is a solid budget swap. Why this? The acidity ensures the baking soda activates fully.
- 1 tsp pure vanilla extract: For that classic aromatic base.
- 1/2 tsp lemon extract: Do not skip this; it's the signature "deli" flavor.
- 1.25 cups (160g) all purpose flour: Provides the necessary structure.
- 1.25 cups (150g) cake flour: If you don't have it, use AP flour minus 2 tbsp, plus 2 tbsp cornstarch.
- 0.5 tsp baking powder & baking soda: Our leavening duo.
- 0.5 tsp fine sea salt: Balances the heavy sugar in the glaze.
- 4 cups (500g) powdered sugar, sifted: The bulk of your icing.
- 5 tbsp boiling water: To melt the sugar into a smooth glaze.
- 1 tbsp light corn syrup: Keeps the icing shiny and flexible.
- 0.25 cup (25g) Dutch processed cocoa powder: For the "black" side of the cookie.
| Original Ingredient | Substitute | Why It Works |
|---|---|---|
| Cake Flour (150g) | AP Flour + Cornstarch | Cornstarch lowers protein levels. Note: Crumb may be slightly less fine. |
| Sour Cream (60g) | Full fat Greek Yogurt | Similar acidity and fat content. Note: Adds a slightly tangier note. |
| Dutch processed Cocoa | Natural Cocoa + pinch Soda | Adjusts pH for color. Note: Flavor will be slightly more acidic. |
Using these swaps can save a few dollars, especially if you already have yogurt or cornstarch in the fridge. Just remember that the texture is the soul of this cookie, so stick to the full fat options whenever possible to maintain that velvety mouthfeel.
The Minimalist Tool Kit for Smooth Cookie Glazing
You likely have most of this already. You'll need two large baking sheets and parchment paper - never grease the pan directly, as it causes the cookies to spread too thin. A standard hand mixer or a stand mixer (like a KitchenAid) is vital for creaming the butter and sugar until they're light and fluffy.
For the icing, grab two small heat proof bowls. A small offset spatula is a total game changer for getting that clean line, but if you don't have one, the back of a teaspoon works in a pinch. You also need a wire cooling rack; icing a warm cookie is the fastest way to end up with a puddly mess.
Chef's Tip: Freeze your butter for just 10 minutes before you start creaming. It helps maintain the air pockets better than butter that is too soft or greasy.
Also, when it comes to the icing, heat your metal spatula in a cup of hot water and wipe it dry before smoothing the glaze it gives it a professional, mirrored finish.
step-by-step Method for a Velvety Cake Texture

1. Build the Aerated Base
Cream the 225g of softened butter and 200g of granulated sugar until the mixture is pale and noticeably fluffy. This usually takes about 3 to 4 minutes on medium high speed. Add the eggs one at a time, followed by the vanilla and lemon extracts.
Note: This step builds the air bubbles that the leaveners will later expand.
2. Sift and Fold
In a separate bowl, whisk together the AP flour, cake flour, baking powder, baking soda, and salt. Gradually add this to the butter mixture, alternating with the milk and sour cream. Start and end with the flour. Stop mixing the moment no white streaks remain.
Note: Overmixing at this stage develops gluten, which makes the cookies tough instead of cakey.
3. Scoop and Bake
Using a large scoop, drop mounds of dough onto parchment lined sheets, spaced at least 5cm apart. Bake at 175°C (350°F) for 15 minutes until the edges are set and the bottoms are a very pale golden brown. The tops should remain white.
Let them cool completely on the pan for 5 minutes before moving to a rack.
4. Master the Two Tone Icing
Whisk the 500g of powdered sugar with 5 tbsp of boiling water, 1 tbsp of corn syrup, and 1 tsp of vanilla until smooth. It should be thick but pourable. Transfer half of this mixture to another bowl and whisk in the 25g of cocoa powder. If the chocolate side gets too thick, add a few drops of boiling water.
5. The Professional Finish
Flip the cooled cookies over you are icing the flat bottom, not the rounded top. Use your spatula to spread the vanilla icing over exactly one half of the cookie. Let it set for 15 minutes until the surface doesn't transfer when touched. Repeat with the chocolate icing on the other half. If you're a fan of this kind of assembly, you should definitely try this Chocolate Chip Cookie recipe which uses a similar "fill and set" logic.
Fixing Common Baking Flaws for Professional Looking Cookies
Why Your Cookies Spread Too Much
This usually happens because the butter was too warm or the oven wasn't preheated correctly. If the dough feels greasy or very soft, chill it for 20 minutes before scooping. Also, check that you aren't over beating the eggs, which can add too much liquid structure and cause a collapse.
Why the Icing is Translucent or Runny
If you can see the cookie through the white icing, your glaze is too thin. This happens if the water was added too quickly or if the powdered sugar wasn't measured by weight. The fix is simple: whisk in more sifted powdered sugar, one tablespoon at a time, until the glaze coats the back of a spoon thickly.
| Problem | Root Cause | Solution |
|---|---|---|
| Cookies are dry/hard | Overbaked or too much flour | Pull them when the center still looks slightly soft. |
| Icing won't set | No corn syrup or too much water | Add more sugar and ensure the water was boiling. |
| Colors bleeding | Icing second half too soon | Wait until the white side is matte and dry to the touch. |
Common Mistakes Checklist
- ✓ Use room temperature eggs to prevent the butter from curdling.
- ✓ Sift your powdered sugar; lumps will ruin the glossy finish.
- ✓ Always ice the flat side (the bottom) for that authentic look.
- ✓ Let the first color dry completely before starting the second.
- ✓ Don't overcrowd the baking sheet - these cookies grow!
Clever Variations to Personalize Your Two Tone Treats
If you want a mini black and white cookies recipe, simply use a small tablespoon sized scoop and reduce the bake time to about 10 minutes. These are perfect for parties and much easier to handle if you're serving a crowd.
For an easy black and white cookies recipe hack, you can actually use a high-quality vanilla cake mix as the base. Just reduce the liquid called for on the box by half and add an extra egg to keep the dough scoopable rather than pourable.
It won't have that exact jewish black and white cookie recipe soul, but it's a great shortcut for busy weekdays.
To Ensure a Velvety, Cake Like Crumb
The inclusion of cake flour is non negotiable for the best results. It has a lower protein content (around 7-8%) compared to all purpose flour (10-12%). This means less gluten is formed, resulting in a texture that is closer to a sponge cake than a biscuit.
For an Intense Chocolate Side
If you find the chocolate icing a bit lackluster, swap the vanilla extract in the chocolate half for a tiny drop of espresso or strong coffee. It won't make the cookie taste like coffee, but it will significantly deepen the cocoa notes, making the "black" side much more punchy.
Keeping Your Cookies Fresh and Minimizing Kitchen Waste
Storage Guidelines: These cookies are best eaten within 2 days. Because of the high moisture content in the base, they can become soggy if stored in a completely airtight container too soon. Keep them in a single layer (do not stack them!) in a cool, dry place.
If you must stack them, place a piece of parchment paper between each layer once the icing is 100% dry.
Freezing: You can freeze the un iced cookie bases for up to 3 months. Wrap them tightly in plastic wrap and then foil. When you're ready to eat, thaw them at room temperature and apply the fresh icing.
I don't recommend freezing them once they are iced, as the glaze can become "sweaty" and lose its snap upon thawing.
Zero Waste Tips: If you have leftover icing, don't throw it out! The vanilla and chocolate glazes can be drizzled over fruit, stirred into oatmeal, or even used to sandwich together plain crackers for a quick snack.
Any broken cookie bits make a fantastic crust for a cheesecake or a topping for vanilla bean ice cream.
Styling Your Cookies for That High End Bakery Look
To get that Ina Garten black and white cookies level of polish, focus on the "mid line." Use a toothpick to lightly score a line down the center of the flipped cookie before you start icing. This gives you a visual guide so your halves don't end up lopsided.
Another trick used by pro bakers is the "dip" method. Instead of spreading with a spatula, you can hold the cookie by its edges and carefully dip one half into the bowl of glaze. This often results in a smoother, more even coat, though it requires a bit more glaze in the bowl to work effectively.
The Decision Shortcut If you want a softer, cakey texture, use the full amount of sour cream and don't overbake. If you want a cleaner icing line, chill the cookies for 30 minutes before glazing.
If you want a more citrusy flavor, add a teaspoon of fresh lemon zest to the sugar before creaming.
Myths About the Manhattan Half Moon
Myth 1: You must use shortening for the "authentic" texture. Many old school bakeries used shortening because it was cheaper and shelf stable, but butter actually provides a much better flavor and a more tender crumb. You don't lose the "deli" feel by using high-quality butter; you actually improve it.
Myth 2: The lemon extract is optional. I've heard people say it's just a vanilla cookie, but they're wrong! That tiny hint of lemon is what distinguishes a real NYC black and white from a generic frosted cookie. It provides a floral high note that balances the heavy sugar in the glaze.
Myth 3: You can use "cold" water for the icing. The water must be boiling. The heat helps dissolve the powdered sugar more effectively and activates the corn syrup, ensuring that the icing sets with a glossy, hard finish rather than a grainy, soft one.
Without the heat, your icing will likely never fully dry, leaving you with a sticky mess.
Following these steps will give you a result that is truly delightful, transforming simple pantry staples into a world class dessert. Whether you're making them for a nostalgic NYC transplant or just because you love a good technical challenge, these cookies are a guaranteed hit.
Enjoy every zesty, chocolatey bite!

Recipe FAQs
What are black and white cookies traditionally called?
They are called Black and White Cookies. They are an iconic New York City bakery staple, sometimes referred to as "half moons" due to their shape.
What exactly is a black and-white cookie?
It is a soft, cake like cookie with two distinct flavors of icing. The base is typically vanilla flavored, topped with half vanilla fondant icing and half chocolate fondant icing.
What ethnicity are black and white cookies?
They are strongly associated with Jewish delicatessens in New York. While not strictly kosher, the recipe became popularized in Jewish bakeries across NYC in the early 20th century.
Are black and white cookies a New York thing?
Yes, they are overwhelmingly considered a New York City specialty. They originated there and remain a signature item found frequently in delis and bakeries across the five boroughs.
How do I stop the white and chocolate icing from bleeding into each other?
Allow the first icing layer to dry completely before applying the second. Wait until the first half is matte and no longer tacky to the touch; this usually requires a 15-minute set time.
Why is my cookie base dry instead of cake like?
Your cookie base is likely dry due to overbaking or excessive gluten development. The secret to the velvety crumb is using a blend of cake flour and all-purpose flour, which you can learn more about when mastering texture control in other recipes.
How do I achieve the perfectly glossy finish on the icing?
Add a small amount of light corn syrup to your glaze mixture. The syrup inhibits sugar crystallization, which prevents the icing from looking dull and grainy and helps it set with a beautiful shine.
Black And White Cookies Recipe

Ingredients:
Instructions:
Nutrition Facts:
| Calories | 492 kcal |
|---|---|
| Protein | 4.3 g |
| Fat | 17.8 g |
| Carbs | 81.4 g |
| Fiber | 1.4 g |
| Sugar | 59.8 g |
| Sodium | 147 mg |
