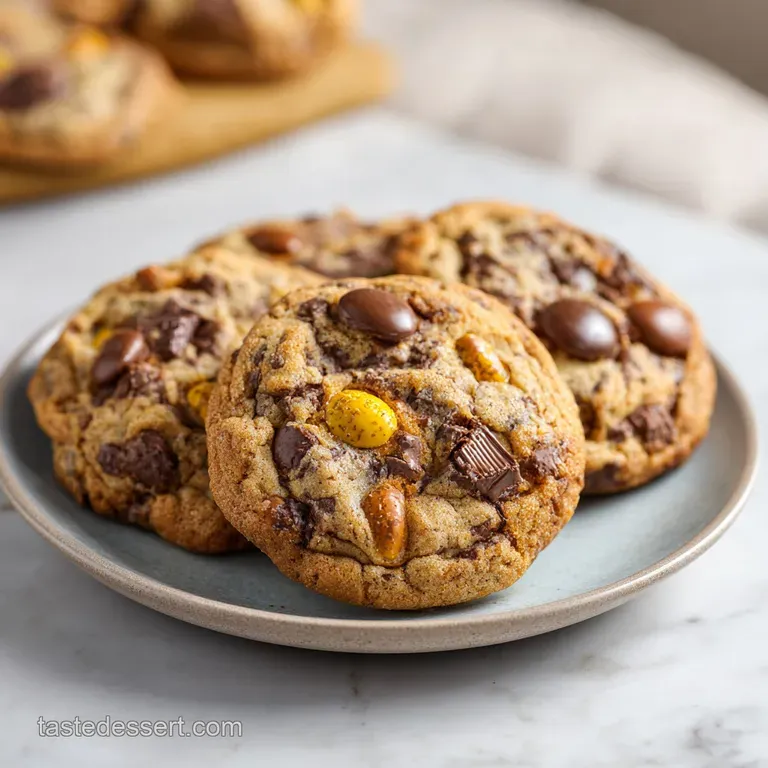
Brown Butter Cadbury Egg Cookies
- Time: Active 15 minutes, Passive 10 minutes, Total 25 minutes
- Flavor/Texture Hook: Nutty brown butter base with a candy shell shatter
- Perfect for: Easter celebrations and spring bake sales
- Making The Chewiest Cadbury Egg Cookies
- Essential Stats For Your Bake
- The Core Elements Of Flavor
- Tools For A Successful Session
- Step By Step To Golden Perfection
- Solving Common Baking Texture Issues
- Customizing Your Batch Of Cookies
- Scaling Your Cookie Production
- Myths About Brown Butter Baking
- Storage Methods And Waste Reduction
- Ideal Pairings For Your Sweets
- Recipe FAQs
- 📝 Recipe Card
Making The Chewiest Cadbury Egg Cookies
You know that specific "crack" when you bite into a Cadbury Mini Egg? That thin, matte sugar shell giving way to the solid milk chocolate inside? It’s a sensory core memory for me.
Every year, as soon as those purple bags hit the shelves, I find myself standing at the kitchen counter, rolling pin in hand, ready to smash a handful of them into beautiful, pastel dust. But here’s the thing I learned the hard way: if you just throw them into a standard cookie dough, they get lost.
You need a base that can stand up to that much sweetness and provide a texture that contrasts with the crunch.
I remember my first attempt at these. I used a standard "back of the bag" recipe, and the cookies were so thin they practically dissolved under the weight of the candy. They were greasy, flat, and honestly, a bit of a letdown.
I realized then that the secret isn't just the eggs; it's the architecture of the dough itself. We need something substantial, something that smells like toasted hazelnuts and feels like a soft pillow. That’s where the brown butter comes in.
It changes everything from the aroma in your kitchen to the way the cookie feels on your tongue.
We're going to walk through this together, from the moment that butter starts to sizzle and foam in your pan to the second you pull these golden beauties out of the oven. I've made the mistakes so you don't have to, like forgetting to let the butter cool (which melts your chocolate chips instantly) or over crushing the eggs into a fine powder that turns the dough a muddy gray.
We're aiming for shards, chunks, and colorful flecks that make each bite a different experience. Trust me, once you smell that amber butter, there's no going back to the old way of baking.
Essential Stats For Your Bake
Before we get our hands messy, we need to look at the numbers. Success in baking often comes down to the small details, like how thick you scoop your dough or how long you let the pan rest.
If you want that classic "bakery style" look where the edges are set but the middle looks slightly underdone, you have to be precise with your timing. I've found that these cookies thrive when they have a bit of height to them, which prevents them from spreading into one giant sugar sheet on your baking tray.
| Cookie Thickness | Internal Temperature | Rest Time | Visual Cues |
|---|---|---|---|
| 1 inch (Raw) | 350°F (175°C) Oven | 10 minutes | Edges turn golden brown |
| 1.5 inches (Large) | 350°F (175°C) Oven | 12 minutes | Center loses its raw shine |
| 0.5 inch (Thin) | 350°F (175°C) Oven | 8 minutes | Entire cookie looks matte |
When you're aiming for that velvety center, the internal temperature of the oven is your best friend. A standard 350°F (175°C) is the sweet spot. It's hot enough to caramelize the edges quickly while leaving the middle soft.
If your oven runs hot, you'll end up with a cookie that’s burnt on the bottom and raw on top. If you haven't calibrated your oven lately, this is the perfect time to pop a thermometer in there and check.
The Core Elements Of Flavor
Why does this specific combination of ingredients work so well? It’s all about the balance of fats and sugars. When we use browned butter, we're essentially removing the water content from the butter and toasting the milk solids. This creates a much more concentrated flavor.
But because we've removed that water, the cookies can become too crumbly if we don't compensate. That’s why we use a specific ratio of brown sugar to white sugar, and why that extra egg yolk is absolutely non negotiable for the structure.
- Maillard Enhancement: Browning the butter creates complex, nutty flavor compounds that cut through the intense sweetness of the milk chocolate.
- Hygroscopic Balance: Using more dark brown sugar than white sugar pulls moisture from the air, ensuring the cookies stay soft for days rather than turning into bricks.
- Fat Saturation: Adding an extra egg yolk increases the lecithin content, which helps emulsify the fats and sugars into a more stable, rich crumb.
- Structural Integrity: The higher protein content in all purpose flour provides the "skeleton" needed to hold up the heavy Cadbury Mini Eggs without the cookie collapsing.
| Ingredient | Science Role | Pro Secret |
|---|---|---|
| Unsalted Butter | Flavor & Fat | Brown it until it smells like toasted nuts to add depth. |
| Dark Brown Sugar | Moisture & Chew | Pack it tightly to ensure you get the full molasses hit. |
| Egg Yolk | Emulsifier | Use it at room temperature to prevent the butter from seizing. |
| Baking Soda | Leavening | It reacts with the acidic brown sugar to create lift and browning. |
The interaction between the baking soda and the molasses in the dark brown sugar is what gives these cookies their gorgeous deep color. Without that acidity, the cookies would stay pale and wouldn't develop those beautiful cracks on the surface. It's a tiny chemical dance happening right inside your oven. If you're interested in other festive textures, you might notice similar principles in my Animal Cookies Frosted recipe, where structure is key to holding onto that nostalgic glaze.
Tools For A Successful Session
You don't need a professional kitchen to make these, but a few specific tools will make your life much easier. First, a light colored saucepan is a must for browning the butter. If you use a dark non stick pan, you won't be able to see the milk solids changing from white to golden to amber, and you’ll likely burn it.
I’ve done it, and the smell of burnt butter is not something you want lingering in your drapes for three days.
A sturdy rolling pin or even a heavy wine bottle is necessary for the "smash" phase. You aren't looking for a fine grit; you want variety. I like to put the eggs in a double layered zip top bag to prevent any sharp candy shells from piercing through and sending pastel shards flying across the room.
Finally,, use a spring loaded cookie scoop. It ensures every cookie is the exact same size, which means they all finish baking at the exact same time. No more "one burnt, one raw" trays.
step-by-step To Golden Perfection
Let’s get into the actual process. The most important thing here is patience during the cooling phases. If you rush the butter or the sugar mixture, the heat will cook your eggs or melt your chocolate before the cookie even hits the oven.
We want those chocolate chips to stay as distinct pockets of gooey goodness, not streaks of brown in the dough.
- Brown the butter. Place 1 cup of unsalted butter in a light colored saucepan over medium heat. Whisk constantly as it sizzles and foams. Note: This takes about 5 to 8 minutes; look for amber flecks at the bottom.
- Combine fats and sugars. Pour the hot butter into a large bowl and immediately whisk in ¾ cup dark brown sugar and ½ cup granulated white sugar.
- Cool the base. Let the butter and sugar mixture sit for 5 minutes. Until the bowl feels warm but not hot to the touch.
- Emulsify the liquids. Vigorously beat in 1 large egg, 1 egg yolk, and 1 tbsp vanilla extract. Until the mixture is thick, pale, and leaves a "ribbon" when the whisk is lifted.
- Crush the eggs. Place 1 ½ cups Cadbury Mini Eggs in a bag and strike them with a rolling pin. Until you have a mix of dust, halves, and large shards.
- Fold in dry ingredients. Add 2 ¼ cups flour, 1 tsp baking soda, and ½ tsp sea salt. Fold gently with a spatula. Note: Do not overmix; stop as soon as the flour disappears.
- Add the mix ins. Fold in the crushed eggs and ½ cup semi sweet chocolate chips. Until they are evenly distributed throughout the thick dough.
- Portion the dough. Scoop rounded tablespoons (about 2 oz each) onto parchment lined baking sheets, leaving 2 inches of space between them.
- Bake the cookies. Bake at 350°F (175°C) for 9 to 11 minutes. Until the edges are set and golden but the centers look soft and slightly puffy.
- Final touch. Remove from the oven and immediately sprinkle with flaky sea salt if you like that sweet salty contrast. Let them rest on the pan for 10 minutes to firm up.
While these are baking, you'll notice the aroma changes from buttery to caramelized. That's the sugars reacting with the heat. If you're a fan of that velvety texture in the center of your bakes, you should definitely check out my peanut butter blossom cookies, which use a similar technique to keep the centers soft while the outside gets that perfect sugary crust.
Solving Common Baking Texture Issues

Even with the best intentions, cookies can be finicky. The temperature of your kitchen, the humidity in the air, or even the brand of flour you use can shift the results. If your cookies didn't turn out exactly like the photos, don't panic.
Most issues are easily fixed with a small adjustment to your technique or a quick check of your ingredients.
Why Your Cookies Spread Too Much
If your cookies turned into one giant pancake, the culprit is usually the temperature of the dough. If the brown butter was still too hot when you added the flour, or if your kitchen is particularly warm, the fat will melt the second it hits the oven before the flour has a chance to set the structure.
Another possibility is that you over measured the sugar and under measured the flour.
| Problem | Root Cause | Solution |
|---|---|---|
| Greasy edges | Butter was too hot | Let brown butter cool to room temp before mixing. |
| Dry/Crumbly texture | Too much flour | Use a kitchen scale to measure 280g of flour. |
| Candy shells melted | Over crushed eggs | Keep the candy chunks larger so the shell stays intact. |
Another common mistake is "over creaming." While some recipes want you to beat the butter and sugar for five minutes to incorporate air, this recipe relies on the dense, fudgy quality of the brown butter. We want to whisk it just enough to combine, not so much that we create a cake like texture. If you want a more structured cookie for something like decorating, my Buttery Sugar Cookies might be more your speed.
Common Mistakes Checklist
- ✓ Ensure your egg and egg yolk are truly at room temperature (dip them in warm water for 5 minutes if you forgot).
- ✓ Don't skip the extra egg yolk; it’s the secret to that "velvety" mouthfeel.
- ✓ Check the expiration date on your baking soda; if it's older than 6 months, your cookies won't rise.
- ✓ Use a light colored pan for the butter; seeing the "amber" stage is critical to avoiding a burnt taste.
- ✓ Allow the cookies to rest on the hot baking sheet for at least 10 minutes after removal.
Customizing Your Batch Of Cookies
The beauty of this dough is that it's a fantastic canvas for other flavors. While the Cadbury eggs are the star of the show, you can easily swap them out or add complementary ingredients.
I've had great success adding a teaspoon of espresso powder to the dry ingredients to deepen the chocolate flavor, or even swapping the semi sweet chips for white chocolate for an even creamier profile.
If you are looking to save a little bit of money, or if the store is sold out of the name brand eggs, there are plenty of ways to adjust without losing that festive feel. Just remember that different candies have different melting points, so your visual cues in the oven might change slightly.
| Premium Ingredient | Budget Alternative | Flavor Impact | Savings |
|---|---|---|---|
| Cadbury Mini Eggs | Generic Malted Eggs | Less creamy chocolate, more crunch | Save $2-4 per bag |
| Pure Vanilla Extract | Vanilla Bean Paste | More intense flavor flecks | Costs $5+ more |
| Dark Brown Sugar | Light Brown Sugar | Slightly less "toffee" flavor | No cost change |
If you find yourself with extra dough but no more mini eggs, you can roll the remaining dough in cinnamon sugar for a quick snickerdoodle style treat. The brown butter base is so versatile that it works with almost any mix in. If you enjoy the process of customizing classic treats, you'll love the variations possible in my Aunt Millies Butter Cookies recipe, where simple swaps change the entire character of the bake.
Scaling Your Cookie Production
If you’re baking for a big Easter party or a school bake sale, you might need to double this recipe. Most cookie doughs scale up linearly, but you have to be careful with the leavening agents and the liquids.
When doubling, I suggest using 1.5x the salt and baking soda rather than a full 2x to prevent a metallic aftertaste. For the eggs, a simple 2 eggs plus 2 yolks works perfectly.
If you need to scale down for just a small batch (though I don't know why you'd want fewer of these!), you can use half of every ingredient. For the "half egg" situation, simply whisk one whole egg in a small bowl and use exactly 2 tablespoons of the liquid.
This ensures your hydration levels stay consistent and your cookies don't end up too dry.
Myths About Brown Butter Baking
There's a lot of misinformation out there about using browned butter in cookies. One of the biggest myths is that you can just swap it 1:1 for softened butter without any other changes. Because browning butter removes water, your dough will be inherently drier.
If you don't use a recipe specifically designed for brown butter like this one your cookies might turn out sandy or crumbly.
Another myth is that you have to let the browned butter solidify back into a solid block before using it. While that's true for some shortbread recipes, for a chewy, fudgy cookie, using the butter while it's still liquid (but cooled to warm) actually helps the sugars dissolve better, leading to that crackly, shiny top we all love.
It’s about the science of the sugar fat bond, not just the temperature.
Storage Methods And Waste Reduction
These cookies are surprisingly hardy thanks to the molasses in the sugar. You can keep them in an airtight container at room temperature for up to 5 days. If they start to feel a little firm, just pop one in the microwave for 8 seconds, and it will return to its just baked, gooey glory.
For long term storage, these freeze beautifully. I like to freeze the individual dough balls on a tray, then transfer them to a freezer bag. You can bake them straight from frozen; just add 2 minutes to the total bake time.
Don't let the "dust" from crushing your eggs go to waste! That fine sugary chocolate powder is gold. I like to save it in a small jar and sprinkle it over vanilla ice cream or stir it into my morning coffee for a festive "Easter Mocha." If you have broken cookie bits at the bottom of the jar, crush them up and use them as a crust for a cheesecake or a topping for a chocolate mousse.
There is zero reason for any part of this recipe to end up in the bin.
Ideal Pairings For Your Sweets
What goes better with a rich, chocolatey cookie than a cold glass of milk? But if you’re looking to serve these at a gathering, think about contrasting the sweetness. A sharp, hot espresso or a bitter dark roast coffee cuts through the sugar of the candy coating perfectly.
If you're serving these as part of a larger dessert spread, they pair wonderfully with tart fruit elements, like a lemon curd or fresh raspberries, which help cleanse the palate between bites.
For a true "dessert board" experience, I love to serve these alongside a variety of textures. You might pair them with something lighter and crispier, like my Sugar Cookies for decorating, or even a decadent Cookies and Cream Cake for the ultimate chocolate lovers' celebration. The key is to vary the levels of sweetness and crunch so your guests keep coming back for more. Happy baking, and I hope these become a new tradition in your kitchen just like they have in mine!

Recipe FAQs
Is it true I must melt the butter on high heat to save time?
No, this is a common misconception. You must use medium heat to control the browning process, as high heat will burn the milk solids before they develop the necessary nutty flavor.
How to ensure the cookies stay soft and chewy?
Remove the cookies from the oven when the edges are set but the centers still look soft. They continue to cook on the hot baking sheet for 10 minutes, which creates a perfect texture similar to our thick and chewy peanut butter cookies.
Why is my butter bubbling and foaming during the browning process?
This is a normal part of water evaporation. You should continue to whisk constantly until the foaming subsides and you see golden brown flecks, indicating the butter is toasted and ready.
How to prevent the chocolate from melting into streaks in the dough?
Cool your butter and sugar mixture for 5 minutes before adding the flour and chocolate. If the base is too hot, the chocolate chips and egg candy shells will lose their structure before you even scoop the dough.
Can I bake the dough balls directly from the freezer?
Yes, you can bake them frozen. Simply add 2 minutes to the official 9 11 minute bake time to ensure the centers reach the correct temperature.
How to get the most consistent size for 24 cookies?
Use a 2-ounce spring loaded scoop to portion the dough. This ensures every cookie bakes at the same rate, preventing some from being overdone while others remain raw.
Is it necessary to use a light colored saucepan for browning the butter?
Yes, it is highly recommended. The light surface allows you to clearly see the color change to amber, making it much easier to catch the exact moment the butter is ready without burning it.
Brown Butter Cadbury Egg Cookies

Ingredients:
Instructions:
Nutrition Facts:
| Calories | 231 calories |
|---|---|
| Protein | 2.3 g |
| Fat | 11.4 g |
| Carbs | 29.7 g |
| Fiber | 0.8 g |
| Sugar | 21.2 g |
| Sodium | 108 mg |
