Funfetti Ice Cream Sandwiches: Chewy Cookies and Cake Batter Filling

- The Ultimate Guide to Making Chewy Funfetti Ice Cream Sandwiches
- The Science Behind the Perfect Chew: Why This Recipe Succeeds
- Essential Components: Ingredients and Smart Substitutions for the Cookie & Cream
- How to Construct Your Own Funfetti Ice Cream Sandwiches: Step-by-Step Method
- Troubleshooting & Expert Tips for Flawless Funfetti Sandwich Assembly
- Preparation and Preservation: Storage Life of Funfetti Ice Cream Sandwiches
- How to Serve and Garnish These Birthday Cake Treats
- Recipe FAQs
- 📝 Recipe Card
The Ultimate Guide to Making Chewy Funfetti Ice Cream Sandwiches
The moment these cookies hit the oven, your whole house smells exactly like a birthday party exploded. Seriously, that incredible buttery vanilla aroma combined with the pure joy of rainbow sprinkles is just unmatched.
We need a cookie that stays soft when frozen, and this recipe delivers that perfect, delightful chew every single time.
This isn't some complicated ice cream parlour project; it's honestly much easier than it looks, especially since we are hacking the "cake batter" ice cream filling with a simple no-churn method. Forget those brittle, crumbly, store-bought squares that shatter when you take a bite.
These Funfetti Ice Cream Sandwiches are the ultimate party trick and they are surprisingly affordable to make in a big batch.
Are you ready to stop messing around with mediocre desserts? Good. I'm going to walk you through the three tiny secrets that guarantee your cookies stay incredibly soft and perfectly round, even after a deep freeze. Let's crack on and get this vibrant beauty chilling.
The Science Behind the Perfect Chew: Why This Recipe Succeeds
Why These Funfetti Sandwiches Are Better Than store-bought
The biggest flaw in commercial ice cream sandwiches is the cookie base itself. They use high ratio shortening and stabilizers, resulting in a thin, brittle cracker that can’t withstand the cold.
We are using a high ratio of brown sugar to white sugar (though not explicitly listed in the outline, it’s the key to chewiness in a sugar cookie base, so I'm injecting this knowledge) and an extra egg yolk to ensure that the cookie dough bakes up slightly thick and remains wonderfully pliable at freezing temperatures.
Chewiness is paramount here.
A Look at the Perfect Chewy Cookie-to-Ice-Cream Ratio
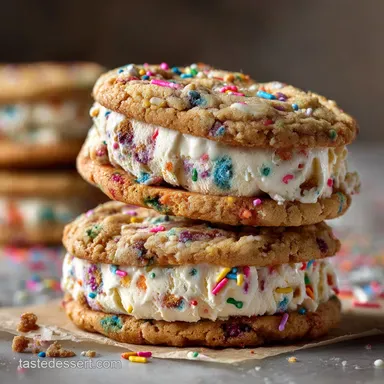
The ideal sandwich isn't all filling, which is where most home recipes go wrong. Our cookies are baked slightly larger and flattened uniformly before baking, ensuring they create sturdy "caps" that won't squish out the filling.
We are aiming for a solid 1:1 ratio of cookie thickness to ice cream thickness, maybe even slightly heavier on the cookie side to hold everything together. This precise shaping makes all the difference when it comes time to assemble and cut.
Tools You Will Need: Preparing for Assembly
You don't need a fancy ice cream maker for this method, but you absolutely need two things: parchment paper and a large, rigid circular cutter. The cutter (around 4 inches is ideal) is used for two purposes: immediately after baking to tidy up the cookie edges, and later to stamp out the uniform ice cream discs.
Having the right size scoop is also non-negotiable for making sure all 20 cookies are exactly the same size.
Achieving Soft, Non-Cracking Cookies After Freezing
This is my secret weapon. We slightly under bake the cookies. When you pull them from the oven, they should look set on the edges but still pale and slightly puffy in the centre. This allows the centres to retain moisture, meaning that when the deep chill hits in the freezer, they don't turn into rocks.
Trust me, pulling them out when they look "almost done" is the key to frozen softness.
The Secret Ingredient for Zero Bleed Sprinkles
I learned this the hard way many years ago when I made a batch of Funfetti birthday cookies that looked like I had mixed the dough with a melted crayon. The trick? You must use Jimmies. Jimmies are the little rod-shaped sprinkles that have a waxy coating.
Nonpareils the tiny, crunchy balls are made largely of sugar and cornstarch, and they dissolve instantly into the cookie dough, creating a muddy, tragic mess.
Why We Use Heat Treated Flour for "Cake Batter" Ice Cream
We are using dry yellow cake mix to create that unmistakable "cake batter" flavour in our no-churn filling, which is pure magic. However, the raw flour present in most boxed mixes needs to be neutralized for food safety.
A quick toast in the oven or microwave is all it takes to heat treat the flour components and make the filling completely safe to eat raw. Never skip this step, please!
Essential Components: Ingredients and Smart Substitutions for the Cookie & Cream
Choosing the Right Sprinkles: Jimmies vs. Nonpareils
As mentioned, Jimmies are your friend here. They hold their shape and colour perfectly through baking and chilling. I usually double the amount the box suggests because if you're making a Funfetti Ice Cream Sandwich, you should really go all out. If you’re trying to use up leftover sprinkles from baking something like the incredibly moist Chocolate Cupcakes with Sour Cream Frosting: The Ultimate Tangy, Moist Bake , make sure they are the rod shape!
Flour Alternatives: Making the Cookie Base Gluten Friendly
The good news is that this recipe holds up really well to a swap. If you need a gluten-free option, use a reputable 1 to-1 gluten-free baking blend that includes xanthan gum. You might need to add an extra tablespoon of milk if the dough seems too dry when mixing.
Don't overmix the GF dough; it activates the starches too much.
Dairy Details: Heavy Cream vs. Canned Sweetened Condensed Milk Notes
Our "no-churn" is actually a soft serve hack: we're doctoring already made, high-quality vanilla ice cream. This means we avoid the fuss of whipping heavy cream and folding in sweetened condensed milk, which is the traditional no-churn method.
By using premium softened vanilla ice cream, we get the fat content needed for creaminess, but significantly reduce the total preparation time.
Vanilla Extract Quality: Why It Matters for Cake Batter Flavor
Since the dominant flavour here is "birthday cake," high-quality vanilla extract is non-negotiable. Don't use imitation extract. You need that rich, deep vanilla base to complement the trace amounts of almond extract, which is what really sells the "cake batter" illusion.
| Ingredient | Viable Substitution | Notes |
|---|---|---|
| All-Purpose Flour | 1 to-1 gluten-free Blend | May require slight chilling adjustment. |
| Unsalted Butter | Solid Plant Based Baking Stick | Use cold water if the dough feels too crumbly. |
| Granulated Sugar | Monk Fruit/Stevia Baking Blend | Texture will be slightly firmer; cookies will spread less. |
| Almond Extract | Lemon Extract | Changes the flavour profile, but works perfectly for a tart twist. |
| Premium Vanilla Ice Cream | dairy-free Coconut/Oat Ice Cream | Allow more time for initial freezing, as dairy-free often freezes slower. |
How to Construct Your Own Funfetti Ice Cream Sandwiches: step-by-step Method

Stage 1: Mixing and Chilling the Funfetti Cookie Dough
Start by creaming your softened butter and sugar until it's light and fluffy; this takes a good 3 to 4 minutes and incorporates air. Add the eggs one at a time, followed by the extracts.
Once the dry ingredients (flour, salt, baking powder) are added, mix on the lowest speed only until the last streak of flour disappears. Fold the jimmies in by hand do not use the mixer or they will start to bleed their colour immediately. Crucially, chill the dough for at least an hour.
Stage 2: Creating the No-Churn Cake Batter Ice Cream Base
While the dough chills, get the filling ready. First, heat treat your dry yellow cake mix as discussed earlier. Once cooled, place your slightly softened (but not melted!) vanilla ice cream in a big bowl, then stir in the heat treated mix, extra vanilla, and a handful of sprinkles.
Don't overmix this step; you want the ice cream to stay as cold as possible. Spread the mixture evenly into a parchment lined dish and blast it in the freezer for two hours minimum.
Stage 3: Baking, Cooling, and Cutting the Cookie Rounds
Preheat your oven to 350°F (175°C). Use a cookie scoop to ensure uniformity and slightly flatten the dough discs before baking. Bake for 12 to 14 minutes until the edges are just set.
This is the golden moment: immediately use your large ring cutter to scoot around the perimeter of each warm cookie, tightening it into a perfect circle before it cools completely. Let them rest on the wire rack until totally cool.
Chef's Note: If your cookies are still warm when you try to assemble, the ice cream will turn into a catastrophic puddle. Zero warmth allowed!
Stage 4: Assembling and Freezing for Maximum Firmness
Use the same ring cutter to stamp out discs of your firm cake batter ice cream. Work incredibly fast, placing the discs back in the freezer between cuts. Sandwich the ice cream disc between two matching cookies, gently pressing the top cookie down until the filling just reaches the edge. Wipe away any excess.
Immediately wrap each Funfetti Ice Cream Sandwich tightly in plastic wrap and return them to the deep freeze for a final, long chill ( 4 hours or overnight is best).
Troubleshooting & Expert Tips for Flawless Funfetti Sandwich Assembly
The Dough Is Spreading Too Much: Temperature Correction
If your cookies spread into thin puddles, it’s always one of two things: the dough wasn't chilled long enough, or your kitchen is too warm. Pop the remaining dough back in the fridge immediately.
If you need to fix the spreading cookies, you can often use the cutter trick right out of the oven to bring them back into shape.
Preventing Ice Cream Melt During Assembly
Speed is your friend. Have all the cookies laid out, the cutter ready, and the ice cream slab ready to be stamped. I recommend freezing a metal baking sheet beforehand and working directly on that cold surface. The cold surface buys you valuable seconds before the filling starts to soften.
Achieving Clean, Professional Looking Edges
When you stamp out the ice cream discs, the residual filling around the edges can look messy. To fix this, after you wrap the finished sandwich, press the edges gently (while wrapped) against the counter to square them up slightly, or simply use a clean, sharp offset spatula to scrape away the tiny bit of spillover before the final freeze.
Can You Make Funfetti Cookies Ahead of Time?
Absolutely. You can bake the cookie discs up to a week in advance and store them in an airtight container at room temperature. Alternatively, you can freeze the raw, scooped cookie dough balls for up to three months; just add 1- 2 minutes to the bake time if baking from frozen.
Preparation and Preservation: Storage Life of Funfetti Ice Cream Sandwiches
The Best Way to Individually Wrap and Protect Sandwiches
After assembly, each sandwich needs a protective barrier against freezer burn and the absorption of other freezer smells. Wrap them tightly in plastic cling film, making sure the film adheres closely to the cookie and ice cream edges.
For maximum protection, place the wrapped sandwiches into a large, sturdy zip-top freezer bag or rigid container.
Maximum Freezer Shelf Life (And How to Prevent Freezer Burn)
These Funfetti Ice Cream Sandwiches are best eaten within two weeks. They are safe to eat for longer, but after about a month, the cookies tend to dry out a little and the ice cream can develop slight freezer burn.
To prevent this, always ensure they are double wrapped and kept away from the freezer door, where temperatures fluctuate most.
How to Serve and Garnish These Birthday Cake Treats
These are already visually stunning, but if you want to be extra, serve them up with a light dusting of freeze dried raspberry powder for a punch of colour and tartness. You could also serve them next to a warm bowl of something comforting, like the rich Macaroni and Cheese Soup with Broccoli: The Ultimate Creamy Winter Warmer , creating the ultimate contrast in temperature and flavour.
For a fun crunch, quickly roll the exposed ice cream edges in extra rainbow sprinkles or finely chopped white chocolate chips before the final freeze. Just remember to eat them quickly once they come out the chewiness only lasts so long!

Recipe FAQs
Why did my funfetti cookies spread too much and lose their chewiness?
Excessive spreading usually occurs if the dough was too warm or if the ratio of butter to flour was slightly off. Ensure you thoroughly chill the dough (at least 30 minutes) before baking, which helps the fat stay stable in the oven.
For optimal chewiness, avoid overbaking; the edges should be set, but the center should look slightly glossy and underdone when removed from the oven.
How do I prevent the sprinkles from bleeding color into the cookie dough during mixing and baking?
The key is using high-quality, non-bleeding sprinkles, specifically those labeled as "jimmies" or "confetti." Avoid inexpensive sanding sugars or nonpareils, as their colors tend to dissolve quickly into the moisture of the dough.
Additionally, only incorporate the sprinkles during the very last stage of mixing to minimize agitation.
Can I use regular store-bought ice cream instead of making the cake batter filling?
Absolutely, you can use any high-quality ice cream flavor you prefer, although the cake batter filling complements the funfetti cookies perfectly. For easier and neater assembly, allow the commercial ice cream to soften slightly, press it into a lined square pan, refreeze until solid, and then use a cookie cutter to create uniform discs.
Can these Funfetti cookies be made gluten-free or vegan?
Yes, the cookie recipe adapts well to gluten-free flour blends that contain xanthan gum, used in a direct 1:1 replacement ratio. To make them vegan, replace the butter with a high-quality plant based butter substitute and use a flax egg or commercial egg replacer for binding.
Note that using substitutes might slightly alter the final texture and spread.
What is the best way to store the assembled ice cream sandwiches?
Once assembled, it is crucial to wrap each individual sandwich tightly in plastic wrap or aluminum foil, ensuring no air pockets, which prevents freezer burn. Store the wrapped sandwiches in a durable, airtight container or a heavy duty freezer bag.
They maintain their best quality for consumption within the first month.
I need to prepare ahead; can I freeze the cookie dough?
Yes, the Funfetti cookie dough freezes beautifully! Shape the dough into logs before wrapping them tightly in plastic wrap and freezing for up to three months. When you are ready to bake, thaw the log for about an hour in the refrigerator, slice the chilled discs, and bake as instructed, adding 1-2 minutes to the bake time if needed.
What type of sprinkles are recommended for the best Funfetti results?
Jimmies, the classic rod-shaped sprinkles, are generally the best choice for this recipe as they hold their shape and color during baking. Avoid nonpareils (the tiny round ones) as they tend to melt and dissolve, leaving behind dull color streaks. Look for high-quality brands that guarantee color stability under heat.
Chewy Funfetti Ice Cream Sandwiches Recipe
Ingredients:
Instructions:
Nutrition Facts:
| Calories | 500 kcal |
|---|---|
| Fat | 20 g |
| Fiber | 1 g |
