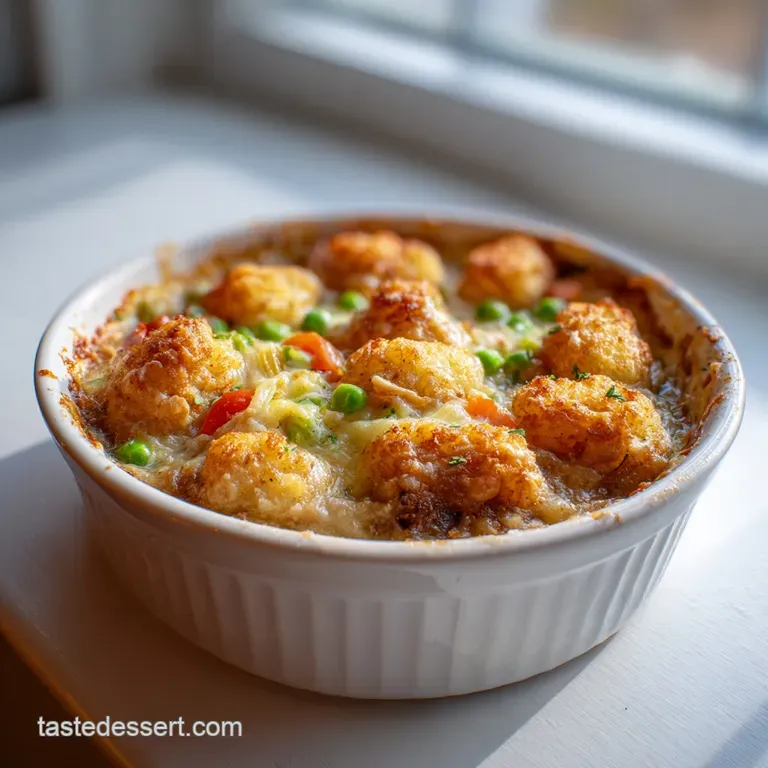
Chicken Tater Tot Pot Pie: Creamy and Crispy

- Time: Active 15 minutes, Passive 30 minutes, Total 45 minutes
- Flavor/Texture Hook: Shattering tater tot crust meets a silky, thyme scented chicken gravy
- Perfect for: Cozy family Sundays or a crowd-pleasing potluck showstopper
- Why Most Recipes Sink Into a Soggy Tater Tot Disaster
- Designing the Perfect Blueprint for Your Chicken Tater Tot Pot Pie
- Component Analysis and Ingredient Deep Dive
- The Artist's Toolkit for Crafting a Deeply Golden Hotdish
- Bringing the Vision to Life with a Golden Sculpted Crust
- Mastering the Details and Navigating Common Casserole Pitfalls
- Reimagining the Canvas with Playful Flavor and Dietary Variations
- Protecting Your Masterpiece with Smart Storage and Freezing Techniques
- Complementing the Texture with Vibrant Sides and Festive Pairings
- Recipe FAQs
- 📝 Recipe Card
Why Most Recipes Sink Into a Soggy Tater Tot Disaster
Picture this: you pull a bubbling tray from the oven, anticipating that glorious crunch, only to find your tater tots have surrendered to the steam, turning into a sad, mealy mush that’s indistinguishable from the filling. It’s a tragedy that happens in kitchens every single night.
Most versions of this dish fail because they treat the filling like a soup rather than a structured sauce. If your gravy is too thin or your vegetables release too much water, those tots are doomed to drown before they ever have a chance to crisp up.
Discover the ultimate comfort food with our single, show stopping Chicken Tater Tot Pot Pie with Vegetables recipe.
We've all been there, staring at a casserole that looks more like a beige swamp than a culinary triumph. The secret I stumbled upon after many soggy dinners is all about the "starch barrier" and thermal management. You can't just throw everything in a pan and hope for the best.
You need to create a base that’s thick enough to support the weight of the frozen tots, acting as a structural canvas rather than a quicksand pit. When the sauce is correctly emulsified, it hugs the chicken and vegetables, leaving the tots to sit proudly on top where the dry heat of the oven can turn them into golden armor.
I used to think the soggy bottom was just part of the deal, like some kind of tax you pay for the convenience of using frozen potatoes. But then I realized that the moisture was coming from the inside out.
By using a cast iron skillet and a higher oven temperature, we create a thermal environment that attacks the moisture from both sides. We’re going to build a blonde roux that acts as the glue for our masterpiece, ensuring that every bite has that playful contrast between the velvety interior and the shattering exterior.
Designing the Perfect Blueprint for Your Chicken Tater Tot Pot Pie
The Physics of the Golden Crust
Most people bake their casseroles at 350°F (180°C), but that’s a mistake for frozen potatoes. We need the intensity of 400°F (200°C) to flash evaporate the ice crystals on the tots before they can soak into the sauce.
This creates a rapid steam release that puffs up the potato interior while the outside fries in the fat from the cheese and butter.
Structural Integrity of the Roux
Viscosity Control: The roux must be cooked until it looks like wet sand, ensuring the flour taste is gone but the thickening power is at its peak to hold up the heavy tots.
The Bone Broth Advantage
Umami Depth: Using chicken bone broth instead of standard stock adds gelatin, which provides a richer mouthfeel and helps the sauce set into a silky ribbon rather than a watery pool.
Moisture Management in Vegetables
Frozen Veggie Logic: Adding the mixed vegetables while still frozen actually helps regulate the temperature of the sauce, preventing it from breaking or thinning out too much before it hits the oven.
| Method | Time | Texture | Best For |
|---|---|---|---|
| Cast Iron Skillet | 30 minutes | Ultimate crisp edges | The gold standard for texture |
| Glass Baking Dish | 35 minutes | Softer, more uniform | Feeding a larger crowd |
| Individual Ramekins | 20 minutes | Maximum crunch ratio | Fancy dinner parties |
The choice of vessel changes the way heat moves through the dish. A cast iron skillet is essentially a heat battery; it stays hot and sears the bottom of the filling while the oven air crisps the top. This dual action cooking is what prevents the middle from staying cold or the edges from getting too dry. If you’re looking for a similar comforting vibe but with a spoonable, lighter finish, you might enjoy my Chicken Pot Pie Soup recipe, which leans into that same velvety flavor profile without the potato crust.
Component Analysis and Ingredient Deep Dive
| Component | Role in the Dish | Pro Secret |
|---|---|---|
| Heavy Cream | Provides a silky, luxurious mouthfeel | Add it at the very end of the sauce build to prevent curdling |
| Chicken Bone Broth | The savory backbone and structural glue | Use a low sodium version to have total control over the seasoning |
| Tater Tots | The architectural crowning glory | Arrange them in a concentric circle for even heat distribution |
Every artist needs high-quality pigments, and in our kitchen, those pigments are the aromatics. The onion and celery aren't just there for bulk; they provide the foundational scent that wafts through the house as the pie bakes.
When you sauté them in the butter, you’re creating a flavor base that the flour will latch onto. It’s about building layers starting with the fat, moving to the aromatics, then the thickening agent, and finally the liquids.
For the chicken, I almost always reach for a rotisserie bird. It’s a shortcut that actually adds flavor because that chicken has been slow roasted and seasoned deeply. It saves you about 45 minutes of prep work, but the result feels entirely handcrafted.
The contrast between the tender, shredded meat and the snap of the peas and carrots creates a mosaic of textures that makes every spoonful interesting.
The Elements of the Filling
- 3 cups (450g) rotisserie chicken: Shredded or diced. Why this? It’s pre seasoned and perfectly tender, saving significant time.
- 2 cups (300g) frozen mixed vegetables: Peas, carrots, corn. Why this? They stay vibrant and don't turn to mush during the bake.
- 1 medium (150g) yellow onion: Finely diced. Why this? Provides the aromatic sweetness that balances the salty broth.
- 2 stalks (100g) celery: Diced. Why this? Adds a necessary savory crunch and herbal note.
- 4 tbsp (56g) unsalted butter: Why this? The fat base for our roux that carries the thyme flavor.
- 1/4 cup (32g) all purpose flour: Why this? The essential thickener for a stable, velvety sauce.
- 2 cups (480ml) chicken bone broth: Why this? Richer in collagen than stock, leading to a better sauce set.
- 1/2 cup (120ml) heavy cream: Why this? Adds the signature "pot pie" richness and white color.
- 1 tsp dried thyme: Why this? The classic poultry herb that makes it smell like home.
- 1/2 tsp garlic powder: Why this? Distributes flavor more evenly than fresh garlic in a thick sauce.
- 1 tsp kosher salt: Why this? Brightens all the other ingredients without being "salty."
- 1/2 tsp cracked black pepper: Why this? Provides a subtle heat and visual flecks of spice.
The Topping Components
- 32 oz (900g) frozen tater tots: Why this? The structural "tiles" that provide the crunch.
- 1 cup (115g) sharp cheddar cheese: Freshly shredded. Why this? Adds a sharp tang and helps the tots brown.
- 1 tbsp fresh parsley: Chopped. Why this? A vibrant green finish to cut through the richness.
| Original Ingredient | Substitute | Why It Works |
|---|---|---|
| Heavy Cream | Full fat Coconut Milk | Similar fat content. Note: Adds a subtle nutty note to the dish. |
| All purpose Flour | Cornstarch (half amount) | Great for gluten-free needs. Mix with cold water first to avoid lumps. |
| Rotisserie Chicken | Roasted Turkey | Same texture. Note: Excellent way to use up holiday leftovers. |
Substituting ingredients in a bake like this requires a bit of intuition. If you go the coconut milk route, you might want to add a pinch more thyme or even a dash of lemon juice to balance that tropical sweetness. The goal is always to maintain that "velvety" mouthfeel. If you find yourself making this during the holidays, this dish is a fantastic cousin to a traditional Sourdough Sausage Stuffing, as they both lean into those savory, herby notes that define comfort food.
The Artist's Toolkit for Crafting a Deeply Golden Hotdish
You don't need a professional kitchen to make a masterpiece, but a few specific tools make the process much more fluid. The star of the show is the 12 inch cast iron skillet. It acts as both your mixing bowl, your sauté pan, and your serving dish.
There is something so rustic and inviting about bringing a heavy, blackened skillet to the table, still sizzling at the edges.
If you don't have cast iron, a heavy bottomed oven safe stainless steel pan will work, but you might miss out on that specific crust development on the very bottom of the filling. You'll also want a sturdy whisk something that can really get into the corners of the pan when you’re adding the bone broth.
Lumps are the enemy of a silky sauce, and a good whisk is your best defense.
Chef Tip: Freeze your cheese for 10 minutes before shredding it. This makes it much easier to get those long, beautiful strands that melt evenly over the tots rather than clumping into a ball.
Finally,, make sure you have a solid cutting board and a sharp chef's knife. Dicing the onion and celery finely is more than just an aesthetic choice; it ensures that the aromatics melt into the sauce, providing flavor in every single bite without any large, distracting chunks.
Bringing the Vision to Life with a Golden Sculpted Crust
- Preheat and Sauté: Set your oven to 400°F (200°C). In your 12 inch cast iron skillet, melt 4 tbsp of butter over medium heat. Add the diced onions and celery, sautéing for 5–7 minutes until they are translucent and the kitchen smells like a holiday morning.
- Create the Roux: Sprinkle 1/4 cup of flour over the softened vegetables. Whisk constantly for 2 minutes until the flour smells slightly nutty and looks like wet sand. Note: This cooks out the raw flour taste.
- Integrate the Broth: Gradually pour in the 2 cups of chicken bone broth. Whisk vigorously as you pour until the mixture is smooth and begins to thicken slightly.
- Enrich the Sauce: Stir in the 1/2 cup of heavy cream, 1 tsp thyme, 1/2 tsp garlic powder, 1 tsp salt, and 1/2 tsp pepper. Simmer until the sauce is thick enough to leave a clear trail when you run a spoon through it.
- Fold in the Proteins: Gently fold in the 3 cups of shredded chicken and 2 cups of frozen vegetables until they are completely coated and the mixture is steaming.
- Artful Arrangement: Remove the skillet from the heat. Arrange the 32 oz of frozen tater tots in a tight, single layer starting from the outside edge and working inward until the entire surface is covered in a potato mosaic.
- Cheese Application: Sprinkle the 1 cup of shredded cheddar cheese evenly over the tots. The cheese acts as a golden glue for the crust.
- The Bake: Transfer the skillet to the center rack of the oven. Bake for 25–30 minutes until the tater tots are deeply golden brown and the filling is bubbling aggressively around the edges.
- The Reveal: Remove from the oven and let it stand for 5 minutes. This allows the sauce to set so it doesn't run when served.
- Final Flourish: Garnish with 1 tbsp of fresh parsley. The green pop against the golden tots makes the dish look like art.
Precision Checkpoints
- Visual: The roux should reach a "blonde" stage, not brown, to keep the sauce light and creamy.
- Temperature: Ensure the oven is fully preheated to 400°F (200°C) before the skillet goes in to prevent soggy tots.
- Texture: The sauce should "nappe," meaning it’s thick enough to coat the back of a spoon without immediately dripping off.
Mastering the Details and Navigating Common Casserole Pitfalls
Why Your Pot Pie Is Too Runny
A soupy filling is usually the result of one of two things: either the roux wasn't cooked long enough to activate the starches, or the broth was added too quickly. If you find your sauce is thin, let it simmer for an extra 3–4 minutes before adding the chicken.
The heat will evaporate excess water, concentrating the flavor and the thickening power.
| Problem | Root Cause | Solution |
|---|---|---|
| Soggy Tots | Oven temp too low or sauce too thin | Bake at 400°F and ensure the sauce is thick before topping |
| Bland Filling | Under seasoned aromatics | Sauté onions with a pinch of salt to draw out their natural sugars |
| Broken Sauce | Added cream to a boiling liquid | Lower heat to a gentle simmer before stirring in the heavy cream |
Another common mistake is overcrowding the pan. If the tater tots are piled on top of each other, the bottom layers will steam while only the top layer crisps. This leads to a texture that’s half crunchy and half mashed potato. A single, tight layer is the secret to that "shattering" finish we're after.
Common Mistakes Checklist
- ✓ Don't skip the 2 minute flour cook time; raw flour will make the sauce taste like paste.
- ✓ Ensure the broth is added slowly while whisking to prevent the dreaded "lump syndrome."
- ✓ Avoid using "light" or "low-fat" cream, as the lower fat content can cause the sauce to break at high heat.
- ✓ Let the dish rest for at least 5 minutes before serving; the sauce needs time to re thicken as it cools slightly.
- ✓ Check that your tater tots are truly frozen when they go on top; thawed tots will absorb moisture too fast.
Reimagining the Canvas with Playful Flavor and Dietary Variations
This recipe is incredibly versatile, acting as a canvas for whatever you have in the fridge. If you want a bit of a kick, you can swap the cheddar for pepper jack and add a small can of diced green chiles to the filling. It transforms the dish from a classic comfort bake into something with a southwestern flair.
For those looking for a lighter touch, you can replace half of the tater tots with cauliflower tots. They don't get quite as shattering as the potato version, but they offer a great flavor and reduce the carb count significantly.
Just be sure to pat them dry before adding them, as cauliflower releases more water than potatoes do.
Decision Shortcut
- If you want a smokier flavor, add 1/4 cup of chopped cooked bacon to the filling before topping with tots.
- If you want a vegetarian version, swap the chicken for roasted mushrooms and use a rich vegetable bouillon.
- If you want a crispier top, turn on the broiler for the last 2 minutes of cooking, but watch it like a hawk to prevent burning.
Dietary Adjustments
Making this gluten-free is as simple as using a 1 to-1 gluten-free flour blend for the roux. Most tater tots are naturally gluten-free, but always check the bag for any hidden wheat starches. If you need to go dairy-free, use a high-quality vegan butter and heavy cream alternative (like an oat based cream).
The mechanics of the roux remain the same, though the browning might take a few extra minutes.
| Fresh Component | Shortcut Alternative | Flavor Impact |
|---|---|---|
| Hand Diced Veggies | Frozen Mixed Bag | Same texture, saves 10 minutes of chopping |
| Poached Chicken | Rotisserie Chicken | Rotisserie is more flavorful and much faster |
| Homemade Stock | Bone Broth (store-bought) | Bone broth provides a similar richness to homemade |
Protecting Your Masterpiece with Smart Storage and Freezing Techniques
Leftovers are a gift, and this Chicken Tater Tot Pot Pie holds up surprisingly well. In the fridge, it will stay fresh for up to 4 days. The key is to keep it in an airtight container so the tots don't absorb all the "fridge smells." When you’re ready to eat it again, avoid the microwave if you can.
The microwave is the enemy of the crunch.
Instead, reheat your portion in the oven or a toaster oven at 350°F (180°C) for about 10–15 minutes. This will help the tots regain some of their original shattering texture while the filling gets hot and bubbly again.
If you're in a rush, a quick 2 minute zap in the microwave followed by a minute under the broiler works wonders.
Zero Waste Tips
Don't throw away the bones from that rotisserie chicken! You can boil them down with some veggie scraps to make your own stock for the next time you make this dish. Even the stems from your fresh parsley can be finely chopped and added to the filling they have tons of flavor that usually gets tossed in the bin.
For freezing, this dish is a meal prepper's dream. You can assemble the entire thing (up to the baking step) and freeze it for up to 3 months. Just cover it tightly with a layer of plastic wrap and then a layer of heavy duty foil.
When you're ready to bake, you can take it straight from the freezer to the oven just add about 15–20 minutes to the total bake time.
Complementing the Texture with Vibrant Sides and Festive Pairings
While this dish is a complete meal on its own, adding a bright, acidic side dish can really make the flavors pop. A simple arugula salad with a lemon vinaigrette provides a peppery contrast to the rich, creamy sauce.
The bitterness of the greens cuts through the fat of the cheddar and heavy cream, refreshing your palate between bites.
If you’re serving this as part of a larger spread, it pairs beautifully with other classic comfort sides. I often serve it alongside my Green Bean Casserole with Crispy Shallots, as they both share that satisfying crunch meets cream dynamic. The playfulness of the tots makes it a hit at kids' tables, while the sophisticated bone broth and thyme filling keeps the adults coming back for seconds.
The Myth of the "Soggy Bottom"
People often think that the bottom of the tater tots will always be mushy. This is a myth! If your sauce is properly thickened (the "nappe" stage), the tots won't sink. They will sit on top of the sauce, and the heat from the cast iron will actually help cook them from below while the oven air hits the top.
The Myth of "Low Heat for Cream"
You’ll often hear that you should never boil a sauce with cream in it. While you don't want a rolling boil for twenty minutes, a gentle simmer is actually necessary to help the sauce thicken and the flavors meld. As long as you have a stable roux base, the cream won't separate.
It's the fat to starch ratio that keeps everything together, not just the temperature.
Visualizing the Finished Canvas
When you bring this to the table, take a moment to appreciate the colors. You have the golden brown peaks of the tots, the melted orange hue of the sharp cheddar, and the vibrant green of the fresh parsley.
It’s a rustic, beautiful dish that proves that "comfort food" can still be "art." The way the sauce bubbles up between the cracks of the tots creates a visual of a volcanic, delicious landscape that is almost too pretty to eat almost.

Recipe FAQs
How to ensure the sauce has the right consistency?
Whisk the broth into the roux gradually. Adding liquid slowly while constantly stirring prevents lumps and ensures you achieve a smooth, velvet texture similar to the one we use in our creamy potato soup base.
Is it necessary to cook the flour for two minutes?
Yes, this is critical to avoid a raw flour taste. Cooking the flour and butter mixture creates a blonde roux that provides the essential thickening power for your sauce.
How to keep the tater tots crispy during baking?
Keep the tater tots frozen until the very last second. If they thaw before hitting the oven, they will absorb too much moisture from the filling and become soggy instead of golden brown.
Can I use low-fat cream in this recipe?
No, stick to heavy cream. The high fat content is required to keep the sauce stable and creamy while it bubbles at 400°F.
How to prevent the sauce from being too thin when serving?
Let the skillet rest for 5 minutes after removing it from the oven. This brief cooling period allows the sauce to settle and thicken properly before you plate it.
Is it true I can bake this at a lower temperature to avoid burning?
No, this is a common misconception. You must maintain 400°F to ensure the tater tots reach their signature crunch within the 25 30 minute cook time.
How to handle the onions and celery for the best base flavor?
Sauté the vegetables in butter for 5 7 minutes until they are translucent. This step builds the aromatic foundation of the dish and ensures the vegetables soften completely before the liquid is added.
Chicken Tater Tot Pot Pie
Ingredients:
Instructions:
Nutrition Facts:
| Calories | 489 kcal |
|---|---|
| Protein | 25.0 g |
| Fat | 28.4 g |
| Carbs | 33.8 g |
| Fiber | 3.1 g |
| Sugar | 2.5 g |
| Sodium | 615 mg |
