Chocolate Marshmallow Swirl Cookies Recipe
- Time: Active 15 minutes, Passive 10 minutes, Total 25 minutes
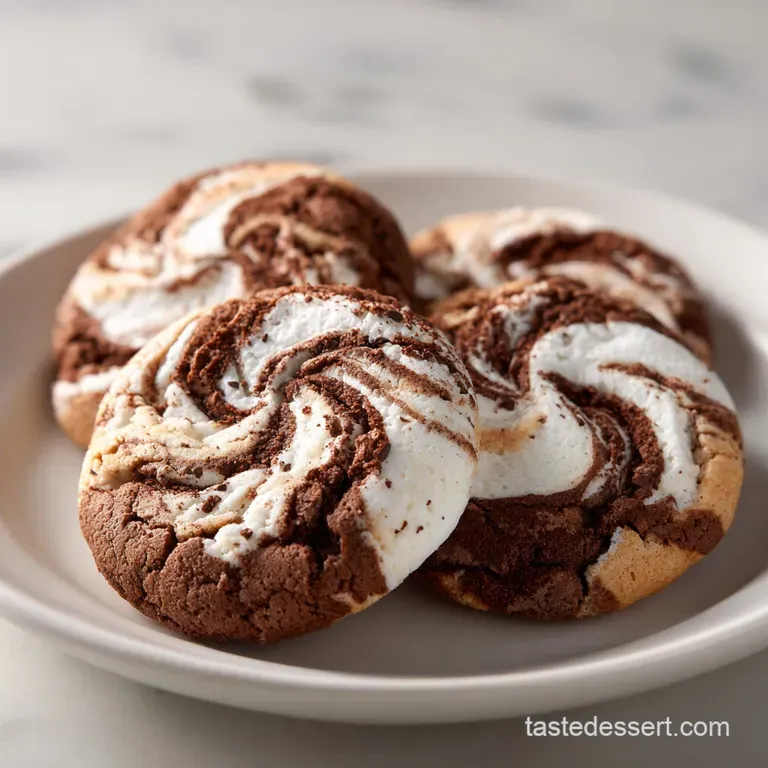
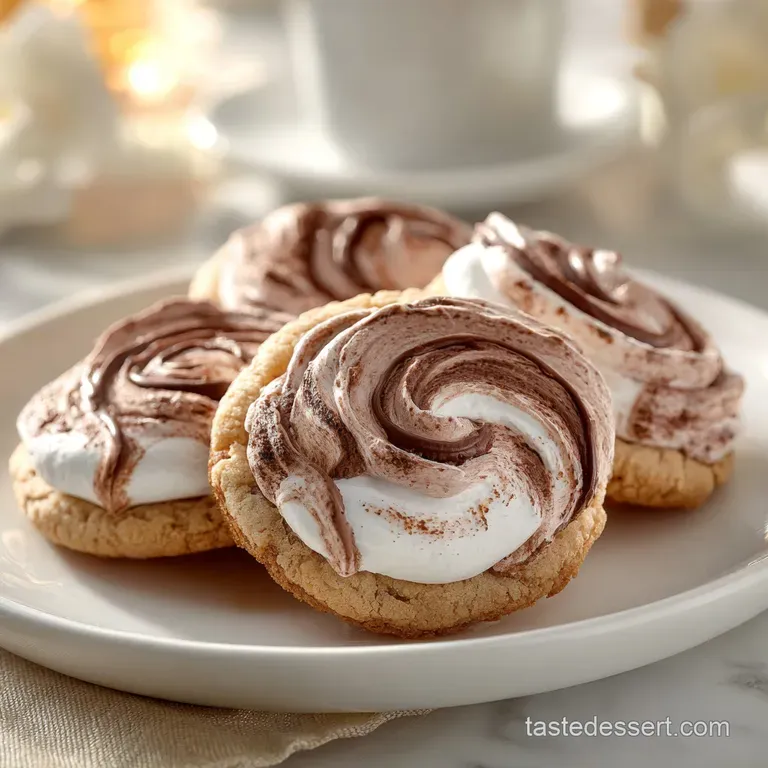
- Flavor/Texture Hook: Velvety dark cocoa paired with a gooey, sticky marshmallow shatter
- Perfect for: Late night snack cravings, weekend baking projects, or festive holiday platters
- What Makes This Amazing Chocolate Marshmallow Swirl Cookies Recipe
- Essential Recipe Timing and Yield Details
- The Science Behind Your Flavorful Ingredients
- Tools Required for Successful Cookie Baking
- Precise Steps for Creating the Swirl
- Solving Common Chocolate Cookie Baking Problems
- Flavor Variations and Simple Ingredient Swaps
- Preservation Methods and Smart Kitchen Waste
- Optimal Serving Styles and Texture Tips
- Recipe FAQs
- 📝 Recipe Card
What Makes This Amazing Chocolate Marshmallow Swirl Cookies Recipe
The moment you pull these out of the oven, the aroma of toasted sugar and deep, earthy cocoa hits you like a warm hug. I remember the first time I tried to get that "swirl" right- I ended up with a literal puddle of marshmallow goo that fused to my baking sheet.
It was a disaster, but it taught me that the secret isn't just mixing things together; it's about the timing and the temperature of your ingredients.
We are going for a cookie that has those slightly crisp, crinkly edges but a center that feels almost like a truffle. By using Dutch processed cocoa powder, we get a much smoother, darker profile that isn't overly acidic, allowing the sweetness of the marshmallow fluff to really pop.
This isn't just another boring biscuit; it's a texture rich experience that makes people stop and ask, "Wait, how did you get it to look like that?"
You don't need to be a professional pastry chef to master this. We're going to walk through the physics of why certain fats work better and how to handle the "stickiness factor" without losing your mind.
If you've ever felt like your homemade bakes were a bit flat or uninspired, this recipe is going to change your kitchen game entirely. Let's get into the details and turn your oven into a chocolatey haven.
Essential Recipe Timing and Yield Details
Before we start cracking eggs and sifting flour, we need a game plan. Success in baking often comes down to the "mise en place" - having everything ready before the butter even touches the mixer. This recipe is surprisingly fast, but the 10 minute bake time is a strict window.
A minute too long and your marshmallows will vanish into thin air; a minute too short and the dough won't set.
The Physics of the Swirl
Marshmallow fluff has a lower melting point than cookie dough, so it wants to liquefy and run. By swirling it into the dark dough at the last possible second, we create "pockets" where the fluff is insulated by the cocoa rich batter.
This allows the exterior of the marshmallow to caramelize slightly while the interior stays soft and stretchy.
Chef's Tip: Freeze your marshmallow fluff for 10 minutes before using it. It makes it much easier to scoop and prevents it from immediately dissolving into the dough.
Texture and Timing Comparison
| Method | Bake Time | Edge Texture | Center Texture |
|---|---|---|---|
| Standard Oven | 10 minutes | Crisp, defined | Fudgy/Chewy |
| Air Fryer | 7 minutes | Extra crunchy | Very soft |
| Convection | 8 minutes | Uniformly crisp | Denser |
When you are aiming for that classic bakery look, the standard oven method is usually the winner. It allows the heat to circulate slowly enough that the sugar can caramelize on the bottom without burning the delicate marshmallow swirls on top. If you're a fan of different textures, you might want to try my Aunt Millies Butter recipe which focuses on a more delicate, melt in-your mouth feel.
The Science Behind Your Flavorful Ingredients
Every ingredient in this chocolate marshmallow swirl cookies recipe serves a specific purpose. We aren't just adding things for the sake of it. The combination of granulated and light brown sugar, for instance, is a deliberate choice.
The white sugar provides the structure and those crisp edges, while the molasses in the brown sugar keeps the center moist and adds a hint of caramel depth.
Component Analysis
| Ingredient | Science Role | Pro Secret |
|---|---|---|
| Dutch Cocoa | Neutralizes acidity | Use high fat cocoa (20%+) for a silkier mouthfeel |
| Cornstarch | Interferes with gluten | Keeps the cookies from getting "bready" or tough |
| Egg Yolk | Adds emulsifiers | The extra yolk provides a rich, fatty "fudge" factor |
| Sea Salt | Flavor contrast | Enhances the perception of chocolate without adding bitterness |
Adding that extra egg yolk is a trick I learned from a French bakery. It provides more lecithin, which helps the fat and water in the dough bind together more tightly. This results in a cookie that doesn't spread into a thin pancake but stays thick and luxurious. It is the same logic used when you want to How to Whip recipe a perfect mousse - it's all about the stability of the fats.
Tools Required for Successful Cookie Baking
You don't need a kitchen full of high tech gadgets, but a few specific items will make your life much easier. First and foremost, a silicone baking mat or high-quality parchment paper is non negotiable.
Marshmallow is essentially glue once it gets hot; if you bake these directly on a greased cookie sheet, you'll be scraping them off with a chisel.
- Electric Hand Mixer or Stand Mixer: Such as a KitchenAid, to ensure the butter and sugars are properly aerated.
- Large Mixing Bowl: For the dry ingredients.
- Medium Mixing Bowl: For the wet ingredients.
- Cookie Scoop (1.5 - 2 tablespoons): This ensures even baking. If the cookies are different sizes, some will burn while others stay raw.
- Fine Mesh Sieve: Essential for sifting the cocoa powder, which is notoriously prone to stubborn lumps.
- Wire Cooling Rack: To prevent the bottoms from getting soggy as they cool.
Having a heavy duty cooling rack is actually more important than people think. If you leave the cookies on the hot pan, they continue to cook from the residual heat (carryover cooking). For a "soft batch" style, you want to move them to a rack about 5 minutes after they leave the oven.
This stops the cooking process and preserves that fudgy interior we worked so hard for.
Precise Steps for Creating the Swirl
Let's get down to business. This process is all about the "gentle touch." If you over mix the marshmallow, you'll just end up with a grey, streaky mess instead of beautiful white clouds contrasting against dark chocolate. Follow these steps exactly, and you'll be rewarded with a professional looking batch every time.
- Prep the oven. Preheat to 350°F (175°C) and line two large baking sheets with parchment paper. Note: Preheating is vital for the leavening agents to react immediately.
- Cream the fats. Beat 1 cup softened unsalted butter with 0.75 cup granulated white sugar and 0.75 cup packed light brown sugar until light, fluffy, and pale yellow.
- Add the liquids. Incorporate 1 large egg, 1 large egg yolk, and 2 tsp vanilla extract. Note: Scraping the bowl ensures no pockets of butter remain unmixed.
- Sift the dry goods. In a separate bowl, whisk 2 cups all purpose flour, 0.66 cup Dutch processed cocoa powder, 1 tsp cornstarch, 1 tsp baking soda, and 0.5 tsp sea salt.
- Combine carefully. Slowly add the dry ingredients to the wet mixture, mixing on low speed until no white flour streaks remain.
- Fold in chocolate. Add 1 cup semi sweet chocolate chips by hand. Note: Hand folding prevents overworking the gluten.
- The Swirl Technique. Drop 0.75 cup marshmallow fluff and 0.5 cup mini marshmallows onto the dough. Use a butter knife to swirl it through the dough only 3 or 4 times.
- Scoop and Space. Use a cookie scoop to place balls 2 inches apart. Make sure a marshmallow pocket is visible on top.
- Bake. Slide into the oven for 10 minutes until the edges are set but the center looks slightly soft.
- Cool. Let them rest on the pan for 5 minutes, then move to a wire rack to finish cooling.
While these are cooling, you might notice the marshmallow "deflates" slightly - that's totally normal. It creates a beautiful, craggy landscape on the cookie's surface. If you love this type of hands on baking, you should definitely explore some Sourdough Discard Dessert Recipes for your next weekend project.
Solving Common Chocolate Cookie Baking Problems
Baking is a science, and sometimes the variables don't play nice. If your cookies didn't turn out exactly like the photos, don't panic. It's usually a small adjustment in temperature or measurement that fixes everything.
The most common issue I see is people measuring their flour by "scooping" the cup into the bag, which packs the flour down and leads to a dry, crumbly cookie.
Why Your Marshmallow Swirls Disappeared
If the white swirls seem to have vanished into the dark dough, you likely over mixed the fluff. Remember, you want distinct "globs" of marshmallow. Another culprit could be the oven temperature; if it's too low, the marshmallow stays liquid for too long and absorbs into the dough rather than setting on top.
Why Your Cookies Are Spreading Too Much
This is usually caused by butter that was too warm. If your butter was oily or melted rather than "cool room temperature," the structure of the cookie collapses the second it hits the heat. If this happens, chill your remaining dough for 30 minutes before baking the next batch.
| Problem | Root Cause | Solution |
|---|---|---|
| Flat Cookies | Butter too warm or old baking soda | Chill dough 30 mins; check soda freshness |
| Dry/Crumbly | Too much flour | Weigh flour (250g) or use spoon and level method |
| Burnt Bottoms | Thin baking sheet | Use a double pan or a silicone mat for insulation |
Common Mistakes Checklist
- ✓ Ensure eggs are at room temperature so they emulsify properly with the butter.
- ✓ Don't skip the sifting of the cocoa powder; those lumps will not bake out.
- ✓ Never place cookie dough on a hot baking sheet from a previous batch.
- ✓ Check your oven temperature with a thermometer; many ovens run 25°F off.
- ✓ Use Dutch processed cocoa; natural cocoa powder is too acidic for this specific balance.
Flavor Variations and Simple Ingredient Swaps
One of the best things about this chocolate marshmallow swirl cookies recipe is how adaptable it is. Once you have the base dough down, you can start experimenting with different mix ins to suit your mood.
I personally love adding a bit of espresso powder to the dough - it doesn't make the cookie taste like coffee, but it makes the chocolate taste "more like chocolate."
Decision Shortcut: Choosing Your Mix Ins
- If you want a "Rocky Road" vibe: Add 0.5 cup chopped toasted walnuts or almonds.
- If you want a "Mexican Hot Chocolate" kick: Add 0.5 tsp cinnamon and a tiny pinch of cayenne.
- If you want a "Salted Caramel" twist: Replace half the chocolate chips with caramel bits and add a sprinkle of flaky salt on top.
Substitution Table
| Original Ingredient | Substitute | Why It Works |
|---|---|---|
| Semi sweet Chips | Dark Chocolate Chunks | Higher cocoa butter content; creates "pools" of chocolate |
| Marshmallow Fluff | Large Marshmallows (cut) | More distinct chunks, though slightly less "swirly" |
| All Purpose Flour | 1:1 gluten-free Blend | Rice flour bases mimic the structure well. Note: May be slightly grittier. |
If you are looking for something even simpler but with a similar comfort food profile, my How to Make recipe for chocolate chip delight is a fantastic alternative that uses many of the same pantry staples.
Preservation Methods and Smart Kitchen Waste
If you somehow manage to have leftovers (a rare occurrence in my house), you need to store them correctly to maintain that soft texture. Because of the marshmallow content, these cookies can become quite sticky if they are exposed to humidity.
I always recommend placing a piece of parchment paper between layers of cookies in your storage container.
Storage: Keep them in an airtight container at room temperature for up to 4 days. If they start to get a bit firm, popping one in the microwave for 8 seconds will revive that "fresh from the oven" gooiness.
Freezing: You can freeze the baked cookies for up to 2 months. However, I prefer freezing the unbaked dough balls (without the fluff swirled in). When you're ready to bake, thaw the dough, swirl in the fluff fresh, and bake as directed.
This prevents the marshmallow from getting "chewy" in the freezer.
Zero Waste Tips: If you have leftover marshmallow fluff, don't throw it out! It makes a fantastic topping for hot chocolate or can be used as a "glue" for a quick graham cracker sandwich.
If you have cocoa powder scraps or "dust" at the bottom of the bag, save it to toss with roasted nuts for a quick snack.
Optimal Serving Styles and Texture Tips
To really lean into the indulgence of these cookies, serve them while they are still slightly warm. The marshmallow should be stretchy and the chocolate chips should be in a semi liquid state.
If you are hosting a dinner party, these look beautiful served on a dark wood board with a few fresh raspberries on the side to cut through the richness.
Fresh vs. Shortcut Comparison
| Feature | Fresh (This Recipe) | store-bought Dough Shortcut |
|---|---|---|
| Flavor | Deep, nuanced cocoa | Mostly sweet, less chocolatey |
| Texture | Fudgy with sticky swirls | Often greasy or crunchy |
| Marshmallow | Distinct, gooey pockets | Usually disappears into the dough |
Flavor Myths
Myth 1: You must chill the dough overnight. While chilling helps some recipes, this one is designed for immediate baking to keep the marshmallow from breaking down. You get a better "shatter" on the marshmallow if you bake right away.
Myth 2: More marshmallow is always better. If you add too much fluff, the cookie loses its structural integrity and becomes a sticky mess that won't hold its shape. Stick to the measurements provided for the best results!
Finally, remember that the "doneness" of a chocolate cookie is harder to judge because you can't see the browning as easily. Trust the "set edges" rule. If the middle still looks a bit shiny, that's okay - it will firm up as it cools, giving you that velvety texture we're aiming for. Enjoy your baking session!

Recipe FAQs
What's the key to getting visible marshmallow swirls?
Swirl gently just 3-4 times. Overmixing the marshmallow fluff will cause it to disappear into the dough, leaving you with streaks instead of distinct swirls. You want to create pockets of marshmallow that remain somewhat separate from the cookie base.
Why are my cookies spreading too much?
Your butter was likely too warm. If the butter is oily or melted instead of cool room temperature, the cookie structure collapses in the oven. For the next batch, chill the dough for 30 minutes before baking to help it hold its shape.
Can I use regular cocoa powder instead of Dutch processed?
No, stick with Dutch processed for this recipe. Natural cocoa powder is too acidic and will react differently with the baking soda, affecting the texture and color. Dutch processed cocoa provides a smoother, darker chocolate flavor that balances the sweetness of the marshmallow.
How do I prevent the bottoms of my cookies from burning?
Use a silicone mat or a double baking sheet. A silicone mat provides an insulating layer between the hot pan and the cookie. If using regular baking sheets, try stacking two together for extra insulation.
My marshmallow is too sticky to swirl, what can I do?
Freeze your marshmallow fluff for 10 minutes. This makes it much firmer and easier to scoop and swirl into the dough. It prevents the fluff from immediately melting and dissolving into the batter before baking.
Can I substitute the semi sweet chocolate chips?
Yes, dark chocolate chunks create lovely pools. Dark chocolate has a higher cocoa butter content, which melts into rich, distinct pockets within the cookie. If you want a similar textural experience, try exploring our Ultimate Fudge Brownie Cupcakes where rich chocolate is a key component.
How long can I store these cookies?
Store them in an airtight container for up to 4 days. To keep them from getting too sticky due to the marshmallow, place a piece of parchment paper between layers. If they feel a bit firm, a quick 8-second microwave zap will revive the gooeyness.
Chocolate Marshmallow Swirl Cookies

Ingredients:
Instructions:
Nutrition Facts:
| Calories | 296 kcal |
|---|---|
| Protein | 3.1 g |
| Fat | 14.2 g |
| Carbs | 42.1 g |
| Fiber | 1.4 g |
| Sugar | 29.8 g |
| Sodium | 134 mg |
