Dark Chocolate Raspberry Mousse Cake Recipe
- Time: Active 45 minutes, Passive 6 hours 15 mins, Total 7 hours
- Flavor/Texture Hook: Velvety mousse meets sharp, tangy raspberry
- Perfect for: Milestone birthdays, anniversary dinners, or impressing your toughest food critics
- Crafting a Decadent Dark Chocolate Raspberry Mousse Cake
- The Science of Silky Texture
- Component Analysis for Perfect Layers
- Budget-Friendly Ingredient Selection
- Required Tools for Success
- Step-by-Step Construction Guide
- Troubleshooting the Perfect Set
- Flavor Variations and Substitutions
- Storage and Zero Waste
- Professional Presentation Techniques
- Recipe FAQs
- 📝 Recipe Card
Crafting a Decadent Dark Chocolate Raspberry Mousse Cake
The smell of raspberries reducing on the stove is one of my favorite kitchen memories. I first attempted this recipe for my sister's graduation, and I spent half the night hovering over the fridge, praying the layers would set.
When I finally cut into it, the sound of the chocolate glaze giving way that soft "shatter" of the top layer followed by the silky slide through the mousse was purely delightful.
You don't need a pastry degree to pull this off, but you do need patience. This isn't a "whip it up in twenty minutes" kind of deal; it's a labor of love that rewards you with textures that melt against your tongue.
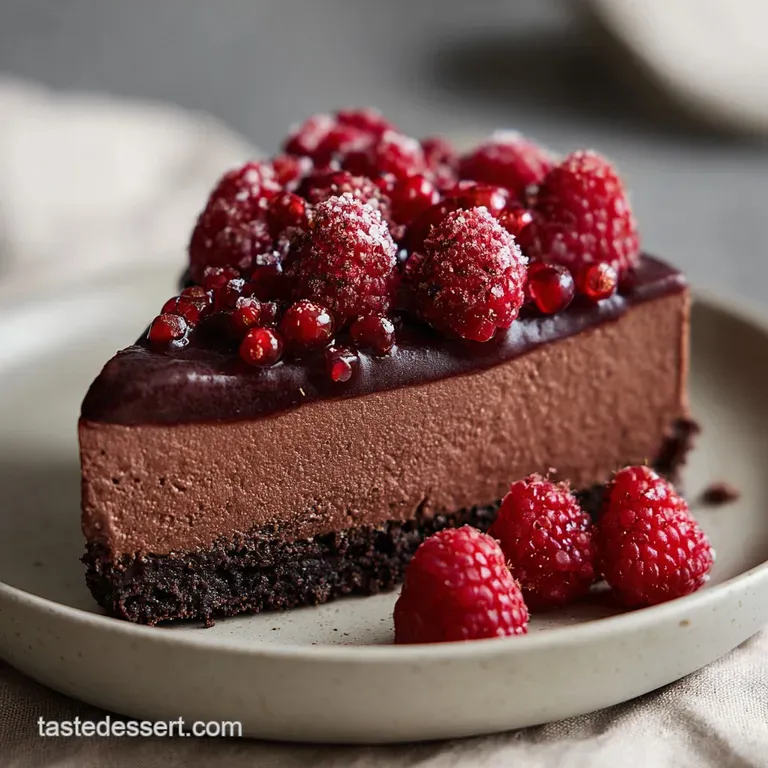
We're talking about a brownie base so fudgy it almost sticks to the fork, topped with a cloud like raspberry layer and a deep, dark chocolate finish.
Trust me, once you see those clean, sharp lines of red and brown when you unclip the springform pan, you’ll feel like a total pro. We're going to use a few budget smart tricks to get that high end French patisserie look without the high end price tag. Ready to get chocolate on your hands? Let's crack on.
The Science of Silky Texture
Pectin Concentration: Reducing the 250g of raspberries with sugar and lemon juice concentrates the natural pectin, which provides the structural "set" for the mousse without needing gelatin.
Fat Emulsification: Slowly whisking 200g of melted chocolate into cold whipped cream creates a stable fat in-water emulsion that stays airy yet firm enough to slice.
Cocoa Hydration: Mixing the 30g of Dutch process cocoa directly into 115g of melted butter blooms the cocoa solids, transforming the flavor from flat to intensely earthy and rich.
| Method | Total Time | Texture | Best For |
|---|---|---|---|
| Classic Chill | 7 hours | Firm, clean layers | Dinner parties, formal events |
| Fast Freezer | 3 hours | Softer, slightly icy | Last minute cravings, family night |
| No Bake Hack | 1 hour | Crumbly, cheesecake like | Beginners or hot summer days |
Using the right chocolate is the secret here; if you love the intensity of this cake, you'll probably enjoy making the The Oh My recipe which uses similar melting techniques for a different result.
Component Analysis for Perfect Layers
| Ingredient | Science Role | Pro Secret |
|---|---|---|
| Dutch process Cocoa | Provides deep color and lower acidity | Sift it twice to avoid bitter lumps in the fudgy base |
| 60% Dark Chocolate | Acts as the primary structural stabilizer | Use bar chocolate rather than chips for a smoother melt |
| Lemon Juice | Brightens the fruit and aids pectin set | Fresh juice provides better enzymatic action than bottled |
We are aiming for a specific balance of fat and sugar to ensure the cake doesn't become too cloying. By using Dutch process cocoa, we get that dark, mahogany look that screams "expensive dessert" while keeping our costs down.
Budget Friendly Ingredient Selection
- 115g unsalted butter, melted
- Use margarine if you're pinching pennies, but butter provides the best mouthfeel.
- 150g granulated sugar
- Standard white sugar is perfect for that slightly crackled top.
- 1 large egg, room temperature
- Why this? Ensures the fat and protein emulsify smoothly without curdling.
- 1 tsp vanilla extract
- Vanilla bean paste is fancy, but a good extract works wonders.
- 30g Dutch process cocoa powder
- Why this? It has a neutral pH for a smoother, darker chocolate profile.
- 65g all purpose flour
- No need for cake flour; we want the structure of AP.
- 0.25 tsp salt
- Fine sea salt balances the sweetness of the sugar.
- 250g fresh or frozen raspberries
- Frozen berries are often cheaper and more flavorful out of season.
- 50g granulated sugar
- This helps the berries release their juices.
- 1 tbsp lemon juice
- Essential for the "set" of the mousse.
- 240ml heavy whipping cream, cold
- Must be at least 35% fat to hold its shape.
- 200g dark chocolate (60% cacao)
- Bittersweet chocolate provides the best contrast to the berries.
- 360ml heavy whipping cream, divided
- Why this? Part is for melting chocolate, part is for airy volume.
- 1 tbsp espresso powder
- Why this? It doesn't taste like coffee; it just makes the chocolate taste "more."
For the chocolate ganache: 115g dark chocolate, chopped: Use leftovers from the mousse layer if needed. 120ml heavy cream: This creates that shiny, pourable finish.
Required Tools for Success
You don't need a kitchen full of gadgets, but a 20cm springform pan is non negotiable for this Decadent Dark Chocolate Raspberry Mousse Cake. Without it, you’ll never get the cake out without destroying those beautiful layers.
A fine mesh sieve is also vital for the raspberry coulis; nobody wants seeds stuck in their teeth while enjoying a velvety mousse.
I personally use a standard hand mixer for the whipping steps. While a stand mixer is great, the hand mixer gives you better control so you don't accidentally turn your heavy cream into butter. If you've ever made the The Homemade Funfetti recipe, you know how important it is to have the right sized bowl for aeration.
step-by-step Construction Guide
1. Constructing the Fudgy Base
Preheat your oven to 180°C. Grease your springform pan and line the bottom with parchment paper. Whisk 115g melted butter and 150g sugar until the mixture looks slightly pale. Add the egg and vanilla, beating vigorously for 1 minute. Sift in 30g cocoa, 65g flour, and salt.
Fold gently until no dry streaks remain. Spread the batter into the pan and bake for 20 minutes until the edges are set but the center remains slightly soft. Let it cool completely in the pan.
2. Concentrating the Berry Essence
Combine 250g raspberries, 50g sugar, and 1 tbsp lemon juice in a saucepan. Simmer over medium heat for 10 minutes until the berries have broken down and the liquid has thickened. Press the mixture through a fine mesh sieve into a bowl to remove all seeds.
Set aside to cool to room temperature.
3. Emulsifying the Raspberry Layer
In a cold bowl, whip 240ml heavy cream until stiff peaks form. Gently fold the cooled raspberry coulis into the whipped cream. Pour this over the cooled chocolate base and smooth the top with a spatula.
Chill in the fridge for at least 2 hours until the surface is firm to the touch.
4. Crafting the Chocolate Mousse
Melt 200g dark chocolate with 120ml of the heavy cream (from the 360ml) and 1 tbsp espresso powder. Whisk until the chocolate is glossy and completely smooth. Let it cool until it's just barely warm. Whip the remaining 240ml cream until soft peaks appear.
Fold the chocolate mixture into the whipped cream in three batches. Spread this over the raspberry layer and chill for another 2 hours.
5. The Mirror Glaze Finish
Heat 120ml cream until it just begins to simmer and small bubbles form. Pour it over 115g chopped dark chocolate. Let it sit for 2 minutes, then stir from the center outwards until a shiny ganache forms.
Pour the glaze over the chilled cake, tilting the pan to cover the edges. Chill for a final 2 hours before serving.
Troubleshooting the Perfect Set
Why Your Mousse Is Runny
If the raspberry or chocolate layers didn't firm up, it’s usually because the cream wasn't whipped enough or the chocolate/raspberry base was too hot when you folded them in. Heat is the enemy of stable whipped cream.
To Fix Grainy Chocolate Seizing
If your ganache or mousse chocolate looks curdled and dull, a tiny drop of water likely got into it. This causes the sugar and cocoa to clump.
| Problem | Root Cause | Solution |
|---|---|---|
| Separated Ganache | Cream was too hot | Whisk in a teaspoon of cold cream slowly to re emulsify. |
| Lumpy Raspberry Mousse | Coulter was too cold | Let the berries reach room temp before folding into the cream. |
| Cake Sticks to Pan | No parchment used | Run a thin knife dipped in hot water around the edges. |
Common Mistakes Checklist
- ✓ Ensure the cream is cold from the fridge before whipping (warm cream won't hold air).
- ✓ Sift the cocoa powder (it loves to form little bitter pebbles in your batter).
- ✓ Wait for the base to be 100% cold before adding the first mousse layer (otherwise, it melts!).
- ✓ Wipe your knife with a warm, damp cloth between every single slice for that "bakery look."
- ✓ Don't skip the espresso powder; it's the secret to making the chocolate taste expensive.
Flavor Variations and Substitutions
If you're on a tight budget, you can actually use high-quality chocolate chips instead of bar chocolate for the mousse, though the texture might be slightly less "shatter crisp" on top. For a different vibe, try swapping the raspberries for strawberries or even a tart passionfruit curd.
Chef Tip: If you want a "French Dark Chocolate Raspberry Cake" feel, add a tablespoon of Chambord or brandy to the raspberry coulis after it cools. It adds a sophisticated depth that cuts through the sugar.
| Original Ingredient | Substitute | Why It Works |
|---|---|---|
| Dutch Cocoa (30g) | Natural Cocoa | More acidic. Note: Results in a lighter color and tangier chocolate base. |
| Dark Chocolate (200g) | Semisweet Chips | Higher sugar content. Note: Mousse will be sweeter and slightly softer. |
| Heavy Cream (720ml total) | Coconut Cream | Full fat only. Note: Adds a tropical flavor best if you like "Bounty" style treats. |
If you scale this recipe down to half, use a smaller 15cm pan and reduce the bake time for the base by 5 minutes. If you double it, work in batches for the mousse to ensure the cream stays cold while you're whipping.
Storage and Zero Waste
This Decadent Dark Chocolate Raspberry Mousse Cake keeps beautifully in the fridge for up to 4 days. In fact, I think it tastes better on day two because the raspberry flavor has time to migrate into the chocolate. You can also freeze it!
Wrap individual slices in plastic wrap and then foil; they’ll last for a month. Just thaw them in the fridge for 3 hours before you want to eat.
For a zero waste kitchen, don't throw away those raspberry seeds you strained out. Mix them into your morning yogurt or oatmeal they're packed with fiber and still have a bit of that tart berry juice clinging to them.
If you have leftover ganache, let it harden in the fridge and roll it into tiny truffles for a mid week treat.
Professional Presentation Techniques
To get those perfectly clean layers, I always use a piece of acetate film (or even a cut up clean plastic folder) to line the inside of my springform pan before pouring in the mousse. When you peel it off after chilling, the sides will be as smooth as glass.
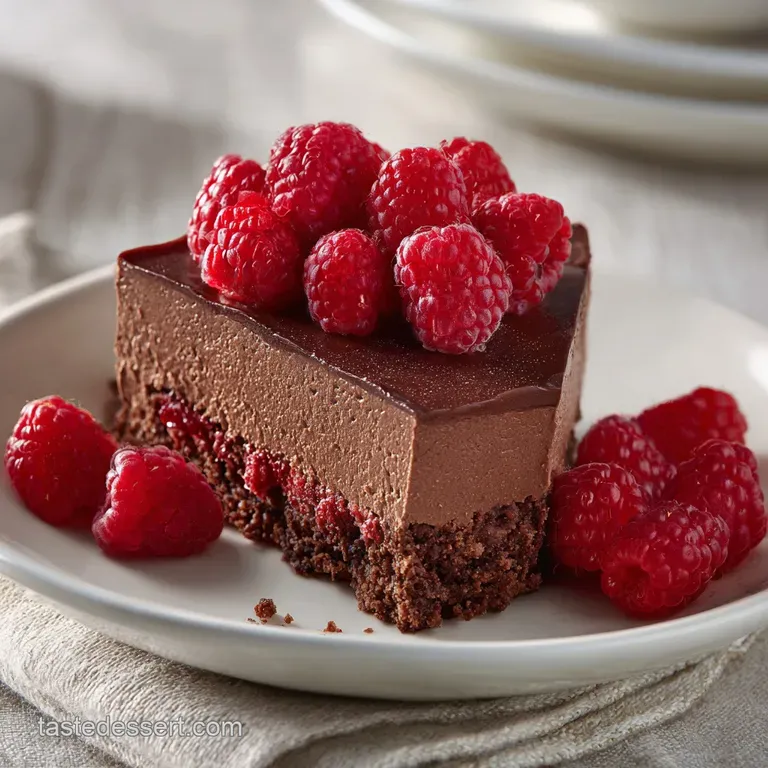
For the final touch, don't just dump berries on top. Place three fresh raspberries in the center and dust them with a tiny bit of powdered sugar. If you’re feeling extra, use a vegetable peeler to shave some curls off a block of dark chocolate.
It’s a simple trick, but it makes the whole thing look like it cost fifty bucks at a boutique bakery. Remember, we eat with our eyes first, so take that extra two minutes to make it look sharp!

Recipe FAQs
Can I substitute frozen raspberries for fresh in the mousse layer?
Yes, frozen raspberries are usually fine here. They release more moisture when cooked down, so ensure you simmer the coulis until it has visibly reduced before chilling.
How to prevent the dark chocolate mousse from collapsing during folding?
Ensure the melted chocolate mixture is only lukewarm, not hot. If the chocolate is too hot, it melts the air you just whipped into the cream; if you mastered stabilizing emulsions in recipes like our Classic Homemade Éclairs recipe, you'll recognize this temperature rule.
What is the best way to chill the cake for faster setting?
Place the cake in the freezer for 45 minutes between layers. While the full 7 hours in the fridge is ideal for the best texture, quick chilling between layers prevents bleeding, though the final glaze benefits from a full 2-hour chill afterward.
Is it true that Dutch process cocoa powder makes the chocolate flavor taste weaker?
False. Dutch process cocoa is alkalized, which lowers its acidity, resulting in a much smoother, deeper, and less harsh chocolate note perfect for this decadent profile.
How to achieve perfectly clean slices when cutting the set cake?
Use a long, thin knife dipped in hot water and wiped dry before each cut. Heating the blade slightly helps it glide through the firm mousse and glaze layers without dragging or cracking the surface.
What can I use instead of a springform pan if I don't own one?
Line a standard 20cm cake pan with a removable acetate sheet or plastic wrap barrier. This allows you to gently lift the cake out after it has fully set, mimicking the function of a springform base.
Can I use lower fat cream for the mousse to make it lighter?
No, you must use heavy whipping cream (35% fat minimum). The high fat content is necessary to whip into stable aeration that holds the chocolate structure; lower fat versions will not hold their volume.
Chocolate Raspberry Mousse Cake
Ingredients:
Instructions:
Nutrition Facts:
| Calories | 522 calories |
|---|---|
| Protein | 4.6g |
| Fat | 39.6g |
| Carbs | 40.3g |
| Fiber | 5.1g |
| Sugar | 34.1g |
| Sodium | 58mg |
