The Real Deal Classic Southern Homemade Banana Pudding with Vanilla Wafer Layers
- Unveiling the Magic of Truly Traditional Banana Pudding
- Why This Southern Comfort Recipe Reigns Supreme
- Procuring the Components for Deep Flavor
- The Essential Shopping List for Classic Pudding
- Crafting the Silky Custard Base
- Elevating Your Banana Pudding Experience
- Troubleshooting and Storage Secrets
- Frequently Asked Questions
- 📝 Recipe Card
Unveiling the Magic of Truly Traditional Banana Pudding
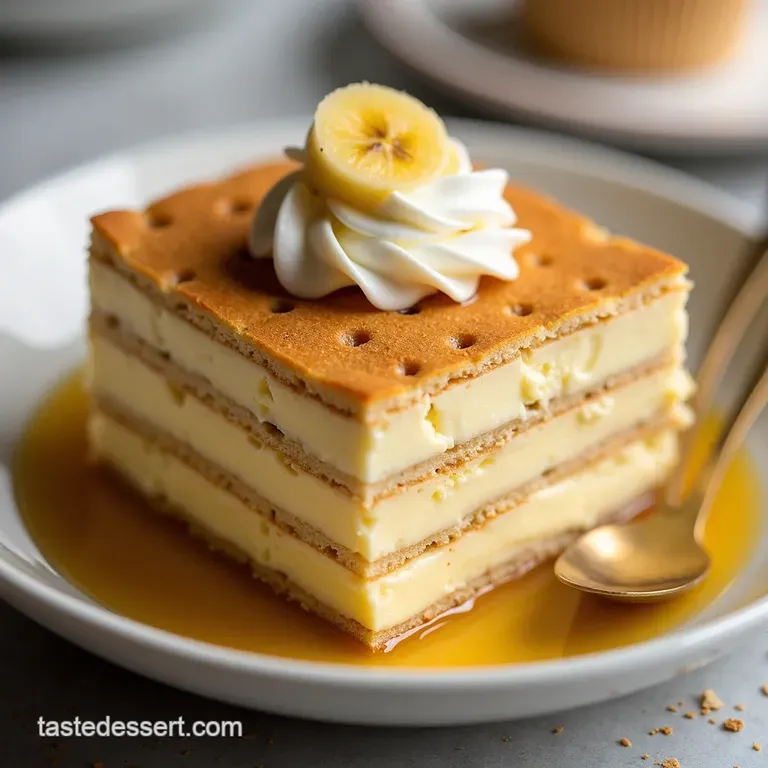
There are desserts, and then there is the dessert the one that transports you instantly back to childhood kitchens and sun-drenched afternoons. For many in the American South, that masterpiece is Homemade Banana Pudding .
This isn't merely mixing pudding powder with milk; we are embarking on a journey to create the quintessential Homemade Banana Pudding From Scratch , resulting in a velvety texture and depth of flavor that packets simply cannot replicate.
We are focusing today on the authentic, layered approach, ensuring those vanilla wafers soak up the rich custard just right.
Why This Southern Comfort Recipe Reigns Supreme
The distinction between a good pudding and a legendary one lies entirely in the execution of the custard base and the quality of the components. This Homemade Banana Pudding Recipe is built on foundational techniques designed to maximize creaminess and banana perfume.
Ditching Instant Mixes: The Path to Authentic Flavor
Why go through the effort of making a custard when the box promises speed? The answer is complexity. Instant mixes offer a one-note sweetness, whereas slow cooking egg yolks, milk, sugar, and flour creates a luxurious mouthfeel a true Homemade Banana Pudding Custard that coats the tongue.
The subtle caramelization that occurs during the stovetop cooking process adds layers of flavor unattainable through cold preparation.
A Nostalgic Dive into Homemade Banana Pudding History
While the exact origins are debated, the concept of layering fruit, cookies, and cream has roots in European trifle traditions. However, the Americanized version cemented its place in culinary history by utilizing readily available ingredients like packaged vanilla wafers (think Nilla Wafers).
This specific combination defines the classic Banana Pudding Dessert With Nilla Wafers we cherish today.
Setting Expectations: The Ultimate Creamy Consistency
Our goal is not a firm, sliceable custard, but rather a luscious, spoonable texture that yields slightly when the wafers are pressed against it. The correct balance of flour and cornstarch ensures stability without becoming rubbery, providing the perfect backdrop for the tender bananas.
This is the cornerstone of a successful Homemade Banana Pudding .
Procuring the Components for Deep Flavor
The quality of your final product hinges entirely on the raw materials you select. Since this dessert relies on relatively few elements, each component must pull its weight in delivering robust flavor.
Related Recipes Worth Trying
- Proper Homemade Gravy Silky Smooth Ready in 20 Mins — Forget the lumps This easy homemade gravy recipe shows you how to make rich brown gravy from scratch that coats every roast potato beautifully Foolproof...
- The Best Sloppy Joe Recipe Easy Proper Homemade Sauce Cider Vinegar — Forget the tinned versionthis is the proper Homemade Sloppy Joe Our easy recipe uses cider vinegar for the perfect tangy sauce Ultimate weeknight comfort food
- The Ultimate Homemade Sloppy Joes Recipe Best Easy Weeknight Dinner — Forget the can Learn how to make the best homemade Sloppy Joes recipe from scratch This gourmet ground beef sandwich filling is a quick proper weeknight dinner
The Essential Shopping List for Classic Pudding
To achieve the definitive Banana Pudding Dessert With Nilla Wafers , you will need standard pantry staples alongside fresh fruit and dairy. Remember, we are using four large egg yolks for richness, saving the whites if you plan on achieving the stunning Homemade Banana Pudding With Meringue finish later on.
For the silky custard base, gather 1 cup of granulated sugar, 1/3 cup of all-purpose flour, 2 tablespoons of cornstarch, a pinch of salt, 3 cups of whole milk, 2 tablespoons of unsalted butter, and 2 teaspoons of high-quality vanilla extract.
Assembly requires 4 to 5 large, ripe bananas and one standard box of vanilla wafer cookies.
Selecting Bananas at Peak Ripeness
This is non-negotiable for a truly flavorful experience. You are seeking bananas that are yellow but generously dotted with brown spots. These are softer, sweeter, and have a deeper banana flavor profile, which is crucial as the bananas are not cooked during the layering process.
Green bananas remain starchy and detract from the creamy experience.
Sourcing high-quality Vanilla Wafers
The cookie layer provides texture and absorbs the custard beautifully. While any sturdy vanilla wafer will work for a Banana Pudding With Vanilla Wafers Recipe , choosing a brand you genuinely enjoy ensures that subtle vanilla note carries through the final, soft layers.
Dairy and Thickening Agents Breakdown
For the richest custard, whole milk is essential. Fat carries flavor and provides the necessary silkiness. The combination of flour and cornstarch acts as our primary thickener; flour provides body, while cornstarch gives that signature glassy sheen and smooth finish to the Homemade Banana Pudding Custard .
Crafting the Silky Custard Base
This is where the "medium" difficulty rating truly applies. Creating this slow cooked custard requires focus, patience, and temperature awareness.
Tempering Eggs: Avoiding Scrambled Custard Catastrophe
Before incorporating the four essential egg yolks, they must be gently warmed to prevent shocking them when they hit the hot milk base. Whisk the yolks in a separate bowl. Then, while whisking the yolks vigorously, slowly ladle in about one cup of the already heated milk mixture.
This gradual temperature introduction is called tempering and is the secret to keeping your Homemade Banana Pudding smooth rather than chunky.
Achieving the Ideal Pudding Set Point
After returning the tempered yolks to the saucepan, continue cooking over medium low heat. Stirring constantly with a heat proof spatula ensuring you scrape the bottom and corners you will notice the mixture transition from liquid to a thick, coat the-back-of-a-spoon consistency.
Once it reaches a gentle simmer and cooks for one minute, remove it instantly from the heat. Whisk in the butter until melted and glossy, followed by the vanilla extract.
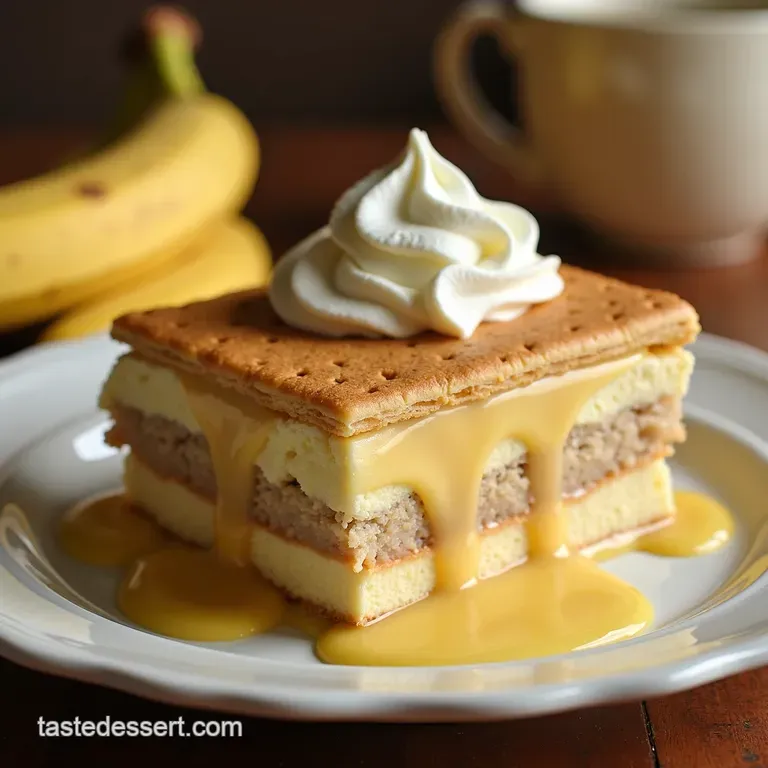
Strategic Assembly: Protecting the Wafers from Sogging
Layering must be efficient. Start with a base layer of wafers, followed by sliced bananas, then the custard. The key to a great Easy Banana Pudding Recipe that doesn't turn into soup is to ensure that every wafer is completely submerged and covered by the next layer of ingredients.
The slight cooling of the custard before assembly helps slow down the initial softening process slightly.
The Crucial Overnight Chill for Homemade Banana Pudding Perfection
Resist the urge to dig in immediately! Covering the finished, layered dish tightly with plastic wrap and chilling it for a minimum of four hours, though preferably overnight, allows the starches to fully set and, more importantly, allows the vanilla wafers to absorb the custard, transforming them into soft, cake like layers that define superior Homemade Banana Pudding .
Elevating Your Banana Pudding Experience
While the classic version is already magnificent, there are delightful ways to personalize this beloved dessert beyond the standard structure.
Troubleshooting and Storage Secrets
Even expert bakers sometimes run into minor snags, but understanding storage ensures your efforts are preserved for maximum enjoyment.
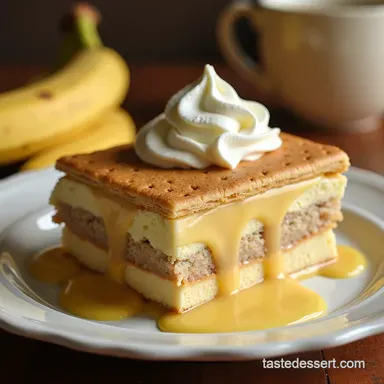
Innovative Topping Twists Beyond Meringue
If you choose not to use the optional Homemade Banana Pudding With Meringue topping, consider alternatives that offer textural contrast. A layer of lightly toasted, crumbled pecans mixed into freshly whipped cream adds a welcome crunch.
Alternatively, a thin layer of salted caramel drizzled over the chilled pudding before serving provides a sophisticated, salty sweet counterpoint to the creamy base.
Optimal Refrigeration Times for Serving
For the best structural integrity and flavor melding, this Homemade Banana Pudding should be served within 24 to 36 hours of assembly.
After this point, the bananas begin to oxidize and soften excessively, potentially compromising the texture, even if the custard remains stable.
Handling Leftovers: Reviving the Layers
If you have leftovers stored longer than two days, the very top layer of bananas might look slightly darkened. Gently scrape off this top, affected layer. The remaining pudding underneath is often perfectly fine.
You can refresh the dessert’s appearance by topping the leftovers with a fresh dollop of whipped cream or a sprinkling of crushed wafers just before serving again.

Frequently Asked Questions
Why is my Homemade Banana Pudding custard lumpy instead of smooth?
That’s a common mishap, often down to temperature control don't worry, it happens to the best of us! Lumps usually mean the eggs cooked too quickly without being properly tempered, or you didn’t whisk vigorously enough when thickening the milk base.
Try pouring the mixture through a fine mesh sieve right before cooling to catch any rogue cooked bits, and next time, ensure you are constantly whisking over medium heat.
How long does Homemade Banana Pudding need to chill, and what happens if I don’t wait?
For the absolute best results, you need at least 4 hours, but honestly, overnight is the ticket it allows the vanilla wafers to fully absorb the custard and soften up nicely.
If you cut corners, you'll end up with distinct layers of hard cookie, mushy banana, and runny custard, rather than that glorious, unified, cake like texture that screams Southern comfort.
My bananas went brown even though they are covered in custard is that normal?
Bananas are notoriously tricky customers when it comes to browning, even when submerged! This oxidation is natural, but to minimise it, try tossing your banana slices lightly in a tablespoon of lemon juice or pineapple juice before layering them in the dish.
If you are using a meringue topping, ensure it seals the edges perfectly, acting as a shield against the air.
Can I make this recipe ahead of time, and how should I store leftovers?
Yes, making this ahead is actually encouraged; it tastes better the next day! Store the covered dish in the refrigerator for up to 3 days. If you used a meringue topping, note that it tends to weep or deflate slightly overnight in the fridge, so for the best presentation, it’s often best to save the meringue step until just before serving.
I’m not a fan of meringue; what’s a good alternative topping for my Homemade Banana Pudding?
If meringue feels like too much faff, you’ve got a couple of cracking alternatives! The easiest swap is a simple layer of lightly sweetened whipped cream piped or spread over the chilled pudding right before serving.
For a textural contrast, try crushing some of those leftover vanilla wafers and sprinkling them on top for a lovely crunch.
Classic Homemade Banana Pudding
Ingredients:
Instructions:
Nutrition Facts:
| Calories | 596 kcal |
|---|---|
| Protein | 7.6 g |
| Fat | 16.9 g |
| Carbs | 59.6 g |
| Fiber | 0.7 g |
| Sodium | 146 mg |
