Lemon Meringue Pie: the Zesty Billow Chefs Classic Recipe
- Mastering the Chef’s Classic Lemon Meringue Pie
- The Science Behind the Billow: Why This Lemon Meringue Pie Excels
- Essential Ingredients and Smart Substitutions
- Step-by-Step Directions: Constructing Your Lemon Meringue Masterpiece
- Troubleshooting and Expert Fixes for Common Lemon Meringue Pie Errors
- Maximizing Freshness: Storage and Serving Guidance
- Recipe FAQs
- 📝 Recipe Card
Mastering the Chef’s Classic Lemon Meringue Pie
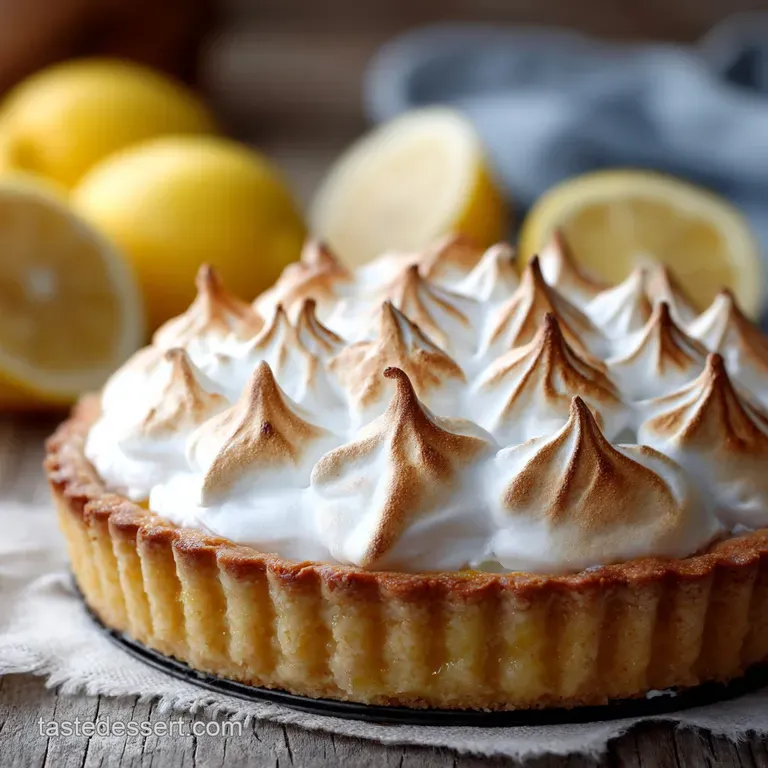
I swear, the minute you pull a Lemon Meringue Pie out of the oven, the whole house smells like pure, sweet sunshine. That crackle of the golden meringue peaks against the vibrant yellow filling is just chef's kiss .
It’s a glorious texture game, combining the crisp crust, the silky filling, and that ethereal marshmallow cloud on top.
Sure, this pie has three separate components, which makes it look incredibly intimidating to beginners. But honestly, if you can handle separating eggs and stirring a pot consistently, you can nail this recipe, turning a few pantry staples into a show stopping dessert.
It’s cheap, impressively elegant, and guaranteed to silence the table in a good way, obviously.
I’ve burned the crust, I’ve had the filling run away, and I’ve certainly battled the dreaded meringue weep. Today, though, we’re cutting through the noise and focusing only on the proven methods that deliver a perfect, high rising, weeping free pie every single time.
Let’s stop talking and start baking this [Best Lemon Meringue Pie].
The Science Behind the Billow: Why This Lemon Meringue Pie Excels
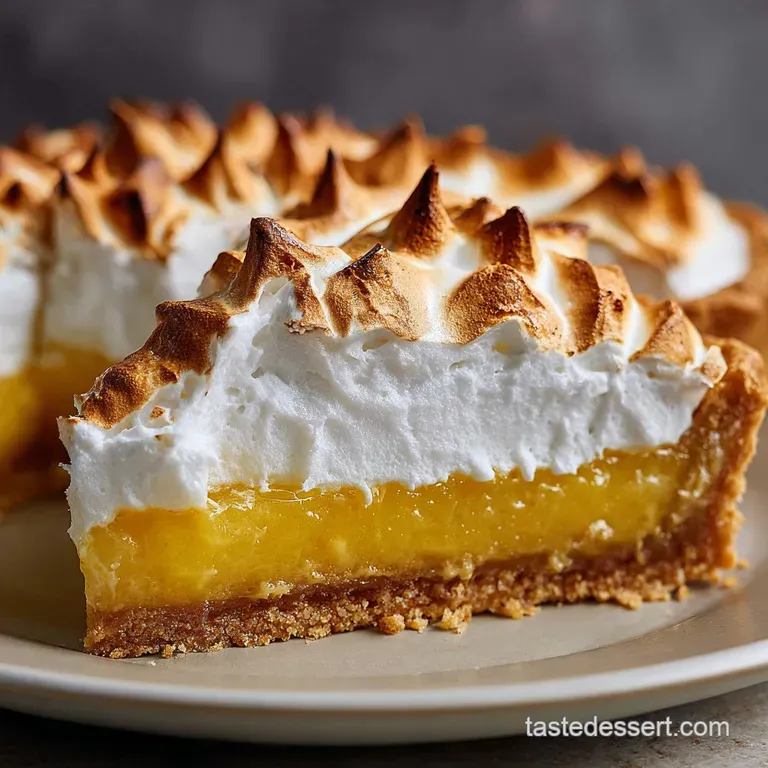
The Anatomy of a Perfect Slice: Flaky Crust, Tart Filling, Billowy Meringue
A truly great Lemon Meringue Pie is a balancing act of temperatures and textures. We need an incredibly flaky, blind baked shortcrust that stands up to the liquid filling, totally preventing that dreaded soggy bottom.
The filling must be intensely tart we use enough fresh lemon juice and zest to make your cheeks pucker because it needs to counteract the massive amount of sugar in the meringue.
Finally, the meringue must be cooked immediately on top of the hot curd, creating that essential seal that keeps the syrup exactly where it belongs: in the foam.
Preparation Timeline: Planning for Chilling and Baking Success
Do not rush this pie; patience is truly your most powerful ingredient here. The biggest mistake I ever made was slicing it too early, ending up with hot, sloppy goo running everywhere. We must plan for chilling the pastry dough, the critical slow cooling of the baked pie, and the final refrigeration setting time.
Start this recipe the day before you need it. The minimum four hour fridge time is non-negotiable if you want clean, structural slices.
Equipment Checklist: Essential Tools for Dessert Perfection
You don't need a professional kitchen, but a few tools make a huge difference. While you could technically whisk the meringue by hand, a stand mixer is truly your best friend for achieving the stiff, glossy peaks necessary for a stable meringue.
You'll also need a heavy bottomed saucepan for the curd to prevent scorching and a microplane for maximizing the potent lemon zest without hitting the bitter white pith.
Balancing Act: Achieving the Ideal Lemon Tartness (Acid vs. Sweetness)
The key to a classic Lemon Meringue Pie Recipe is aggression in the filling. We need that puckering tartness! If you’ve ever tasted a lackluster pie, it’s usually because the cook was shy with the juice.
Don't worry about the high sugar content; the acid cuts through the richness beautifully, ensuring every bite is vibrant and clean.
Preventing the Weep: Stabilizing the French Meringue
Weeping happens when the sugar in the meringue separates from the egg proteins and liquefies. To fight this, we use two tricks: cream of tartar (an acid stabilizer) and, crucially, applying the meringue directly onto the piping hot filling.
The heat cooks the underside of the meringue instantly, creating a thermal barrier that locks everything in place.
The Starch Secret: Ensuring a Smooth, Set Lemon Curd Filling
This is the secret sauce for perfect Lemon Meringue Pie Filling stability: Cornstarch. Unlike many simple custard recipes that rely solely on egg yolks, we use a combination of eggs and a significant amount of cornstarch.
This allows the filling to boil and thicken into a sturdy pudding like consistency before adding the delicate egg yolks, guaranteeing a smooth, sliceable set every time, even with all that lemon juice.
Essential Ingredients and Smart Substitutions
Choosing Your Lemons: Zest vs. Juice Intensity
Always opt for fresh, unwaxed lemons. The juice gives us the acid, but the zest delivers the actual citrus flavour . I use a microplane to get every drop of bright yellow oil from the surface, avoiding the pith entirely.
Don't be tempted by bottled juice; you'll lose that fresh complexity needed for the best Lemon Meringue Pie.
| Ingredient | Substitute (Use this instead!) | Notes |
|---|---|---|
| All-Purpose Flour | 1:1 gluten-free Blend | Ensure it contains xanthan gum for structure. |
| Cream of Tartar | 1 tsp White Vinegar or Lemon Juice | The acid stabilizes the egg proteins just as well. |
| Caster Sugar | Standard Granulated Sugar | Caster dissolves faster in the meringue, but granulated works fine; just beat longer. |
Egg Separation Mastery: Avoiding Meringue Failure
Meringue fails the second any fat touches it. You need four perfectly separated egg whites, completely free of yolk, and they must be at room temperature before whipping. Cold whites don't reach the same volume!
I separate the eggs straight from the fridge (yolks are firmer then), then let the whites sit out for 30 minutes. Use the remaining yolks, plus an extra whole egg, in the filling for richness.
Pantry Prep: Flour Types and Butter Temperature Notes
For the crust, use standard all-purpose flour. Your butter, however, needs to be aggressively cold . Cut it into small cubes and even pop the cubes in the freezer for five minutes before mixing.
This ensures that when mixed with the water, it stays in separate little pockets, which translates directly into flaky, wonderful pastry.
step-by-step Directions: Constructing Your Lemon Meringue Masterpiece
Phase I: Blind Baking the Golden Shortcrust Pastry
The perfect crust starts with cold ingredients and minimal handling. Mix your dough just until it barely comes together; we want to avoid developing too much gluten. After chilling, roll it out and fit it into the dish, making sure the crimped edge is firm.
Blind baking is crucial: Use parchment and baking weights (rice or dried beans work!) to hold the shape during the first bake, then remove the paper and weights to crisp up the base completely. Trust me, skipping this step means certain disaster.
Phase II: Preparing and Cooking the Vibrant Lemon Curd Filling
This is where the magic happens and where we achieve that perfect [Lemon Meringue Pie Filling]. Start by whisking the sugar and cornstarch with hot water to create a stable slurry this prevents lumps later on. Bring that mix to a rolling boil until it looks like thick, shiny pudding.
Now, the tempering: take a cup of that hot mixture and slowly drizzle it into the whisked eggs and yolks. Whisk constantly! This step gently raises the eggs' temperature. Then, pour the whole lot back into the pan and cook for just a couple more minutes until it coats the back of a spoon.
Finally, off the heat, stir in the butter, juice, and zest. If you happen to have a bunch of extra zest, you could totally use it later in a bright main dish like my [Lemon Chili Shrimp Quinoa Bowl: Easy 30 Minute Weeknight Meal]!
Chef's Note: The filling must be poured into the crust and topped with meringue while still steaming hot. This prevents skin formation and helps the meringue adhere perfectly.
Phase III: Whipping and Torching the Sky-High Meringue
Ensure your mixing bowl is hospital grade clean; seriously, wipe it with a vinegar soaked paper towel if you are nervous. Start whipping the room temperature whites until foamy, then add the cream of tartar.
Gradually add the sugar, one tablespoon at a time, until it fully dissolves and you reach incredibly stiff, glossy peaks. If the mixture looks grainy, you rushed the sugar. Quickly spoon or pipe the meringue onto the hot curd, making sure it touches the crust all the way around the perimeter.
Bake for a few minutes to set the crust or, even better, use a kitchen torch for instant, beautiful browning.
Troubleshooting and Expert Fixes for Common Lemon Meringue Pie Errors
The Dreaded Meringue Shrink: Temperature Control is Key
Meringue shrinkage is almost always caused by a poor seal or rapid temperature change. Fix: Always apply the meringue directly to the hot filling. When cooling, let the pie sit at room temperature for at least an hour on the counter before even thinking about the fridge.
Gradual cooling minimizes shrinkage.
Solving the ‘Soggy Bottom’ Dilemma
If your crust is damp and soft, you likely didn't bake it long enough before adding the filling. Fix: Ensure you blind bake the crust completely until it is golden and firm before filling.
If you still worry about moisture, brush the warm crust with a thin layer of egg white before adding the filling; it creates a waterproof barrier.
How to Avoid Overtaxing the Curd (Lumpy Filling Prevention)
Lumps happen when the cornstarch or the eggs scramble during cooking. Fix: When cooking the cornstarch base, whisk constantly until it boils and thickens. When tempering the eggs, whisk fiercely while slowly drizzling in the hot liquid. If you accidentally get a small lump, don't fret!
Simply press the hot curd through a fine mesh sieve before pouring it into the crust.
Maximizing Freshness: Storage and Serving Guidance
Safely Slicing the Pie: Cooling Time Requirements
Do not slice this pie until it is fully set, chilled, and firm. That means a minimum of four hours in the fridge, or ideally, overnight. To get clean slices that look professional, use a very sharp knife dipped in hot water and wiped dry between each cut. It makes a massive difference!
Making Ahead: Storing Unfilled Crusts and Baked Pies
You can easily prepare the shortcrust pastry dough up to three days in advance; keep it tightly wrapped in the fridge. The fully baked pie, however, is best eaten within 48 hours. After two days, the meringue starts to break down and may weep slightly. Do not freeze the finished pie.
The meringue turns spongy, and the filling separates upon thawing. If you are looking for a great make-ahead dessert, try something like the [Skinny NoBake Peanut Butter Pie The Ultra Creamy Protein Dessert] instead, which handles freezing beautifully.
Beverage Pairings: What to Sip Alongside the Tartness
Because this pie is intensely sweet and tart, you need a strong counterpoint. I love serving this with a robust cup of freshly brewed black coffee or, if you want something alcoholic, a dry sparkling wine or prosecco works wonders. The bubbles cut through the richness and cleanse the palate perfectly.

Recipe FAQs
Why is my meringue 'weeping' or releasing liquid?
Weeping, or beading, often happens when the meringue is undercooked or spread onto a hot filling. Ensure the filling has cooled slightly before adding the meringue, and bake the meringue quickly at a high temperature (around 350°F) until the peaks are firm and dry to the touch.
This locks in the moisture and stabilizes the foam structure.
My lemon filling didn't set firmly. What went wrong?
This usually indicates the filling wasn't cooked long enough or didn't contain enough starch to thicken properly. You must boil the filling mixture for a full minute, stirring constantly, to fully activate the starch and achieve a firm set once completely cooled.
Over stirring during the cooling process can also prevent the mixture from solidifying.
How do I prevent the meringue from shrinking away from the crust edges?
To create a good seal, ensure the meringue is spread while the filling is still slightly warm, and make sure the meringue completely touches the inner edges of the pastry crust. This seal prevents air pockets from forming between the filling and the crust, which causes the retraction during cooling.
What is the best way to store Lemon Meringue Pie?
Lemon Meringue Pie is best stored loosely covered in the refrigerator, as the meringue softens quickly at room temperature. Due to the egg-based filling and meringue, it should be consumed within 2 to 3 days for optimal texture and freshness. Condensation is the enemy, so avoid tightly wrapping the pie.
Can I freeze leftover Lemon Meringue Pie?
Freezing is generally not recommended as it ruins the light, airy texture of the meringue, causing it to become soggy and collapse upon thawing. If absolutely necessary, you may freeze the pre-baked pie shell with the fully cooled lemon filling, adding a fresh meringue just before thawing and serving.
Can I substitute fresh lemon juice with bottled juice?
While bottled juice is convenient, it lacks the bright, intense flavour and essential oils found in fresh juice and zest. For "Chef's Classic" quality and truly vibrant flavour, always use freshly squeezed lemons. The quality of the lemon juice directly impacts the overall taste of the pie.
What are the differences between French and Swiss meringues?
French meringue, used here, is simply egg whites beaten with sugar at room temperature, making it the lightest but least stable meringue. Swiss meringue requires heating the egg whites and sugar over a water bath before whipping; this creates a denser, glossier, and much more stable topping that is less likely to weep.
Classic Lemon Meringue Pie Recipe

Ingredients:
Instructions:
Nutrition Facts:
| Calories | 111 kcal |
|---|---|
| Protein | 1.2 g |
| Fat | 5.5 g |
| Carbs | 14.6 g |
