Crispy Japanese Beef Cutlet Perfection
- Look into Into Gyukatsu: That Crispy Beef Cutlet You Didn’t Know You Were Craving
- Your Ultimate Guide to Essential Ingredients for Gyukatsu Magic
- Mastering the Professional Cooking Method for Gyukatsu: A Tokyo Food Guide Favorite
- Nailing Gyukatsu Like a Pro: Insider Tips & Secrets
- How to Present Gyukatsu Like It’s Straight Out of Akihabara Tokyo’s Best Japan Restaurant
- Storing & Planning Ahead Without Losing That Crunch
- Play with It: Variations That Make Gyukatsu Your Own Japan Food Adventure
- What’s In It For You: The Nutrition Lowdown and Why Gyukatsu Rocks
- Final Thoughts: Tap Into Your Inner Tokyo Foodie and look into In!
- Frequently Asked Questions
- 📝 Recipe Card
Look into Into Gyukatsu: That Crispy Beef Cutlet You Didn’t Know You Were Craving
Oh man, let me tell you, the first time i stumbled upon gyukatsu was totally by accident during a tokyo trip.
I was wandering through akihabara tokyo, eyes half glazed out by anime stores and neon signs (yes, i’m a total persona anime fan), when i caught a whiff of something irresistibly crunchy and beefy.
One quick detour later, and i was face first in a steaming plate of that golden, crispy beef cutlet magic. if you ever want a true gem from the tokyo food guide , gyukatsu is it.
Seriously, if you’re into japan restaurant vibes that feel both modern and deeply traditional, this dish nails the balance perfectly.
I get it, typing “gyukatsu” into a search probably means you’re either planning your next trip to japan travel destinations or hunting down the real deal in tokyo restaurants or even at home.
Either way, you’re about to join a tasty club. gyukatsu motomura, a famous spot in tokyo, kinda set the bar for this dish, but don’t worry, this recipe will have you making your own crunchy masterpiece from your kitchen without having to fight the lunch crowds near shibuya.
What’s Gyukatsu? A Quick Peek Into It’s Samurai Roots
Gyukatsu literally means “beef cutlet,” but it’s not just any fried beef. unlike regular tonkatsu (those panko crusted pork cutlets), gyukatsu rocks premium beef, lightly breaded and fried quickly to keep the inside juicy and pink .
It’s believed to have japanese roots dating back to the 20th century when japan fell in love with breaded deep fried foods, thanks to western influence.
But gyukatsu, compared to its pork sibling, is like the cool younger cousin more sophisticated with leaner meat and delicate cooking.
Fast forward to now, gyukatsu has shot fresh popularity. for folks looking at food in tokyo tours or even those crafting their april vision board goals, it’s a must try.
Easy enough to whip up in under 30 minutes (perfect for busy evenings or impressing your pals), this dish isn’t rocket science but does call for a little finesse to nail that crispy crust while keeping the beef tender and rare ish .
It’s like the sweet spot of “medium rare but with crunch.”
Cost wise? yeah, you wanna go for a good cut of beef, ribeye or sirloin, so it might not be your cheapest weeknight meal, but it’s totally worth it a rich payoff with a couple of steaks feeding two hungry people.
Plus, the leftovers if you have any... well, that’s a win.
Why You’ll Want Gyukatsu on Your Menu Yesterday
Look, i’m not gonna lie gyukatsu isn’t just tasty, it’s kinda healthy in its own way. beef brings a punch of protein, iron, and b12, plus that crisp breadcrumb coating cooks up less oily if you keep your oil temp right around 350° f .
That means you get the crisp without the grease overdose. plus, pairing it with shredded cabbage adds a fresh crunch and fiber kick.
I always loved how gyukatsu keeps things balanced, unlike some fried foods that go all in on oil or batter.
What sets gyukatsu apart from everyday fried foods? it’s the texture play that soft, juicy center paired with a crunchy shell.
Plus, it’s super versatile for occasions. whether you're chasing that japan travel destinations vibe or just craving something different for dinner, gyukatsu shines at casual dinners, foodie meetups, or even little celebrations.
Trust me, folks back home loved it when i brought this dish to our last potluck.
And if you’re eyeing things from your fuzzy Persona anime marathon couch, this beef cutlet can transform an average snack break into a near ceremonial feast.
Alright, now that your mouth is watering and you’re picturing that perfect panko crunch... let’s move on to the ingredients to get you set for crispy, juicy gyukatsu like a Tokyo pro.
Ready to make your kitchen feel like a bustling Japan restaurant? Let’s dig into what you’ll need to nail this crispy beef cutlet.
Your Ultimate Guide to Essential Ingredients for Gyukatsu Magic
Alright, pals, let’s talk about the must have things before you dive into making that crispy, juicy gyukatsu you know, the japanese beef cutlet that’s basically a tokyo food guide’s dream dish.
I still remember the first time i tried gyukatsu motomura in akihabara tokyo oh my gosh, it blew my mind! and getting those ingredients right? game changer.
Premium Core Components: The Beefy Backbone
First up, the beef itself. for 10 oz (280g) sirloin or ribeye steak, about 1 inch thick , fresh and bright is the way to go.
If your steak smells funky or feels sticky, toss it! freshness is sacred in japan’s restaurants, and for good reason you want your gyukatsu tender and juicy, not funky or dry.
When measuring, stick to us cups and metric grams for accuracy. it’s tempting to eyeball things, but you'll get the juiciest results when proportions are spot on.
Don’t go wild with seasoning either just a pinch of salt and freshly ground black pepper works wonders.
Pro tip: store your beef in the fridge at around 34° f ( 1° c) and use within 2 days for best freshness.
Wrapping it tightly in plastic wrap or a vacuum sealed bag prevents nasty odors and freezer burn, especially if you’re planning a japan travel destinations inspired meal night.
Signature Seasoning Blend: Your Flavor Passport
Gyukatsu may seem simple, but the real magic hides in the seasoning. beyond plain salt and pepper, i love tossing some fresh herbs like finely chopped parsley or shiso leaves to brighten it up.
Adding a pinch of shichimi togarashi (japanese seven spice) to the panko adds a subtle kick.
For the panko coating 1 cup (90g) of japanese style breadcrumbs look for the flakier and airier texture. this is what gives gyukatsu its legendary crunch.
And don’t forget to serve it up with a citrusy ponzu sauce or classic tonkatsu sauce. it’s all about that balance of crisp versus umami .
Hey, if you hit the Japan Restaurant scene, you’ll notice some places swap out basic herbs for sesame seeds or even garlic powder for regional spin offs. Feel free to experiment!
Smart Substitutions When Life Throws a Curveball
No panko on hand? don’t sweat it. pulse your regular breadcrumbs in a food processor, just a bit, and you’ll recreate that essential crumb crunch.
In a pinch, crushed cornflakes can work too yeah, really!
If you or your friends are gluten-free or going keto, swap out all-purpose flour for rice flour or almond flour, and choose gluten-free panko available online or in specialty stores.
Also, instead of vegetable oil, punching it up with canola or peanut oil helps maintain that perfect frying temp, especially at american home kitchens.
Don’t have fresh beef? honestly, store-bought frozen quality can still shine if thawed carefully overnight and cooked right. i’ve pulled an emergency gyukatsu dinner from the freezer more than once, so trust me on this one.
Kitchen Equipment Essentials: Tools to Rule Your Kitchen
You don’t need a fancy tokyo restaurant kitchen to whip this up. a heavy bottomed skillet or cast iron pan is golden for evenly heating oil and getting that flawless crust.
Measure your oil depth to about 1 inch for safe frying. if you’re worried about temp, a meat thermometer (really, don’t skip this!) will help keep your beef at the perfect 130° f ( 54° c) for medium rare .
And hey, no thermometer? drop a breadcrumb in your oil if it sizzles vigorously without smoking, you’re hitting that sweet 350° f ( 175° c) range.
Use tongs or chopsticks for easy flipping. trust me, using fingers near hot oil is asking for trouble.
Got a mandoline slicer? Perfect for shredding cabbage thin, just like they do at Gyukatsu Motomura. No slicer? A sharp knife and patience work too.
Once cooked, let your gyukatsu rest for a few minutes this little pause lets juices lock in. A resting plate with paper towels helps keep it crispy without sogginess.
Wrapping It Up: Ready for That Gyukatsu Feast?
I've gotta say, prepping these ingredients feels like a mini trip to tokyo restaurants without the jet lag. whether you’re chilling at home or planning a full persona anime themed april vision board dinner party (trust me, friends love that), these tips set you up like a pro.
And if you’re dreaming of exploring Food In Tokyo without leaving your kitchen, mastering these essentials for gyukatsu is a fantastic start.
Next up? I’ll walk you through the step-by-step instructions to get that golden crust and rare center just right. Spoiler: it’s all about timing and loving your beef. Stay tuned!
Mastering the Professional Cooking Method for Gyukatsu: A Tokyo Food Guide Favorite
Alright, friend, if you’ve ever wandered around akihabara tokyo or checked out the bomb eats at gyukatsu motomura , you know this crispy japanese beef cutlet is chef’s kiss perfect.
But guess what? you can totally nail it at home with the right method. i’ve messed up a few times (like overcooking my beef or ending up with soggy crusts), but after some trial and error, cooking gyukatsu professionally became my go-to flex for impressing guests.
Let’s dive into the Professional Cooking Method —all the juicy details that’ll get your gyukatsu crispy outside, tender inside, and make you feel like a Tokyo restaurants pro.
Essential Prep Moves for Smooth Cooking
First things first: mise en place . yep, that fancy french phrase just means “everything in its place.” honestly, it's a lifesaver.
Before heating any oil or touching the beef, get your flour, beaten egg, and panko breadcrumbs ready in separate shallow bowls.
Trust me, scrambling while frying only ends in burnt crusts or raw centers.
Time management is key here. if the cutting board is cluttered, you’ll slow down, and greasy oil waits for no one.
So chop your cabbage, season your beef with salt and pepper, and set your frying station up all neat and ready.
One trick i picked up from my japan travel destinations vlog always keep your cooking space organized. heavy pan, tongs, thermometer, paper towels for draining, all within arm’s reach.
It sounds obvious but helps avoid “holy crap-i-burned-it” moments.
Oh! and safety. hot oil is no joke. keep a splatter guard nearby or use a deep pan to reduce accidental splashes.
Also, never leave the stove unattended once you hit that 350° f ( 175° c) mark.
Step-by-step Cooking Process
- Season beef with salt and pepper evenly. Pat dry first to help the crust stick better.
- Breading station: Flour, egg, then panko dredge each steak piece lightly.
- Heat vegetable oil to a consistent 350° F ( 175° C) —this temp is crucial for that perfect golden crunch.
- Fry each cutlet carefully for about 1.5 to 2 minutes per side for medium rare. You want that beautiful blush inside, not gray mush.
- Use visual clues: crispy golden crust on outside, slight firmness but tender when you give it a poke.
- Drain on paper towels, then let rest 3- 5 minutes to redistribute juices ignore this and your steak dries faster than April Vision Board dreams.
Honestly, a meat thermometer is your BFF here. Aim for about 130° F ( 54° C) inside. Nothing worse than tough beef when you wanted melt-in-your mouth.
Pro Tips & Tricks That Separates Legends from the Rest
Here’s where you get the inside scoop:
- Don’t overbread! Thicker coat means greasy, uneven cooking.
- Keep your oil hot if it dips below 325° F , crumbs soak too much oil.
- Patience is a virtue with resting meat. Slice too soon and juices escape.
- If your crust burns before the inside’s done, lower heat slightly or try a thicker beef cut.
During my first attempt, I forgot to rest the gyukatsu, and my dining buddy gave me that sad “Is it rubber?” look. Lesson learned.
If your crust bubbles weird or colors unevenly, toss some fresh panko next time. Old breadcrumbs can be stale, no matter what the label says.
Success Strategies for Perfect Gyukatsu Every Time
Common pitfalls? Overcooking beef, greasy crust, or overcrowding your pan (which crashes oil temp). Want a killer gyukatsu every time?
- Use quality beef like sirloin or ribeye fat marbling elevates taste and texture.
- Avoid stacking cutlets. Fry in batches if you have to.
- Try a small wedge of lemon on the side it brightens every bite like the bustling streets of Tokyo at night.
- For a bangin’ make-ahead option, let gyukatsu cool completely, then reheat briefly in a hot pan or under a broiler. No soggy reheats allowed!
I still remember the first time i nailed the timing at home crust crisp, beef pink inside, and my friend seriously thought i had snuck out for some fancy japan restaurant meal.
That’s the magic of proper cooking.
Alright, i could go on about this all day, but next, let’s jump into additional information to help you explore not just gyukatsu but the best ways to enjoy it and even more insider tips from our adventures in food in tokyo .
Stay tuned!
Nailing Gyukatsu Like a Pro: Insider Tips & Secrets
Oh man, if you ever dipped your toes into tokyo restaurants scene, especially hitting up spots like gyukatsu motomura , you know how those crispy beef cutlets are on another level.
But cooking that juicy, slightly rare gyukatsu at home? it’s a whole vibe, and i’ve got some chef level nuggets to make sure you crush it.
First off, dry your beef like you mean it. seriously, pat it down with paper towels until it’s less damp than your april vision board after a rainstorm.
This little trick helps the panko crumbs stick better and get that golden crunch everyone craves.
Wanna save mad time? prep your breading station before you even touch the beef. this is classic kitchen zen flour, egg, panko, each in their own shallow dish.
Doing it assembly line style saves you fumbling around and keeps the beef from getting soggy while you get your act together.
Oh, and don’t pile on the breadcrumbs or layer them thick like you're building a bread fortress. thin and even is where it’s at!
The heat is everything . when you fry, keep that oil around 350° f . dip a breadcrumb in first once it bubbles vigorously and stands out, you’re cooking with gas (not literally, but you get it).
Too low, and the coating soaks up oil like a sponge; too high, and you’ll blacken the outside while leaving the inside sad and raw.
If you’re feeling fancy or unsure about doneness, use a meat thermometer set to 130° f for that perfect medium rare that’s how gyukatsu is supposed to be.
Honestly, i botched this the first few times and ended up with a well done steak masquerading as gyukatsu. not the vibe.
Resting your cutlets after frying? don’t skip it. give 'em 3- 5 minutes to chill on paper towels. that swirling, juicy goodness inside will redistribute and stop escaping right when you slice in trust me, your mouth will thank you.
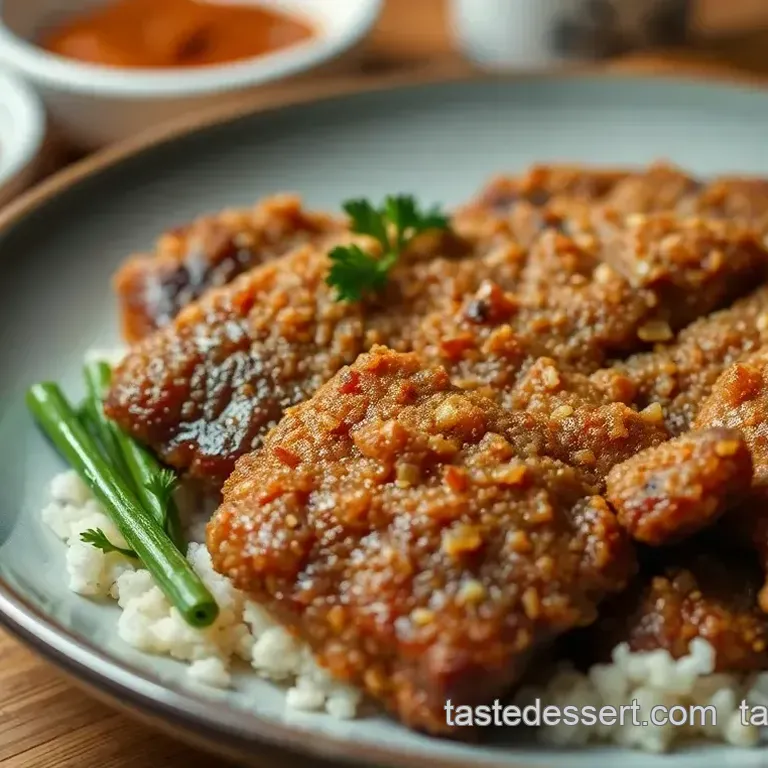
How to Present Gyukatsu Like It’s Straight Out of Akihabara Tokyo’s Best Japan Restaurant
Okay, presentation this ain’t just about looks. Plating your gyukatsu correctly is kinda like setting the stage for a Persona Anime intro sequence. You want drama, contrast, and balance.
Slice the cutlets into half inch thick strips across the grain . This makes each bite tender and easy to handle, plus those golden edges look so darn good when arranged neatly.
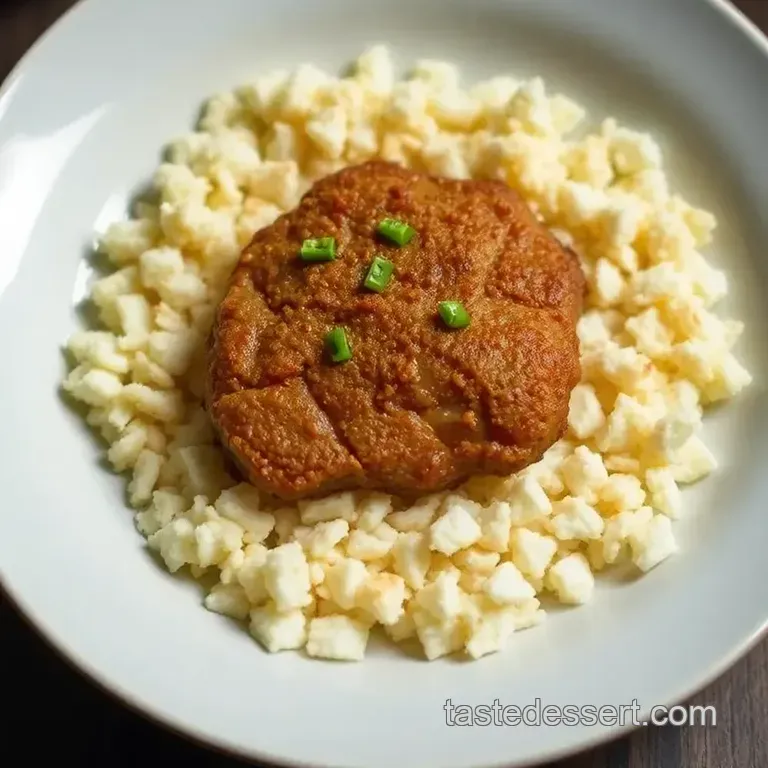
Pile up a little mound of finely shredded cabbage on the side this is the classic tokyo food guide approved touch. it adds a fresh crunch and color pop.
For garnish, lemon wedges are your simple, sexy go-to they brighten flavors and give your dish that killer zing.
Play with colors here: the deep brown crust, bright green cabbage, pale lemon, and maybe a drizzle of tonkatsu sauce or ponzu that pools artistically on the plate.
Suddenly, your kitchen feels like a japan travel destination food stall.
Storing & Planning Ahead Without Losing That Crunch
Look, i get it. sometimes you wanna make gyukatsu ahead for a chill night or pack it up for lunch.
Here’s the deal: store it uncovered on a rack in the fridge if you can, so air circulates and prevents sogginess.
Wrapped tight in plastic wrap? nah, that’ll steam the crust and kill the crisp.
Reheat gently use a quick broil or pan-fry for just a minute or two per side at medium heat. Microwave? Please don’t unless you want sad, chewy beef.
For freshness, enjoy your gyukatsu the same day you fry it. leftovers can work for a day-two lunch, but you’ll wanna devour that crunch while it’s fresh and your taste buds are still buzzing from the journey.
Play with It: Variations That Make Gyukatsu Your Own Japan Food Adventure
One time, out of pure curiosity, i tossed some shichimi togarashi into my panko mix. oh wow, the extra spice hit woke my taste buds like a caffeine shot during an all-nighter anime binge.
You can also swap out sirloin with wagyu beef for a melt-in-your mouth version that’s basically the stuff dreams are made of.
Going gluten-free or veggie? try rice flour with gluten-free panko for the breading. for a change-up, glaze with wasabi mayo instead of traditional tonkatsu sauce.
Seasonal twist? throw in mushroom or sweet potato fries on the side for some fall flavors.
What’s In It For You: The Nutrition Lowdown and Why Gyukatsu Rocks
Breaking it down, gyukatsu isn’t just delicious; it’s protein packed, with about 40g of protein per serving. that’s muscle fuel right there if you’re powering through your day or prepping for a persona anime cosplay event (i don’t judge).
Yes, it has fat (around 25g), but the crispy coating and juicy beef make it a satisfying treat that keeps you full without needing to drown it in sauces.
Just serve it with cabbage and you’re getting fiber too a nice balance.
Keep portion sizes reasonable two cutlets per person is perfect to avoid the dreaded “food coma” feel. and hey, when you’re exploring food in tokyo virtually or with your taste buds, enjoy every bite without guilt.
Final Thoughts: Tap Into Your Inner Tokyo Foodie and look into In!
Honestly, preparing gyukatsu at home made me appreciate the little wonders of japanese cuisine more. it’s this perfect harmony of crunchy crust and tender beef that feels like a culinary hug after a long day wandering through akihabara tokyo streets hunting down the latest persona anime merch.
Give this crispy gyukatsu recipe a shot, and you might just find yourself daydreaming of those bustling Japan Travel Destinations and cozy restaurants where great food and great vibes meet.
And hey if your april vision board includes mastering tokyo’s flavors, this is a delicious first step. trust me, once you nail the breading and frying dance, you’ll be shouting, “take me back to japan!” even if you’re just in your kitchen.
Enjoy every crunchy, juicy bite!
Frequently Asked Questions
What exactly is gyukatsu and how does it differ from other Japanese fried dishes?
Gyukatsu is a Japanese beef cutlet that’s breaded with panko breadcrumbs and deep fried until crispy on the outside while keeping the inside tender and typically medium rare.
Unlike tonkatsu, which is made with pork, gyukatsu uses high-quality beef, giving it a rich, juicy flavour with a lovely contrast of textures. It’s often served with dipping sauces like tonkatsu sauce or ponzu for a refreshing twist.
How can I tell when my gyukatsu is cooked just right?
The key to perfect gyukatsu is frying it quickly at around 350°F (175°C) so the outside crisps up while the beef stays medium rare inside. Use a meat thermometer to check for about 130°F (54°C) internal temperature for medium rare.
If you don’t have one, frying for roughly 1.5 to 2 minutes per side is a good rule of thumb. Letting the meat rest after frying helps the juices redistribute for tender bites.
Can I make gyukatsu with different cuts of beef or adapt it for dietary needs?
Absolutely! While sirloin or ribeye are preferred for their tenderness and marbling, you can use other steaks if you adjust cooking times to prevent toughness. For gluten-free versions, swap regular flour and panko breadcrumbs with rice flour and gluten-free panko.
Also, choosing leaner cuts will reduce fat content if you’re watching your diet, though the dish won’t be as juicy.
What’s the best way to store leftovers and reheat gyukatsu without losing crispiness?
Store leftover gyukatsu in an airtight container in the fridge for up to 2 days. To keep it crispy when reheating, use an oven or toaster oven at 350°F (175°C) for 5-7 minutes rather than the microwave, which can make the coating soggy.
If you don’t have an oven, a quick pan-fry on medium heat can also revive the crunch.
Are there any popular variations or serving ideas to jazz up my gyukatsu?
Definitely! Try tossing panko with shichimi togarashi (Japanese seven spice) for a subtle kick or serve with wasabi mayo for a modern twist. You can also pair gyukatsu with classic sides like shredded cabbage, steamed rice, and miso soup for a traditional Japanese meal.
Lemon wedges and different dipping sauces like ponzu add lovely acidity and brightness.
Crispy Japanese Beef Cutlet Perfection