Chicken Quesadillas: Crispy, Spicy, and Ready in 35 Minutes
- The Crispy & Spicy Tex-Mex Chicken Quesadilla (A 35 Minute Fix)
- Flavor Science: Achieving Peak Crispness and Spice Balance
- Essential Components for the Best Homemade Chicken Quesadillas
- Step-by-Step Guide: Building and Griddling Your Quesadilla Masterpiece
- Pro Tips and Troubleshooting Common Quesadilla Mistakes
- Complementary Sides and Dipping Sauces for Chicken Quesadillas
- Making Ahead, Storing Leftovers, and Reheating Instructions
- Recipe FAQs
- 📝 Recipe Card
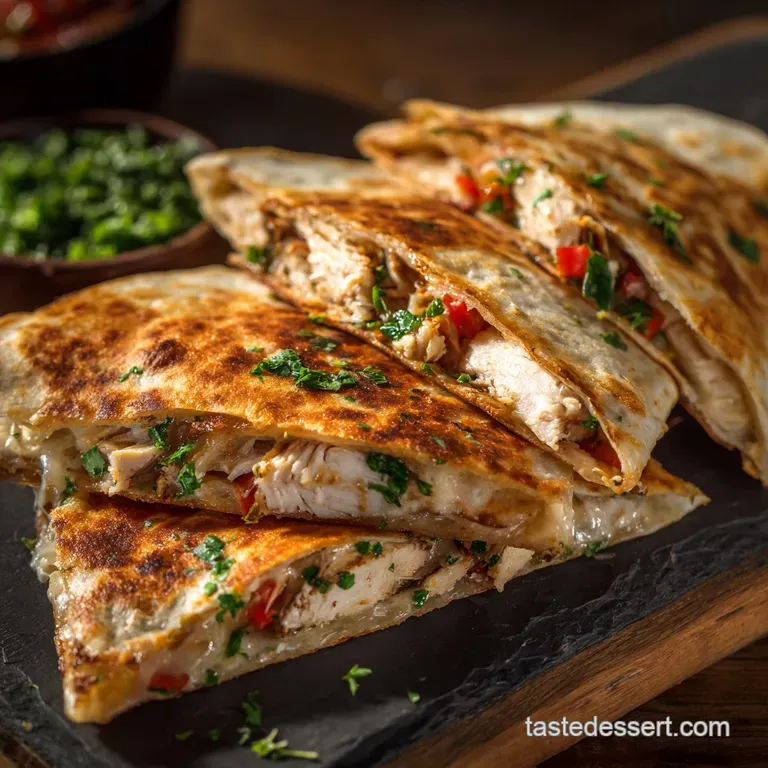
The Crispy & Spicy Tex-Mex Chicken Quesadilla (A 35 Minute Fix)
The aroma alone is enough to stop you dead in your tracks. I’m talking about the sharp, heady scent of melted Monterey Jack mingling with smoky paprika and that golden, toasty smell of a flour tortilla hitting a hot pan. That perfect balance of crispy exterior and molten, juicy interior?
That’s the goal.
This Easy Chicken Quesadilla Recipe is my ultimate secret weapon for those nights when the fridge is bare and the clock is ticking toward dinner meltdown. It’s faster than ordering delivery, cheaper than takeout, and delivers serious Tex-Mex comfort food satisfaction every single time.
Trust me, learning how to make the best chicken quesadillas is a life skill.
We aren’t just throwing leftovers in a shell here; we are building a structural masterpiece designed for maximum crispness and deep, layered flavour. Grab your skillet, friends. Let’s crack on and elevate this simple Quesadilla.
Flavor Science: Achieving Peak Crispness and Spice Balance
You might think a basic chicken quesadilla recipe doesn’t need science, but I’m telling you, understanding the heat and the filling structure changes everything. This is how we guarantee that perfect golden crust and that supremely juicy filling.
Deconstructing the Perfect Quesadilla (Crisp vs. Creamy)
The magic lies in the structural integrity provided by the cheese. We need just enough cheese to glue the tortilla together and adhere to the filling, but not so much that it oozes out and makes a mess in the pan.
We also use butter for griddling, which lowers the cooking temperature slightly compared to dry heat, allowing the tortilla surface to brown slowly and develop a rich, nutty flavor.
The Secret to Ultra Juicy Spiced Chicken
I never skimp on the spice rub because the chicken is the heart of this dish. We’re using diced chicken thighs here, which have just enough fat to stay moist under high heat (more on that later).
Adding a tiny splash of water or stock right at the end of the cooking process creates a quick glaze, binding the spices to the chicken cubes beautifully and preventing that sad, dry, crumbly texture.
Quick Prep: Minimizing Time Without Sacrificing Flavor
Speed is key for weeknights, right? We cook the chicken and the aromatics separately before combining them, which ensures the vegetables don't steam the meat while it's searing. This method guarantees a richer, deeper flavor profile in the same amount of time it takes to throw together OnePot Chicken and Artichoke Cavatappi: Creamy Weeknight Dinner .
The Maillard Reaction and the Golden Tortilla
That beautiful, complex brown colour you want on the outside is thanks to the Maillard Reaction the chemical process where amino acids react with reducing sugars under heat.
We encourage this reaction by using medium heat and a bit of butter, which gives us a gorgeous, deep golden brown crust instead of a white, scorched one. Never crank the heat to high; you’ll burn the outside before the cheese melts inside.
Layering the Heat: Spice Blend Breakdown
Our blend of chili powder, smoked paprika, and cumin offers a perfect Tex-Mex flavor baseline. If you prefer a milder version, you can reduce the chili powder, but don't skip the smoked paprika it gives the chicken that elusive depth you usually only get from cooking over fire. If you want serious fire, stir in a teaspoon of cayenne or minced jalapeño. For a totally different, sweeter smoke, you should definitely check out my BBQ Chicken Quesadilla: Restaurant Flavor in 25 Minutes .
Why Thigh Meat is Superior for Quesadillas
Look, I know some folks love chicken breast, but for a over high heat application like a quesadilla, thighs win every time. Thighs have a higher fat content, meaning they stay wonderfully juicy even if you accidentally overcook them for a minute or two.
Dicing them small (1/2 inch cubes) ensures they cook quickly and remain incredibly tender.
Essential Components for the Best Homemade Chicken Quesadillas
Getting the ingredients right is half the battle. Don't grab the wrong tortilla or the wrong cheese blend, or you’ll end up with a structural failure.
Selecting the Right Tortilla Size and Type
I use large 10 inch flour tortillas because they give you the best fold and hold capacity. Avoid corn tortillas here; they taste great, but they crack when folded, spilling all your precious filling. Make sure they are room temperature, which helps them stay pliable.
Optimal Cheese Choices for Melt and Tang
The cheese must melt well, and it needs a bit of punch. I always go for a blend of Monterey Jack (for stretch and melt) and sharp cheddar (for flavor). Pre-shredded bags are fine in a pinch, but remember they contain anti caking agents, making the melt slightly less smooth.
If you have time, shred your own cheese.
Customizing Your Spice Rub: Heat Level Adjustments
Our standard recipe sits around a medium heat level flavorful but family friendly. If you’re craving more heat, add a pinch of cayenne or replace half the chili powder with a spicy Mexican blend. For extra earthiness, consider adding a dash of onion powder to the mix.
Prepping and Shredding the Cooked Filling
We diced our chicken small before cooking, so no need for shredding here. However, if you are using leftover shredded chicken (like rotisserie), make sure to combine it thoroughly with the spice blend and wet vegetables to ensure it doesn't dry out when you heat it up later.
| Ingredient | Substitute | Why it works |
|---|---|---|
| Chicken Thighs | Chicken Breast | Dice slightly smaller; cook until just done to avoid dryness. |
| Monterey Jack/Cheddar | Mozzarella and Provolone | Mozzarella provides stretch; Provolone adds a necessary sharp flavor. |
| Flour Tortillas | Whole Wheat Tortillas | These work well but sometimes require a slightly lower heat to prevent quick browning. |
| Smoked Paprika | Standard Paprika + Dash of Liquid Smoke | Smoked paprika is vital, but this hack offers decent flavor replacement. |
step-by-step Guide: Building and Griddling Your Quesadilla Masterpiece

We're combining the detailed steps from the outline here, focusing on the conversational delivery.
- Season the Cubes: Start by taking your diced chicken and tossing it thoroughly with all the measured spices, including the salt and pepper. Get your hands in there and really massage that rub into the meat.
- Sauté the Veggies: Heat 1 Tbsp of oil in your largest skillet over medium high heat. Add your diced onion and pepper. Cook for about four minutes until they start to soften and smell sweet, then pull them out and set them aside in a bowl.
- Sear the Chicken: Add the remaining oil to the pan. Now, add your seasoned chicken cubes in a single layer. Let them cook, undisturbed, for a couple of minutes before stirring. You want a nice brown crust on the outside. Cook until the chicken is fully done (no pink left inside).
- Glaze and Bind: Return those sautéed vegetables to the pan with the chicken. Pour in the 1/4 cup of stock or water. Bring it to a rolling simmer and cook vigorously for just 60 seconds. The liquid should disappear instantly, creating a thick, sticky glaze that wraps around the chicken and spices. Turn off the heat and let the filling cool down a little.
Chef's Note: Cooling the filling is non-negotiable! If you use piping hot filling, it will melt the cheese before you even start griddling, leading to cheese leakage disaster.
- Butter Up: Wipe your skillet clean if there are any burnt bits. Place it back over medium heat. Add half a tablespoon of butter and let it melt until it foams slightly. That’s your cue.
- Layer and Load: Place one tortilla in the pan. Sprinkle about one-third of the cheese on only one half of the tortilla. Then, spoon one-quarter of the filling over that cheese layer. Top the filling with a second, thinner layer of cheese.
- Fold and Press: Fold the empty side of the tortilla over the filled side, creating a perfect half moon. Press down gently but firmly with a spatula to encourage the melted cheese to start binding immediately.
- Grill and Flip: Cook for 3– 4 minutes per side. You want that deep golden brown colour. Flip carefully when the first side is ready, and cook the second side until the cheese is oozing slightly and the whole thing feels sturdy.
- Rest and Slice: Transfer the cooked quesadilla to a cutting board. Give it a full minute to rest and settle before slicing it into wedges this prevents the filling from tumbling out when you cut it.
Pro Tips and Troubleshooting Common Quesadilla Mistakes
We’ve all been there: the burnt outside, the cold cheese, the messy explosion. Here’s how to avoid my early failures.
Marinating and Searing the Filling to Perfection
If you have time, season the diced chicken for 30 minutes before cooking. The salt helps tenderize the meat, and the spices really penetrate. When you sear the chicken, make sure the pan is hot enough to brown it quickly; don't overcrowd the pan, or the chicken will steam instead of sear.
The Art of the Even Cheese Spread
The cheese is the glue. Spread your cheese thinly but evenly across the bottom tortilla, making sure to hit the edges of the filling. Remember to place a second, thinner layer of cheese on top of the filling right before folding. This sandwiching technique ensures maximum bind.
Achieving the Perfect Golden Brown Crust (Pressing Technique)
Use a second heavy skillet or a sturdy spatula to press down on the quesadilla gently while it cooks. This ensures maximum contact between the tortilla and the hot pan, promoting consistent browning and preventing air pockets. You’re looking for a deep, crunchy texture.
Tips for Flipping Large Quesadillas Safely
This requires confidence! Slide the spatula entirely under the folded edge. In one swift, deliberate motion, flip the entire thing over. If you hesitate, you risk having the filling slide out. If you're nervous, pull the quesadilla halfway out of the pan, steady it, and then use two spatulas.
Preventing the Dreaded Soggy Center
This is usually caused by two things: using filling that is too wet or overfilling the tortilla. Make sure you fully evaporate that glaze in Step 4. Also, remember to keep your layers relatively thin; thick layers trap steam, which turns the tortilla soggy.
Managing Stove Heat for Consistent Crispness
Medium heat is your friend here. If the tortilla is browning within two minutes, your heat is too high, and the cheese won't melt. If it takes five minutes to brown, your heat is too low, and the final result will be oily rather than crisp. Adjust your dial until you get that perfect 3 4 minute per side crispness.
Complementary Sides and Dipping Sauces for Chicken Quesadillas
A great quesadilla deserves fantastic companions. These are my go-to pairings that make this feel like a restaurant meal.
Fresh Pairings: Slaws, Salsas, and Citrus
A simple side of fresh Pico de Gallo and some creamy Guacamole is non-negotiable in my house. The cool, raw acidity cuts through the richness of the cheese and spiced meat beautifully. Sometimes I even skip the salsa and just make a super quick cabbage slaw dressed with lime juice and cilantro for extra crunch.
Beyond Sour Cream: Creative Dipping Options
Don’t just default to sour cream! Try using Greek yogurt mixed with a squeeze of lime juice for a healthier, tangier option. Or, if you want something unexpected, pair these with a slightly spicy Asian inspired peanut sauce if you love satay flavours, you’d probably enjoy my recipe for Peanut Noodles With Chicken: Speedy Satay Style Recipe as a side, too!
Serving Temperature and Immediate Plating
Quesadillas are meant to be eaten hot. Serve them immediately after slicing, when the cheese is still wonderfully molten. I like to dust mine with a tiny bit of fresh cilantro just before they hit the table.
Making Ahead, Storing Leftovers, and Reheating Instructions
But does it freeze well? You bet it does. Here’s how to handle your leftovers and prep ahead of time.
Freezing Uncooked Quesadillas (The Foil Method)
If you want to freeze them, assemble them uncooked up to the point of griddling. Wrap each one tightly in parchment paper first, then tightly in aluminum foil. Label and freeze for up to three months.
To cook, thaw overnight in the fridge, then griddle as directed, possibly adding a minute or two of cooking time.
Shelf Life of the Cooked Filling
The spiced chicken filling is perfect for meal prepping. Store the cooked filling separately in an airtight container in the fridge for up to four days. When you’re ready to eat, simply reheat a portion of the filling quickly in the microwave or skillet, then assemble and griddle your quesadilla.
Reviving Crispness: The Best Reheating Methods
Please, never, ever use the microwave for a leftover quesadilla unless you enjoy rubbery tortillas. To get back that glorious crispness, use the oven or air fryer. Cook them in the air fryer at 350°F (175°C) for 3– 5 minutes, or on a baking sheet in a 375°F (190°C) oven for 8– 10 minutes, flipping halfway.
This heats the filling and recrisps the tortilla simultaneously.

Recipe FAQs
What is the secret to getting a truly crispy quesadilla exterior?
The key to superior crispiness is a combination of fat and moderate heat. Use butter, or a 50/50 blend of butter and vegetable oil, and cook the quesadilla over steady medium low heat. This allows the tortilla to achieve a deep golden crunch and the interior cheese to melt fully without burning the exterior.
How do I prevent my seasoned chicken filling from tasting dry?
We highly recommend using chicken thighs for this recipe, as their higher fat content naturally locks in moisture and flavour during the quick cooking process. If you must use chicken breast, marinate it for at least 30 minutes in a mixture of oil, lime juice, and the seasonings to help tenderize the meat.
Always check that the chicken is cooked immediately once it hits 165°F (74°C) internal temperature.
Can I use pre-cooked or rotisserie chicken for this recipe?
Absolutely, using pre-cooked chicken is an excellent time saver; you will need about 2 cups of shredded meat. Ensure you still toss the shredded chicken thoroughly with all the specified spices and a splash of lime juice before assembling.
This step is crucial for incorporating the distinct Tex-Mex flavour profile into the otherwise plain cooked meat.
What are the best cheese substitutions if I don't have Monterey Jack?
The ideal substitute is low-moisture mozzarella, which offers a great melt and stretch, or a mild cheddar cheese. For a slight upgrade in flavour, consider mixing in a small amount of pepper jack for heat or cotija for a salty, crumbly bite. Always use freshly grated cheese for the best melt quality.
My filling keeps spilling out during cooking; what am I doing wrong?
You may be overfilling your tortillas; aim for no more than 3/4 cup of filling per large tortilla to ensure it seals correctly. More importantly, use the cheese as your culinary "glue" by placing a thin layer of cheese down first, then the chicken, and a final light layer of cheese on top before folding.
The initial layer will help secure the fold quickly.
How should I store leftover quesadillas and the best way to reheat them?
Store fully cooled leftover quesadillas in an airtight container in the refrigerator for up to 3 days, placing parchment paper between layers to prevent sticking. The best method for reheating is in a dry skillet over medium heat, or in a toaster oven, which helps to revive the crucial crispy texture lost in refrigeration.
Avoid the microwave, as it makes the tortillas soggy.
Can I use an air fryer or oven instead of a skillet?
Yes, both are excellent alternatives for batch cooking or achieving maximum crispness. Cook in an air fryer at 375°F (190°C) for 5 7 minutes, flipping halfway, or bake on a sheet pan at 400°F (200°C) for 8 10 minutes.
Ensure you lightly brush both sides of the quesadilla with oil before using either method to promote golden browning.
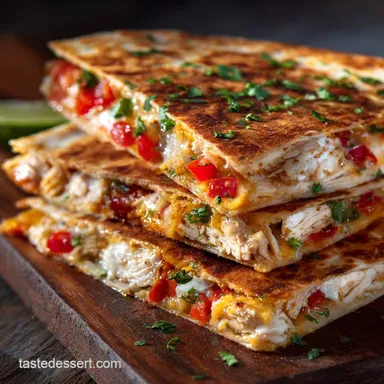
Crispy Tex Mex Chicken Quesadillas
Ingredients:
Instructions:
Nutrition Facts:
| Calories | 515 calories |
|---|---|
| Fat | 25 grams |
| Fiber | 3 grams |
