Easter Egg Cake Pops: Cracking Good Showstopping Spring Treats
- Introducing the Ultimate Easter Egg Cake Pops Recipe
- The Science of Fudgy Perfection: Texture and Flavor Secrets
- Essential Ingredients for Vibrant Easter Egg Cake Pops
- Step-by-Step Guide: Crafting and Coating Your Easter Egg Cake Pops
- Expert Tips and Troubleshooting for Cake Pop Success
- Prep Ahead: Storage, Shelf Life, and Freezing Easter Egg Cake Pops
- Display and Presentation: Serving Your Miniature Masterpieces
- Recipe FAQs
- 📝 Recipe Card
Introducing the Ultimate Easter Egg Cake Pops Recipe
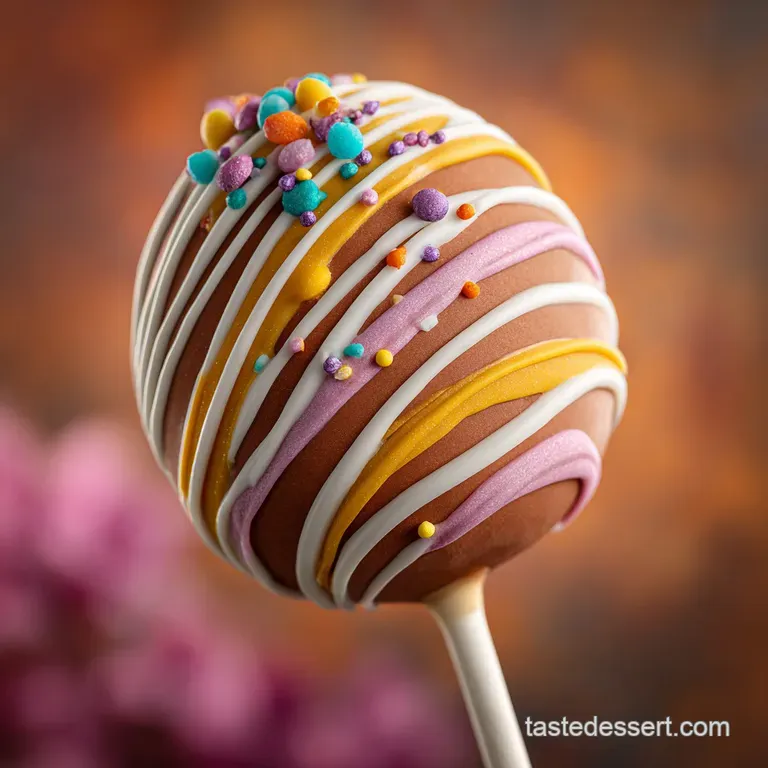
Okay, friend, you know I love a high impact dessert that doesn't actually require a culinary degree. These Easter Egg Cake Pops are exactly that. Forget dry, crumbly cake balls; these little beauties are impossibly dense, fudgy on the inside, and offer the most satisfying snap when you bite through that colourful confectionery shell.
They look totally professional, which is the best part, right? They are the ultimate budget lifesaver because they actually utilize leftover cake beautifully, transforming day-old crumbs into dazzling, miniature masterpieces. I swear, the only hard part is keeping people from eating them all before Easter Sunday.
We’re not just rolling up cake scraps here, though; we’re using a specific binder ratio and some serious temperature control to ensure maximum structural integrity. Ready to ditch the baking stress and dominate the dessert table? Let’s crack on.
The Science of Fudgy Perfection: Texture and Flavor Secrets
The Art of the Edible Egg: Why Cake Pops are the Perfect Easter Treat
Easter requires cute desserts, period. While I love making big, impressive layered cakes seriously, my [German Chocolate Cake: The Ultimate Classic Coconut Pecan Frosting Recipe] is a masterpiece sometimes you need something portable and mess free.
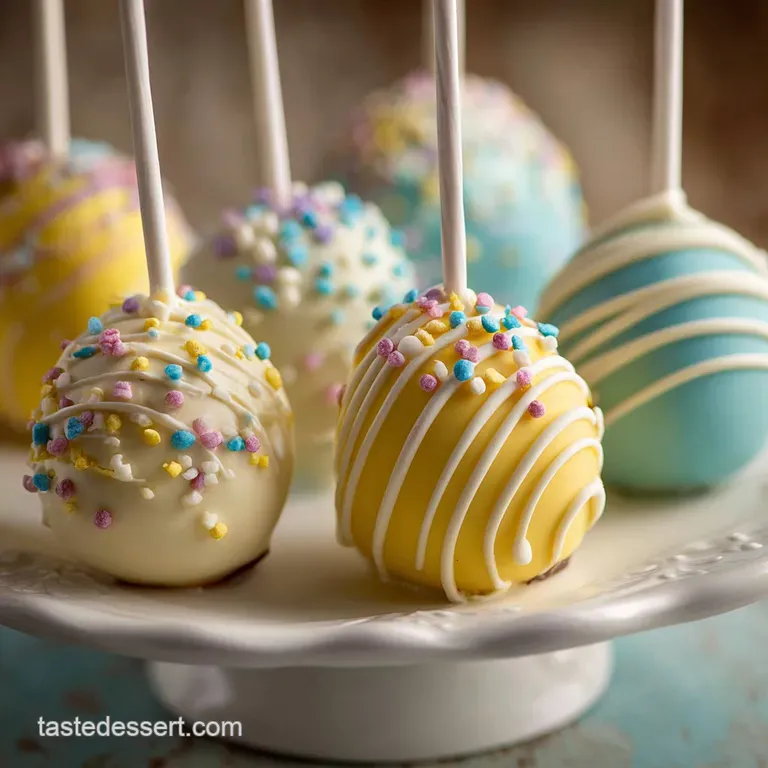
These easter egg shaped cake pops deliver immediate visual joy and portion control, which is essential for busy holiday gatherings. Plus, you can make them days ahead, totally winning the holiday prep game.
What Makes This Recipe Showstopping?
The secret to this recipe’s success is twofold: texture and shaping. We crumble the cake finely and use a slightly denser binder than traditional buttercream. This results in a dough that is firm enough to be moulded into the perfect oval egg shape without cracking.
It's the difference between a dense truffle and a loose snowball.
Achieving Maximum Moisture: The Sponge-to-Frosting Ratio
Listen up: too much frosting equals disaster. When I first started making cake pops, they would invariably fall off the stick because the mixture was too soft and sticky. You must use a heavy hand when crumbling the cake and a light hand when adding the binder.
The goal is firm play dough consistency, allowing you to press and roll without the dough adhering messily to your hands.
Why Cream Cheese Frosting is the Superior Binder
I know some recipes call for plain buttercream, but cream cheese frosting is the undisputed champion here. Why? The subtle tang of the cream cheese cuts through the sweetness of the cake and the confectionery coating, preventing that sickly sweet feeling.
It also adds necessary acidity and moisture without the greasiness of pure butter, resulting in a cleaner, richer texture for your Easter Cake Balls.
Mastering the Smooth, Crack Free Confectionery Shell
This is where people usually panic, but it’s simple physics. The cake pop must be cold (from the chill time) and the coating must be warm and thin . If the coating is too hot, it melts the pop. If the pop is too warm, the coating cracks immediately upon cooling.
Temperature management is crucial for that gorgeous, smooth finish.
Essential Ingredients for Vibrant Easter Egg Cake Pops
We keep the base simple (vanilla!) so the vibrant colours can take centre stage. I always recommend using a digital scale here for best results, especially with the flour and sugar.
The Base: Vanilla Sponge Components (and Leftover Cake Options)
We use a standard vanilla butter cake, but any dense, non-crumbly cake works wonders. If you happen to have a cake base leftover from, say, my recipe for [Cool Whip Cookies: The Cloud Soft, Easy Cake Mix Crinkle Recipe], feel free to use that instead.
| Component | Standard Ingredient | Viable Substitution |
|---|---|---|
| Flour | All-Purpose White Flour | 1:1 gluten-free Baking Blend |
| Butter (Cake/Binder) | Unsalted Butter | high-quality Plant Based Butter Sticks |
| Milk | Whole Milk | Unsweetened Oat or Almond Milk |
| Eggs | Large Chicken Eggs | Flaxseed Eggs (3 Tbsp flax meal + 9 Tbsp water) |
The Binder: Choosing the Right Cream Cheese Frosting
Full fat, block cream cheese is absolutely necessary. Please avoid the whipped tubs, as they introduce too much moisture. We are looking for maximum fat and stability here.
Coating Colors: Sourcing high-quality Candy Melts
Using actual confectionery melting wafers (candy melts) is a total game changer, far easier than tempering chocolate. They hold colour better and set harder than pure white chocolate. For vibrant colours, you must use oil-based food colouring specifically designed for chocolate and candy melts.
Do not use liquid food dyes! I once tried that, and the chocolate seized immediately it was a total disaster and a waste of expensive melts.
Ingredient Swaps: Making gluten-free or dairy-free Easter Pops
These pops are surprisingly versatile! For a dairy-free version, simply swap out the butter and cream cheese for vegan alternatives, ensuring they are firm and full fat. For gluten-free cake, use a GF blend, but be sure to bake until truly firm, as GF cakes can be overly delicate when hot.
step-by-step Guide: Crafting and Coating Your Easter Egg Cake Pops
Phase 1: Crumbly Cake Dough Preparation
- Bake the Base: Follow the recipe instructions to bake your vanilla sponge until golden. Let it cool completely. Seriously, don't rush this step.
- Crumble Time: Remove the cake crusts, then crumble the cake into super fine crumbs think beach sand, not gravel. Use your hands or a stand mixer paddle attachment on low speed to achieve this.
- Mix the Binder: Combine the softened cream cheese, butter, vanilla, and sifted icing sugar until your binder is smooth and creamy.
- Form the Dough: Gradually add the binder to the crumbs, mixing with your hands until the dough comes together. Test the dough by squeezing it; it should hold its shape perfectly without feeling sticky.
Phase 2: Achieving the Perfect Egg Shape and Chill
- Shape the Eggs: Scoop out approximately 35 40g portions. First, roll it into a firm ball, then gently roll it back and forth between your palms, applying more pressure to one end than the other. This creates that lovely, classic elongated mini egg cake pops shape.
- First Chill: Place the shaped eggs on a parchment lined tray and chill them for at least 45 minutes. This firming up is non-negotiable for structural integrity.
Phase 3: Dipping Techniques for a Professional Finish
- Melt the Coating: Melt your confectionery wafers in a deep, narrow vessel. Add shortening or coconut oil if the mixture is too thick; it needs to drip smoothly, like thin gravy.
- The Glue Step: Dip the very tip of a lollipop stick into the melted coating, then push the stick halfway into the chilled cake egg. Immediately return the pops to the freezer for 5- 10 minutes to let the 'glue' set.
Chef’s Note: The stick glue is the single most important step in preventing your perfect cake pops from falling into the melted chocolate mid-dip. Trust me on this.
- Dip and Drain: Take 4 5 pops out of the freezer at a time (keep the rest cold!). Submerge the pop into the melted coating, ensuring you cover the joint where the stick meets the cake. Pull straight out and gently tap the stick on the rim of the container to shake off excess coating until it stops dripping.
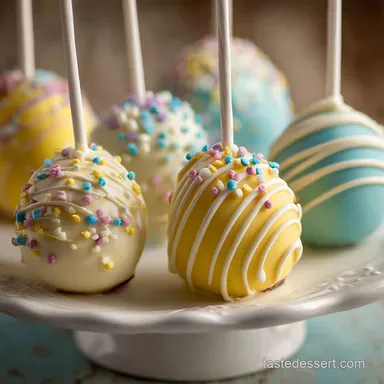
Phase 4: Creative Drizzling and Decoration Ideas
- Immediate Decoration: If using sprinkles or sanding sugar, sprinkle them on immediately while the coating is wet.
- Set the Base: Place the pops, stick-up, into a Styrofoam block to set fully.
- Drizzling Details: Once the base coat is completely hardened, you can melt a contrasting colour (maybe dark chocolate, like I use for my [Chocolate Mummy Cupcakes The Ultimate Decadent Halloween Treat]), and use a fork or a piping bag with a tiny hole to drizzle stripes or speckles over the smooth surface. Let the final decorations set fully before serving.
Expert Tips and Troubleshooting for Cake Pop Success
Preventing Pop Droop: Ensuring the Stick Stays Put
The stick must be secured with melted candy, as detailed in step 8. If your Easter Cake Balls are still drooping, it means your cake mixture was too warm or too moist. Next time, add a tiny bit more cake crumb, or give the pops a full hour in the freezer before the glue step.
The Dreaded Cracking Coating: Temperature Control is Key
If your perfect, smooth coating starts cracking as it sets, it’s a temperature mismatch. The cold pop is causing the warm coating to contract too quickly. Fix: Let your chilled pops sit at room temperature for about 5 minutes before dipping, or warm your coating very slightly more (but be careful not to scorch it).
Time Saving Strategy: Can I Use Boxed Cake Mix?
Absolutely! This is a cute easter dessert recipe that welcomes cheats. Use your favourite boxed vanilla or white cake mix, but here's the trick: bake it according to the box, and then proceed with the recipe as written, removing the crusts before crumbling.
Solving Sagging: Getting the Perfect Oval Egg Shape
If your carefully shaped eggs start looking like sad, round balls during the chill phase, they were likely too soft to begin with. The mix needs to be truly firm. Next time, add 1 2 tablespoons of powdered sugar to the cake dough mixture; this absorbs excess moisture and firms it up quickly.
Prep Ahead: Storage, Shelf Life, and Freezing Easter Egg Cake Pops
Best Practice for Refrigerated Storage
Cake pops are ideal for prep ahead! Once completely finished and the coating is hardened, store your Easter Egg Cake Pops in an airtight container in the refrigerator for up to 5 days.
Just make sure the container is large enough that the pops aren't touching each other, or they might stick and ruin the coating.
Can You Freeze Finished Easter Egg Cake Pops?
You bet. You can freeze the finished pops for up to 3 months. Wrap them individually in plastic wrap, then place them in an airtight freezer bag. Crucial Thawing Step: When you're ready to serve, transfer the bag to the refrigerator overnight, then let them come to room temperature while still inside the bag.
This prevents condensation from forming on the surface, which would ruin that smooth, colourful coating.
Display and Presentation: Serving Your Miniature Masterpieces
You’ve created stunning, edible works of art, so display them proudly! For a festive look, I love arranging the sticks vertically in a cute vase or a terracotta pot filled with craft moss or even shredded, green dyed coconut flakes. They instantly become the Easter centrepiece .
Alternatively, lay them flat on a decorative platter alongside small pastel marshmallows or jelly beans.

Recipe FAQs
Why are my cake pops falling apart or sliding down the stick?
This usually happens if the cake mixture is too wet (too much frosting) or if the stick wasn't properly secured. Ensure the mixture is just fudgy, not sticky, before shaping. Dip the tip of the stick into melted coating before inserting it halfway into the cake ball; let this seal set before dipping the whole pop.
My confectionery coating is too thick and won't dip smoothly. How can I fix this?
The coating is likely too cool or has seized due to moisture contact. To thin it safely, use a neutral fat like specialized paramount crystals or a small amount of refined coconut oil (1 teaspoon at a time). Never add water, which will instantly cause the chocolate to seize and become unusable.
Can I use regular melted chocolate instead of candy melts (confectionery coating)?
While possible, regular chocolate must be tempered correctly to set hard and shiny without melting easily at room temperature. If you are a novice, stick to candy melts or compound coatings, as they are formulated to harden quickly and require no specialized tempering process.
Can I use different cake flavors, like lemon or chocolate, instead of vanilla sponge?
Absolutely. The technique works well with nearly any dense cake flavor, such as red velvet, chocolate fudge, or spiced carrot cake. Just ensure you adjust the binding frosting quantity, as different cake types absorb moisture differently.
What is the best technique for shaping the cake mixture into consistent egg shapes?
Start by rolling the mixture into a standard round ball first, ensuring all your portions are weighed for consistency. Then, gently pinch and taper one end of the ball between your thumb and forefinger while rolling slightly to achieve that classic oval egg shape.
Quick work prevents the mixture from getting too warm from your hands.
How far in advance can I prepare these Easter Egg Cake Pops, and how should I store them?
The finished pops can be stored in an airtight container at cool room temperature (below 70°F) for up to five days. Since the filling contains cream cheese, refrigeration is highly recommended for safety, but allow them to come to room temperature for 30 minutes before serving for the best texture.
How can I adapt this recipe to be completely gluten-free or dairy-free?
For a gluten-free version, simply bake a suitable gluten-free vanilla sponge as the base. For dairy-free, use a non-dairy "buttercream" style frosting instead of cream cheese to bind the crumbs. Additionally, ensure your confectionery coating is certified dairy-free, as many compounds contain milk solids.
Easter Egg Cake Pops Recipe
Ingredients:
Instructions:
Nutrition Facts:
| Calories | 389 kcal |
|---|---|
| Protein | 3.1 g |
| Fat | 22.3 g |
| Carbs | 44.9 g |
