The Oh My Goodness Homemade Dark Chocolate Truffles Foolproof Ganache
- Unlock the Secret to Ridiculously Rich Homemade Chocolate Truffles
- Why This Ganache Recipe Will Change Your Dessert Game
- Sourcing Superior Components for Perfect Truffle Bases
- Essential Toolkit for Seamless Truffle Production
- The Precise Art of Emulsifying Your Ganache Base
- Chilling, Shaping, and Finishing Your Homemade Chocolate Truffles
- Elevating Your Truffles: Creative Flavor Infusions and Coatings
- Storage Secrets: Keeping Your Treasures Fresh
- Recipe FAQs
- 📝 Recipe Card
Unlock the Secret to Ridiculously Rich Homemade Chocolate Truffles
There is something undeniably magical about biting into a perfect chocolate truffle. It’s a small, decadent sphere that offers an intense burst of pure cocoa flavor, dissolving silkily on the tongue.
Many home cooks believe that achieving this level of richness requires professional skills, but I’m here to dispel that myth. Creating Homemade Chocolate Truffles is one of the most rewarding and surprisingly straightforward projects in the confectionery world.
Forget those overly sweet, waxy supermarket versions; we are aiming for that classic, deeply satisfying texture that rivals the finest artisan shops. This Homemade Chocolate Truffles Recipe is built around a flawless ganache foundation, ensuring that every batch you make yields velvety perfection.
Why This Ganache Recipe Will Change Your Dessert Game
The foundation of any exceptional truffle is the ganache a simple emulsion of chocolate and heavy cream. It’s the ratio and the quality of these two elements that determine success.
This specific formula, which incorporates a touch of high-quality butter, guarantees a texture that is both firm enough to hold its shape and soft enough to truly melt in your mouth.
The Allure of Artisan Confectionery Made Simple
The beauty of these DIY Chocolate Truffles lies in their deceptive simplicity. With just four primary components dark chocolate, heavy cream, butter, and vanilla you are transforming humble ingredients into something that feels incredibly luxurious.
This process is straightforward enough to qualify as an Easy Chocolate Truffles Recipe , requiring minimal active effort. The total prep time is swift, making these an ideal last minute gift or an impressive addition to any dinner party dessert spread.
Setting Expectations: Melt-in-Your Mouth Texture Guaranteed
When we talk about the perfect truffle, we are looking for a specific mouthfeel. Our method focuses on achieving an ultra smooth emulsion, resulting in those glorious Fudge Truffle Balls . The key is the balance: too much cream, and they won't set; too much chocolate, and they become dry.
By following the precise measurements outlined below using 10 ounces of dark chocolate to 3/4 cup of heavy cream we establish the perfect framework for luxurious Chocolate Truffle Balls .
A Baker’s Promise: Truffles Without the Fuss
If you’ve ever been intimidated by chocolate work, rest assured. This recipe bypasses complex tempering steps often associated with chocolate coating. We are focusing squarely on the ganache center. The Simple Chocolate Truffle Steps involve heating, mixing, chilling, and rolling.
There is no candy thermometer required, making this perhaps the Best Homemade Chocolate Truffles experience you can have without stepping into a professional kitchen.
Sourcing Superior Components for Perfect Truffle Bases
Success in such a minimalistic recipe hinges entirely on the quality of your ingredients. Since there are so few elements involved, each one plays a starring role in the final flavor profile of your Chocolate Truffles with Cocoa Powder dusting.
When selecting chocolate, aim for a high-quality dark variety, ideally between 60% and 70% cocoa solids. This concentration provides the deep, slightly bitter counterpoint needed to balance the richness of the cream.
Avoid using standard chocolate chips if possible; they contain stabilizers that can prevent the ganache from emulsifying smoothly. If using chips is necessary, ensure they are premium quality.
For the dairy component, only genuine heavy whipping cream (35% fat or higher) will do. Lower fat creams will result in a runny ganache that struggles to set properly. The small addition of unsalted butter, cut into cubes and softened slightly, acts as an emulsifier enhancer, lending a beautiful sheen and a deeper, rounder mouthfeel to the finished product.
Essential Toolkit for Seamless Truffle Production

While you don’t need specialized confectionery equipment, having the right tools on hand ensures a smooth workflow, particularly when dealing with the setting times.
Choosing Your Chocolate: Quality Over Quantity Matters
As mentioned, high-quality chocolate is non-negotiable. For our 285 grams (10 ounces) of chocolate, ensure it is finely chopped or use high-quality couverture wafers. Finely chopping ensures that the chocolate melts evenly and quickly once the hot cream is introduced, which is vital for a smooth emulsion.
Cream, Butter, and Flavorings: The Supporting Cast
You will need 3/4 cup (180 ml) of heavy cream, which must be heated gently. Alongside this, gather 2 tablespoons of unsalted butter, cut into small cubes, and 1 teaspoon of pure vanilla extract.
Don’t forget that tiny pinch of salt; it’s a flavor amplifier, crucial for drawing out the deep notes of the cocoa.
Must Have Equipment for Perfect Scooping and Rolling
For consistency, a small ice cream scoop or a melon baller is highly recommended when portioning the chilled ganache. This ensures your Chocolate Truffle Balls are uniform in size, which is aesthetically pleasing and helps them set evenly.
You’ll also need a medium, heavy bottomed saucepan for heating the cream and a heatproof mixing bowl, ideally glass or metal, large enough to whisk the ganache comfortably. Always prepare a baking sheet lined with parchment paper for the rolling stage.
Related Recipes Worth Trying
- Authentic Homemade Croissants Recipe Flaky Buttery Layers — Tackle the king of pastries Learn how to make truly spectacular Homemade French Croissants from scratch with stepbystep lamination guidance
- The Ultimate Homemade Cheese Sticks Recipe Crispy Gooey — Ditch the freezer bag Learn how to make restaurantquality Homemade Cheese Sticks with a triplecrunch coating These easy cheese sticks recipes are foolproof
- The Proper Pint Smoky Sweet Homemade BBQ Sauce Recipe — Ditch the jarred stuff Learn how to make easy homemade BBQ sauce thats tangy and richperfect for your next batch of ribs or pulled pork
The Precise Art of Emulsifying Your Ganache Base
This is the heart of the Easy Chocolate Truffles Recipe . The process relies on controlled heat and gentle agitation.
First, place your 285 grams of finely chopped dark chocolate into your heatproof mixing bowl and set it aside. Next, pour the 3/4 cup of heavy cream into the saucepan along with the pinch of salt. Heat this mixture over medium heat.
The goal is not a violent boil, but rather to bring the cream just to the point where tiny bubbles appear around the edges of the pan. Remove it from the heat instantly when this occurs.
Now, pour that hot cream directly and evenly over the waiting chocolate. This is the moment for patience: let the mixture sit, completely undisturbed, for a full five minutes. This resting period allows the residual heat to penetrate and melt the chocolate thoroughly, setting the stage for a perfect emulsion.
Chilling, Shaping, and Finishing Your Homemade Chocolate Truffles
Once the initial melt has occurred, the transformation into that decadent truffle texture begins.
Step 1: Gently Heating the Dairy to Unlock Flavor
As detailed above, the cream is heated just until steaming, ensuring all the fat molecules are activated but not so hot that they scorch or split the eventual mixture. This controlled heat releases the subtle dairy sweetness that complements the bittersweet dark chocolate.
The Critical Moment: Folding the Chocolate into Hot Cream
After the mandatory five minute rest, begin stirring. Start in the very center of the bowl with a rubber spatula or whisk, using small circular motions. As the chocolate begins to incorporate, slowly widen your circle, gently folding the mixture outwards until it is entirely uniform, glossy, and utterly smooth.
Immediately whisk in the 2 tablespoons of softened butter and the teaspoon of vanilla until fully dissolved and the ganache takes on a beautiful, high shine.
The Essential Chill Time: Patience for Proper Setting
Cover the bowl, ensuring the plastic wrap is touching the surface of the ganache to prevent a dry 'skin' from forming. Transfer this bowl to the refrigerator for a minimum of three hours. This chilling period is non-negotiable; it firms the mixture enough so that you can handle it without turning it into a sticky mess.
You are aiming for a texture that is firm but yields slightly when pressed pliable enough for rolling but solid enough to hold its shape.
Techniques for Uniform Rolling and Dusting
Once chilled, line your baking sheet. Working quickly, use your small scoop to portion out uniform amounts of ganache about one teaspoon each. Roll each portion gently between your palms to form a smooth sphere. Work fast, as the heat from your hands will soften the exterior quickly.
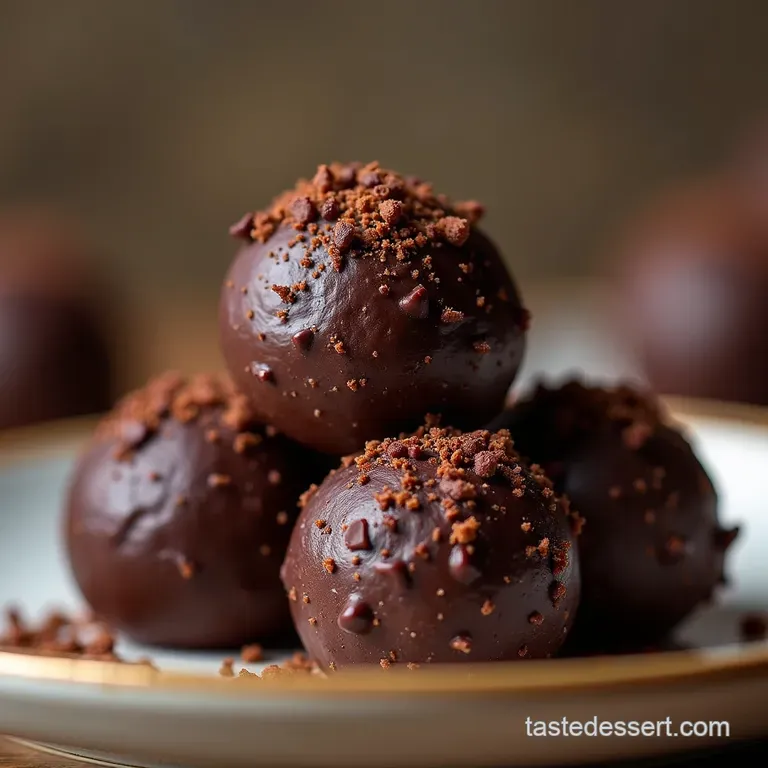
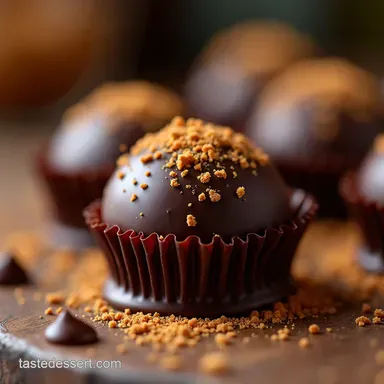
Immediately place these Chocolate Truffle Balls onto the lined sheet and return them to the fridge for a final 30-minute set before coating them in your chosen dusting.
Elevating Your Truffles: Creative Flavor Infusions and Coatings
While the classic Chocolate Truffles with Cocoa Powder are divine on their own, this base is a fantastic canvas for experimentation.
Beyond Cocoa Powder: Exploring Exotic Outer Layers
The traditional finish involves dusting generously with high-quality, unsweetened cocoa powder. However, don’t stop there! Consider rolling the chilled balls in finely chopped toasted nuts like hazelnuts or pecans for texture, or using sifted icing sugar for a snow white finish.
For the ultimate decadent coat, you can dip the chilled balls into melted and tempered chocolate, allowing them to set completely on parchment paper.
Incorporating Zests, Liqueurs, and Spices into the Ganache
If you want deeper complexity within the truffle itself, consider adding flavourings directly into the hot cream just before you pour it over the chocolate. A splash of high-quality dark rum, Irish cream liqueur, or Grand Marnier adds aromatic depth.
Alternatively, grating a teaspoon of fresh orange zest or adding a tiny pinch of cayenne pepper can provide an unexpected, sophisticated kick. This is where your Homemade Chocolate Truffles truly become your signature creation.
Storage Secrets: Keeping Your Treasures Fresh
Proper storage is key to maintaining the melt-in-your mouth quality of your Homemade Chocolate Truffles .
Optimal Temperatures for Gifting and Serving
Truffles should always be stored in an airtight container in the refrigerator. They will keep well for up to two weeks. When you plan to serve them especially if they are intended for gifting remove them from the fridge about 30 minutes prior to serving.
Allowing them to warm slightly enhances the creamy, melty texture that makes these such a treat.
Troubleshooting: Fixing Ganache That Won't Set
If, after the initial chilling period, your ganache still seems too soft or oily (a sign of a slight separation or too much fat), don't panic. Return it to a cool room temperature, and whisk in one tablespoon of finely chopped, high-quality dark chocolate until it fully incorporates and thickens the mixture.
If it’s overly stiff and crumbly, leave it out for another 15 minutes to soften slightly before attempting to roll, or whisk in a teaspoon of warm cream very slowly.

Recipe FAQs
Why are my Homemade Chocolate Truffles too soft to roll?
This is a common hiccup, usually caused by the ganache not chilling long enough, or perhaps your kitchen is a tad warm we don't want them turning into puddles! Make sure they chill for a full three hours, or even overnight if you can manage the wait.
If they are still too soft after chilling, pop them in the freezer for just 15 minutes to firm up before attempting to scoop and roll them quickly.
Can I make these without heavy cream? What's the best substitute?
Heavy cream is the backbone of the ganache, providing the necessary fat content for that silky texture, so it’s best to stick to it if you can. If you absolutely must substitute, high fat coconut cream (the thick layer from a refrigerated can) works surprisingly well, especially for dairy-free efforts.
Avoid standard milk or half and-half, as the low-fat content will result in a sloppy, grainy mess rather than a proper truffle.
How long will these Homemade Chocolate Truffles last, and where should I store them?
Because they are essentially pure chocolate and cream, they store brilliantly, provided they are kept cool. Keep them in an airtight container in the refrigerator for up to two weeks; they are often even better after a day or two when the flavours have really melded.
For long term storage, they freeze beautifully for up to three months just wrap them well before popping them in the deep freeze.
I’m new to this; what is the secret to getting a really shiny finish on my truffles?
The secret to that gorgeous sheen is twofold: first, ensure your chocolate is thoroughly emulsified with the warm cream until it is completely smooth, and secondly, adding that small cube of butter at the end provides essential fat and gloss.
If you plan on dipping them, using properly tempered chocolate will give you that satisfying, crisp snap and a lovely shine once it sets.
What’s a simple flavour variation if I don't want just plain chocolate?
You’re in luck; ganache takes flavourings like a dream! A dead easy variation is adding a splash of booze think Grand Marnier, brandy, or even a good coffee liqueur stirred in right after the chocolate has melted.
For a non-alcoholic twist, steep your hot cream with a cinnamon stick or a teaspoon of orange zest for 10 minutes before pouring it over the chocolate.
Easy Dark Chocolate Truffles
Ingredients:
Instructions:
Nutrition Facts:
| Calories | 247 kcal |
|---|---|
| Protein | 0.5 g |
| Fat | 10.1 g |
| Carbs | 3.3 g |
| Fiber | 0.2 g |
| Sodium | 13 mg |
