Cookie Frosting: the Ultimate Stable Royal Icing
- The Queen's Glaze: Mastering Stable Cookie Decorating Icing
- The Science of the Shine: Achieving Professional Glaze Consistency
- Essential Components for Your Royal Icing Toolkit
- Step-by-Step Guide to Whipping the Perfect Glaze
- Expert Tips and Troubleshooting for Flawless Results
- Preparation and Shelf Life: Storing Your Finished Cookie Frosting
- Best Biscuit Pairings and Creative Applications
- Recipe FAQs: The Queen's Glaze (Royal Icing)
- 📝 Recipe Card
The Queen's Glaze: Mastering Stable Cookie Decorating Icing
Oh, darling, if you’ve ever stared longingly at those impossibly smooth, glossy cookies on Pinterest, this is the magic behind them. We aren't making fluffy buttercream here; we are making the gold standard of decorative glazes.
This Cookie Frosting recipe, technically Royal Icing, dries to a perfect, hard sheen that allows you to stack, ship, and show off your baking without worrying about smudges.
Listen, I spent years wrestling with recipes that used raw egg whites, which were fussy, unreliable, and frankly, a bit sketchy when serving to children. This method uses meringue powder, which makes the whole process faster, safer, and incredibly consistent.
It’s the easiest way to guarantee you get a professional level Cookie Frosting that sets hard every single time.
This isn’t just a recipe; it’s a detailed guide to consistency. Once you understand the "10 second rule" and the difference between piping and flooding, you’ll unlock a whole new level of biscuit artistry.
So, let’s stop the faffing and get this perfect Cookie Frosting whipped up!
The Science of the Shine: Achieving Professional Glaze Consistency
The secret to a truly stunning decorated cookie isn't just the design; it's the stable foundation underneath. This is where understanding the why of your Cookie Frosting comes into play. We are creating a robust sugar structure, not just a sweet spread.
The Difference Between Royal Icing and Standard Frosting
Standard buttercream or simple butter Cookie Frosting uses fat to achieve its texture, meaning it stays soft and can melt or smear. Royal Icing, however, is a fat-free, water activated sugar paste.
When the water evaporates, the crystalline structure of the sugar locks into place, giving you that famous, crisp glaze. This is crucial for detailed work; you can’t get that level of precision using soft icing.
Why Meringue Powder is the Modern Baker's Choice
Meringue powder is essentially pasteurized, dehydrated egg white that includes stabilizers and usually some vanilla flavouring. Using it eliminates the risk of salmonella and, crucially, gives you predictable results.
Raw egg white stability can vary wildly based on the age of the egg or temperature, but meringue powder ensures that every batch of your Cookie Frosting whips up consistently stiff and strong.
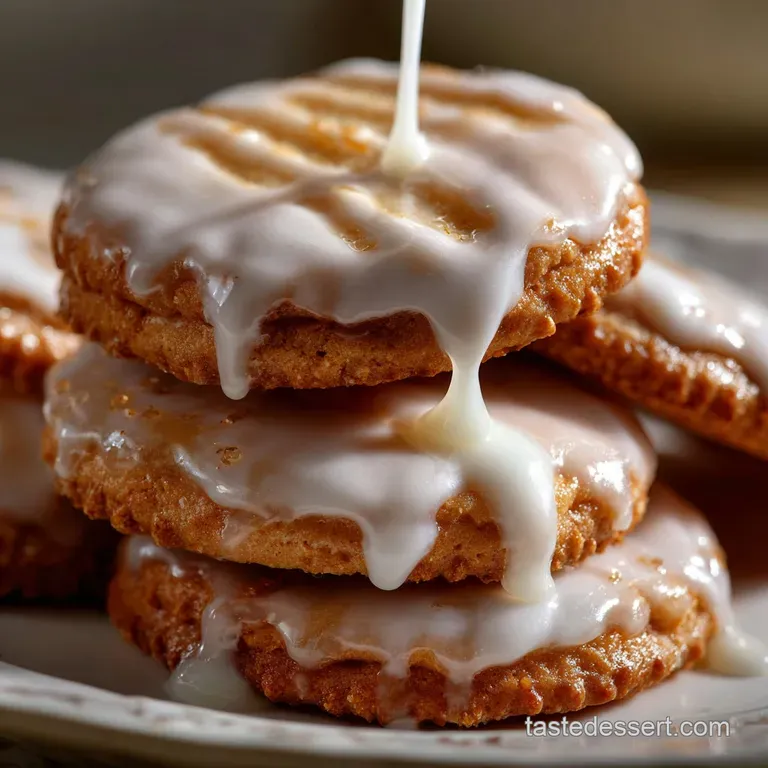
What 'Setting Hard' Actually Means for Your Biscuits
When this Cookie Frosting is fully dry, it will sound firm when gently tapped. This isn’t just for looks; this hard surface prevents colours from bleeding into each other and provides a durable canvas for additional layers of detail.
It means you can stack twenty cookies high in a tin without damaging the artwork.
How Powdered Sugar Creates the Crisp Structure
You absolutely must use confectioner’s sugar (icing sugar) and you must sift it. The anti caking agents in powdered sugar, combined with the microscopic protein structure provided by the meringue powder, are what allow the glaze to set into that beautifully crisp shell.
If your Cookie Frosting looks gritty, you skipped the sifting step, which is a major crime in my kitchen.
Hydration Ratios: Finding the Perfect Piping and Flood Consistencies
This is the hardest part, but stick with me. We are creating a thick, stiff base, and then we thin it down gradually. The stiff base is for outlining (Piping Consistency). The thin base is for filling the outline (Flooding Consistency).
Mastering this ratio separates good Cookie Frosting makers from the great ones.
Controlling Drying Time for Intricate Designs
Humidity is the enemy of perfectly set Cookie Frosting . If it’s raining outside, your cookies will take longer to dry, which increases the risk of colour bleed and that annoying "cratering" effect.
To speed up drying and get a flawless finish on your decorated cookies, use a cheap desktop fan aimed gently at the trays of freshly flooded biscuits.
Essential Components for Your Royal Icing Toolkit
You don't need fancy equipment, but quality ingredients make a massive difference in the final look and texture of your Cookie Frosting .
Detailed Breakdown of Required Ingredients (Meringue Powder Focus)
Meringue powder is a non-negotiable part of this recipe. Four cups of icing sugar need exactly three tablespoons of meringue powder to ensure structural integrity. Don't eyeball this; measure carefully. If you want a quick, easy cookie, try my recipe for Hershey Kiss Cookies: Chewy Peanut Butter Blossoms Recipe , but for proper decorating, you need the powder!
| Ingredient | My Top Tip | Viable Substitution |
|---|---|---|
| Icing Sugar | Sift, Sift, SIFT! | Granulated sugar is NOT a substitute. |
| Meringue Powder | Crucial for stability. | Pasteurized liquid egg whites (use 3 whites) |
| Clear Extracts | Prevents discolouration. | Lemon or coconut extract |
Flavoring Notes: Going Beyond Standard Vanilla Extract
Clear vanilla extract keeps your white Cookie Frosting brilliantly white. I always include almond extract it’s the classic bakery flavour that makes people ask, "What is that?" A small splash of lemon juice instead of some water also adds a nice zing that cuts the sweetness.
Necessary Adjustments for High Humidity Climates
If you live where the air is thick, you will need to reduce the water slightly, perhaps using only 5 tablespoons initially. The atmosphere itself contributes moisture, which slows down the setting process of the Cookie Frosting significantly.
Sourcing the Finest Powdered Sugar for Smooth Results
Cheap sugar can contain more cornstarch or larger lumps. Look for a reputable brand of confectioner's sugar. The finer the grind, the smoother your final glaze will be, preventing clogging in your finest piping tips. This is critical for delicate work, like the kind of decoration found in any great Sugar cookie frosting: The easy recipe that hardens for decorating guide.
step-by-step Guide to Whipping the Perfect Glaze
Initial Mixing: Incorporating Dry Ingredients Safely
Please, start low and slow. Place the sifted icing sugar and meringue powder in your stand mixer. Add the extracts and the initial 4 tablespoons of warm water. Mix on the lowest speed for one full minute. If you turn it up too soon, you’ll wear a sugary cloud that day.
We want the water incorporated before we start whipping air in.
Achieving Peak Stiffness: When to Stop Mixing
After the initial mix, crank the speed up to Medium High. You are aiming for volume. The mixture will look thick and yellow ish at first, then it will lighten, becoming brilliant white and increasing in size.
Mix for 5 to 8 minutes until you see stiff peaks —the icing on the paddle should hold its shape rigidly when lifted. At this point, the texture changes from shiny to slightly matte. This stiff Cookie Frosting is perfect for borders.
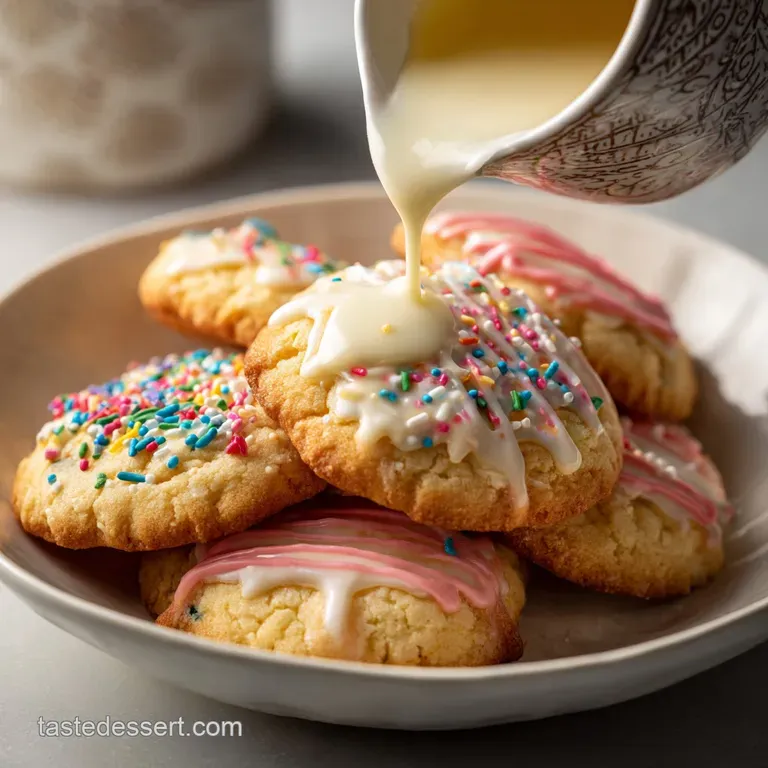
Coloring the Icing: Techniques for Deep, Vibrant Hues
Always use highly concentrated gel colours, not the watery liquid drops you find in the supermarket. A little goes a very long way. If you want black or deep red, use a pre-coloured paste or powder, as adding enough liquid gel to get that depth will ruin the perfect consistency of your Cookie Frosting .
Let the colour sit for 10 minutes; colours deepen as they rest.
Adjusting Consistency: Thinning Icing for Flooding Techniques
Once you have your colours, it's time to thin the majority of the icing for flooding. Add warm water, one teaspoon at a time. Mix it gently by hand or on the lowest speed.
Chef's Note: The 10 Second Rule is your consistency guide. Drop a spoonful of the thinned icing back into the bowl. If the surface smooths out and the drop disappears in exactly 8 to 10 seconds, it’s perfect for flooding! If it takes 20 seconds, it’s too thick; if it vanishes in 3 seconds, it's too thin for reliable Cookie Frosting .
Expert Tips and Troubleshooting for Flawless Results
Preventing 'Cratering' in Flooded Sections
Cratering happens when the surface of the flooded icing sets before the moisture underneath has escaped, causing the middle to sink or crack. To fix this, ensure your flood icing isn't overly thin (stick to the 10 second rule) and place the decorated cookies directly under a fan or in a dehumidified space immediately after flooding.
Rescuing a Batch That Has Become Too Thin
Don't panic! If you added too much water and the Cookie Frosting is running too quickly, simply add 1 or 2 tablespoons of sifted icing sugar and a tiny bit of meringue powder to re-stabilise and thicken it. Whip it for another minute until it holds its structure again.
Preparation and Shelf Life: Storing Your Finished Cookie Frosting
Optimal Short Term Storage for Fresh Icing
Royal Icing dries fast. Keep any portion you are not actively using in an airtight container with a piece of damp kitchen roll or cling film pressed directly onto the surface of the icing. This prevents a crust from forming and clogging your tips.
Stored this way, the prepared Cookie Frosting is safe on the counter for two days, or in the fridge for up to two weeks.
Can You Successfully Freeze Prepared Royal Icing?
Yes, you can freeze the stiff base icing! I wrap it tightly in plastic wrap and then place it in a freezer bag. When you thaw it, the texture might look slightly separated or deflated. Simply let it come completely to room temperature and re-whip it on high speed for 3- 5 minutes.
You might need a couple of drops of water to bring the smooth consistency back, but the stability of the Cookie Frosting should return just fine.
Best Biscuit Pairings and Creative Applications
This perfect Cookie Frosting is designed for decoration, meaning it pairs best with cookies that are flat, sturdy, and won't spread excessively in the oven.
Recommended Cookie Recipes for Stable Decoration
Classic rolled sugar cookies or gingerbread are the obvious choices, of course. For a delicious, sturdy foundation for your decorated sweets, you could also try my recipe for Crinkle Cookies: The Best Fudgy Chocolate Recipe — just make sure they cool completely before applying this stable Cookie Frosting .
Beyond the Biscuit: Using Royal Icing on Other Baked Goods
You don't have to limit this amazing Cookie Frosting to flat biscuits! It's fantastic for "gluing" together gingerbread house components because it dries rock hard and is structurally sound. You can also use it to stencil designs onto cakes or pipe delicate borders onto petit fours.
This easy Cookie Frosting recipe is truly an essential tool in your baking arsenal!

Recipe FAQs: The Queen's Glaze (Royal Icing)
Why is my Royal Icing too stiff or crumbly, and how do I fix the consistency?
This issue typically arises from adding too much powdered sugar or not incorporating enough liquid early in the mixing process. Gradually add water or lemon juice, a teaspoon at a time, until the icing reaches the desired flow consistency; it should drizzle smoothly off a spoon without immediately breaking.
How do I achieve the proper consistency for outlining versus flooding the cookies?
For outlining, aim for a "stiff peak" consistency where the icing holds its shape firmly without slumping. For flooding (filling in the outline), thin the base icing with drops of water until it reaches the critical "10-second consistency," meaning a line drawn through the icing disappears in exactly ten seconds.
What is the benefit of using meringue powder instead of fresh egg whites?
Meringue powder provides superior stability and eliminates the food safety risks associated with raw egg whites, guaranteeing a consistent, reliable structure for drying. It ensures your final product will dry hard, glossy, and remain stable when packaged or stacked.
How long should I allow the decorated cookies to dry before stacking or packaging them?
While the surface might be dry to the touch within 4 to 8 hours, the underlying icing requires more time to cure completely. For intricate stacking or safe packaging, allow a full 12 to 24 hours of undisturbed drying, preferably in a low-humidity environment.
Why does my hardened icing look dull, chalky, or develop small craters?
Dullness or chalkiness often results from over mixing, which traps excess air, or letting the icing dry too slowly in high humidity. Craters typically appear in flooded sections when the icing is too thin; mitigating this requires ensuring your flood consistency is perfectly calibrated.
Can this Royal Icing recipe be made vegan or egg-free?
Yes, you can substitute the meringue powder entirely with aquafaba the liquid drained from canned chickpeas which provides the necessary protein structure for the icing to set hard.
You will need approximately three tablespoons of whipped aquafaba per cup of powdered sugar to achieve the required volume and stability.
How should I store leftover Royal Icing, and how long will it keep?
Store royal icing immediately in an airtight container, making sure plastic wrap is pressed directly onto the surface to prevent a hard crust from forming. Properly stored icing will last about one week at cool room temperature or up to two weeks refrigerated; simply whisk it gently to remove any surface separation before use.
Essential Royal Cookie Frosting Recipe

Ingredients:
Instructions:
Nutrition Facts:
| Calories | 805 kcal |
|---|---|
| Protein | 0.1 g |
| Fat | 0.3 g |
| Carbs | 211.7 g |
