Apple Pie Recipe: the Quintessential Flaky, Double-Crust Classic
- Decoding the Perfect Apple Pie: A Crust That Never Fails
- Assembling Your Toolkit and Key Components for This Apple Pie
- Crafting the Flaky Dough: Step and by-Step Methodology
- Bringing It All Together: Filling, Assembly, and Finishing
- Troubleshooting and Expert Tips for the Ultimate Apple Pie Experience
- Recipe FAQs
- 📝 Recipe Card
Decoding the Perfect Apple Pie: A Crust That Never Fails
Okay, confession time. I used to be terrified of making Apple Pie . Not the filling that’s easy but the crust. For years, I churned out pies with bottoms so soggy you could practically scoop them out with a spoon, or tops so tough they put up a fight.
It was a disaster every time. But I persisted, and now I’ve cracked the code on the Perfect Apple Pie (and yes, that involves a double crust). This recipe isn’t fussy; it’s just precise. We’re talking about real, old and school flavour delivered without the anxiety.
The Secret to All and Butter Flakiness
Forget shortening. Forget lard (unless you really want to go deep heritage, but we'll stick to butter for now). The secret to truly ethereal, flaky pastry lies in using 100% cold, high and quality butter. It’s non and negotiable.
When you combine flour and fat, you want the fat to stay in distinct, tiny pieces. This is crucial. When those cold pieces of butter hit the heat of the oven, the water trapped inside turns to steam, pushing apart the layers of flour. That puff, that lightness? That’s pure, glorious, butter steam.
If your butter is soft, it just smears into the flour, creating glue instead of layers. Always keep it cold. Always.
Why Blended Apples Create the Ultimate Filling Texture
You might think any apple will do for a great Apple Pie Recipe , but you’d be wrong. Dead wrong. If you use only soft apples (like McIntosh or Red Delicious), you end up with apple soup. A runny, gloopy mess inside your beautiful crust. We need structure and flavour.
The key to a stellar Apple Pies Filling is blending a tart, firm apple with a softer, sweeter one. The firm apples (hello, Granny Smith!) retain their shape under heat, giving the filling bite and structure.
The softer apples break down slightly, creating a thick, syrupy base that coats everything beautifully. It’s a simple trick, but it totally changes the game.
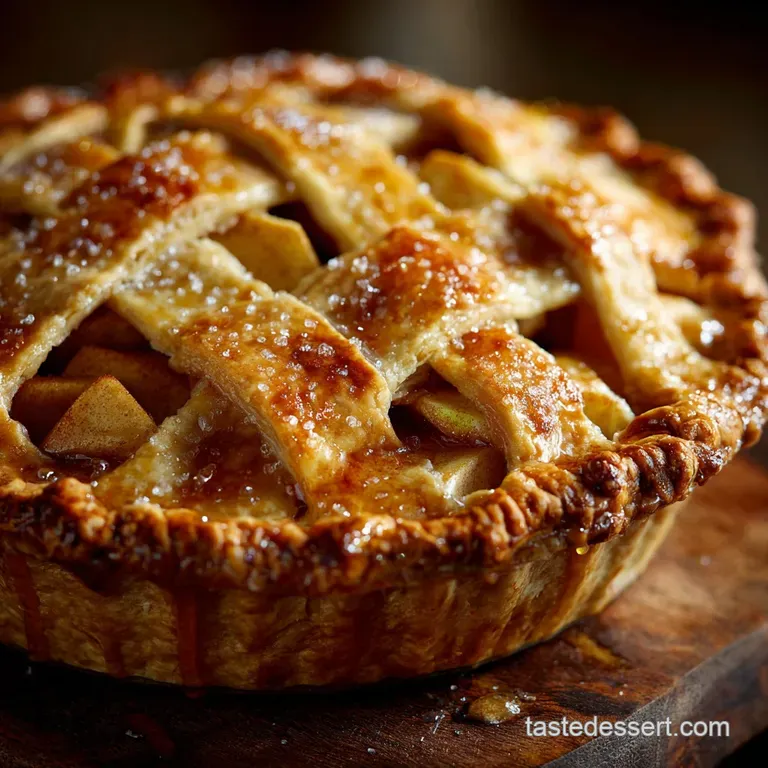
The Enduring Charm of a Double and Crust Classic
Look, I love a good crumb top. I really do. But when you crave that iconic American or British comfort food, nothing beats the satisfaction of slicing into a deeply golden, fully sealed, double and crust beauty. It’s an act of dedication.
The top crust acts like an insulating layer, trapping steam and moisture, which helps the apples cook down evenly and develop that rich, spiced flavour profile we all adore. Plus, the extra surface area means more room for that delightful, crunchy turbinado sugar finish.
Assembling Your Toolkit and Key Components for This Apple Pie
Selecting the Ideal Apple Blend for Structure and Flavor
For this Classic Apple Pie , we are aiming for a ratio of about 2/3 structure to 1/3 flavour. My go and to combination is Granny Smith (for that essential tartness and structure) mixed with either Honeycrisp or Braeburn (for sweetness and a lovely aromatic quality).
If you can't find those, any firm baking apple like Gala or Fuji will work well alongside the tart Granny Smiths. Make sure you slice them uniformly (about ¼ inch thick). Uniformity equals even cooking.
Essential Pantry Items for the Rich, Sweet and Tart Filling
You need the spices, obviously cinnamon and nutmeg are mandatory. Please, if you have a grater, use fresh nutmeg. It smells like Christmas and makes a massive difference. But the true MVP here is the cornstarch.
Many recipes use flour, but cornstarch creates a clear, glassy, perfectly thick sauce that holds its shape when sliced. It’s the difference between a messy spoon pie and one that stands proud.
CRUCIAL NOTE: Do not skimp on the lemon juice and zest. The acid doesn't just prevent browning; it actually wakes up the sugar and deepens the apple flavour, preventing the whole thing from tasting one and dimensionally sweet.
The Non and Negotiable Kitchen Tools for Pastry Success
I’m telling you right now: A food processor is a game changer for pastry. It keeps the processing time short and, more importantly, keeps your warm hands off the cold butter. If you don't have one, use a pastry blender or two cold knives. A good, heavy rolling pin is also essential for rolling the pastry evenly.
And a 9 inch ceramic or glass deep and dish pie plate? Absolutely. Metal pie plates tend to bake too quickly on the outside, but glass allows heat to permeate slowly and evenly, which is key for a non and soggy bottom.
Related Recipes Worth Trying
- Apple Pie Recipe: Best Homemade Flaky Crust (Butter Shortening) — This truly great Apple Pie recipe guarantees a sublimely flaky, buttery crust and an intensely spiced filling. Master the technique for the Best Homemade...
- Mini Pumpkin Pies Easy Creamy Recipe for Individual Fall Treats — Mini Pumpkin Pies are the ultimate individual dessert for Fall Use this easy mini pumpkin pie recipe baked in a muffin tin for Thanksgiving Desserts No...
- Apple Crisp Mini Cheesecakes Easy Recipe for the Perfect Fall Treat — Apple Crisp Mini Cheesecakes are the perfect individual fall dessert Get the easy recipe for these mini apple cheesecakes featuring a crispy oat topping
Crafting the Flaky Dough: Step and by-Step Methodology
I’m not going to bore you with the full instruction list (that’s up top!), but I will highlight the methodology that will make or break your crust. The process is a meditation on coldness and patience.
- Prep the Butter: Cut the butter into small cubes and toss it back into the freezer for 15 minutes. While you wait, put your measured flour and dry ingredients in the fridge, too. Get everything cold.
- Pulse, Don’t Blend: Whether using a processor or cutter, work the butter into the flour only until the mixture looks like coarse sand mixed with small peas. You should see distinct pieces of butter. This is the flakiness.
- The Water Trick: Use ice water. Literally, water with ice cubes in it (measure the water after straining out the ice). Add it slowly, tablespoon by tablespoon. Stop the second the dough looks shaggy and holds together when pinched. It should feel dry, not sticky.
- Chill, Chill, Chill: Ninety minutes is the minimum for the dough discs. This resting period allows the gluten to relax (meaning easier rolling) and firms up the butter again. Rushing this step guarantees pastry shrinkage in the oven.
Bringing It All Together: Filling, Assembly, and Finishing
Preparing the Dough: The Cold Butter Rule for Maximized Flakiness
When you pull the dough out of the fridge, let it sit on the counter for maybe five minutes. Just enough so it doesn't crack immediately when you roll it, but not so long that the butter starts to seep out. Work quickly and keep your hands light.
Chilling and Rolling: Achieving the Perfect Thickness and Diameter
Aim for a bottom crust rolled to about a 12 inch diameter. Thickness matters. I aim for slightly less than ⅛ inch. Too thin, and it tears when you fill it. Too thick, and it’s doughy. Once the bottom crust is settled in the pie plate, put the whole plate back in the fridge while you tackle the filling.
This extra chill time is another firewall against shrinkage.
Combining the Filling: Ensuring Maximum Flavor and Zero Sogginess
After you mix the sliced apples, sugars, spices, and cornstarch, let the mixture sit for 15 minutes. What’s happening? Osmosis! The sugar is drawing moisture out of the apples. If you bake that liquid right away, it steams the bottom crust. So, we let it weep a little.
Then, when you transfer the filling to the chilled crust, spoon it in, but try to leave behind any excess pooling liquid at the bottom of the bowl. That's a huge tip for avoiding a runny Apple Pie Filling .
Sealing the Pie: Master the Crimp and Venting Techniques
Lay your top crust or lattice over the mounded apples. Trim the edges, leaving about an inch of overhang, and then tuck the top overhang underneath the bottom overhang. This creates a fat, strong edge. Crimp firmly.
A loose crimp leads to escaping steam, which in turn leads to a dry crust and a messy filling boil and over. Finally, vents are mandatory! They let the steam escape and, more importantly, allow you to see the filling bubbling madly (which signals doneness).
Baking Schedule: Hitting that Deep Golden Brown Crust
We start hot (425°F/220°C) for the first 15– 20 minutes. Why? This sets the structure of the pastry fast and triggers the steam and puffing action. Then, we drop the temperature down to 375°F (190°C) for the rest of the bake.
This lower, slower heat ensures the apples cook fully in the center without burning the edges. Don’t pull it out until it’s truly a deep golden brown, not pale yellow. That colour is flavour, people!
Troubleshooting and Expert Tips for the Ultimate Apple Pie Experience
Preventing a Soggy Bottom: Baker's Strategies
This is the big one. How do we beat the soggy bottom? It comes down to three things:
- The Temperature Drop: Starting the oven hot ensures the bottom crust sets immediately.
- The Thickener: Use the cornstarch!
- The Wait: The most critical step. If you cut into that Apple Pie while it’s still warm, the starch hasn't fully hydrated and set. All the beautiful juices will run out. You must wait 2– 4 hours. It’s painful, but necessary. Trust me on this.
Storage Secrets: Refrigeration, Freezing, and Reheating
If you want to bake ahead, you can assemble the whole pie (unbaked), wrap it tightly, and freeze it for up to 3 months. When you’re ready, bake it straight from frozen (add about 20– 30 minutes to the total baking time).
For baked leftovers, cover the pie loosely and store it at room temperature for up to two days. If it lasts that long (it won't). To reheat, pop a slice in a 350°F (175°C) oven for about 10 minutes to crisp up the crust. Microwaves make it rubbery. Don't do that.
Customizing the Spice Profile: Variations on Cinnamon and Nutmeg
While cinnamon and nutmeg are the Classic Apple Pie core, you can absolutely play with this.
- Add a dash of allspice or ground cloves (use sparingly, they are strong!).
- A pinch of cardamom gives it a sophisticated, almost citrusy lift.
- Black pepper. Yes, really. A tiny grind of fresh black pepper enhances the sweetness and depth without tasting peppery. It’s brilliant.
Approximate Calorie Count and Macronutrient Breakdown
Listen, we are making Apple Pie , not diet food. This is comfort. This is celebration. The numbers above are an estimate (around 450 calories per slice, before toppings), but honestly? It’s not about the macros.
It’s about the soul and soothing deliciousness that comes from baking something magnificent from scratch.
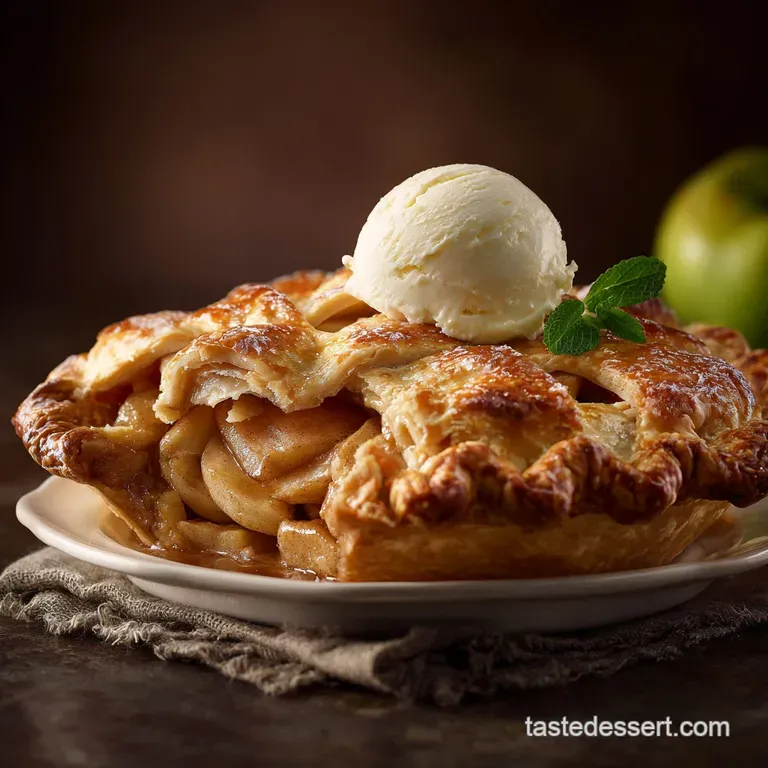
Best Pairings: From Vanilla Bean Ice Cream to Aged Cheddar
There are two correct ways to serve this pie.
- The American Way: Hot, with melting, high and quality vanilla bean ice cream (not the cheap stuff).
- The British/New England Way: With a sharp slice of aged cheddar cheese. I know, it sounds weird if you haven't tried it, but the sharp, salty cheese against the warm, sweet spices is absolutely sublime. It's a revelation. Go try it.

Recipe FAQs
My pies always have a soggy bottom how do I ensure this Apple Pie stays perfectly crisp?
The secret is heat and chilling: ensure your all-butter pastry is kept ice-cold before it hits the oven, and bake the pie on a preheated baking sheet placed on the lowest rack to give that base maximum direct heat.
If you're feeling ambitious, a quick 10-minute blind bake of the bottom crust before filling is absolute insurance against a wet base.
What are the absolute best apples to use for a truly brilliant Apple Pie?
For the best structure and flavour, use a blend: rely on firm, tart apples like Granny Smith to hold their shape, and mix them with a sweeter variety like Honeycrisp or Braeburn for complexity and depth. Using just one kind of apple can often lead to a monotone flavour or apples that turn into complete mush.
Help! My filling is runny when I slice it. Have I done something wrong?
Not at all, but patience is absolutely vital with pie you must allow the pie to cool completely for a minimum of 2 to 4 hours on a wire rack, as this cooling time is essential for the cornstarch thickener to fully activate and set the filling. If you cut it too early, it’s akin to serving soup on a plate!
Can I bake the whole pie in advance, and how should I store leftover slices?
You can bake the pie up to two days ahead and keep it loosely covered at room temperature; for longer storage, leftovers keep well in the fridge for up to four days, though you might want to give the slices a quick blast in the oven before serving to re-crisp the crust.
It’s just not right without a topping what’s the proper serving suggestion for this British American classic?
While a generous scoop of proper vanilla bean ice cream (A la mode, as the Americans say) or a ladle of warm custard is traditional, many people swear by pairing a warm slice with a sliver of mature English cheddar cheese don’t knock the cheese till you’ve tried it!
Flaky All Butter Apple Pie Recipe
Ingredients:
Instructions:
Nutrition Facts:
| Calories | 420 kcal |
|---|---|
| Protein | 4.0 g |
| Fat | 18.0 g |
| Carbs | 63.0 g |
