Healthy 4Ingredient Waffles Crispy Banana Oat Waffles Blender Method
- The Kitchen Revolution: Mastering Quick, Clean and Eating Breakfasts
- Why These Healthy 4Ingredient Waffles Will Replace Your Usual Mix
- Just Four Items: Assembling Your Minimalist Ingredient List
- Essential Gear: What You Need for Perfect Waffle Texture
- From Pantry to Plate: The Seamless Blending and Cooking Method
- Achieving the Perfect Crisp: Timing Your Waffle Cook
- Beyond the Base: Creative Toppings and Flavor Enhancements
- Storing and Reheating: Keeping Your Waffles Fresh
- Nutritional Deep Dive: The Benefits of a Flourless Waffle
- Recipe FAQs
- 📝 Recipe Card
The Kitchen Revolution: Mastering Quick, Clean and Eating Breakfasts
Look, I’m a busy person. You’re a busy person. We all deserve a breakfast that feels like a decadent weekend brunch but takes five minutes of active prep time. Is that too much to ask? Absolutely not.
For years, I relied on those dusty boxed mixes, thinking that making proper, healthy waffles was this intense, two and hour commitment involving sifting flour and separating eggs. I was wrong. Seriously, totally wrong.
This Healthy Waffle Recipe is a total game and changer. It’s what I whip up when I’m trying to hit those protein goals before 9 AM, or when I just want a genuinely good, hearty, whole and food breakfast without the carb coma.
It’s based on just four simple ingredients, and honestly, the sheer volume of fibre and satisfying protein packed into these bad boys makes them infinitely superior to anything in the dry goods aisle. This is how we win breakfast, people.
Why These Healthy 4Ingredient Waffles Will Replace Your Usual Mix
Have you ever looked at the ingredient list on a store and bought waffle mix? It’s usually a thesis statement about refined flour, sugar, and preservatives. We’re ditching all that nonsense. These Healthy 4Ingredient Waffles don’t just taste good; they provide actual, sustained energy.
We're talking ingredients you probably already have hanging out in your pantry and fridge. It's minimalist cooking at its best.
Decoding the Four and Ingredient Wonder: How Simple Ingredients Create Structure
The magic is in the method, specifically, the blending. Traditional recipes rely on gluten in flour for structure, but we’re using oats. When you blitz rolled oats (not instant, we’ll get to that) in a high and speed blender, they turn into a dense, fiber and rich flour. This creates the primary bulk.
The ripe banana acts as our natural sweetener and, crucially, as the binder. Then, the Greek yogurt and eggs swoop in, adding moisture, fat, and all the necessary lift. It’s a simple chemical reaction, but the results taste complex and rich.
Goodbye Flour, Hello Fiber: The Nutritional Upgrade of Oat and Based Waffles
If you’re tracking macros, following a WW Recipes plan, or just aiming for general better nutrition, these are your new best friend. By swapping white flour for whole grain rolled oats, you immediately bump up the fiber content, which helps keep you full for hours. No more that 10 AM sugar crash!
These are designed to be healthy treats , but they function as serious, sustained fuel.
The 10 Minute Prep Promise: Breakfast Without the Kitchen Fuss
When I say 10 minutes of prep, I mean it. You throw four things into a blender, press a button, let the batter rest (that’s the passive time, you can go make coffee then), and then start cooking. There is zero mess.
There are no bowls full of dry ingredients and bowls full of wet ingredients. It all happens in one pitcher. If you’re searching for quick brunch recipes that don't make you dread the cleanup, this is the answer.
Certified Clean Fuel: Making Delicious Dietary Choices Effortless
This batter is naturally gluten and free (just make sure you buy certified gluten and free oats if you need it strictly GF). We aren't adding any refined sugar, relying instead on the inherent sweetness of a nice, brown and spotted, ripe banana. It makes controlling your dietary intake so much easier.
You know exactly what’s going into your Waffle Recipe , and it's all good stuff.
Just Four Items: Assembling Your Minimalist Ingredient List
| The Magic 4 | Why it Matters |
|---|---|
| Rolled Oats | The foundation. Provides structure and fiber. |
| Ripe Banana | Natural sweetness and essential binding agent. |
| Large Eggs | Protein, richness, and crucial lift. |
| Plain Greek Yogurt | Moisture, tang, and serious protein boost. |
That’s it. Stop looking for the fifth ingredient. (Okay, fine, a pinch of salt is necessary to make the sweetness pop, but we don't count it, do we?)
Essential Gear: What You Need for Perfect Waffle Texture
You only need two major items, but they need to be the right tools for the job.
The Power Four: Detailed Breakdown of Oats, Bananas, and Essentials
A crucial point on the banana: it needs to be ripe . I’m talking about the kind of banana that has a few brown spots that usually signal “eat me now or freeze me.” An underripe banana won’t lend enough sweetness or binding power, and the Healthy 4Ingredient Waffles will end up tasting bland.
For the yogurt, I usually grab full and fat Greek yogurt because it adds better flavour and satiety, but low and fat or even non and fat works well too, particularly if you are trying to lean toward Skinny Taste Recipes . Just promise me it’s plain; we don't want strawberry flavor here.
Smart Swaps and Substitutions for Allergy and Dietary Flexibility
These waffles are already flexible, but sometimes life throws us a curveball (like realizing you’re out of yogurt).
- Dairy and Free Yogurt: You can absolutely swap the Greek yogurt for an equivalent amount of plain, thick coconut or soy yogurt. Just be aware that non and dairy tends to be thinner, so you might need to add a tablespoon or two more oats during the resting period.
- Need a Higher Protein Kick? Substitute the Greek yogurt with the same amount of cottage cheese. Just make sure you blend it in first until totally smooth before adding the other ingredients!
- Egg and Free? This is tricky because the eggs provide so much structure. You’d need to use two flax or chia "eggs," increase the yogurt slightly, and understand the result will be much softer.
Choosing the Right Blender for a Silky and Smooth Batter Consistency
Listen, this isn’t a job for your tiny, travel and sized smoothie blender. If you don't break down those oats completely, your waffles will be crumbly and fall apart. You need a powerful machine, like a Vitamix or a high and speed Ninja.
The goal is to turn the oats into a fine powder before adding the wet ingredients. That smooth, flour and like texture is non and negotiable for success.
Prepping Your Waffle Iron for Guaranteed Non and Stick Success
If you hate scrubbing sticky waffle irons (who doesn't?), pay attention. Always preheat the iron fully. Then, give it a very light spray of over high heat cooking oil (avocado or coconut is perfect).
Even if your iron claims to be non and stick, that little bit of oil ensures the fragile oat batter releases perfectly every time. If you see smoking, you’ve used too much!
Related Recipes Worth Trying
- Turkey Enchilada Stuffed Poblanos Rellenos Healthy Baked Recipe — Turkey Enchilada Stuffed Poblanos Rellenos are the ultimate weeknight comfort food This Baked Poblano Rellenos Recipe features lean meat Homemade Poblano...
- Cilantro Lime Quinoa Bowls with Shrimp Zesty Healthy 35Minute Dinner — Make these vibrant Cilantro Lime Quinoa Bowls with Shrimp tonight This Easy Weeknight Quinoa Recipe delivers incredible zesty flavor and lean protein...
- Meal Prep Breakfast Taco Scramble Easy Healthy Weekday Fuel — This Meal Prep Breakfast Taco Scramble is your ultimate weekday answer Get a healthy breakfast scramble meal prep ready in 35 minutes perfectly suited for...
From Pantry to Plate: The Seamless Blending and Cooking Method
Right, let’s crack on with the instructions. This is where the magic happens fast. First step, the oats go in. Blend them until they look like pale dust. Next, throw in the banana (broken in two is fine), the eggs, and the yogurt. Blitz for 60 seconds until everything is completely smooth.
You shouldn't see any lumps.
CRUCIAL WAITING PERIOD: Once blended, pour the batter out and let it sit at room temperature for 10 minutes. Do not skip this! The oats need time to absorb the liquid and thicken, preventing fragile, falling and apart waffles.
Achieving the Perfect Crisp: Timing Your Waffle Cook
You don't want a pancake masquerading as a waffle. You want that crispy exterior, that deep, golden and brown colour, and those glorious little pockets for holding maple syrup. Getting the timing right is key to all waffle maker recipes .
Step and by-Step Batter Creation: Optimized Blender Sequence for Smoothness
- Oat Flour First: Place 1 cup of rolled oats (and a pinch of salt) into the blender. Pulse on medium and high until completely pulverized into a coarse flour.
- Wet Components: Add the 2 large eggs, the 1 ripe banana, and the 1/2 cup of Greek yogurt.
- High and Speed Blitz: Blend for 45 seconds straight. Scrape the sides once to ensure no dry oat bits are hiding. The batter should look thick, like very heavy cream.
- The Rest: Let it rest 10 minutes. (Go set the table!)
Temperature Control: Dialing in Your Waffle Iron Heat for Ideal Browning
Your waffle iron must be fully preheated. If it's not hot enough, the batter will steam instead of crisping, and you will end up with a pale, soft, spongy disaster. I usually run mine on medium and high (setting 4 out of 5) for about seven minutes before I even think about pouring batter.
A hot iron provides a quick sear that locks in the crispness.
Pouring Precision: Tips for Even Batter Distribution Across the Grids
Use a 1/2 cup measuring scoop to pour the batter right into the centre of your pre and greased iron. Resist the urge to spread it! The batter is thick and will mostly spread itself when you close the lid. If you overfill it, you will have batter oozing out the sides, which is a mess you don’t need.
The Golden Reveal: Knowing When Your Healthy 4Ingredient Waffles Are Done
How do you know they’re ready? A reliable sign is that the steam stops escaping from the sides of the iron. Most irons have a light, but sometimes those lights lie. Cook them for a full 4 to 5 minutes.
When you lift the lid, the waffle should be deep golden, slightly firm to the touch, and release from the iron without any tugging.
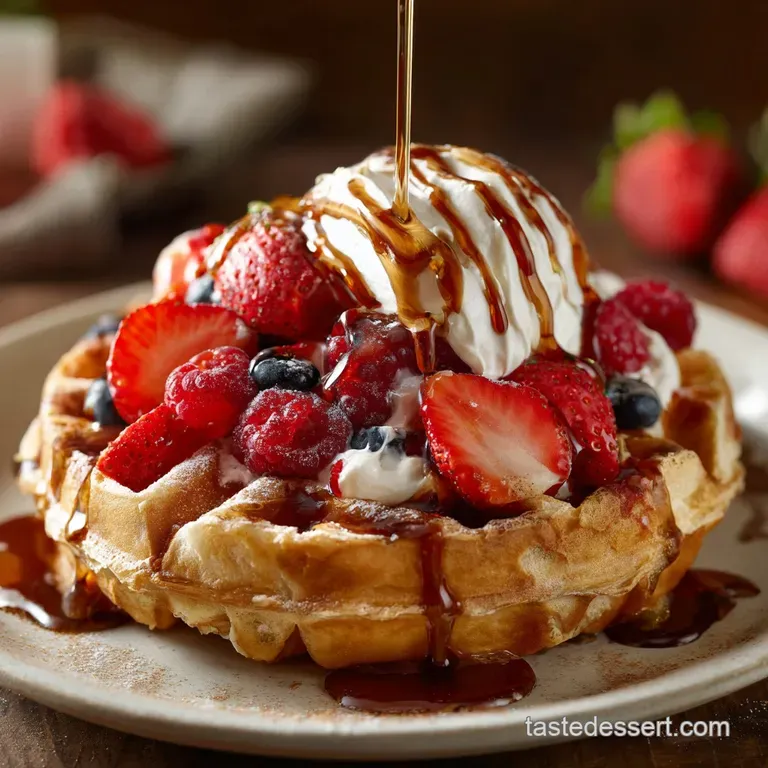
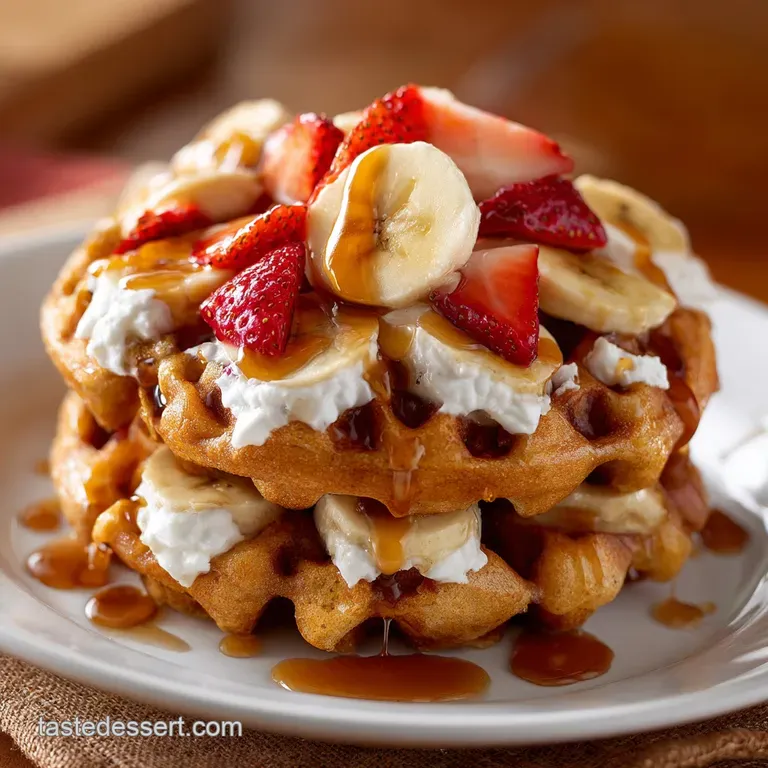
Beyond the Base: Creative Toppings and Flavor Enhancements
These Healthy Waffles are great plain, but let's be real, the toppings are half the fun.
Mastering Sweet and Savory Topping Combinations
Don't box yourself into just syrup!
- Sweet: Greek yogurt (more!) mixed with a little honey, fresh raspberries, or a dusting of cinnamon sugar.
- Savory Idea: Next time, skip the banana and add 1/4 cup of shredded sharp cheddar cheese and a pinch of black pepper to the batter. Top the finished waffle with a fried egg and hot sauce. Mind blown.
Elevating Flavor Profiles with Extracts and Spices
Want to feel fancy? Add 1/2 teaspoon of vanilla extract to the wet ingredients before blending. Or, try 1/4 teaspoon of ground cardamom and a tiny bit of orange zest for an incredible, aromatic flavour. It feels sophisticated, but it took an extra five seconds.
Storing and Reheating: Keeping Your Waffles Fresh
These are perfect for meal prepping! You can make a batch on Sunday and enjoy quick breakfasts all week long.
Meal Prep Mastery: Freezing Instructions for Weekday Breakfasts
Once cooked, immediately move the waffles to a wire cooling rack and let them cool completely. Do not stack them while warm (they will sweat and get soggy). Once cooled, stack them with small squares of parchment paper between each one, place them in a freezer bag, and freeze flat.
They’ll keep for about two months.
Reheating Methods for Maintaining the Ultimate Crispy Exterior
Forget the microwave; that turns them into sad, damp sponges.
- Toaster: My preferred method. Pop them straight from the freezer into a wide toaster slot and toast until heated through and perfectly crisp again.
- Oven/Toaster Oven: Place them directly on the rack (or a lightly greased baking sheet) and bake at 350°F (175°C) for 5- 8 minutes.
Nutritional Deep Dive: The Benefits of a Flourless Waffle
We started with four simple ingredients, and we ended up with a powerful, nutrient and dense breakfast.
Understanding the High and Fiber and Protein Content
The combination of whole oats, eggs, and Greek yogurt makes this breakfast a protein powerhouse. The fiber from the oats ensures a slow, steady release of energy, which means you won't crash mid and morning. It's the ideal way to kick off the day, whether you’re counting points or just trying to eat cleaner.
Troubleshooting Common Waffle Issues (Too soft? Too crumbly?)
If you run into trouble, here are the most common culprits and how to fix them next time:
| Problem | Cause | Quick Fix |
|---|---|---|
| Waffles are soft/pale. | Iron wasn't hot enough, or they weren't cooked long enough. | Turn the iron up to max and cook until the steam stops. |
| Waffles fall apart. | The batter didn't rest, or the oats weren't blended enough. | Next time, rest the batter for the full 10 minutes. |
| Waffles stick to the iron. | Not enough oil or not hot enough (sticking happens on cold irons). | Pre and grease, even if non and stick, and ensure full preheat. |

Recipe FAQs
Are these Healthy 4-Ingredient Waffles actually good for me, or is it just clever marketing?
Absolutely! Because they rely on oats, eggs, and Greek yogurt, they are packed with protein and fiber, making them a smashing alternative to traditional flour based, refined sugar mixes.
My waffles keep sticking to the iron, or they are coming out fragile and falling apart. What am I doing wrong?
The most common culprit is skipping the crucial 10-minute rest time; the oats must hydrate fully, otherwise the structure won't hold, so don't skip that step and always ensure your iron is piping hot and well greased before you start.
I’m not a fan of banana. Can I use something else to bind the batter and provide sweetness?
Not on your Nelly the banana is key to the sweetness and moisture, but you can successfully swap it for 1/2 cup of unsweetened apple sauce, perhaps adding a small squeeze of honey or maple syrup to compensate for the lost sweetness.
I'm always rushed in the morning. Can I make this Healthy 4-Ingredient Waffles batter the night before?
It's best not to blend it completely ahead of time, as the batter will thicken significantly and become gluey; instead, blitz the dry oats and let them rest overnight, adding the wet ingredients just 15 minutes before cooking the next morning.
What’s the best way to store leftovers, and can I freeze these?
You can freeze these waffles beautifully for up to three months! Once completely cooled on a wire rack (do not stack them!), layer them between parchment paper and reheat straight from frozen in a toaster for ultimate crispness easy peasy!
Healthy 4ingredient Waffles Recipe

Ingredients:
Instructions:
Nutrition Facts:
| Calories | 280 kcal |
|---|---|
| Fat | 9 g |
| Fiber | 5 g |
