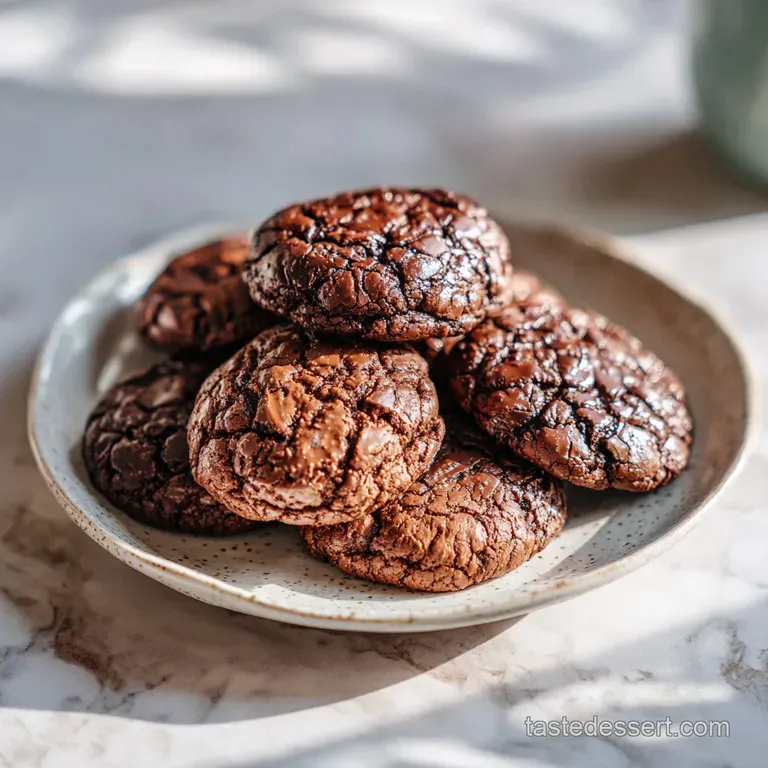
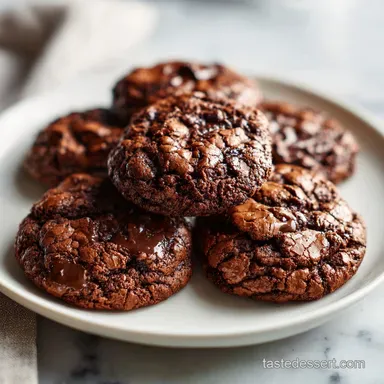
Cosmic Brownie Cookies: Chewy and Fudgy
- Time: Active 15 minutes, Passive 10 minutes, Total 25 minutes
- Flavor/Texture Hook: Fudgy, dark chocolate base with a velvety ganache and a signature shatter thin top.
- Perfect for: School bake sales, nostalgic birthday parties, or a cozy weekend baking project.
- Why This Works
- Selecting Your Cherished Ingredients
- Gathering Your Essentials
- Tools for Fudgy Success
- Crafting the Mahogany Base
- Avoid Common Baking Mistakes
- Personalize Your Chocolate Treats
- Timing for Fudgy Cookie Success
- Storage and Freezing Guide
- Perfect Pairings and Serving Ideas
- Recipe FAQs
- 📝 Recipe Card
Why This Works
- The Sugar Egg Bond: Whisking the egg and sugars vigorously for 60 seconds creates a meringue like structure. This is what gives you that beautiful, paper thin crinkle on the surface.
- Melted Butter Magic: Using melted butter instead of creamed butter eliminates air pockets. This ensures the cookies stay dense and chewy rather than light and airy.
- Dutch Cocoa Intensity: Dutch processed cocoa has a lower acidity and a darker color. It provides that specific "Oreo adjacent" richness that makes these taste truly "cosmic."
- Espresso Powder Secret: A tiny amount of espresso doesn't make the cookies taste like coffee. Instead, it acts as a flavor booster that makes the chocolate taste twice as dark and complex.
- Heavy Cream Stability: The fat content in the heavy whipping cream allows the ganache to set firmly enough to handle, but it stays silky on the tongue.
| Method | Time | Texture | Best For |
|---|---|---|---|
| Standard Oven | 10 minutes | Fudgy with set edges | The classic, reliable result |
| Toaster Oven | 8 minutes | Extra crispy edges | Small batches of 4-6 cookies |
| Air Fryer | 7 minutes | Very soft centers | A "molten" brownie cookie feel |
If you are looking for that specific crinkle that mimics my fudgy homemade brownies with crinkle top, the key is definitely in that 60 second whisking step. Don't skip it, even if your arm gets a little tired. It’s the difference between a plain chocolate cookie and a true brownie hybrid.
Selecting Your Cherished Ingredients
Choosing the right components is everything when you want to recreate a timeless classic. I always reach for Dutch processed cocoa because it has been treated with an alkali to neutralize its natural acidity. This results in a much smoother, mellower chocolate flavor that isn't sharp or bitter.
In this recipe, that cocoa works in tandem with the espresso powder to create a mahogany colored dough that looks as rich as it tastes.
I’ve found that using room temperature eggs is a non negotiable step. If you drop a cold egg into melted butter, the butter might seize up and create little clumps, which ruins the velvety texture we are after. The vanilla extract also plays a huge role here.
While some recipes use just a teaspoon, we're using a full tablespoon. This might seem like a lot, but it rounds out the bitterness of the cocoa and adds a floral sweetness that lingers.
| Ingredient | Science Role | Pro Secret |
|---|---|---|
| Dutch Cocoa | Lowers acidity | Sift it twice to avoid "cocoa bombs" in the dough |
| Espresso Powder | Enzymatic booster | Intensifies chocolate without adding coffee flavor |
| Melted Butter | Fat saturation | Use high-quality butter with low water content |
| Brown Sugar | Humectant | Adds moisture and a hint of molasses chew |
Between the different sugars and the fat content, we're building a structure that is designed to stay moist for days. Unlike a traditional chocolate chip cookie that might get crunchy, these are meant to stay soft.
Gathering Your Essentials
- 1/2 cup (115g) unsalted butter, melted: Why this? Provides the fat needed for a fudgy, non cakey texture. (Sub: Salted butter, but reduce added salt to a pinch).
- 1/2 cup (100g) granulated sugar: Why this? Helps create the crisp, crackly top through crystallization. (Sub: Organic cane sugar).
- 1/4 cup (50g) light brown sugar, packed: Why this? Adds moisture and a chewy, caramelized depth. (Sub: Dark brown sugar for more molasses flavor).
- 1 large egg, room temperature: Why this? The binder that creates the meringue like surface when whisked. (Sub: 1/4 cup unsweetened applesauce, though it will be less crackly).
- 1 tablespoon vanilla extract: Why this? Enhances the chocolate and provides a nostalgic aroma. (Sub: Vanilla bean paste for speckled appearance).
- 1 cup (125g) all purpose flour: Why this? Gives just enough structure without making the cookie heavy. (Sub: 1:1 gluten-free baking flour).
- 1/2 cup (45g) Dutch processed cocoa powder: Why this? Essential for that dark, "cosmic" chocolate profile. (Sub: Natural cocoa powder, but the flavor will be more acidic).
- 1 teaspoon espresso powder: Why this? A secret weapon that deepens the cocoa notes. (Sub: Instant coffee granules crushed into a fine powder).
- 1/2 teaspoon fine sea salt: Why this? Balances the sugar and makes the chocolate pop. (Sub: Kosher salt, but use 3/4 teaspoon).
- 1 cup (175g) semi sweet chocolate chips: Why this? The base for our smooth, decadent ganache crown. (Sub: Dark chocolate chips for a less sweet topping).
- 1/2 cup (120ml) heavy whipping cream: Why this? Creates a velvety ganache that sets beautifully. (Sub: Full fat coconut milk for a dairy-free swap).
- 3 tablespoons rainbow candy coated chocolate chips: Why this? The iconic topping that makes these truly "cosmic." (Sub: Regular sprinkles or chopped walnuts if you prefer).
Tools for Fudgy Success
You don't need a kitchen full of gadgets for these Cosmic Brownie Cookies, but a few specific items make the process much smoother. A large glass or ceramic mixing bowl is great for the batter because it doesn't retain heat as much as metal, which helps cool the melted butter slightly before you add the egg.
I also highly recommend a fine mesh sieve. Cocoa powder is notorious for clumping, and biting into a dry pocket of cocoa is not the experience we want.
Chef's Note: If you don't have a cookie scoop, use two spoons, but a scoop ensures every cookie is exactly 1.5 tablespoons. This guarantees they all finish baking at the exact same time, preventing the "half burnt, half raw" tray problem.
A silicone spatula is better than a wooden spoon for the final mixing stage. It allows you to scrape the bottom of the bowl effectively, ensuring no streaks of flour are left behind. Since this dough is quite thick and sticky, the flexibility of silicone is a lifesaver.
Finally,, high-quality parchment paper or a silicone baking mat is essential. These cookies are fudgy and can be delicate when warm; you don't want them sticking to the pan after all that hard work.
Crafting the Mahogany Base

- Prep the butter base. In a large mixing bowl, whisk the 1/2 cup of melted butter with 1/2 cup granulated sugar and 1/4 cup light brown sugar. Whisk until the mixture looks glossy and smooth. Note: The sugar won't fully dissolve yet, but it should be well incorporated.
- Develop the crinkle. Add the 1 large egg and 1 tablespoon vanilla extract. Whisk vigorously by hand for exactly 60 seconds until the batter lightens in color and becomes thick. Note: This step is crucial for the meringue top.
- Sift the dry ingredients. Position a sieve over the bowl and add 1 cup flour, 1/2 cup cocoa powder, 1 teaspoon espresso powder, and 1/2 teaspoon salt. Sift them directly into the wet ingredients to remove all lumps.
- Fold gently. Use a silicone spatula to fold the dry ingredients into the butter mixture until no white streaks remain. Stop immediately once combined. Note: Overmixing will lead to a tough, bready cookie.
- Scoop the dough. Using a 1.5 tablespoon scoop, drop rounds of dough onto your prepared baking sheets. Space them 2 inches apart to allow for slight spreading.
- Bake to perfection. Place in the oven at 350°F (175°C) for 9-10 minutes. The edges should be firm while the center looks slightly underdone.
- Cool completely. Leave the cookies on the baking sheet for at least 15 minutes. They will continue to set up from the residual heat until they are sturdy enough to move.
- Simmer the cream. In a small saucepan over medium heat, bring 1/2 cup heavy cream to a gentle simmer until small bubbles form around the edges. Do not let it reach a rolling boil.
- Melt the ganache. Place 1 cup semi sweet chocolate chips in a bowl and pour the hot cream over them. Let it sit for 2 minutes until the chocolate softens completely.
- Finish and top. Stir the ganache until velvety and smooth. Spoon about a tablespoon over each cooled cookie and immediately press the rainbow chips into the wet chocolate. Let them set for 30 minutes before serving.
Avoid Common Baking Mistakes
One of the biggest hurdles with this recipe is knowing when to pull them out of the oven. Because the dough is so dark, you can't rely on the "golden brown" rule. Instead, look at the surface. It should transition from looking wet and shiny to having a matte, cracked appearance.
If you touch the edge lightly with a finger, it should feel set, but the middle should still feel very soft. If the middle feels firm in the oven, you’ve likely overbaked them, and they will lose that signature fudgy center.
Another common pitfall is adding the ganache too early. If the cookie is even slightly warm, the ganache will thin out and run right off the sides, creating a mess instead of a beautiful crown. Patience is a virtue here! Let them cool until they are room temperature to the touch.
To Achieve the Signature Fudgy Density
The density of a brownie cookie comes from the lack of chemical leaveners like baking powder or baking soda. We are relying entirely on the mechanical aeration of the eggs and sugar. If you find your cookies are too flat, your butter might have been too hot when you added the sugars.
Let the melted butter sit for about 3-4 minutes before starting the process. This ensures the fat doesn't immediately melt the sugar crystals, which helps maintain some structure.
To Manage Ganache Consistency
If your ganache is too runny after stirring, it usually means the cream to chocolate ratio was slightly off or the cream was too hot. You can fix this by letting it sit at room temperature for 10-15 minutes, stirring occasionally. It will naturally thicken as it cools.
Conversely, if it’s too thick to spread, a 5 second burst in the microwave will loosen it right up.
| Problem | Root Cause | Solution |
|---|---|---|
| Cookies are cakey | Too much flour or overmixing | Weigh flour with a scale; fold gently |
| Ganache won't set | Too much cream or high humidity | Refrigerate cookies for 20 mins after topping |
| No crinkle top | Eggs weren't whisked enough | Whisk for a full 60 seconds until pale |
Common Mistakes Checklist:
- ✓ Always sift the cocoa powder; it's the only way to avoid bitter clumps.
- ✓ Use room temperature eggs to prevent the melted butter from curdling.
- ✓ Don't skip the espresso powder; it's the secret to professional tasting chocolate.
- ✓ Measure the flour using the "spoon and level" method if you don't have a scale.
- ✓ Allow the ganache to sit for the full 2 minutes before stirring for a smooth finish.
Personalize Your Chocolate Treats
While the classic rainbow chips are cherished for their nostalgic look, you can certainly mix things up. I love swapping the semi sweet ganache for a white chocolate version if I'm making these for a winter holiday. Just use the same ratio of cream to chocolate!
For a more "grown up" version, a sprinkle of flaky sea salt over the wet ganache adds a sophisticated contrast to the sweetness.
If you are planning a large gathering, these are the ultimate party favors. You can easily double the recipe, but keep in mind that you'll want to bake the trays one at a time to ensure even heat circulation. When you're serving a crowd, pairing these with other classics like peanut butter blossom cookies creates a dessert table that appeals to everyone's inner child.
For a Salted Caramel Twist
Try pressing a small Rolo candy or a dollop of salted caramel into the center of the dough ball before baking. The caramel will melt into the brownie base, creating a hidden surprise under the ganache. It takes these from "lunchbox snack" to "gourmet dessert" in one simple step.
Just be sure to seal the dough around the caramel well so it doesn't leak out onto the pan.
For a gluten-free Alternative
This recipe actually adapts beautifully to gluten-free flour blends. Because we aren't looking for a high rise or a lot of gluten structure, a 1:1 replacement (like King Arthur Measure for Measure) works perfectly.
The cookies might spread just a tiny bit more, so chill the dough for 15 minutes before scooping if you notice them becoming too thin.
Timing for Fudgy Cookie Success
When you need to adjust the yield, it's fairly straightforward. If you're looking to make a smaller batch (around 9 cookies), beat one egg in a small bowl, then use exactly half of it by weight or volume. This is much more accurate than trying to "guess" half an egg.
For doubling the recipe, I recommend using a stand mixer with the whisk attachment for the egg and sugar stage to save your arm, then switching to the paddle attachment on the lowest speed for the flour.
| Target Servings | Ingredient Adjustment | Bake Time Change |
|---|---|---|
| 9 Cookies | Halve all ingredients; use 1/2 beaten egg | No change (9-10 mins) |
| 36 Cookies | Double ingredients; use 1.5x salt/spices | Bake in batches; 10 mins per tray |
| 54 Cookies | Triple ingredients; use 2x salt/spices | Rotate trays halfway through |
When doubling or tripling, I suggest keeping the vanilla and espresso powder at a slightly lower ratio (about 1.5x for a 2x batch) to avoid overpowering the other flavors. The liquids should also be monitored; if the dough feels too wet, add an extra tablespoon of flour at a time until it holds its shape on the scoop.
Storage and Freezing Guide
These Cosmic Brownie Cookies are surprisingly hardy. Because of the high fat and sugar content, they stay moist much longer than a standard sugar cookie. You can store them in an airtight container at room temperature for up to 4 days. If you find they are softening too much in a warm kitchen, move them to the fridge.
The cold ganache actually has a wonderful "fudge bar" texture that some people prefer!
To freeze them, I recommend flash freezing the finished cookies on a baking sheet for an hour before transferring them to a freezer safe bag. This prevents the ganache from sticking to the other cookies. They will stay fresh in the freezer for up to 3 months.
When you're ready for a treat, just let one sit at room temperature for 15 minutes, or pop it in the microwave for 5-8 seconds for a "just baked" warmth.
For a zero waste tip: if you have leftover ganache, don't throw it out! It makes an incredible fruit dip or a base for hot chocolate. Just whisk it into warm milk for the richest cocoa you've ever had. If you have broken cookie bits, stir them into vanilla ice cream for a homemade "Cosmic Brownie" swirl.
Perfect Pairings and Serving Ideas
In my house, these are traditionally served with a cold glass of whole milk. The creaminess of the milk cuts through the intensity of the Dutch cocoa perfectly. But if you're looking to make it an "affogato" style dessert, place a warm cookie at the bottom of a bowl, top it with a scoop of vanilla bean ice cream, and pour a shot of hot espresso over the top.
The ganache melts into the coffee and creates a mocha like sauce that is absolutely divine.
- For a deeper flavor
- Let the dough rest in the fridge for 30 minutes before baking to "hydrate" the cocoa.
- For a softer ganache
- Increase the heavy cream by 1 tablespoon for a more pourable consistency.
- For a crispier edge
- Bake for the full 10 minutes and use a metal baking sheet without a silicone mat.
Kitchen Myths Debunked: 1. "Melted butter makes cookies greasy." Not if you balance it with enough dry ingredients! In this recipe, the cocoa powder acts as an extra absorbent, keeping the fat in check for a fudgy, not oily, result. 2.
"Sifting is an optional step." For most cookies, yes. For cocoa heavy recipes, no. Cocoa powder forms hard lumps that won't break down during mixing, leaving you with bitter spots in your final bake. 3.
"Brownie cookies are just underbaked chocolate cookies." Actually, the lack of leavening (no soda/powder) is what makes them brownies. Underbaking a regular cookie just makes it raw; this recipe is engineered for density.
Whether you're sharing these at a family reunion or sneaking one from the jar at midnight, these cookies are a timeless reminder of why we love to bake. They are a cherished connection to the past, brought to life with techniques that ensure every single bite is as fudgy and velvety as you deserve.
Enjoy the process, and most importantly, enjoy that first crackle of the top!

Recipe FAQs
How to achieve the signature crackle top on these cookies?
Whisk the egg, vanilla, and sugars vigorously for at least 60 seconds. This creates the necessary aeration and air-sugar emulsion required to form that thin, shiny, meringue like crust during baking.
Can I use regular cocoa powder instead of Dutch processed?
No, Dutch processed is essential for the intended flavor and texture. Its lower acidity and deeper color help achieve the classic dark brownie profile, which you can also see utilized in our Valentine Ganache Cookies for a similar rich cocoa experience.
How to tell when the cookies are finished baking?
Remove them from the oven once the edges are set while the centers still appear soft. Baking at 350°F for exactly 9-10 minutes ensures they maintain their signature chewy, brownie like interior rather than drying out.
Is it necessary to use espresso powder in the dough?
Yes, it is highly recommended to enhance the chocolate profile. The espresso powder acts as a flavor catalyst that deepens the intensity of the Dutch processed cocoa without making the cookies taste like coffee.
How to store these cookies to keep the ganache fresh?
Keep them in an airtight container at room temperature for up to 4 days. If your kitchen is warm and the ganache becomes too soft, you can move them to the refrigerator, which creates a delicious, firm fudge like consistency.
How to freeze the finished cookies properly?
Flash freeze the cookies on a baking sheet for one hour before placing them in a freezer safe bag. This initial hardening step prevents the ganache topping from smearing or sticking to the other cookies while stored in the freezer.
Is it true I should add the rainbow chips while the ganache is hot?
Yes, apply the chips immediately after spooning the ganache onto the cookies. This ensures the candy coated chips adhere properly to the surface before the ganache begins to set and lose its tackiness.
Homemade Cosmic Brownie Cookies
Ingredients:
Instructions:
Nutrition Facts:
| Calories | 194 kcal |
|---|---|
| Protein | 2.2 g |
| Fat | 11.4 g |
| Carbs | 22.5 g |
| Fiber | 1.1 g |
| Sugar | 15.6 g |
| Sodium | 68 mg |
