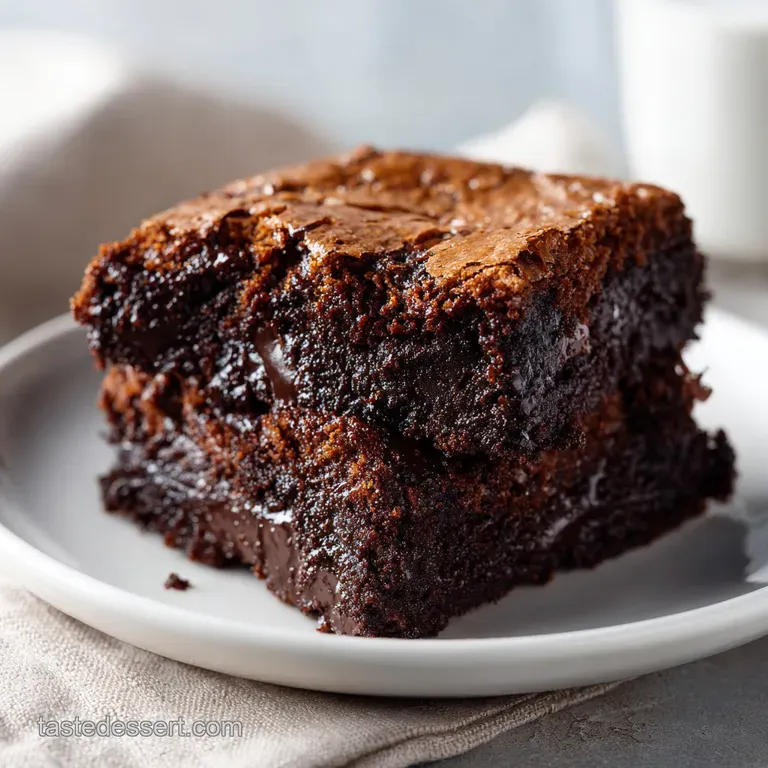
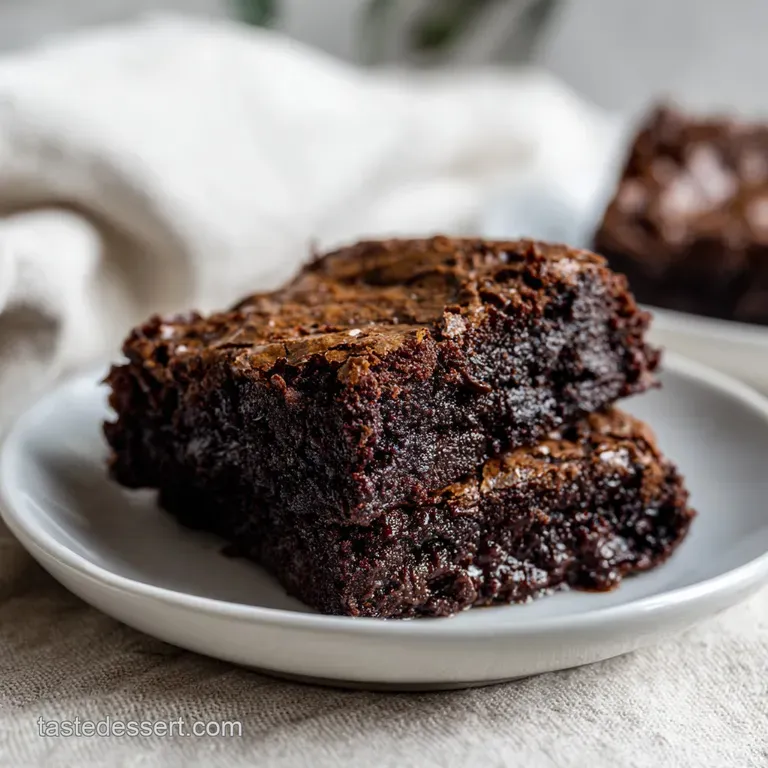
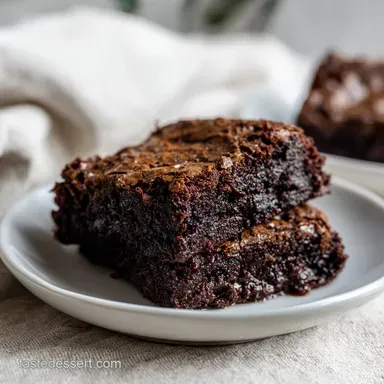
Fudgy Brookie Recipe: Decadent Brownie and Cookie Bars
- Time:20 minutes prep + 40 minutes baking = Total 60 minutes
- Flavor/Texture Hook: Fudgy, velvety brownie base topped with a golden, shatter crisp cookie crust.
- Perfect for: Family gatherings, holiday gift boxes, or a decadent weekend project.
- Mastering Essential Textures and Layers
- Selecting Your Perfect Dessert Specs
- Gathering Your Wonderful Baking Essentials
- Preparing Your Trusted Baking Arsenal
- Following the Joyful Baking Steps
- Correcting Common Baking Mishaps Quickly
- Exploring Variations and Clever Swaps
- Maintaining Freshness and Flavor Longer
- Presenting Your Treats with Love
- Recipe FAQs
- 📝 Recipe Card
Mastering Essential Textures and Layers
Understanding how these two layers interact is the key to achieving that professional look. It isn't just about throwing dough on top of batter, it’s about the physics of density and moisture.
- Density Contrast: The brownie base is heavier and wetter, providing a stable foundation that prevents the cookie dough from sinking to the bottom during the initial rise.
- Fat Temperature Control: Melted butter in the brownie creates a dense, fudgy crumb, while softened butter in the cookie layer traps air for a classic chewy lift.
- The Sugar Shell: High granulated sugar content in the brownie layer moves to the surface during baking, creating that iconic thin, crackly "skin" that we all love.
- Moisture Migration: The brownie layer acts as a humectant, keeping the bottom of the cookie layer soft while the top gets that wonderful golden crunch in the dry oven heat.
Melting Butter Texture Effects
Using melted butter (115g) for the brownie layer is a deliberate choice for those of us who love a dense, fudgy bite. When butter is melted, it loses the ability to hold air bubbles, which means the brownie won't rise like a cake. Instead, it stays rich and velvety.
I always suggest melting it slowly to avoid scorching those precious milk solids that add so much flavor.
Sugar Ratios Surface Cracks
The interaction between the 200g of granulated sugar and the eggs is what creates that beautiful, paper thin crust. By whisking them vigorously for at least 2 minutes, you’re creating a stable meringue like structure that rises and then dries out as it bakes.
This results in a delicate shatter when you finally bite into the bar.
Cocoa Bloom Flavor Science
When we add the 45g of unsweetened cocoa powder to the warm butter and sugar mixture, we are "blooming" the chocolate. The heat helps release the fat soluble flavor compounds within the cocoa, making the chocolate taste much more intense.
It’s a small step, but it’s the difference between a "good" brownie and a "wonderful" one.
| Thickness | Internal Temp | Rest Time | Visual Cue |
|---|---|---|---|
| 2.5 cm | 88°C | 60 minutes | Edges pull away slightly |
| 3.0 cm | 90°C | 90 minutes | Surface is matte and set |
| 2.0 cm | 85°C | 45 minutes | Center has a slight wobble |
Allowing the bars to rest is perhaps the hardest part of the whole process. However, that rest time is when the starches fully set and the fats solidify. If you cut into them too early, you'll end up with a delicious mess rather than a tidy square. Trust me, the wait is worth it for those clean, sharp edges.
Selecting Your Perfect Dessert Specs
When you are standing in your kitchen, the quality of your ingredients really does shine through in the final bake. I always reach for the best cocoa I can find because it’s the heart of the brownie layer.
| Component | Science Role | Pro Secret |
|---|---|---|
| Unsalted Butter | Provides fat for tenderness and carries flavor molecules. | Use European style butter for a higher fat content and richer mouthfeel. |
| Granulated Sugar | Humectant that keeps the base moist and creates the crackly top. | Whisk with eggs until the color turns pale to ensure a glossy finish. |
| Large Eggs | Emulsify the fats and provide the primary structure for the rise. | Always use room temperature eggs to prevent the melted butter from seizing. |
| All Purpose Flour | Provides the gluten network that holds the layers together. | Measure by weight (grams) to avoid a dry, crumbly, or "bready" texture. |
Choosing the right equipment is just as important as the ingredients themselves. While you can certainly mix things by hand, a good whisk and a sturdy spatula are your best friends here.
| Method | Time | Texture | Best For |
|---|---|---|---|
| Oven Bake | 40 minutes | Crispy top, fudgy core | Traditional texture and appearance |
| Stovetop Melt | 5 minutes | Smooth, liquid fat | Prepping the brownie base efficiently |
While the oven does the heavy lifting of baking, the stovetop is where the flavor journey begins. Melting the butter gently on the stove allows you to control the temperature perfectly, ensuring it's warm enough to bloom the cocoa but not so hot that it cooks the eggs on contact.
Gathering Your Wonderful Baking Essentials
Before we dive into the mixing, let's make sure everything is laid out on the counter. There is nothing worse than being mid whisk and realizing you're out of baking soda!
- 115g Unsalted Butter (Melted): Why this? Creates the fudgy, dense base required for the brownie layer.
- Substitute: 115g Coconut oil (refined) for a dairy-free alternative with a similar fat profile.
- 200g Granulated Sugar: Why this? Essential for that signature crackly brownie skin.
- Substitute: 200g Superfine sugar for a more delicate, uniform crust.
- 2 Large Eggs: Why this? Bind the ingredients and provide a slight, airy lift.
- Substitute: 1/2 cup Unsweetened applesauce (note: result will be much denser and more cake like).
- 1 tsp Vanilla Extract: Why this? Enhances the chocolate notes and adds a floral aroma.
- Substitute: 1 tsp Almond extract for a nutty, cherry like twist.
- 45g Unsweetened Cocoa Powder: Why this? The source of deep, dark chocolate flavor.
- Substitute: 45g Dutch processed cocoa for a darker, smoother, less acidic taste.
- 65g All Purpose Flour (Brownie): Why this? Gives the brownie just enough structure to hold its shape.
- Substitute: 65g 1 to-1 gluten-free flour blend.
- 1/4 tsp Salt (Brownie): Why this? Balances the sweetness and intensifies the cocoa.
- Substitute: 1/4 tsp Sea salt flakes for tiny bursts of flavor.
- 115g Unsalted Butter (Softened): Why this? Allows for creaming with sugar to aerate the cookie layer.
- Substitute: 115g Vegan butter sticks (high fat) for a dairy-free cookie.
- 100g Brown Sugar (Packed): Why this? Provides moisture and a deep molasses caramel undertone.
- Substitute: 100g Coconut sugar for a lower glycemic, earthy sweetness.
- 50g Granulated Sugar (Cookie): Why this? Helps the cookie edges become crisp and golden.
- Substitute: 50g Cane sugar for a slightly coarser texture.
- 1 Large Egg (Cookie): Why this? Adds moisture and richness to the dough.
- Substitute: 1 Flax egg (1 tbsp ground flax + 3 tbsp water).
- 160g All Purpose Flour (Cookie): Why this? The backbone of the cookie, providing a chewy bite.
- Substitute: 160g Oat flour (homemade) for a nuttier, slightly more fragile texture.
- 1/2 tsp Baking Soda: Why this? Reacts with brown sugar to lift the cookie layer.
- Substitute: 1.5 tsp Baking powder (note: result will be puffier, not chewy).
- 170g Semi Sweet Chocolate Chips: Why this? Provides pockets of melted chocolate throughout the top.
- Substitute: 170g Dark chocolate chunks for a more sophisticated, melting texture.
Preparing Your Trusted Baking Arsenal
You don't need a professional kitchen to make a wonderful batch of brookies, but a few specific tools will make your life so much easier. I always tell my friends to invest in a kitchen scale.
Measuring 115g of butter is much more accurate than trying to eyeball a "half cup," and in baking, accuracy is the path to success.
For the brownie layer, a medium sized glass or stainless steel bowl is fine. You’ll want a sturdy whisk to get that sugar and egg mixture pale and glossy. For the cookie dough, a hand mixer or a stand mixer (like a KitchenAid) is a real time saver when it comes to creaming the softened butter and sugars.
If you don't have one, a sturdy spatula and some elbow grease will work just as well think of it as a little pre dessert workout!
The most important tool, however, is your 9x9 inch square baking pan. I prefer metal pans because they conduct heat more evenly than glass. Glass can sometimes hold onto heat too long, which might lead to the edges of your brookies getting a bit too dark before the center is done. And don't forget the parchment paper!
Creating a "sling" by letting the paper hang over the edges is a trick I learned the hard way after too many ruined first squares.
Following the Joyful Baking Steps
- Preheat your oven to 175°C. Line a 9x9 inch square baking pan with parchment paper, leaving an overhang on two sides to create a sling. Note: This ensures you can lift the entire block out for easy slicing.
- Prepare the brownie layer: In a medium mixing bowl, whisk together the 115g melted butter and 200g granulated sugar until combined.
- Add 2 large eggs and 1 tsp vanilla to the butter mixture. Whisk vigorously for at least 2 minutes until the batter appears pale, smooth, and glossy. Note: This is the secret to the crackly top!
- Using a spatula, gently fold in the 45g sifted cocoa powder, 65g flour, and 1/4 tsp salt until just combined.
- Pour the brownie batter into the prepared pan and spread evenly.
- Prepare the cookie layer: In a separate bowl, cream the 115g softened butter with the 100g brown sugar and 50g granulated sugar until light and fluffy.
- Beat in the remaining large egg and 1 tsp vanilla extract.
- Stir in 160g flour, 1/2 tsp baking soda, and 1/4 tsp salt. Fold in the 170g chocolate chips until a soft dough forms.
- Drop spoonfuls of the cookie dough over the brownie batter. Use a spatula to gently press the dough into an even layer without swirling it into the base.
- Bake for 40 minutes. Allow the bars to cool completely in the pan before lifting the parchment sling and slicing into 24 bars. The surface should be matte and golden.
Correcting Common Baking Mishaps Quickly
Even with the best intentions, baking can sometimes throw us a curveball. But don't worry, almost every mistake is a learning opportunity in disguise. If your bars don't look exactly like the picture the first time, they will likely still taste wonderful!
Layer Blending Root Causes
If you find that your cookie dough has disappeared into the brownie layer, it usually means the brownie batter was too thin or the cookie dough was too warm. Next time, try chilling the brownie batter in the pan for 10 minutes before adding the cookie dough.
This creates a firmer surface for the dough to sit on.
Dry Brownie Texture Fixes
A dry or crumbly brownie layer is usually a sign of over baking or over measuring the flour. If you suspect your oven runs hot, start checking the bars at the 35 minute mark. You want a toothpick to come out with a few moist crumbs if it's bone dry, they've been in too long!
Uneven Baking Solution Guide
Sometimes the edges get hard while the center stays raw. This is common in ovens with hot spots. To fix this, rotate your pan 180 degrees halfway through the 40 minute baking time. This ensures every corner of that 9x9 pan gets equal love from the heating elements.
| Problem | Root Cause | Solution |
|---|---|---|
| Sunken Center | Underbaked or opened oven too soon. | Bake for full 40 minutes; don't peek before 30 minutes. |
| Greasy Surface | Butter was too hot when adding eggs. | Let melted butter cool to lukewarm (approx 40°C) before mixing. |
| Tough Texture | Overmixed the flour in the brownie. | Fold flour in by hand just until white streaks disappear. |
Common Mistakes Checklist
- ✓ Pat the butter wrapper inside the pan before lining with parchment (helps the paper stick).
- ✓ Sift your cocoa powder to ensure there are no bitter, dry lumps in the fudgy base.
- ✓ Use room temperature eggs so the fats in the batter stay emulsified and smooth.
- ✓ Resist the urge to cut the bars while warm; they need that hour to set their structure.
- ✓ Measure your flour using a scale (160g for cookies) rather than a measuring cup.
Exploring Variations and Clever Swaps
Once you have mastered this classic brookie recipe, the fun really begins! I love to treat the base recipe like a canvas. One of my favorite things to do is add a layer of creamy peanut butter between the brownie and the cookie. Just swirl about 1/2 cup of peanut butter over the brownie before adding the cookie dough.
It adds a salty, savory note that is just delightful.
If you are looking for something a bit more festive, you could try making a version of this with my butterscotch fudge chopped up and folded into the cookie layer instead of chocolate chips. The butterscotch adds a rich, toasted sugar flavor that pairs beautifully with the dark cocoa of the brownie.
Salty Element Addition Ideas
For those who love a "sweet and salty" combo, try sprinkling a tablespoon of coarse sea salt over the cookie dough right before it goes into the oven. The salt crystals won't melt, providing a sharp contrast to the 188 calories of sugar per serving.
You could also press some small pretzel twists into the top for an added crunch.
Peanut Butter Variation Tips
If you want to go full peanut butter, replace half of the softened butter in the cookie layer with 60g of creamy peanut butter. This will make the cookie layer a bit softer and more aromatic. It’s a wonderful twist for a birthday party or a school treat.
gluten-free Substitution Rules
Making this gluten-free is actually quite simple. Because brownies are naturally dense, a high-quality 1 to-1 gluten-free flour blend works remarkably well. In the cookie layer, you might find the dough is a bit more fragile, so I recommend letting the dough rest for 15 minutes before layering it onto the brownie to allow the rice flours to hydrate.
Maintaining Freshness and Flavor Longer
If you are baking for a smaller group, you might want to scale this recipe down. To make a half batch, use a loaf pan (approx 9x5 inches). You’ll need to beat one egg and use exactly half of it for the cookie layer, which is a bit of a trick but totally doable!
Reduce the baking time to about 28-30 minutes and keep a close eye on it.
Scaling up is even easier for a big party. You can double the ingredients and use a 9x13 inch baking pan. When doubling, I suggest keeping the salt and vanilla at 1.5x the original amount so they don't overpower the other flavors.
The bake time will usually increase by about 10-15 minutes, so plan for a total of 50-55 minutes in the oven.
Room Temperature Storage Guide
These brookies stay wonderful at room temperature for up to 4 days. I find they actually taste even better on day two once the flavors have had time to fully mingle. Keep them in an airtight container, but wait until they are completely cool before sealing the lid, otherwise, the condensation will make the cookie top soggy.
Freezer Preservation Method Details
Yes, you can absolutely freeze these! Wrap individual squares tightly in plastic wrap and then place them in a freezer safe bag. They will stay fresh for up to 3 months. When you’re ready for a treat, just let one thaw on the counter for 30 minutes, or give it a quick 15 second zap in the microwave for that "just baked" warmth.
Baking Myths "Overmixing the brownie makes it fudgier." Actually, the opposite is true. Overmixing develops gluten, which makes the brownie tough and bread like rather than velvety.
"You must use expensive chocolate chips." While high-quality chips are nice, standard semi sweet chips are engineered to hold their shape in the oven, which actually provides a better texture for these bars. "The oven temperature doesn't have to be exact." Baking is a science!
Even a 10 degree difference can change the way the sugars caramelize on the cookie top.
| Plating Level | Accessory | Technique | Result |
|---|---|---|---|
| Simple | Parchment Square | Cut into clean 2x2 inch squares. | Perfect for casual snacking. |
| Polished | White Ceramic | Dust with a light snowfall of powdered sugar. | Elegant for a tea party. |
| Restaurant | Warm Skillet | Top with vanilla bean ice cream and caramel. | A decadent, melting masterpiece. |
Presenting Your Treats with Love
When it comes to serving these, I believe the presentation should match the joy that went into making them. For a simple family night, I just pile them on a pretty wooden board in the center of the table and let everyone dig in. There is something so communal about sharing a stack of homemade treats.
If I'm serving these for a more formal occasion, I like to cut them into smaller, bite sized "tapas" style squares. It makes them feel a bit more refined. If you're looking for a different seasonal vibe entirely, you might consider serving these alongside a slice of homemade blueberry pie during a summer barbecue the tart berries provide a refreshing break from the rich chocolate.
Fancy Dessert Pairing Ideas
For a truly "restaurant style" experience, serve a warm brookie square with a dollop of crème fraîche instead of whipped cream. The slight tanginess of the crème fraîche cuts through the richness of the 10.4g of fat per serving, making it feel much lighter.
A drizzle of raspberry coulis on the plate adds a beautiful pop of color and a bit of acidity.
Sundae Service Presentation Style
If you want to go all out, turn these into a "Brookie Sundae." Place a warm square at the bottom of a glass bowl, add a massive scoop of vanilla ice cream, and top with toasted walnuts and a cherry. It’s the kind of dessert that makes memories.
I’ve served this at many graduation parties, and it is always the first thing to disappear!
Creating this brookie recipe is a journey of textures and tastes that brings so much warmth to a home. From the moment you whisk that first egg to the second you pull the golden tray out of the oven, it’s a process filled with love.
I hope these tips and tricks help you create something truly wonderful for your friends and family. Happy baking!

Recipe FAQs
Can you use brownie mix for brookies?
Yes, but the texture will differ. Using a pre-packaged mix often results in a more cake like crumb compared to the dense, fudgy base created by the official recipe's specific butter-to-cocoa ratio.
How to assemble a Brookie?
Spread the prepared brownie batter evenly into your parchment lined pan, then drop spoonfuls of cookie dough across the top. Gently press the dough into an even layer with a spatula, ensuring the two batters stay distinct rather than swirling them together.
Why are Trader Joe's brookies so good?
They excel by maintaining a high moisture brownie base paired with a high fat cookie crust. If you enjoyed mastering the fat ratio logic in this recipe, you can see how that same principle creates professional grade textures in other baked goods.
Is it true Snoop Dogg has a secret cookie recipe for this?
No, this is a common misconception. There is no specific celebrity recipe required; the success of this treat relies entirely on using the correct butter temperatures melted for the brownie and softened for the cookie to achieve the signature contrast.
How to prevent the brownie layer from becoming too dry?
Limit the bake time to exactly 40 minutes at 350°F (175°C). Removing the bars when the edges are set but the center remains slightly fudgy ensures the moisture stays trapped within the brownie base.
Can I use milk chocolate instead of semi sweet?
Yes, but the bars will be significantly sweeter. Because semi sweet chips provide a necessary bitterness to balance the granulated sugar, using milk chocolate may make the final product feel less balanced.
How to ensure the brownies slice cleanly?
Allow the bars to cool completely in the pan before slicing. If you cut into them while warm, the brownie base will be too soft to hold its structure, leading to messy, crumbly edges.
Homemade Fudgy Brookie Recipe
Ingredients:
Instructions:
Nutrition Facts:
| Calories | 206 kcal |
|---|---|
| Protein | 2.5 g |
| Fat | 10.4 g |
| Carbs | 27.2 g |
| Fiber | 1.1 g |
| Sugar | 18.8 g |
| Sodium | 72 mg |
