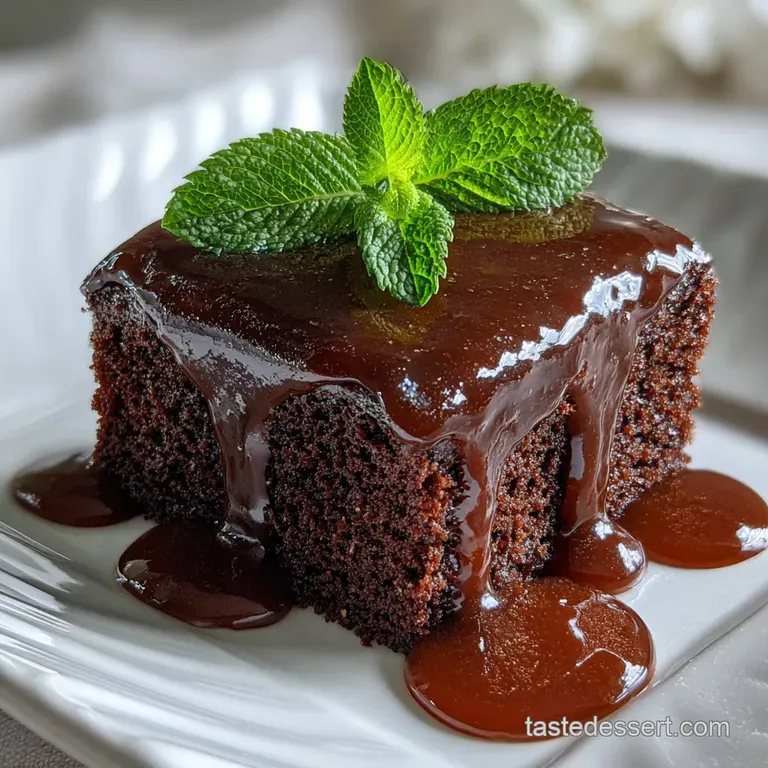
Hot Chocolate Poke Cake
- Time: Active 20 mins, Passive 30 mins, Total 50 mins
- Flavor/Texture Hook: Fudgy, velvety crumb paired with a light, airy cocoa topping
- Perfect for: Holiday gatherings, snowy weeknights, or beginner bakers wanting a "wow" factor
- Decoding the Decadent Hot Chocolate Poke Cake
- Essential Specs for This Delightful Cocoa Sweet
- Component Analysis for the Fudgy Cake Base
- Gathering Elements for Your Fudgy Cocoa Base
- Minimal Tools for Transforming Your Cake Base
- Mastering the Molten Chocolate Filling Process
- Professional Fixes for Common Poke Cake Errors
- Fun Flavor Variations for a Custom Winter Treat
- Keeping Your Fudgy Cake Velvety and Fresh
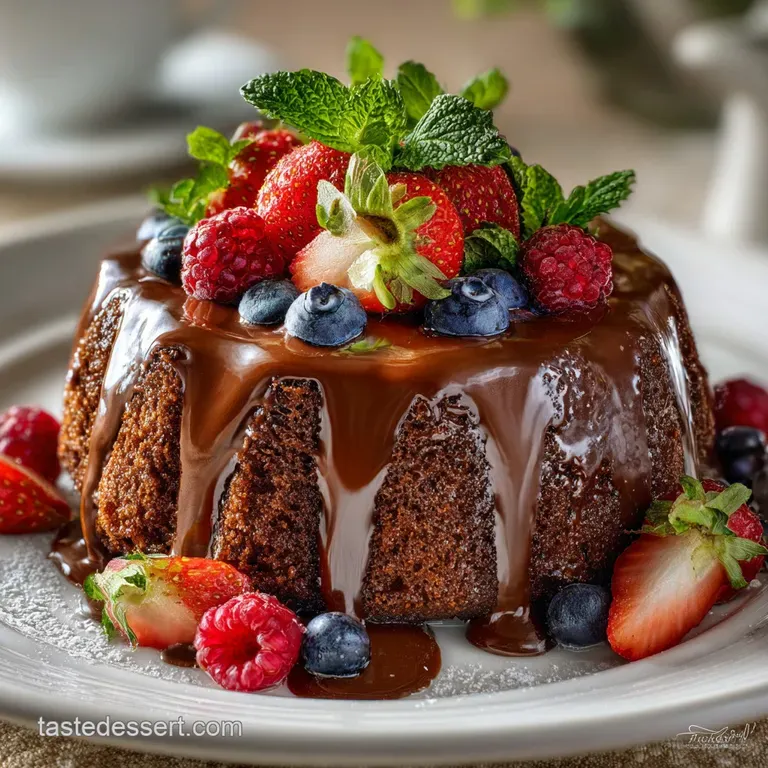
- Delightful Ways to Present Your Fudgy Winter Treat
- Recipe FAQs
- 📝 Recipe Card
Decoding the Decadent Hot Chocolate Poke Cake
The kitchen currently smells like a giant, liquid hug. You know that specific aroma when you rip open a packet of cocoa mix and the dust hits the air? Multiply that by ten and add the scent of a dark chocolate sponge cooling on the counter.
I first tried making this on a Tuesday when the rain wouldn't quit and I needed a win. I thought it would be just another box mix hack, but when the warm fudge hit those holes and disappeared into the cake, I knew I was onto something special.
Honestly, the best part isn't even the eating; it's the process. There is something oddly satisfying about poking holes in a perfectly smooth cake and then watching a thick, glossy river of fudge and condensed milk fill every single one.
We have all seen poke cakes that turn into a soggy, unappealing mess, but we are going to avoid that entirely. We want a cake that feels like a truffle, not a sponge soaked in water.
By the time you finish this, you will have a dessert that looks like it took hours but actually relies on smart shortcuts and a few kitchen tricks I learned the hard way. It’s all about the contrast between the dense, dark cake and that marshmallow infused cloud on top.
Let's get into why this works so well and how you can nail it on your first try.
Essential Specs for This Delightful Cocoa Sweet
- Science: Hygroscopic Saturation: The sweetened condensed milk and hot fudge act as humectants, drawing moisture into the cake crumb and preventing it from drying out even after days in the fridge.
- Science: Starch Retrogradation: Adding sour cream to the mix introduces extra fat and acidity, which interferes with the flour's starch network, ensuring the crumb remains tender rather than rubbery.
- Science: Emulsified Stability: The fat in the whole milk helps the hot chocolate mix dissolve smoothly into the topping, preventing a grainy texture on the tongue.
| Method | Prep Time | Texture Result | Best Use Case |
|---|---|---|---|
| Shortcut (This Recipe) | 20 mins | Fudgy and velvety | Busy weeknights or parties |
| Fully From Scratch | 55 mins | Denser, more "bready" | High end dinner parties |
| Cold Soak Method | 15 mins | Very wet, pudding like | Warm summer gatherings |
Selecting the right method depends on how much time you have and what texture you prefer. If you love a cake that feels like a solid brownie but eats like a cloud, this shortcut version is the sweet spot. It uses the structural integrity of a mix but transforms it with high fat additions. If you are looking for other ways to use cocoa, you might also love making a German Chocolate Cake recipe for a different kind of chocolate fix.
Component Analysis for the Fudgy Cake Base
| Ingredient | Science Role | Pro Secret |
|---|---|---|
| Sour Cream (1/2 cup) | Adds acidity to weaken gluten | Use full fat only for a velvety mouthfeel |
| Hot Fudge (12 oz) | Provides thick viscosity for "pockets" | Heat it for 15 seconds to ensure it flows into the holes |
| Condensed Milk (1/2 cup) | Acts as a glue to bind the crumb | Pour it while the cake is still slightly warm |
| Cocoa Powder (1 tsp) | Increases chocolate intensity | Sift it over the top at the very last second to avoid clumping |
I've tried making this with just milk instead of the condensed milk and fudge combo, and trust me, it’s a mistake. The cake just gets wet. You need the sugar and fat in the fudge to create that "truffle" texture we’re after. It's the same logic I use when I want to How to Bake recipe for that molten center.
Gathering Elements for Your Fudgy Cocoa Base
- 1 box (432g) Dark Chocolate or Devil's Food Cake Mix: This provides the structural foundation.
- 1 cup (240ml) Water: Standard hydration for the mix.
- 1/2 cup (120ml) Vegetable oil: Ensures a moist crumb that doesn't harden when cold.
- 3 Large eggs: Provides the lift and protein.
- 1/2 cup (120g) Sour cream: Why this? The fat and acid make the box mix taste like it's from a high end bakery.
- 1 jar (340g) Hot fudge topping: The "lava" that fills the holes.
- 1/2 cup (120ml) Sweetened condensed milk: Adds sweetness and a creamy, sticky texture.
- 1/4 cup (60ml) Whole milk: To thin the filling slightly so it reaches the bottom of the cake.
- 1 tub (226g) Thawed whipped topping: The base for our marshmallow cloud.
- 2 envelopes (42g each) Instant hot chocolate mix: Why this? It adds that nostalgic, malted cocoa flavor to the topping.
- 1 tsp Pure vanilla extract: Rounds out the chocolate notes.
- 1 cup (50g) Mini marshmallows: Essential for the "hot chocolate" visual and texture.
- 1/4 cup (45g) Mini semi sweet chocolate chips: For a little bit of crunch.
- 1 tsp Unsweetened cocoa powder: For the final dusting.
| Original Ingredient | Substitute | Why It Works |
|---|---|---|
| Vegetable Oil | Melted Butter | Adds a richer flavor but the cake may be firmer when refrigerated |
| Sour Cream | Plain Greek Yogurt | Similar acidity and moisture but slightly more tang |
| Whipped Topping | Stabilized Whipped Cream | Higher quality flavor but less stable if left at room temperature |
Minimal Tools for Transforming Your Cake Base
You really don't need a pantry full of gadgets for this. A standard 9x13 inch (23x33 cm) baking pan is your best friend here. I prefer metal because it conducts heat faster and gives the edges a slight "shatter" texture that contrasts beautifully with the soft middle.
You will also need a large mixing bowl and a sturdy whisk.
The most important tool, though, is the handle of a wooden spoon. Don't use a fork; the holes will be too small and the fudge will just sit on top. You want big, cavernous craters so the filling can really dive in.
A spatula is also helpful for folding the cocoa mix into the whipped topping without deflating all the air.
Mastering the Molten Chocolate Filling Process
- Preheat your oven to 175°C (350°F) and grease your 9x13 pan.
- Combine the cake mix, water, oil, eggs, and sour cream in a large bowl. Note: Whisk just until the large lumps disappear to avoid overworking the gluten.
- Pour the batter into the pan and bake for 30 mins until a toothpick comes out clean or with just a few moist crumbs.
- Cool the cake for exactly 10 minutes on a wire rack.
- Poke holes across the entire surface using the end of a wooden spoon, spaced about 2 cm apart.
- Whisk the hot fudge, condensed milk, and whole milk in a microwave safe bowl.
- Heat the mixture for 30 seconds and pour it over the cake, until every hole is filled to the brim.
- Chill the cake in the fridge for at least 1 hour until the fudge has set and the cake is cool to the touch.
- Fold the hot chocolate packets and vanilla into the whipped topping gently.
- Spread the topping over the cake and garnish with marshmallows, chips, and a dusting of cocoa.
Chef's Tip: Freeze your jar of hot fudge for 10 minutes before opening. It makes it easier to scoop into your mixing bowl without leaving half the jar behind.
Also, add a tiny pinch of espresso powder to the cake batter; it won't taste like coffee, but it makes the chocolate flavor much deeper.
Professional Fixes for Common Poke Cake Errors
The Problem of the Sinking Topping
If you find your whipped topping is turning into a puddle, it is usually because the cake was still too warm when you frosted it. The residual heat from the fudge filling travels upward and melts the fat in the topping. Always wait until the cake is completely cold.
If you are in a rush, 30 minutes in the freezer can save the day.
The Mystery of the Dry Bottom
Sometimes the fudge stays in the top half of the cake and never reaches the base. This happens if the holes are too narrow or the fudge mixture is too thick. You want those holes to be about the width of your pinky finger. If your fudge seems like paste, add an extra tablespoon of milk to help it flow.
| Problem | Root Cause | Solution |
|---|---|---|
| Soggy Crumb | Too much liquid filling | Measure the condensed milk carefully; don't eye ball it |
| Topping Slides Off | Cake was too warm | Chill for a full hour before adding the whipped layer |
| Marshmallows Get Hard | Exposed to air too long | Add the marshmallows right before serving for the best texture |
Common Mistakes Checklist
- ✓ Don't over mix the batter - stop as soon as the flour streaks vanish to keep it fluffy.
- ✓ Use a wooden spoon handle for holes, not a straw - straws are too flimsy.
- ✓ Ensure the whipped topping is fully thawed before mixing in the cocoa packets.
- ✓ Let the cake rest after pouring the fudge so the liquid can actually migrate into the crumb.
Fun Flavor Variations for a Custom Winter Treat
If you want to take this to the next level, there are a few ways to pivot. For a Mexican Hot Chocolate Poke Cake, add 1 teaspoon of ground cinnamon and a tiny dash of cayenne pepper to the cake mix. The heat from the pepper against the cold whipped topping is incredible.
If you are looking for a Health Conscious Swap, you can use a sugar-free cake mix and Greek yogurt in place of the sour cream. It won't be quite as decadent, but it hits the spot.
For a White Chocolate Version, use a vanilla cake mix and fill it with white chocolate ganache, then top with the same cocoa whipped topping for a "hot cocoa with extra cream" vibe.
- If you want a Salted Version: Sprinkle flaky sea salt over the fudge layer before adding the topping.
- If you want more crunch: Add toasted pecans or walnuts to the top along with the chocolate chips.
- If you want a Boozy Kick: Add a tablespoon of Irish cream liqueur to the condensed milk mixture.
Keeping Your Fudgy Cake Velvety and Fresh
Because this cake has dairy in the topping and the filling, it absolutely must stay in the fridge. It actually tastes better on day two because the flavors have had time to mingle. The fudge slowly migrates into the cake cells, making it almost like a chilled brownie.
- Storage: Keep in an airtight container in the fridge for up to 4 days.
- Freezing: You can freeze the baked cake (after the fudge soak but before the topping). Wrap tightly in plastic and foil for up to 2 months. Thaw in the fridge before adding the whipped topping.
- Zero Waste: If you have leftover cake scraps from the "poking" process, don't throw them away! Toss them in a bowl with a little extra whipped topping and some chocolate chips for a "chef's treat" trifle.
Delightful Ways to Present Your Fudgy Winter Treat
When it comes to serving, presentation is everything. Since this is a "Hot Chocolate" inspired cake, I love serving it in small bowls rather than on plates. It feels more cozy that way. If you want to go the extra mile, serve each slice with a small side of actual hot cocoa for the ultimate chocolate overload.
For a restaurant quality finish, use a kitchen torch to lightly toast the mini marshmallows on top right before serving. It gives them that campfire flavor that pairs so well with the dark chocolate. Just be careful not to melt the whipped topping!
A quick dusting of cocoa powder through a fine mesh sieve adds a professional look that hides any imperfections in the topping. Trust me, once your friends see the molten fudge ribbons inside, they will be asking for the recipe before they even finish their first bite.

Recipe FAQs
Can I use a different flavor cake mix for this recipe?
Yes, but devil's food or dark chocolate is best for the intended flavor. A yellow or vanilla cake mix will work structurally, but you'll lose the deep chocolate base that makes it taste like hot chocolate. For a different flavor profile, consider a recipe like our Ultimate Homemade Funfetti Cake Recipe Truly Moist.
What kind of holes should I poke in the cake?
Use the handle of a wooden spoon for large, cavernous holes. Avoid using a fork, as the holes will be too small and the filling won't penetrate the cake properly. You want generous openings for the fudge and condensed milk to soak in, creating that decadent, truffle like texture.
Why is my topping sinking or melting?
The cake was likely too warm when the topping was added. Residual heat from the fudge filling travels upwards and melts the fat in the whipped topping. Always ensure the cake is thoroughly chilled before spreading the whipped topping to prevent this.
My fudge filling isn't reaching the bottom of the cake, what's wrong?
Your holes might be too narrow, or the fudge mixture is too thick. Widen the holes created by your wooden spoon, aiming for about the width of your pinky finger. If the fudge seems paste like, add an extra tablespoon of milk to the mixture to improve its flow.
Can I make this cake ahead of time?
Yes, it actually tastes better the next day. The flavors meld, and the fudge continues to moisten the cake crumb, enhancing its texture. Store it in an airtight container in the refrigerator for up to 4 days.
How do I store leftovers of this poke cake?
Keep it refrigerated in an airtight container for up to 4 days. Because of the dairy in the filling and topping, it needs to stay cold to maintain its quality and prevent spoilage. The cake gets even more delicious as it chills.
Can I freeze this cake?
Yes, freeze the baked cake before adding the topping. Wrap the cake tightly in plastic wrap and then foil for up to 2 months. Thaw it in the refrigerator before you add the whipped topping and garnishes.
Hot Chocolate Poke Cake

Ingredients:
Instructions:
Nutrition Facts:
| Calories | 494 kcal |
|---|---|
| Protein | 5.6 g |
| Fat | 22.8 g |
| Carbs | 69.3 g |
| Fiber | 1.8 g |
| Sugar | 48.5 g |
| Sodium | 452 mg |
