Kool-Aid Candy Apples: Neon Marble Magic
- Making Vibrant Kool Aid Candy Apples
- Avoiding Common Sticky Candy Mistakes
- Critical Benchmarks for Success
- Ingredients for a Glossy Finish
- Essential Tools for Sugar Work
- Mastering the Marble Swirl Technique
- Fixing Common Coating Mistakes
- Scaling for Large Parties
- Flavor Swaps and Color Ideas
- Storing Your Candy Apples Safely
- Serving These Nostalgic Treats
- Kitchen Myths Debunked
- Recipe FAQs
- 📝 Recipe Card
Making Vibrant Kool Aid Candy Apples
There is something purely magical about the scent of bubbling sugar filling a kitchen, especially when it is paired with the nostalgic, fruity aroma of a freshly opened packet of drink mix. I remember the first time I tried making these.
I was aiming for that glass like finish you see at high end confectioneries, but I wanted that punchy, childhood flavor that only a specific colorful packet can provide. The result was a neon bright, tart and sweet masterpiece that had everyone at the party asking for the secret.
It's a quick win for any host because, despite their professional look, you only need about 20 minutes of prep and 15 minutes of active cooking to get them started.
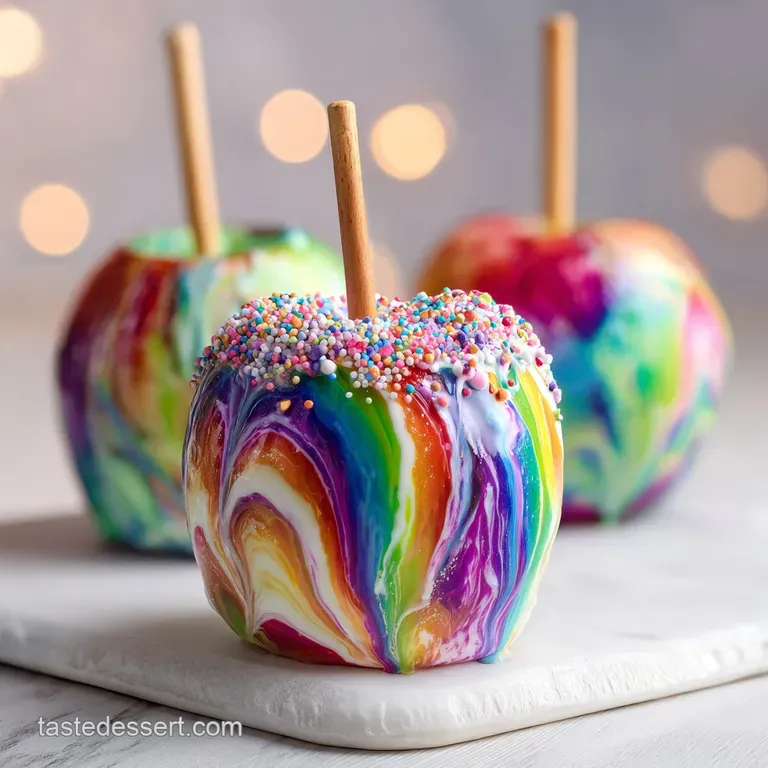
The payoff is an incredible sensory experience. You get that initial sharp "shatter" of the candy shell, followed by the crisp, cool juice of a tart apple. We are moving beyond the basic red cinnamon apples of the past and leaning into a world of electric blues, lime greens, and deep purples.
This recipe is all about achieving that velvety smooth marble swirl without the headache of sticky, soft candy that slides off the fruit. If you have ever struggled with candy coating before, don't worry, we are going to navigate the sugar temperatures together so you get a perfect result every single time.
This version is the ultimate crowd pleaser because it balances the heavy sweetness of the sugar with the citric acid found in the drink mix. It’s not just a candy apple, it is a flavor explosion that looks like it belongs in a boutique candy shop window.
Right then, let's get into why this method actually works and how you can avoid the common pitfalls that leave most home cooks with a sticky, grainy mess.
Avoiding Common Sticky Candy Mistakes
When we talk about candy making, we are really talking about managing crystals. If you just boil sugar and water, it often wants to turn back into a grainy solid. Most recipes fail because they don't use enough "interference" to keep the syrup smooth.
By adding light corn syrup, we are physically blocking those sugar crystals from joining back together. This ensures the coating stays clear and glass like instead of turning opaque and sandy as it cools.
Interference Method: Corn syrup acts as a liquid barrier that prevents sucrose from recrystallizing during the boiling process.
Hard Crack Precision: Reaching exactly 300°F to 310°F ensures all water has evaporated, leaving a brittle, non sticky shell.
Opaque Foundation: Using titanium dioxide (white food coloring) creates a "canvas" so the vibrant colors of the drink mix truly pop.
Surface Tension: Removing the natural wax from the apple skin allows the hot syrup to grip the fruit instead of sliding off.
| Method | Time | Texture | Best For |
|---|---|---|---|
| Traditional Syrup | 35 minutes | Shatter crisp | Classic parties |
| Shortcut (Microwave) | 12 minutes | Chewy/Softer | Quick snacks |
| Slow Cooker Dip | 2 hours | Thick/Tacky | Large batches |
Choosing the traditional stovetop method is vital for that signature crunch. While shortcuts exist, they rarely reach the precise "hard crack" stage required for a professional finish. If you are looking for other fun, fruit based snacks that don't require the stove, you might enjoy my KoolAid Grapes recipe which uses a similar flavor profile but in a cold, no bake format.
| Ingredient | Science Role | Pro Secret |
|---|---|---|
| Granulated Sugar | Structural Base | Use fresh sugar to avoid moisture clumps. |
| Light Corn Syrup | Crystal Inhibitor | Prevents the syrup from turning grainy or "sandy." |
| White Food Coloring | Color Opacifier | Provides the "pop" needed for neon colors. |
| Kool Aid Packets | Acid & Flavor | Adds citric acid which balances the sugar. |
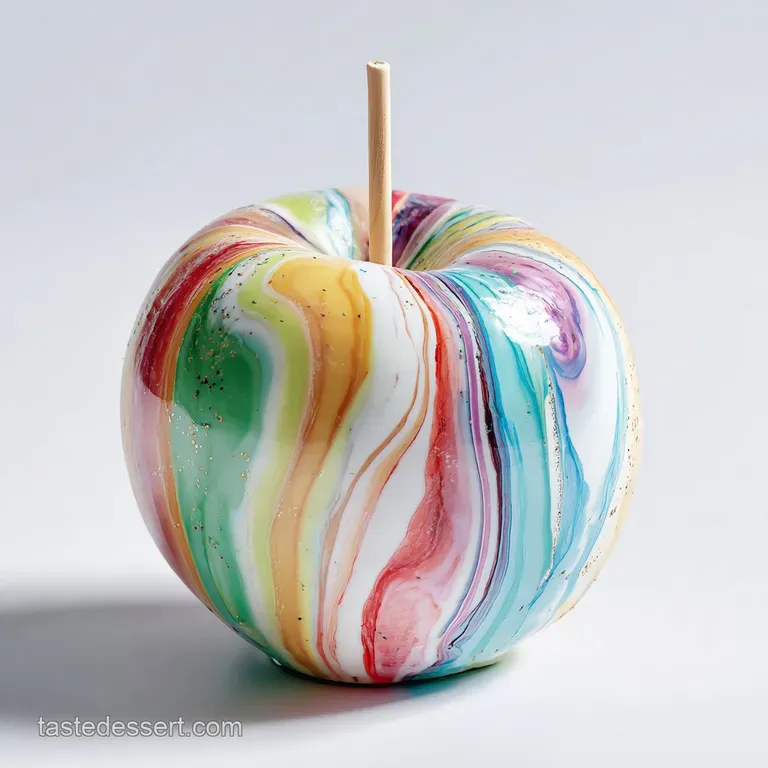
The combination of the white base and the concentrated pigments in the drink mix is what creates that high end, marbled look. Without the white base, the candy remains translucent, and the colors look muddy against the green of the apple.
Using a heavy bottomed pot is also a non negotiable here because it distributes heat evenly, preventing the sugar from scorching at the bottom while the top is still cool.
Critical Benchmarks for Success
When you are planning your day, keep in mind that these apples need a bit of "hanging out" time to fully set. While the active work is fast, the cooling period is where the magic happens. You want to make sure you have a clear workspace and all your tools ready before you even turn on the burner.
Sugar moves fast once it hits the right temperature, and you won't have time to go hunting for skewers or parchment paper once that syrup is ready.
- Prep Time:20 minutes
- Cook Time:15 minutes
- Total Time:35 minutes
- Yield: 7 servings
- Hard Crack Temp:300°F - 310°F
Ingredients for a Glossy Finish
You only need a few staples for this, but the quality of the apple matters just as much as the sugar. I always reach for Granny Smith apples because their tartness cuts through the sugar shell perfectly. Plus, they are sturdy enough to handle the heat of the boiling syrup without turning into mush on the inside.
- 7 medium Granny Smith apples: Firm, tart, and cold from the fridge.
Why this? They provide the perfect structural support and flavor contrast.
- Substitute: Honeycrisp apples (sweeter, but very crisp).
- 3 cups granulated white sugar: The main body of your candy.
Why this? It provides the clean sweetness needed for the flavor packets.
- Substitute: Beet sugar works identically.
- 0.5 cup light corn syrup: Essential for a smooth, glass like finish.
Why this? It prevents crystallization during the over high heat boiling phase.
- Substitute: Glucose syrup or honey (note: honey adds a strong flavor).
- 1 cup water: To dissolve the sugar.
Why this? It carries the heat evenly through the sugar crystals.
- Substitute: None, stick to filtered water.
- 2.5 packets unsweetened Kool Aid drink mix: For that punchy flavor and color.
Why this? It adds both the vibrant hue and the necessary acidity.
- Substitute: Concentrated candy flavoring plus gel colors.
- 0.5 tsp white food coloring (titanium dioxide): For the opaque base.
Why this? It makes the colors bright instead of see through.
- Substitute: White gel icing color (requires more for opacity).
- Gel food coloring (optional): To deepen the marble swirls.
Why this? It adds extra visual depth to the marbling.
- Substitute: Liquid coloring (use sparingly to avoid thinning the syrup).
Essential Tools for Sugar Work
You don't need a professional laboratory, but a few specific items will make your life significantly easier. I once tried making these without a proper thermometer and ended up with a batch of "sticky apples" that never hardened. Trust me, the right tools are the difference between a masterpiece and a disaster.
- Candy Thermometer: This is your most important ally. You need to see the exact moment you hit 300°F.
- Heavy Bottomed Saucepan: A thin pot will create hot spots, causing the sugar to burn.
- Thick Bamboo Skewers: These need to be strong enough to hold the weight of the apple and the heavy coating.
- Silicone Mat or Parchment: Don't use wax paper; the hot sugar will melt it. A greased silicone mat (like a Silpat) is the gold standard.
- Small Bowl of Hot Water: For the "wax removal" phase of the apple prep.
Mastering the Marble Swirl Technique
- Remove the wax from the apples by dipping them in very hot water for 5 seconds, then scrub them with a clean towel until they feel "squeaky." Note: If the wax stays on, the candy will slide right off the apple.
- Insert skewers firmly into the stem end of each apple, making sure they are centered and deep enough to be stable.
- Combine ingredients like sugar, corn syrup, and water in your saucepan and stir just once to moisten the sugar.
- Heat the mixture over medium high without stirring. Cook until the thermometer reads 300°F to 310°F.
- Stop the cooking by immediately removing the pan from the heat and letting it sit for 30 seconds. Wait until the bubbles subside to ensure a smooth finish without air pockets.
- Add the base by gently stirring in the white food coloring until the syrup is milky and opaque.
- Create the swirl by sprinkling the Kool Aid packets over the surface and using a toothpick to lightly marble the colors. Don't over mix or you'll just get one solid color.
- Dip each apple by tilting the pan and rotating the fruit quickly. Lift it out and let the excess drip for a few seconds.
- Set the apples on your greased mat and let them cool at room temperature for at least 45 minutes until they are hard and clicking.
Fixing Common Coating Mistakes
If you find that your candy is still soft after an hour, it usually means the temperature didn't quite get high enough. Sugar is fickle! On a humid day, you might even need to take the temp up to 310°F just to be safe.
If your candy starts hardening in the pot before you finish, you can briefly put it back on low heat to loosen it up, but be careful not to burn it.
Why Your Coating Is Bubbling
Tiny bubbles are usually caused by stirring the syrup too much after it has reached temperature or not letting it rest for those 30 seconds before dipping. When you stir, you incorporate air. Let the syrup go still and "quiet" before you dip your first apple.
| Problem | Root Cause | Solution |
|---|---|---|
| Sticky Coating | Temperature too low | Ensure thermometer reaches 300°F minimum. |
| Candy Sliding Off | Wax still on apple | Use hot water and vinegar to scrub the skin. |
| Grainy Texture | Stirred during boiling | Do not touch the syrup once it starts bubbling. |
Common Mistakes Checklist
- ✓ Ensure apples are completely dry before dipping; moisture causes the candy to repel.
- ✓ Check that your thermometer isn't touching the bottom of the pot (this gives a false high reading).
- ✓ Work quickly once the color is added, as the syrup thickens as it cools.
- ✓ Don't refrigerate the apples to set them; the humidity in the fridge will make them sticky.
Scaling for Large Parties
If you are making these for a big event, like a school bake sale or a large birthday party, you can double the recipe. However, I recommend working in batches rather than one massive pot.
A giant pot of molten sugar stays hot longer, which can actually lead to the sugar burning or becoming too thick to dip properly by the time you get to apple number twelve.
- Scaling Down
- You can halve this recipe easily for a small family treat. Use a smaller pot so the syrup is deep enough to dip the apples.
- Scaling Up
- Work in batches of 7 or 8 apples. Use 1.5x the flavoring for 2x the sugar to keep the flavor from becoming overwhelming.
- Baking/Heat
- If you are doubling, watch your temperature closely. Larger volumes of sugar take longer to reach the hard crack stage but can fly past 310°F very quickly once they get close.
Flavor Swaps and Color Ideas
This is where the nostalgia really kicks in. You can use any unsweetened drink mix flavor you like. Blue Raspberry gives a stunning electric blue, while Black Cherry creates a deep, moody red. For a Halloween twist, try using Orange flavor and then drizzling with a little melted dark chocolate once the candy has set.
If you want a "Sour Patch" style apple, you can actually roll the apple in a mixture of sugar and extra citric acid immediately after dipping, while the candy is still slightly tacky. This adds an extra layer of zing that people absolutely love. For a more sophisticated palate, I sometimes serve these alongside my Southern Fried Apples for a "textures of apple" dessert board.
Storing Your Candy Apples Safely
Storage: These are best eaten within 24 hours. Keep them at room temperature in a cool, dry place. Do not put them in the refrigerator! The moisture in the fridge will break down the sugar, leaving you with a puddle of syrup.
If you must store them longer, wrap them individually in cellophane bags and tie them tightly to keep air out. They will stay crisp for about 2 to 3 days this way.
Zero Waste: If you have leftover candy syrup in the pot, don't throw it out! Pour it onto a piece of parchment paper, let it harden, and then break it into "shards." These make beautiful decorations for cupcakes or can be eaten as hard candy drops.
To clean the pot, simply fill it with water and bring it to a boil; the hardened sugar will dissolve right into the water.
Serving These Nostalgic Treats
When it's time to serve, I like to present these on a clean white platter to make the colors pop. Since they are quite large and the candy is hard, providing a sharp knife to slice them into wedges is often appreciated by guests.
It makes them much easier to eat and allows people to see that beautiful contrast between the neon shell and the white apple flesh.
For a cozy evening, these pair beautifully with a warm dessert. You could even serve them as a vibrant topper for Easy Baked Apples if you are feeling extra indulgent.
Kitchen Myths Debunked
One big myth is that you can't make candy apples on a rainy day. While humidity does make the process more difficult, it isn't impossible. You just have to be more diligent about your temperature. Aim for the higher end of the range (310°F) to ensure the sugar is as dehydrated as possible.
Another misconception is that you can use any old food coloring. While gel colors work for the swirl, you absolutely need that white base (titanium dioxide) if you want the "Kool Aid" colors to look like the ones in the photos.
Without the white, the green of the Granny Smith apple will shine through, turning your beautiful blue raspberry apple into a muddy teal.
Finally, don't believe the "cold water test" is enough if you are a beginner. While experienced candy makers can tell the "hard crack" stage by dropping syrup into cold water, a thermometer is much more reliable and prevents the heartbreak of a failed batch.
Stick to the numbers, and you will have perfect, shattered glass apples every time.

Recipe FAQs
Do you use wax paper or parchment paper for candy apples?
Use parchment paper or a silicone mat. Either surface prevents the hot sugar from sticking permanently, ensuring you can lift the apples cleanly once they reach the hard crack stage.
Do you have to boil apples before making candy apples?
No, you must never boil the fruit itself. Instead, strip the natural wax from the raw apples using hot water or a vinegar water solution, then dry them thoroughly so the candy coating adheres properly.
Why did my candy apple not harden?
You likely did not reach the hard crack stage. If the temperature remains below 300°F, the sugar mixture will stay sticky rather than setting into a crisp, glassy shell.
Do you need to add sugar to Kool Aid?
No, the sugar comes from the syrup base. You only use the unsweetened Kool Aid packets for concentrated flavor and color, which you swirl into the cooked sugar corn syrup mixture.
How to ensure the candy coating stays smooth?
Let the syrup sit for 30 seconds after removing it from the heat. This brief pause allows bubbles to subside, creating a smooth finish. If you mastered this texture control technique here, you can apply similar logic to achieve the perfect bite in other candy projects.
How to prevent the candy apples from becoming sticky after cooling?
Keep them at room temperature in a dry area. Never place them in the refrigerator, as the excess humidity will break down the hardened sugar and turn your crisp coating into a sticky puddle.
Is it true I should stir the sugar mixture constantly while boiling?
No, this is a common misconception. You should only stir once to combine the ingredients before heating, then leave the pot undisturbed until it reaches 300°F to prevent the sugar from crystallizing.
Kool Aid Candy Apples
Ingredients:
Instructions:
Nutrition Facts:
| Calories | 488 kcal |
|---|---|
| Protein | 0.5 g |
| Fat | 0.3 g |
| Carbs | 127.8 g |
| Fiber | 4.1 g |
| Sugar | 121.1 g |
| Sodium | 18 mg |
