Mini Pumpkin Pies the Best Individual Spiced Dessert for Fall Parties

- Why Mini Pumpkin Pies Reign Supreme This Autumn
- The Joy of Single and Serve: Introducing Our Mini Pumpkin Pies
- Gathering Your Autumnal Baking Arsenal
- Baking Mastery: From Dough Prep to Golden Brown Finish
- The Step and by-Step Journey to Perfecting Mini Pumpkin Pies
- Expert Tips and Troubleshooting for Holiday Baking Success
- Forward Planning: Storage, Freezing, and Make and Ahead Options
- Recipe FAQs
- 📝 Recipe Card
Why Mini Pumpkin Pies Reign Supreme This Autumn
I know, I know. Thanksgiving is coming (or maybe it’s just a Tuesday in October), and you feel the pull toward that enormous, classic 9 inch pumpkin pie. You buy the canned filling, you make the crust, you bake it, and it smells heavenly. But then you go to slice it. That’s where the drama starts, right?
You get that messy, broken slice of pie, the edges crumble, and the beautiful creamy filling just kind of flops over.
Forget that noise. We are ditching the palaver this year. I discovered the glory of Mini Pumpkin Pies a few years back, and honestly, they are the only way to go when you’re baking for a crowd (or even just yourself no judgment).
They offer everything you love about the original: that incredible, heady blend of cinnamon, ginger, and nutmeg, that smooth custard texture, and that buttery, flaky base. But they arrive in perfect, individual servings. No messy slicing required. It’s brilliant.
The Joy of Single and Serve: Introducing Our Mini Pumpkin Pies
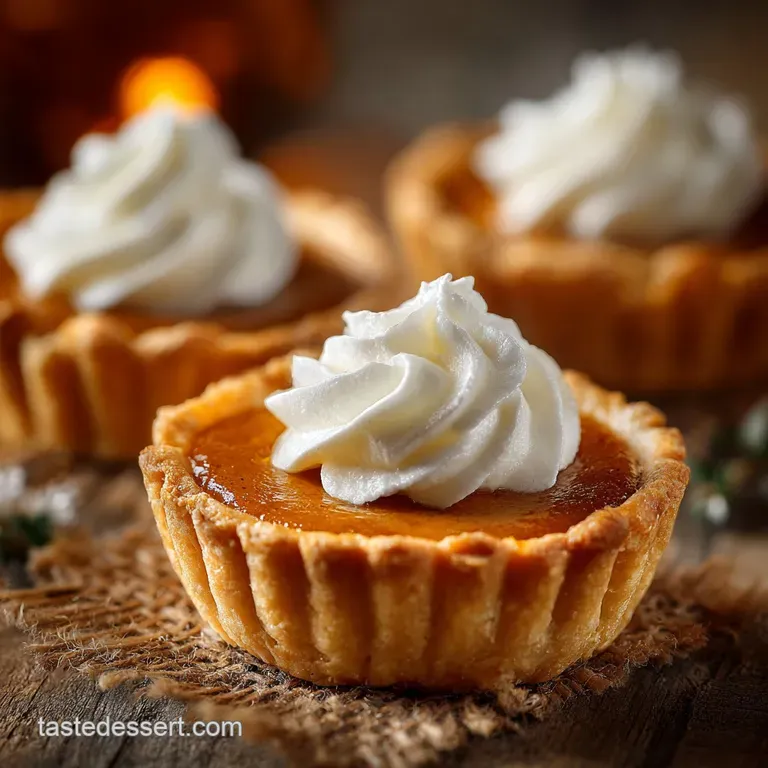
These little beauties are what I call the "dessert solution." Whether you’re hosting a sophisticated fall gathering, or just want a small, cozy treat without committing to an entire cake, these Mini Pumpkin Pies are your friend. We aren't making some fiddly, overly complicated version either.
This is the easy mini pumpkin pie recipe that uses a standard muffin tin to deliver the goods. They look utterly adorable on a platter, and the best part? The ratio of crisp crust to creamy filling is spot on every single time.
Solving the Slicing Dilemma: Portion Control Perfection
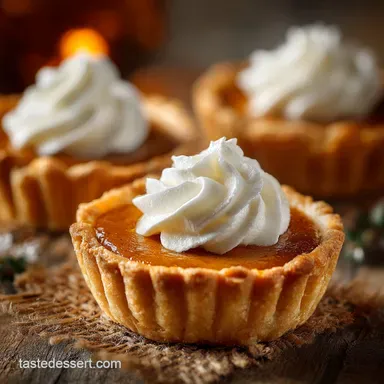
If you’ve ever tried to transport a full pumpkin pie, you know the stress. These individual mini pumpkin pies, however, are sturdy. Once cooled and set, they pop right out of the muffin tin, ready to be arranged. For holiday gatherings or just an autumn dessert buffet, individual desserts are always a winner.
People love grabbing their own personal treat. It keeps things clean, it keeps things organized, and frankly, it just looks more polished.
Unlocking the Deepest Autumnal Spice Profile
You can’t just throw in some "pumpkin pie spice" and call it a day, okay? We are building flavour here. To achieve that deep, warm, slightly spicy profile that tastes like crunchy leaves and crackling fires, you need to measure out the individual spices.
Using a combination of dark brown sugar with a mix of fresh cinnamon, pungent ginger, and just a hint of cloves and nutmeg creates a custard filling that is rich, dark, and almost caramelized. Trust me, it makes a huge difference compared to those lackluster, store and bought spice blends.
We want people saying, "Wow, what spice is in this?" not "Oh, it's pie."
Gathering Your Autumnal Baking Arsenal
Right then, let's crack on with the ingredients. I’ve included the recipe for a stellar shortcrust pastry, but I’m also giving you permission to grab pre and made if you need a Mini Pumpkin Pie Recipe Easy button. I get it. Life happens.
The Crucial Role of Pumpkin Puree vs. Pie Mix
Listen up, this is where I once messed up big time. When you are buying your can, you MUST get 100% pure pumpkin purée . It will say so right on the label.
Do not buy the can labeled "Pumpkin Pie Mix" or "Filling." That stuff already has sugar, spices, and sometimes dairy in it, and we want full control over our flavours and texture.
If you use the filling mix, your pies will likely be overly sweet and might not set correctly because of the different liquid ratios. Check the label twice, please!
Mastering the Buttery Crust: Pre and Made vs. Scratch Options
If you’re going the scratch route (good on you!), remember the rules of buttery shortcrust: keep the butter ice and cold, and handle the dough as little as possible. The minute you overwork it or let it get warm, you kill the potential flakiness.
If you opt for pre and made dough (which is a great time and saver for making mini pumpkin pies for a crowd), let it sit out of the fridge for about 10 minutes before rolling it out so it doesn't tear when you cut the rounds.
Specialized Tools for Handling the Mini Pie Format
While you don't need industrial equipment, a few items make the job a doddle. The crucial tool is the standard 12 cup muffin tin . A 4 inch (10 cm) round cutter is perfect for sizing the pastry shells for the tin cups.
If you don't have a specific cutter, just grab a bowl or a drinking glass that has a similar diameter. And don't forget the pie weights (or dried beans/rice). They are absolutely non and negotiable for blind baking these tiny shells. No soggy bottoms here!
Related Recipes Worth Trying
- Thanksgiving Cake Pops Decadent Pumpkin Spice Treats for Your Holiday — Thanksgiving Cake Pops are the perfect elegant finale to your holiday buffet Our Easy Thanksgiving Cake Pops Recipe uses rich pumpkin spice and cream cheese...
- Apple Crisp Mini Cheesecakes Easy Recipe for the Perfect Fall Treat — Apple Crisp Mini Cheesecakes are the perfect individual fall dessert Get the easy recipe for these mini apple cheesecakes featuring a crispy oat topping
- Mini Beef Wellington Bites Elegant Appetizers with Flaky Puff Pastry — Mini Beef Wellington Bites are the ultimate luxurious appetizers Learn the secrets to crispy pastry and perfect duxelles for these elegant dinner party food...
Baking Mastery: From Dough Prep to Golden Brown Finish
The timeline for these mini pies is tight, but totally manageable. The longest stretch is the dough chilling (which you cannot skip!). Once the dough is properly rested, rolled, and nestled into the muffin tin, we move into the crucial step: pre and baking. Think of the crust as a fortress.
You need to bake it until it’s strong enough to withstand the creamy, wet filling without getting waterlogged. We bake the shells first until they are dry and slightly golden, then we fill them up with the custard, and finish the baking quickly.
The final bake is relatively quick, only about 20 minutes. Keep an eye on the clock; this is not the time for multitasking.
The Step and by-Step Journey to Perfecting Mini Pumpkin Pies
Blind Baking the Shells for a Crispy Foundation
This step is the difference between a sad, soggy base and a crisp, buttery base. After fitting the cold pastry into the muffin tin cups and pricking the bottoms (that's called docking), you need to line them.
Cut small squares of parchment paper you only need enough to cover the base and sides and fill them up with your pie weights. Bake at a higher temperature (375°F/190°C) for the initial bake. Then, remove the weights and bake for a few extra minutes until the base looks dry.
This process seals the pastry and prevents the steam from the filling making the crust mushy later.
Achieving the Silkiest, Crack and Free Custard Filling
The key to a silky filling is using an extra egg yolk. That little bit of extra fat and emulsifier makes the texture unbelievably smooth. When mixing the filling, whisk gently but thoroughly until everything is combined and the brown sugar is dissolved. Don’t introduce too much air, though.
Too much air, coupled with overbaking, is the primary cause of those frustrating cracks on top of the mini pumpkin pies. Once mixed, pour the filling straight into the warm (but not hot) shells.
Identifying the Exact Moment the Mini Pies Are Done
This is the second most crucial step after the blind bake. You are aiming for a set edge but a wobbly centre. After about 18 minutes in the 350°F (175°C) oven, gently nudge the muffin tin.
The filling right near the crust should look completely set and firm, but the very centre of the custard should still have a slight, delicate jiggle, like unset pudding. If it’s totally firm all the way across, it’s already overbaked. Pull them out immediately.
The Critical Cooling Phase: Preventing Collapse
As tempting as it is to dive right in, cooling is essential for structure. If you try to take the pies out immediately, they will definitely collapse. The residual heat finishes cooking the custard, and the cooling process allows the protein structures in the egg to lock into place.
Leave the mini pies in the tin on a wire rack for at least 30 minutes, ideally an hour, before attempting to remove them. Use a small offset spatula or butter knife to gently loosen the edges before popping them out.
Expert Tips and Troubleshooting for Holiday Baking Success
Here are a few nuggets of wisdom I’ve picked up over the years of making Thanksgiving desserts mini pumpkin pie style:
- Prep the Dough Early: Make the pastry dough up to two days in advance. Store it tightly wrapped in the fridge. This makes the day and of baking so much easier.
- Don't Skimp on Spice: If your spices are old (more than six months), toss them. They lose potency fast. Fresh spices are the key to unlocking that powerful autumn flavour.
- The Muffin Tin Release: For super easy release, spray your muffin tin lightly with nonstick spray even if you're using butter and rich pastry. It just gives you peace of mind.
- Serving Temperature: While often served cold, I prefer mini pumpkin pies served slightly chilled, maybe only 10 minutes out of the fridge. The spices really sing at that temperature.
Forward Planning: Storage, Freezing, and Make and Ahead Options
One of the best things about these mini pumpkin pies for fall is how well they keep. Once completely cooled, they can be stored in an airtight container in the refrigerator for up to 4 days. If you want to get way ahead of the holiday chaos, you can definitely freeze them.
Adapting the Recipe: Alternative Crust and Topping Ideas
If you need a shortcut, a quick graham cracker crust works beautifully for mini pumpkin pies in a muffin tin. Simply mix crushed graham crackers with melted butter and sugar, press it firmly into the cups (no blind baking required), and proceed with the filling.
Or, for a darker flavour, switch to a gingersnap crust.
For toppings, skip the canned whipped cream. Make some fresh whipped cream and maybe add a tiny splash of maple syrup or bourbon to it before whipping. It’s simple, but it makes the final presentation and flavour incredible.
Troubleshooting Common Mini Pie Mishaps (Cracking or Soggy Bottoms)
If your filling cracks, you overbaked it, or you cooled it too fast (sudden temperature changes are the enemy of custard). If it cracks, don't panic! Cover the evidence with a hefty dollop of whipped cream. Nobody will ever know.
Crucial Warning: If your pie crust is soggy, you did not blind bake long enough or at a high enough temperature. Make sure the crust base is dry to the touch before pouring in the filling. If you skip blind baking entirely, soggy bottoms are almost guaranteed.
Calculating Nutrition and Serving Sizes
I find 12 mini pies is the perfect batch size. It means everyone gets one perfectly sized portion, which is great for Thanksgiving Desserts Mini Pumpkin Pie style. The estimated nutritional info is rough, but helpful for planning purposes.
Frequently Asked Questions About Mini Pumpkin Pie Preparation
| Question | My Real and World Answer |
|---|---|
| Can I use fresh pumpkin? | Yes, but drain it really well first. Canned purée is drier and more consistent, honestly. |
| How do I prevent shrinking crust? | Make sure your dough is deeply chilled, and always rest the cut rounds in the fridge for 15 minutes before baking. |
| Can I make these dairy and free? | Yes, substitute heavy cream with full and fat coconut milk (the thick cream layer only) for a creamy, dairy and free result. |

Recipe FAQs
Recipe mini pumpkin pies
Achieving a flaky, non-soggy crust is paramount for these miniature treats. Ensure your shortcrust pastry is deeply chilled before forming the shells, and always blind bake properly use pie weights or dried beans right up to the crimped edge to prevent the sides from collapsing.
For successful make-ahead preparation, fully baked and cooled mini pies can be stored airtight at room temperature for up to two days, or refrigerated for up to four. If substituting the brown sugar, use an equal weight of maple sugar to introduce a further layer of autumnal complexity.
Mini pumpkin pies to buy
Ensure your shortcrust pastry shells are fully blind baked and lightly golden before adding the wet pumpkin filling to guarantee a crisp, non-soggy base. For a beautifully golden crust, brush the exposed edges with an egg wash before the final bake.
To prevent cracking, remove the pies from the oven when the filling edges are set but the center still barely jiggles, allowing them to cool completely at room temperature. These individual treats can be stored tightly covered in the refrigerator for up to three days.
Mini pumpkin pies near me
Achieving a perfectly crisp crust requires fully blind baking your chilled shortcrust pastry shells until golden before adding the wet pumpkin filling. Once baked and cooled completely, these delightful treats store beautifully in an airtight container at room temperature for up to two days.
If you need a dairy-free option, substitute the heavy cream with full fat coconut milk (canned, unsweetened) for a remarkably smooth texture.
Mini pumpkin pies with graham cracker crust
To ensure your delicate mini crusts remain perfectly crisp, fully blind bake the pastry shells until lightly golden before adding the filling. For a robust moisture barrier, brush the cooled, blind baked shells with a thin egg white wash and bake for one minute prior to filling them with the pumpkin mixture.
Store leftover baked pies covered in the refrigerator for up to three days.
Mini Pumpkin Pies Recipe Easy
Ingredients:
Instructions:
Nutrition Facts:
| Calories | 678 kcal |
|---|---|
| Protein | 3.7 g |
| Fat | 40.5 g |
| Carbs | 74.8 g |
