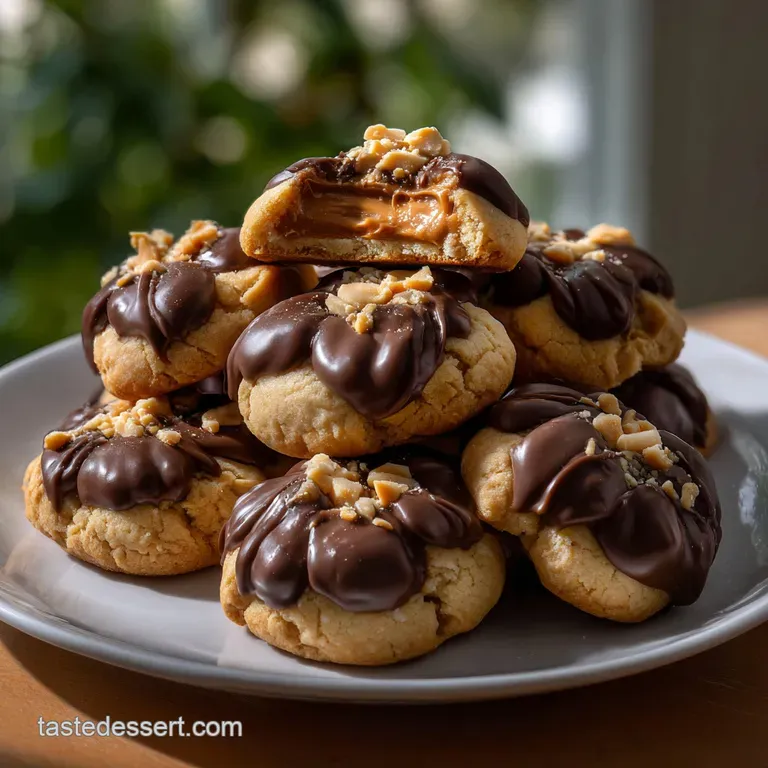
Peanut Butter Blossom Cookies | the Ultimate Recipe
- Effort/Time: 30 minutes total (High-efficiency prep)
- Flavor Hook: Salty-sweet umami with a concentrated cocoa finish
- Perfect for: Holiday-platters, grab-and-go gifting, and nostalgic-snacking
- Thermal Adhesion and the Science of Moisture Migration
- Dimensional Analysis and Yield Parameters for Success
- Molecular Synergy: Selecting High-Performance Elements for Better Baking
- Thermal Mass Control and Precision Baking Apparatus
- The Sequential Protocol for Structural Integrity and Flavor
- Correcting Structural Failures and Thermal Irregularities
- Flavor Architecture and Ingredient Swap Dynamics
- ⚗️ The Scaling Lab: The Physics of Quantity
- Preserving Shelf Stability and Maintaining Moisture Levels
- Aesthetic Presentation and Complementary Flavor Pairings
- Recipe FAQs
- 📝 Recipe Card
Master the Ultimate peanut butter blossom cookies for Shattering Texture
There is nothing more frustrating than spending an hour in the kitchen only to have your chocolate kisses slump into a muddy, unappealing puddle the moment they touch the dough. This common failure isn't just a cosmetic issue; it represents a total breakdown of thermal management that ruins the contrast between the soft crumb and the snap of the chocolate.
When the cookie base lacks the structural integrity to support the candy, the entire sensory experience of these peanut butter blossom cookies is lost to a messy, one-note texture.
I remember my first attempt at this classic where I rushed the cooling process, thinking I could "cheat" the physics of residual heat. I pressed the chocolates into the cookies immediately after pulling the tray from the oven, and within seconds, the cocoa butter reached its melting point, losing its iconic shape entirely.
It was a humbling lesson in patience and heat transfer. I realized that baking isn't just about following a list of quantities; it’s about managing the "carryover cooking" and the temperature delta between the dough and the topping when making peanut butter blossom cookies.
The secret to a Masterclass level result is achieving the "thermal adhesion window." This is the precise moment when the cookie is firm enough to resist the weight of the chocolate but warm enough to slightly melt the very bottom of the kiss, creating a permanent bond.
By understanding the hydration of all-purpose flour and the aeration of fats, we can create a peanut butter blossom cookies recipe that yields a tender, melt-in-the-mouth texture that stays stable for days. The consistency of these peanut butter blossom cookies is unmatched.
Thermal Adhesion and the Science of Moisture Migration
Success in this recipe relies on several key scientific principles that govern how fats and sugars interact under heat.
- Aeration and Leavening: Creaming the Land O'Lakes Unsalted Butter with sugars incorporates micro air pockets that expand during baking, creating a tender, leavened crumb.
- Invert Sugar Interaction: The molasses in the Domino Light Brown Sugar acts as a humectant, pulling moisture from the air to ensure the cookies remain soft rather than brittle.
- Protein Coagulation: The egg provides the necessary structure, with proteins denaturing at 144°F to set the cookie's final shape.
- Starch Gelatinization: As the Gold Medal All-Purpose Flour reaches 150°F, starch granules absorb liquid and swell, providing the "chewy" framework.
- Maillard Reaction: The combination of proteins in the peanut butter and the sugars creates a complex browning effect that develops deep, nutty aromatic compounds essential for great peanut butter blossom cookies.
Dimensional Analysis and Yield Parameters for Success
To achieve professional consistency, adhere to these technical specifications. Precision in measurement, particularly when using a digital scale, ensures that every one of the 36 cookies performs identically in the oven. If you enjoy the nutty profile of this bake, you might also find the creamy texture of a homemade Peanut Milk recipe to be a fascinating study in legume based emulsions.
- Yield: 36 cookies
- Prep Time: 20 minutes
- Cook Time: 10 minutes
- Total Time: 30 minutes
- Serving Size: 1 cookie (Approx. 32g)
Molecular Synergy: Selecting High Performance Elements for Better Baking
Selecting the right components for peanut butter blossom cookies is less about "shopping" and more about "engineering" a flavor profile.
| Ingredient | Chemical/Physical Role (Science) | The Pro Secret (Why This Matters) |
|---|---|---|
| Creamy Peanut Butter | Fat-to-protein emulsion stability | High oil content ensures a velvety mouthfeel and prevents dry crumbling. |
| Light Brown Sugar | Humectant driven hydration | Molasses acidity reacts with baking soda for a localized CO2 boost. |
| Baking Soda | Chemical leavening & pH adjustment | Increases alkalinity to accelerate the Maillard reaction for better browning. |
| Kosher Salt | Ionic flavor enhancement | Sharp crystals cut through the dense fat of the peanut butter to highlight vanilla notes. |
- 1/2 cup (113g) Land O'Lakes Unsalted Butter, softened: Why this? Provides the fat base for aeration; unsalted allows for precise sodium control. (Substitute: Salted butter; reduce added kosher salt by 1/4 tsp).
- 1/2 cup (125g) Jif Creamy Peanut Butter: Why this? Standardized emulsions in commercial brands prevent oil separation during the bake. (Substitute: Almond butter; results in a grittier texture and less "spread").
- 1/2 cup (100g) Granulated White Sugar: Why this? Sharp edges assist in mechanical aeration during the creaming stage. (Substitute: Cane sugar; adds a slight earthy note).
- 1/2 cup (100g) Domino Light Brown Sugar, packed: Why this? Moisture retention through humectant properties. (Substitute: Dark brown sugar; increases acidity and deepens caramel notes).
- 1 Large Egg (50g), room temperature: Provides emulsifiers (lecithin) and structural proteins.
- 1 tsp (5ml) Pure Vanilla Extract: Alcohol based aromatic carrier.
- 2 tbsp (30ml) Whole Milk: Why this? Adds liquid for gluten hydration without increasing fat-solids excessively. (Substitute: Heavy cream; creates a richer, denser crumb).
- 1 1/2 cups (190g) Gold Medal All-Purpose Flour: Provides the gluten network necessary for shape. (Substitute: 1:1 gluten-free flour blend; may require 5 mins extra resting for hydration).
- 1 tsp (5g) Arm & Hammer Baking Soda: The primary leavening agent.
- 1/2 tsp (3g) Diamond Crystal Kosher Salt: Enhances the perception of sweetness and nuttiness.
- 1/3 cup (65g) Granulated Sugar: For external coating/rolling.
- 36 Hershey’s Kisses, unwrapped: The chocolate "blossom" core.
Thermal Mass Control and Precision Baking Apparatus
- KitchenAid Stand Mixer: Necessary for high speed aeration of the butter and sugar matrix.
- USA Pan Half Sheet Pan: Heavy gauge aluminized steel provides even heat distribution to prevent burnt bottoms.
- Silpat Silicone Baking Mat: Reduces direct contact with the metal, slowing heat transfer for a softer edge.
- #40 Cookie Scoop: Ensures a consistent 1.5 tablespoon volume for uniform baking.
- Wire Cooling Rack: Allows air circulation underneath to prevent steam from softening the base after baking.
The Sequential Protocol for Structural Integrity and Flavor
- Preheat the oven to 375°F (190°C) until the internal thermometer stabilizes.
- Cream the 113g butter, 125g peanut butter, and both 100g sugars for 3 minutes until the mixture appears pale, fluffy, and significantly increased in volume. Note: This incorporates the air bubbles necessary for a light texture.
- Incorporate the 50g egg, 5ml vanilla, and 30ml milk until the emulsion is glossy and fully combined.
- Sift the 190g flour, 5g baking soda, and 3g salt together.
- Fold dry ingredients into the wet base until no white streaks remain and a tacky dough forms. Note: Do not overmix, as this develops excess gluten and creates a tough cookie.
- Scoop 1 inch rounds (approx 25g each) and roll in the 65g granulated sugar until a thick, even crystalline coating is achieved.
- Space dough balls 2 inches apart on the USA Pan Sheet Pan to allow for lateral expansion.
- Bake for 8–10 minutes until the edges are set and the tops show characteristic fissures/cracking.
- Remove from oven and let rest for exactly 2 minutes until the internal structure firms slightly but remains hot to the touch.
- Press one Hershey’s Kiss into the center of each cookie until the dough cracks slightly around the edges and the chocolate adheres.
- Transfer to a wire rack for 20 minutes until the chocolate is matte and the cookie is fully set.
Correcting Structural Failures and Thermal Irregularities
Why Your Cookies Spread into Thin Discs
This is usually a failure of "Fat Temperature Control." If the butter is too warm (greasy) before creaming, it cannot hold air. On top of that,, if the dough isn't chilled slightly in a warm kitchen, the fat melts before the flour structure can set, ruining the final shape of the peanut butter blossom cookies.
| Problem | Root Cause | The Fix | Pro Protocol |
|---|---|---|---|
| Flat Cookies | Butter too soft/warm | Chill dough for 20 mins | Use butter at 65°F (cool to touch). |
| Melted Kisses | Added too early | Wait 2 mins post bake | Use a timer; don't eyeball it. |
| Tough/Hard Crumb | Over mixing flour | Mix until just combined | Switch to a spatula for the final fold. |
Why the Chocolate Falls Off
This indicates the "Thermal Adhesion Window" was missed. If the cookie cools too much (below 160°F), the base of the chocolate won't melt enough to create a "glue." This is the key difference between mediocre and excellent peanut butter blossom cookies.
Chef's Tip: If your kitchen is cold and the cookies cool too fast, pop the tray back into the turned off oven for 30 seconds after adding the kisses to "reset" the bond.
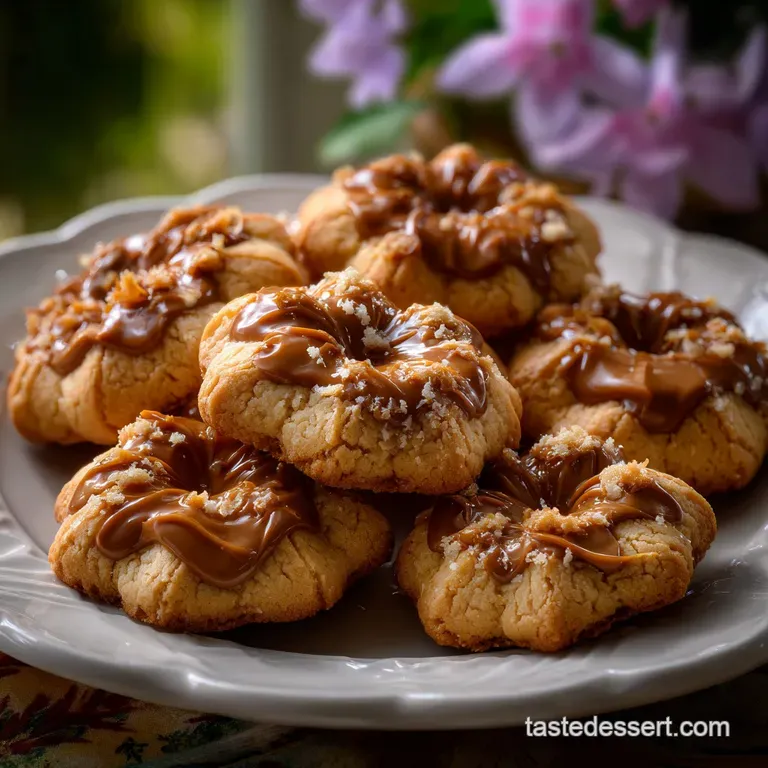
Flavor Architecture and Ingredient Swap Dynamics
While the classic butter blossom cookies rely on milk chocolate, you can manipulate the chemistry for different outcomes. For a festive variation, you might explore the Hershey Kiss Thumbprint Cookies recipe, which utilizes a sugar cookie base for a different flavor profile.
| Original Ingredient | Substitute | Why It Works |
|---|---|---|
| Hershey’s Kisses | Reese’s Mini Cups | Higher fat content; melts faster but offers double the peanut flavor. |
| All-Purpose Flour | Almond Flour (1:1) | Note: Results in a much softer, more fragile cookie with a denser crumb. |
| Granulated Sugar (rolling) | Sanding Sugar | Larger crystals provide a "shattering" crunch and better visual sparkle. |
⚗️ The Scaling Lab: The Physics of Quantity
When doubling this peanut butter blossom cookies recipe to make 72 cookies, you must account for the Thermal Mass of your oven.
- The Pan Crowding Warning: Do not attempt to bake two sheets on the same rack. This creates a "heat shadow," where the bottom sheet remains pale while the top sheet overcooks. Bake in sequential batches.
- Flavor Saturation: Scale the salt and vanilla to 1.5x (not 2x). Aromatics and ionic compounds become overwhelming when doubled linearly in a dense fat matrix like peanut butter.
- The Square Cube Law: A larger bowl of dough retains more internal heat. If you're making a double batch, the last few cookies might be too warm/soft. Divide the dough into two smaller bowls and keep one in the fridge while the first batch bakes.
- Chemical Leavening: Stick to the 1:1 ratio for baking soda. If you add too much, the pH shift will result in a soapy, metallic aftertaste.
Preserving Shelf Stability and Maintaining Moisture Levels
Storage Protocol: Store these blossom cookies in an airtight container at room temperature for up to 5 days. To maintain the "chewy" profile, place a single square of white bread in the container; the cookies will pull moisture from the bread (osmosis) rather than drying out.
Freezing Strategy: You can freeze the unbaked dough balls (rolled in sugar) for up to 3 months. Bake directly from frozen, adding 2 minutes to the timer.
Do not freeze the cookies with the chocolate kisses attached, as the chocolate may develop "bloom" (white streaks) due to temperature shock.
💡 ZERO WASTE PHILOSOPHY: Don't discard the Peanut Butter Jar Scraps. Transform: Add 2 tbsp of warm milk to the almost empty jar and shake vigorously.
Science: The fat in the milk emulsifies with the remaining peanut solids, creating a quick "latte base" or a drizzle for your next batch of peanut butter blossom cookies.
Aesthetic Presentation and Complementary Flavor Pairings
The Classic Milk Pairing
The high fat content of peanut butter blossom cookies coats the palate. A cold glass of milk (or even a high protein Peanut Milk) acts as a "palate cleanser." The proteins in the milk bind to the tannins in the chocolate, smoothing out the finish.
Holiday Platter Arrangement
When placing these on a dessert board, keep them away from peppermint flavored treats. The volatile oils in mint are highly "migratory" and will penetrate the peanut butter base, altering the flavor profile.
- Myth
- You must use "Natural" peanut butter for the best flavor.
- Truth
- Natural PB (oil-on-top) is too unstable for this specific bake; the lack of stabilizers causes the cookies to spread excessively and turn greasy.
- Myth
- Chilling dough is optional.
- Truth
- Chilling for even 15 minutes allows for "hydration of the flour," ensuring a more uniform rise and better flavor development in your peanut butter blossom cookies.
By mastering the thermal window and respecting the chemistry of the fats involved, your peanut butter blossom cookies will transition from a simple pantry staple to a professional grade confection. Trust the science, watch your timers, and wait for that perfect crackle.

Recipe FAQs
how to make peanut butter blossom cookies?
Cream butter/sugar 3 mins, fold in dry until tacky, roll in sugar, bake 9 mins. Immediately press chocolate kiss into center while cookie is still hot to ensure thermal adhesion. If you enjoyed mastering the creaming technique here, see how the same principle works in developing air structure for Garlic Butter Bread Rolls Soft Sticky Homemade Dinner Rolls Recipe.
how to make peanut butter kiss cookies look pretty?
Roll dough evenly and bake until edges set, not browned. An even sugar coating creates a uniform, cracked exterior appearance post bake. Proper spacing prevents lateral spread, maintaining a perfect round base for the chocolate.
how to make peanut butter kiss cookies?
Use room temperature egg and sift dry ingredients separately. The egg must be near 70°F to properly emulsify with the fat base without causing the mixture to curdle. Sifting ensures even distribution of leavening agents across the entire dough matrix.
how to make peanut butter kiss cookies with hershey's?
Press the Hershey's Kiss exactly 2 minutes after removing the cookies from the oven. This timing targets the thermal adhesion window where the cookie is set but the chocolate base melts slightly to bond permanently.
Baking too long causes the cookie to lose structural integrity when the kiss is pressed.
how to make peanut butter blossoms recipe?
Bake at 375°F (190°C) for 8 10 minutes until edges are firm but the center is soft. The residual heat must be sufficient to melt the chocolate base without overcooking the surrounding dough structure. For an alternative crust structure, review our Proper Job Chewy Peanut Butter Cookies The Best Classic Recipe which relies on a slightly lower bake time.
Should I chill the dough before rolling?
No. Chilling dough prevents the desired spread and cracking. Chilled dough resists spreading, which is necessary for the classic fissure pattern that characterizes these cookies. If the dough is too sticky to roll, chill for only 15 minutes, then apply a thicker coating of exterior sugar.
Can I substitute the butter with oil?
Myth: Substituting butter with liquid oil yields a similar texture. Reality: Butter provides necessary aeration during creaming, which liquid oils cannot replicate. Oil results in a flat, greasy cookie that lacks the tender crumb structure essential for these blossoms.
Peanut Butter Blossom Cookies

Ingredients:
Instructions:
Nutrition Facts:
| Calories | 115 kcal |
|---|---|
| Protein | 1.9 g |
| Fat | 5.8 g |
| Carbs | 14.6 g |
| Fiber | 0.5 g |
| Sugar | 10.2 g |
| Sodium | 98 mg |
