Cloudlight British Scones the Ultimate Recipe for Tea Time Perfection
- The Quest for the Ultimate Crumb: Why These Are the Perfect Scones
- Elevating Tea Time: Understanding the Secret to Authentic British Texture
- Assembling Your Arsenal: Essential Components for Fluffy Rounds
- Mastering the Dairy Component for Superior Rise
- The Gentle Art of Dough Creation: Avoiding Overworking
- Shaping and Cutting for Maximum Loft
- Baking Dynamics: Achieving Golden Edges and Soft Centers
- Troubleshooting Common Scone Setbacks
- Serving Suggestions: Elevating Your Cream Tea Experience
- Creative Twists for Next-Level Baking Adventures
- Recipe FAQs
- 📝 Recipe Card
The Quest for the Ultimate Crumb: Why These Are the Perfect Scones
There is a quiet revolution happening every time a batch of truly superior baked goods emerges from the oven, and perhaps no item is more subject to scrutiny than the humble scone.
Forget those dry, dense hockey pucks masquerading as tea-time treats; we are here to establish the blueprint for the Perfect Scones . These aren't merely vehicles for jam and cream; they are light, slightly crumbly, yet beautifully tender rounds that form the very heart of a proper English cream tea.
Achieving this ideal texture high, fluffy, and moist within is less about talent and more about respecting a few crucial rules of physics and temperature management. Once you master this Perfect Scones Recipe , you’ll find yourself baking these beloved staples again and again, making them a reliable staple for any afternoon gathering.
Elevating Tea Time: Understanding the Secret to Authentic British Texture
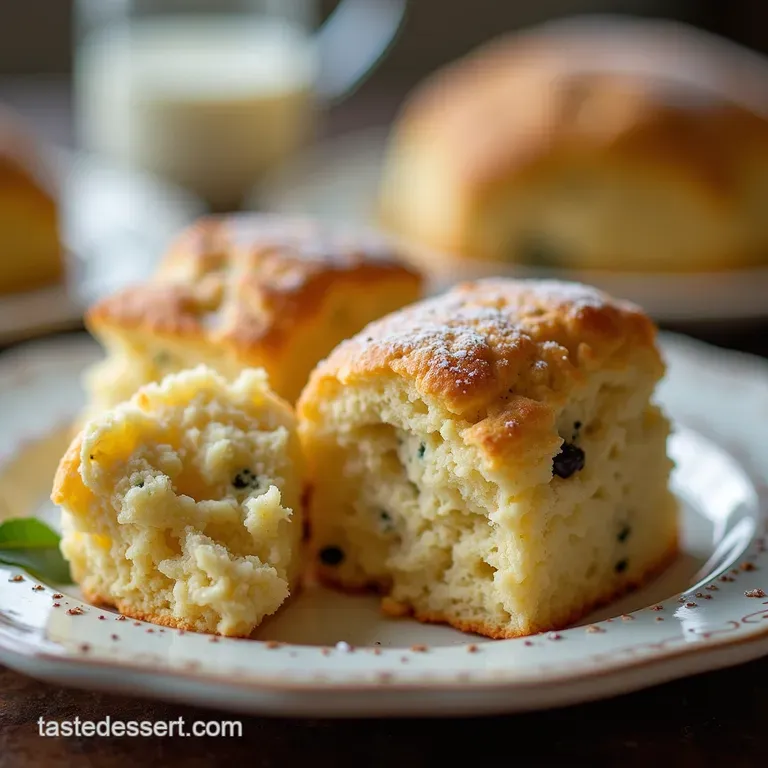
To understand what makes these Perfect Scones UK style so delightful, one must appreciate the desired textural outcome: a beautiful separation into layers when split open, almost like a delicate pull apart bread, yet with the satisfying short crumb of a classic pastry.
This requires careful hydration and minimal gluten development.
Bidding Farewell to Dry, Crumbly Disappointments
The primary foe of a fluffy scone is dryness, often caused by too much handling or ingredients that have become warm during preparation. A dry scone results from the gluten in the flour becoming over developed during mixing or from the fat melting before it hits the heat of the oven.
When the butter melts too early, it coats the flour particles too thoroughly, preventing the steam pockets from forming that give the scone its glorious lift.
Technique Over Talent: The Cold Ingredient Philosophy
The single most important concept in achieving lofty rounds is temperature control. If you take only one piece of advice from this guide to creating Perfect Scones Every Time , let it be this: Keep Everything Cold.
The butter, the buttermilk they must be straight from the refrigerator. This ensures that when the dough hits the hot oven, the trapped, cold butter instantly turns to steam, pushing the layers apart explosively, yielding those iconic, high sides.
A Quick Nod to the Essential Components
While the technique is paramount, the quality of your base ingredients significantly impacts the outcome. We rely on standard pantry staples, elevated by ensuring our leavening agent the baking powder is fresh, as this supplies crucial lift alongside the butter steam.
A touch of sugar is necessary for flavor and browning, but we avoid overloading the mixture, keeping these primarily savory leaning treats that serve as the perfect canvas for sweet accompaniments.
Assembling Your Arsenal: Essential Components for Fluffy Rounds
To create our signature Cloud Light British Scones , we start with the foundational measurements that balance structure and moisture perfectly. For a yielding batch of 8 medium rounds, we begin by whisking together 2 cups (250g) of all-purpose flour with 1 tablespoon (15g) of fresh baking powder and 1/2 teaspoon (3g) of fine sea salt .
To this dry foundation, we incorporate 1/4 cup (50g) of granulated sugar . For a bright, welcoming note that cuts through the richness of the cream, I highly recommend adding 1 teaspoon of finely grated lemon zest right into the dry mix.
Mastering the Dairy Component for Superior Rise
The fat and liquid choices are what truly distinguish these Homemade Scones from lesser attempts.
The Exact Measurements for Truly Perfect Scones
To achieve our target tenderness and height, the ratio of fat to liquid is critical. We need 6 tablespoons (85g) of unsalted butter, cut into small cubes , and crucially, 2/3 cup (160ml) of very cold, full fat buttermilk .
Buttermilk, due to its slight acidity, reacts beautifully with the baking powder, encouraging a tender crumb structure while contributing moisture.
Crucial Tool Checklist: Beyond the Mixing Bowl
While you can certainly use a stand mixer fitted with a paddle attachment for the initial mixing stage, I find the most control comes from using a large mixing bowl and a trusty pastry blender, or even just the tips of your fingers.
You will also need a round biscuit or scone cutter, ideally between 2 to 2.5 inches wide, and a baking sheet lined with parchment paper.
Butter Temperature: The Non-Negotiable Foundation
This bears repeating: your butter must be hard and cold. If you feel the cubes warming up while you work them into the flour, stop immediately and pop the bowl into the freezer for five minutes. The goal is to have distinct, small pieces of fat scattered throughout the flour, waiting for their moment to create steam.
The Gentle Art of Dough Creation: Avoiding Overworking

Once the cold butter is rubbed into the dry ingredients until the mixture resembles coarse breadcrumbs (with some pea-sized chunks remaining visible), it is time for the liquid. Make a well in the center of your flour butter mixture and pour in the cold buttermilk all at once.
Using a fork or rubber spatula, gently draw the flour into the liquid, mixing only until the ingredients just come together into a shaggy, cohesive mass. Stop mixing the moment you can form a rough ball.
This barely combined state is the key to avoiding tough results; the gluten has had minimal chance to activate.
Related Recipes Worth Trying
- The Perfect Sunday Joint Tender Roast Beef with Rich Pan Gravy — Master the classic Sunday Roast Beef with foolproof instructions for a mediumrare finish and silky pan gravy made from scratch Perfect for beginners
- The Perfect Blackberry Lemon Cake Roll Recipe Foolproof Swirl — Master the stunning Blackberry Lemon Cake Roll This easy Swiss roll recipe features a light lemon sponge and tart berry swirl Perfect makeahead dessert
- Fluffy Buttermilk Pancakes from Scratch The Perfect Weekend Breakfast — Tired of flat breakfast discs Master these homemade buttermilk pancakes for a truly fluffy stack every time Easy technique for weekend pancakes Cooking time...
Shaping and Cutting for Maximum Loft
Turn the shaggy dough out onto a lightly floured surface. This is where we utilize the “quick fold and pat” technique. Gently pat the dough into a rectangle, fold it over itself in thirds (like a business letter), turn it 90 degrees, and repeat the gentle patting once or twice more.
This brief manipulation distributes the moisture and strengthens the structure slightly without kneading. Pat the final dough to a thickness of about 3/4 to 1 inch. Using your flour dusted cutter, press straight down firmly and lift straight up .
Never twist the cutter; twisting seals the edges, which physically prevents the dough from rising vertically in the oven, leading to flatter tops.
Baking Dynamics: Achieving Golden Edges and Soft Centers
Preparation for the oven is as important as the mixing itself. For the highest rise possible in these Sweet Scones Recipe creations, I strongly recommend placing the cut rounds onto the prepared baking sheet and chilling them in the refrigerator for a full 15 minutes before they enter the heat.
This final chill firms up the butter one last time for that critical initial burst of oven spring.
The Rubbing Method: Integrating Fat Without Melting
As detailed previously, the ‘rubbing in’ of the cold butter into the dry components must be swift. Whether you use your fingertips (quickly, like you’re lightly dusting something) or a pastry blender, aim for a mixture resembling coarse sand with small, visible flakes of butter scattered throughout.
The Quick Fold and Pat Technique
After adding the buttermilk, bringing the dough together should take less than 30 seconds. Once it forms a mass, the brief folding action helps align the layers slightly, preparing them for that magnificent vertical lift, rather than spreading out horizontally.
Precision Placement on the Baking Sheet
When placing the rounds on the sheet, they should be close enough to encourage them to rise upwards rather than outwards, but not touching, lest they fuse during baking. If you prefer very defined sides, place them nearly touching; if you prefer individual, rounded tops, give them a little space.
The Egg Wash Secret for a Glorious Sheen
For that classic golden brown, bakery quality finish, prepare a simple glaze by lightly beating one large egg with 1 tablespoon of whole milk . Brush this mixture gently over the tops of the chilled scones using a pastry brush.
Be absolutely diligent about avoiding drips down the sides; any wash that touches the sides will bake hard and prevent the scone from achieving its full height.
Place the tray into a preheated oven set to a high heat: 425° F ( 220° C) . Bake for 12 to 15 minutes . They are done when they have risen significantly and the tops are a deep, beautiful golden brown.
Troubleshooting Common Scone Setbacks
Even with the best intentions, baking can sometimes present puzzles. Fortunately, most scone issues trace back to one or two key areas.
Why Did My Scones Spread Instead of Rise?
This is almost always due to warm butter or twisting the cutter. If your butter melted during mixing, it lubricated the flour particles instead of creating steam pockets. Next,, if you noticed your scones were flat with ragged, unappealing sides, you twisted the cutter during portioning.
Always press straight down and lift straight up to respect the structure you just built.
Storage Secrets for Sustained Freshness
Scones are undeniably best enjoyed the moment they emerge from the oven, but if you have leftovers, store them in an airtight container at room temperature for up to two days. To revive them, simply reheat them briefly in a moderate oven (around 300° F or 150° C) for about five minutes until they are warm through.
Serving Suggestions: Elevating Your Cream Tea Experience
A Classic Scones Recipe demands the right accompaniments. Serve these warm, split gently in half horizontally. The traditional pairing is, of course, rich, thick clotted cream (or a good substitute if you are unable to source it) and a vibrant, slightly tart homemade strawberry jam.
A strong, piping hot cup of English Breakfast tea cuts through the richness beautifully.
Creative Twists for Next Level Baking Adventures
While the classic preparation is divine, these versatile rounds are perfect for experimentation.
Transforming the Base Recipe: Flavor Inclusions Beyond the Classic
To move beyond the base recipe, consider adding mix-ins during Step 4 (after rubbing in the butter but before adding the buttermilk). For a wonderful fruit option, try making Blueberry Scones Recipe variations.
Fold in about 1/2 cup of fresh or frozen blueberries, perhaps enhancing the citrus profile by making Lemon Blueberry Scones by increasing the zest slightly.
For a savory option, omit the sugar and zest, and fold in 1/2 cup of grated mature cheddar and a pinch of cayenne pepper for a wonderful brunch offering.
Pairing Suggestions: Jams, Curds, and Clotted Cream Equivalents
Don’t feel restricted to strawberry jam. Tart raspberry preserves, sharp blackcurrant jam, or even a bright lemon curd make exquisite partners. If clotted cream is unavailable, a high-quality, full fat crème fraîche whipped lightly until slightly aerated makes a respectable stand-in for that essential dairy topping.

Recipe FAQs
My scones always turn out flat and tough, not light and fluffy. What am I doing wrong with these Perfect Scones?
Ah, the classic pitfall! Nine times out of ten, it’s down to temperature and technique. Make absolutely sure your butter and buttermilk are ice cold this creates steam pockets for a good rise.
Secondly, stop fussing with the dough; mix it until it’s just combined, and never, ever twist that scone cutter, as that seals the edges.
Why is keeping the ingredients cold so important? Is it just a fussy step?
Not fussy at all it’s pure science, mate! Keeping the butter cold means it stays in distinct little pieces when you bake. As those little frozen chunks hit the hot oven, they melt quickly, creating pockets of steam that push the dough up, giving you that glorious, lofty height.
Warm butter just melts into the flour, resulting in a denser bake.
Can I make these ahead of time, or do I need to serve them straight from the oven?
While they are truly best served warm from the oven, you have a couple of options. You can prepare the dough, cut the shapes, place them on a tray, and chill them in the fridge for up to 12 hours before baking this actually improves the rise!
Once baked, they are best eaten the same day, though leftovers can be gently reheated in a low oven the next day.
What's the best alternative if I don't have buttermilk on hand?
Don't let a lack of buttermilk stop your tea party! You can easily make a substitute by taking regular whole milk and adding a tablespoon of white vinegar or fresh lemon juice for every cup of milk required.
Give it five minutes to sit and slightly curdle, and you've got your acidic liquid ready to react beautifully with the baking powder.
I'm aiming for a proper British cream tea. Should I use jam or cream first?
Ah, the age-old Devon vs. Cornwall debate! If you prefer the Cornish method, spread the jam first, then top with a generous dollop of clotted cream. If you follow the Devonshire tradition, it’s cream first, then the jam on top.
Either way, just enjoy that perfect scone; it’s delicious served with a strong brew!
Perfect Classic Scones

Ingredients:
Instructions:
Nutrition Facts:
| Calories | 189 kcal |
|---|---|
| Protein | 5.5 g |
| Fat | 13.2 g |
| Carbs | 28.6 g |
| Fiber | 0.3 g |
| Sodium | 5074 mg |
