Quick No Knead Bread: the Weekend Wonder Dutch Oven Loaf
- Ditch the Dough Hook: Introducing the Best Quick No Knead Bread Recipe
- Essential Elements: Ingredients for Your Quick No-Knead Masterpiece
- The Hands-Off Method: Step-by-Step Guide to Baking Perfect Quick No Knead Bread
- The Science of the Crust: Why Dutch Oven Baking is Non-Negotiable
- Troubleshooting Your Loaf: Expert Tips for Dutch Oven Bread Success
- Savoring the Loaf: Storage, Freezing, and Perfect Pairings
- Recipe FAQs
- 📝 Recipe Card
Ditch the Dough Hook: Introducing the Best Quick No Knead Bread Recipe
That incredible, deep caramelized aroma hitting you right when the lid comes off the pot? The sound of the crust crackling as it cools is pure auditory magic. This quick no knead bread delivers the kind of rustic perfection you usually pay eight bucks for at a fancy bakery.
It looks professional, smells heavenly, and honestly, requires almost zero effort from you.
But here’s the secret: You don't need a stand mixer, massive arm muscles, or the standard 18 hour wait. This rapid rise Dutch oven method turns out truly artisan bread in just under three hours, start to finish. It’s cheap, incredibly satisfying, and it makes your entire house smell like a comforting dream.
Forget complicated folds and intensive kneading; this is the lazy baker's dream come true. We are using time, heat, and a few smart shortcuts to make the best crusty bread recipe easy enough for a Tuesday afternoon. Get ready to impress yourself, because we are making proper bread today.
From 18 Hours to 3: The Rapid Rise Revolution
The traditional no-knead method relies on slow fermentation to develop the gluten and deep flavor. But who has 18 hours when you suddenly crave fresh bread? Not me, usually. We hack the system by slightly increasing the instant yeast and using warm, not cold, water.
This acceleration encourages the yeast to work much faster, achieving the required bubbly structure in about an hour instead of overnight. The high hydration level keeps the dough sticky and prevents the need for manual kneading. We let the water do the work, baby!
What Makes a "No-Knead" Loaf Truly Artisanal?
It comes down to two things: hydration and heat management. High hydration dough (which ours is, feeling more like thick batter than play dough) relaxes the gluten, leading to large, irregular air pockets the hallmark of artisan bread.
The enclosed, screaming hot Dutch oven traps steam released by the dough itself. That steam is what gives us the unbelievable, shatteringly crisp crust.
The Weekend Wonder: Why This Loaf is Worth the Wait (Even Though It's Fast)
This recipe is incredibly popular for a reason: It’s basically foolproof if you follow the heat rules. Unlike other quick breads, like my favorite Roasted Strawberry Banana Bread The Ultimate Brown Butter Loaf , this needs zero sugar or fat. It’s pure, simple, and versatile. Seriously, you get bakery quality texture with only five minutes of actual hands-on time.
Essential Elements: Ingredients for Your Quick No-Knead Masterpiece
The beauty of homemade bread is its simplicity. You only need four basic ingredients, but their quality and temperature are non-negotiable for this rapid process. Don't skip the scale if you have one, because measuring flour by volume can lead to serious errors in hydration.
Flour Focus: Why Bread Flour is Recommended (and AP Alternatives)
Bread flour has a higher protein content, typically 12% to 14%, which makes the resulting loaf chewier and gives it better structure. It can handle the high hydration of this recipe without turning into soup. However, if you only have standard all-purpose (AP) flour, don't worry, you can still make this.
| Ingredient | Recommendation | Substitution Tip |
|---|---|---|
| Flour | High Protein Bread Flour | Use standard All-Purpose (AP) flour, but start with 1 2 tablespoons less water, as AP absorbs liquid differently. |
Yeast Power: Harnessing Instant Yeast for Maximum Speed
We are leaning heavily on instant dry yeast for this 3 hour no knead bread. Instant yeast is milled finer than active dry yeast, meaning you don't need to dissolve it in water first it works immediately upon contact. Using a slightly generous amount is the key to cutting the fermentation time down dramatically.
| Ingredient | Recommendation | Substitution Tip |
|---|---|---|
| Instant Yeast | Always fresh, instant type. | If you only have Active Dry Yeast, you must first proof it in the warm water for 5 minutes until very foamy; the total rise time may be slightly longer. |
The Salt Balance: Flavor and Fermentation Control
Salt isn't just for flavor; it actually controls the rate at which the yeast produces gas. Too little salt and the dough rises too fast, potentially leading to a weak structure. Too much salt, and the yeast gets sluggish. Kosher salt is my go-to, but fine sea salt works great too.
Water Temperature Matters: Activating the Yeast Perfectly
This is one place where the "quick" factor is determined. The water must be warm (around 105°F or 40°C), slightly warmer than lukewarm but never hot. Hot water will kill your yeast dead. This specific temperature encourages the yeast to wake up quickly and get to work creating bubbles.
| Ingredient | Recommendation | Substitution Tip |
|---|---|---|
| Water Temp | 105°F (40°C) | If you don't have a thermometer, use water that is warm to the touch, but not hot enough to scald your hand. |
The Hands Off Method: step-by-step Guide to Baking Perfect Quick No Knead Bread
The Initial Mix: Achieving Shaggy, Wet Dough Consistency
- Prep the Mix: In a large bowl, whisk together the flour and salt. In a separate cup, measure out the 105°F warm water and stir in the instant yeast.
- Combine: Pour the wet ingredients into the dry. Use a wooden spoon or spatula to stir until the flour is completely hydrated. This should take less than a minute. Stop stirring the moment there are no dry pockets left. The dough will look incredibly sticky, shaggy, and more like a thick batter than traditional bread dough. That’s exactly what we want.
- Initial Rest: Lightly oil a clean bowl. Transfer the sticky dough into the clean bowl, turning once to coat. Cover the bowl tightly with plastic wrap; we need a humid environment for a fast rise.
Proofing Power: Optimizing the Dough's Rapid Rise Environment
- Bulk Fermentation: Place the covered bowl in the warmest spot in your kitchen. I sometimes put it on top of my water heater or inside my oven with the light on (just remember to remove it before preheating!). This quick rise bread needs about 45 to 60 minutes to double in size and look bubbly and domed.
Chef's Note: If your kitchen is cold, the 45 minute mark might be optimistic. Don't rush it; wait until the dough has genuinely doubled before proceeding.
The Gentle Fold: Developing Structure Without Kneading
- Preheat Everything: About 30 minutes before the end of the rise, place your Dutch oven and its lid into the oven and preheat the oven to 450°F (230° C). The pot must be searing hot.
- Shape: Lay out a sheet of parchment paper and dust it lightly with flour or cornmeal. Gently scrape the risen dough out onto a lightly floured surface. Do not punch it down vigorously! Using floured hands, gently fold the edges of the dough toward the center two or three times to form a slightly tighter round.
- Final Rest: Flip the dough seam side down onto the parchment paper. Cover loosely with a towel and let it rest for 15 minutes while the Dutch oven finishes heating. This rest allows the gluten to relax one last time.
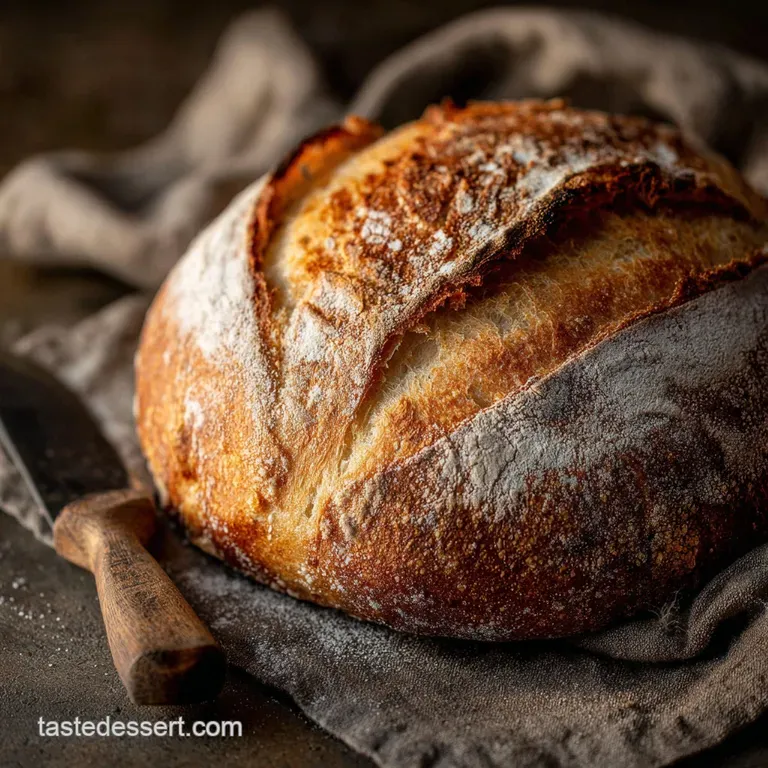
Baking Hot: Mastering the Dutch Oven Preheating Protocol
- Load: Using heavy gloves (seriously, this pot is hotter than the sun), carefully remove the Dutch oven. Score the top of the loaf if you want a controlled break one shallow slash is perfect. Lift the dough using the parchment paper as a sling and place it directly into the hot pot.
- Covered Bake: Replace the lid and bake for 20 minutes . This traps the steam, creating an initially soft surface that allows for maximum oven spring.
- Uncovered Bake: Remove the lid and reduce the heat to 425°F (218° C) . Bake for another 15– 20 minutes until the crust is a deep, gorgeous mahogany brown. Transfer immediately to a cooling rack.
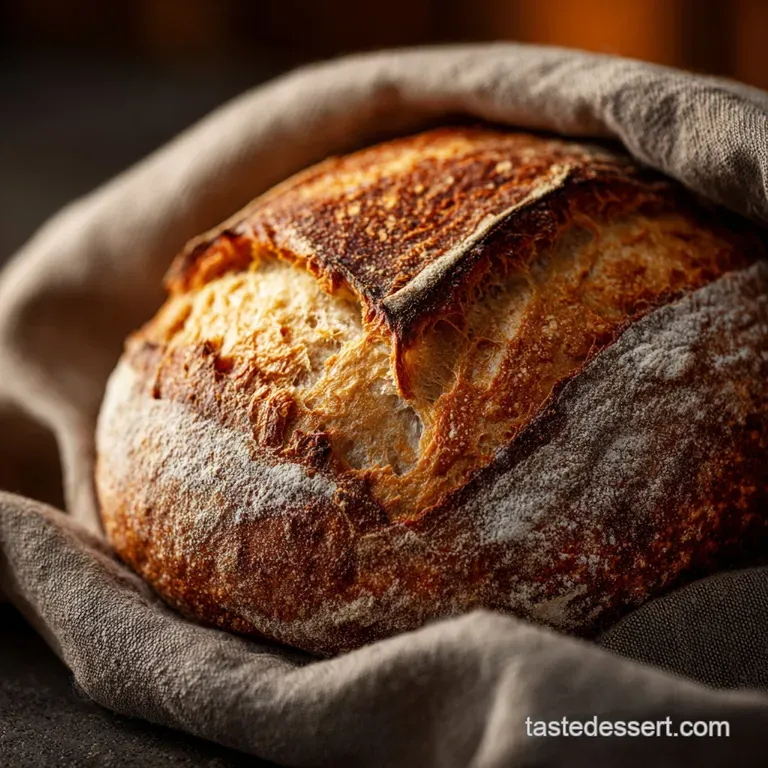
The Science of the Crust: Why Dutch Oven Baking is Non-Negotiable
This is the secret weapon for quick no knead bread perfection. Without that scorching hot, enclosed pot, you simply won't get that classic artisan crunch.
Trapping the Steam: How Hydration Creates the Ultimate Crisp Crust
When you initially bake the dough covered, the moisture in the high hydration dough turns instantly to steam. This steam prevents the crust from setting immediately, allowing the bread to fully expand (oven spring) before hardening. It also gelatinizes the starches on the surface, giving you that incredible glossy, thin, crisp shell. This is a game changer, whether you're baking this loaf or testing a batch of my Pumpkin Dinner Rolls: Fluffy, Spiced Bread for the Holidays .
The Gluten Matrix: Time, Water, and Temperature (Not Kneading)
The strength of this dough comes from letting the flour fully absorb the high amount of water over time even if that time is only 60 minutes, thanks to the warm environment.
The proteins (glutenin and gliadin) hydrate and align themselves into the necessary structure without any physical effort from you. It’s chemistry in action, and it’s beautiful.
Developing Deep Flavor: The Rapid Fermentation Sweet Spot
While an 18 hour cold proof develops complex sour notes, this quick method still achieves a surprisingly sweet, slightly yeasty flavor. The shorter, warmer rise pushes the yeast to quickly produce ethanol and carbon dioxide, which gives the bread its distinct, fresh aroma and signature taste.
Troubleshooting Your Loaf: Expert Tips for Dutch Oven Bread Success
The Stickiness Factor: Handling High Hydration Dough Effortlessly
Mistake: People often panic because the dough is incredibly wet and sticky after the first rise. They start adding lots of extra flour. Fix: Do not add extra flour. The high hydration is essential for the texture.
Use very lightly floured hands and a dough scraper to handle the dough. The quick fold/shape should take less than 30 seconds. Less handling means less sticking.
Identifying an Underproofed vs. Overproofed Dough
Mistake: Baking too early or too late. Fix: A fully proofed quick no knead bread will look jiggly, bubbly, and almost double in size. If it only rose by 50% (underproofed), the final loaf will be dense and won't expand much in the oven.
If it looks like a flat balloon and smells strongly of booze (overproofed), it might collapse entirely when touched. The poke test works: A properly proofed loaf will slowly spring back after a gentle poke.
Stopping the Burn: Preventing a Scorched Bottom Crust
Mistake: The bottom of the loaf gets intensely dark, sometimes burnt, because the heat is concentrating directly on the Dutch oven base. Fix: After you remove the lid for the second half of the bake, slide a baking sheet onto the rack directly below the Dutch oven.
This simple trick shields the bottom from direct radiant heat, letting the crust finish browning perfectly without scorching.
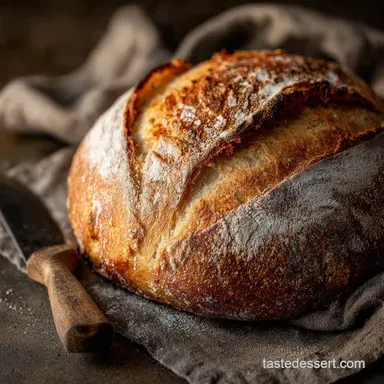
Savoring the Loaf: Storage, Freezing, and Perfect Pairings
Once you have your loaf of quick no knead bread, the biggest challenge is waiting for it to cool. Seriously, wait at least one hour! I once cut into a warm loaf and the steam turned the center gummy and sad. Learn from my mistake, friend.
Storage & Freshness
Store your cooled loaf at room temperature, ideally wrapped in a clean linen towel or placed cut-side down on a cutting board. Never store fresh bread in the refrigerator. The cold air rapidly stales the starch molecules, turning your crusty masterpiece into a rock within hours.
It stays wonderfully fresh for 2 3 days.
Freezing for Future Feasts
But does it freeze well? You bet it does.
- Preparation: Allow the loaf to cool completely.
- Wrapping: Wrap the loaf tightly in plastic wrap, ensuring no air pockets, then follow up with a layer of aluminum foil.
- Thawing: Freeze for up to three months. To thaw, simply unwrap and let it sit at room temperature for several hours.
- Reheating: For that amazing fresh crust feeling, spritz the thawed loaf lightly with water and pop it into a 350°F (175°C) oven for about 10– 15 minutes. The crust snaps right back to life!
Perfect Pairings
This rustic loaf is the ultimate companion to nearly anything. It’s sturdy enough to handle robust flavors.
- Dipping into high-quality olive oil and balsamic vinegar.
- Making the world's best grilled cheese sandwich.
- Serving as the base for bruschetta with summer tomatoes.
- Or, just slathering a thick slice with butter and a good homemade jam maybe even a spoonful of that leftover roasting sauce from the Bisquick Cinnamon Rolls: The 45 Minute, No-Yeast Breakfast Sweet if you want a sweet treat!

Recipe FAQs
Why is my bread dense and not light and airy?
The most common cause of density is improper hydration or under proofing. Ensure your dough mixture is very sticky and shaggy before the bulk rise it should feel wet, not firm. Also, verify that your yeast is fresh, as the rapid rise method relies heavily on active fermentation.
Can I use this recipe without a Dutch Oven?
Yes, you can substitute the Dutch oven by placing a deep, oven safe metal bowl or broiler pan over the loaf while it bakes on a baking sheet or pizza stone. The key function of the Dutch oven is trapping steam, so whatever method you use must be sealed during the first 30 minutes.
Be aware that the crust may be slightly less robust.
My crust came out soft instead of crispy. What went wrong?
A soft crust usually means the steam escaped too early in the baking process. Ensure your Dutch oven lid is properly sealed and that you preheat the pot fully before dropping the dough inside.
Also, do not skip the final 15 20 minutes of baking with the lid off, as this step is crucial for drying and hardening the crust.
What type of flour is best for this quick method?
Bread flour is always the best choice as its higher protein content develops gluten more effectively, but standard All-Purpose flour works perfectly well for this recipe. If using whole wheat, substitute no more than one cup, and be prepared to add an extra tablespoon or two of water, as whole grains absorb liquid faster.
Can I proof the dough overnight in the refrigerator instead of using the rapid rise method?
Absolutely, an overnight cold proof will develop a much deeper, more complex sour flavor. If using this method, reduce the yeast back down to 1 teaspoon (or 3/4 tsp) and use cold water instead of warm water. Allow 12 18 hours for the first rise in the refrigerator.
How should I store the finished bread to keep it fresh?
Once the loaf is completely cooled, store it at room temperature, ideally wrapped in a thick paper bag or linen bread cloth. To maintain moisture, you can place the loaf cut-side down on a wooden cutting board, loosely covered. Never refrigerate bread, as this rapidly stales the texture.
Can I add seeds, nuts, or herbs to this recipe?
Yes, you can incorporate additions like seeds, dried herbs, or chopped walnuts directly into the dry ingredients before mixing the dough. Do not exceed half a cup of total additions, as too much weight can impede the rapid rise and density of the finished loaf. For best results, use seeds like sesame or sunflower.
Quick No Knead Bread Dutch Oven Recipe
Ingredients:
Instructions:
Nutrition Facts:
| Calories | 422 kcal |
|---|---|
| Protein | 11.1 g |
| Fat | 2.8 g |
| Carbs | 82.6 g |
