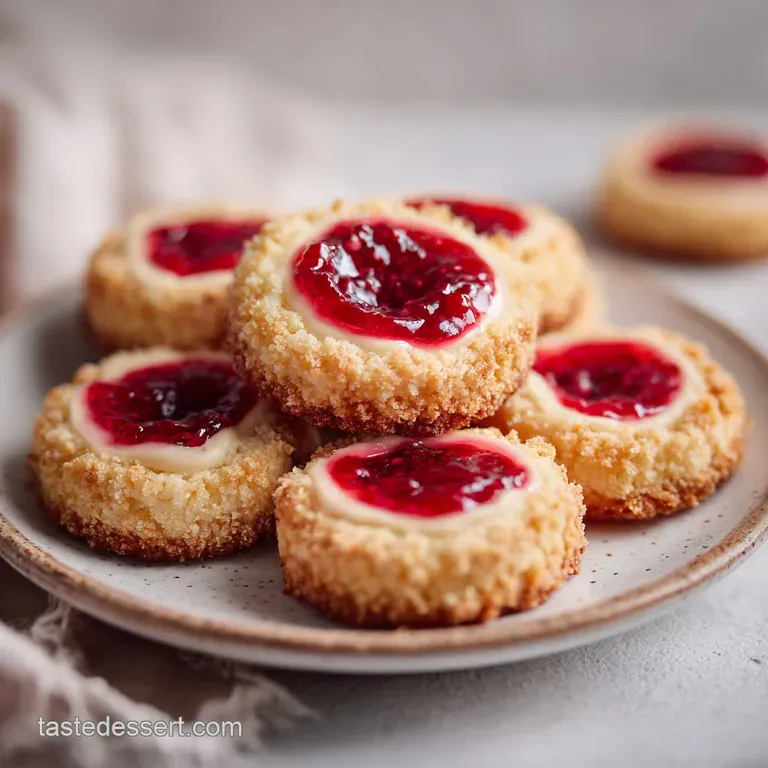
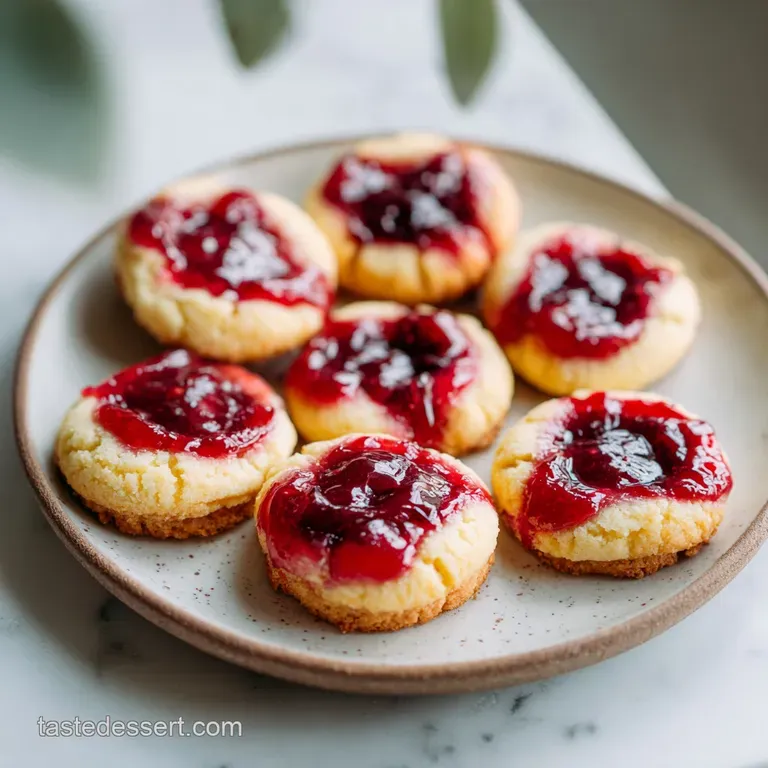
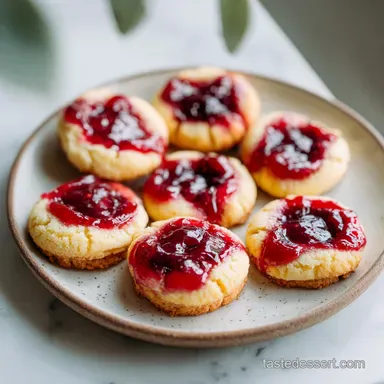
Raspberry Cheesecake Thumbprint Cookies
- Time:20 minutes active + 72 minutes chilling/baking = 92 minutes total
- Flavor/Texture Hook: Velvety cream cheese base with a shatter crisp edge and molten jam center
- Perfect for: Holiday gift boxes, afternoon fika, or a wonderful weekend baking project
- Bake the Ultimate Raspberry Cheesecake Thumbprint Cookies
- Why the Dough Stays Silky
- Essential Ingredients for a Creamy Base
- Gathering Your Essentials
- The Essential Tools for Success
- Master the Step-By-Step Process
- Troubleshooting Common Baking Hurdles
- Creative Variations for Your Cookies
- Storage Guidelines and Freshness
- Artistic Presentation Techniques
- Myths About Cheesecake Cookies
- Recipe FAQs
- 📝 Recipe Card
Bake the Ultimate Raspberry Cheesecake Thumbprint Cookies
The tradition of the thumbprint cookie is a beautiful tapestry woven through European baking history, most notably known in Sweden as "Hallongrotta," which translates affectionately to "raspberry cave." I remember the first time I saw these tiny red jeweled treats sitting on a lace doily in my grandmother’s kitchen; they looked like little treasures waiting to be discovered.
In the Swedish tradition of Sju sorters kakor—the customary practice of serving seven types of cookies at a gathering the raspberry thumbprint has always held a place of honor because of its simple elegance and the joyful pop of color it brings to the table.
When we bring the tangy, modern flair of cream cheese into this classic buttery base, we are essentially creating a portable, bite sized cheesecake. The aroma that fills the kitchen as the butter and sugar begin to aerate is nothing short of a sensory hug, promising something sweet and homemade.
This recipe isn't just about mixing flour and sugar; it’s about continuing a legacy of hospitality and the wonderful feeling of sharing something made by hand. Whether you're baking these for a festive holiday tray or just to brighten a rainy Tuesday, there’s a certain magic in pressing your thumb into that soft dough to make room for a spoonful of bright raspberry preserves.
We’ve all seen cookies that spread too much or centers that turn out gummy, but that is exactly why we are diving deep into the nuances of this dough today. By combining the old world charm of the "raspberry cave" with the rich, velvety texture of a cheesecake, we’re creating a cookie that feels both nostalgic and sophisticated.
It’s a wonderful way to transform a few pantry staples into a batch of memories that your friends and family will be talking about long after the last crumb has been devoured.
Why the Dough Stays Silky
Fat Emulsification: The combination of butter and full fat cream cheese creates a stable fat structure that coats the flour proteins, effectively limiting gluten development for a more tender, velvety crumb.
Temperature Stabilization: Chilling the dough for at least 60 minutes allows the saturated fats to solidify, ensuring the cookies maintain their tall, rounded shape rather than melting into puddles in the hot oven.
Sugar Aeration: Beating the granulated sugar with the fats for a full two minutes creates microscopic air pockets that expand during baking, providing a light lift without the need for chemical leaveners like baking powder.
Hygroscopic Balance: The raspberry preserves contain natural pectin and sugar which, when baked briefly, thicken into a jammy "molten" center that resists soaking into the cookie base.
| Cookie Thickness | Internal Temperature | Rest Time | Visual Cue |
|---|---|---|---|
| 2.5 cm ball | 175°F (80°C) | 5 minutes | Edges are matte and very lightly golden |
| 3 cm ball | 180°F (82°C) | 7 minutes | Jam is bubbling slightly in the center |
| 2 cm ball | 170°F (77°C) | 3 minutes | Bottom is a pale straw color |
When you are deciding on the size of your cookies, keep in mind that a slightly larger ball of dough will result in a more "cheesecake like" soft center, whereas a smaller portion will lean towards a traditional shortbread texture with a more pronounced shatter when you take a bite.
The rest time on the baking sheet is non negotiable because the carryover heat finishes the setting process of the delicate cream cheese fats.
Essential Ingredients for a Creamy Base
The secret to a successful batch of raspberry cheesecake thumbprint cookies is starting with high-quality components that are at the correct temperature. You want your butter and cream cheese to be soft enough to blend into a cloud like consistency, but not so warm that they appear greasy or melted.
Using a full fat block of cream cheese is essential here; the spreadable variety found in tubs contains extra moisture and stabilizers that can ruin the structural integrity of your dough.
| Component | Science Role | Pro Secret |
|---|---|---|
| Full Fat Cream Cheese | Provides tang and moisture binding proteins | Use the block style for a denser, more stable cookie structure |
| Egg Yolk | Adds richness and emulsifies the fat and flour | Omit the white to prevent the cookie from becoming too "cakey" |
| Raspberry Preserves | Provides the tart, colorful center | Use seedless preserves for a smoother, more refined mouthfeel |
| Almond Extract | Enhances the fruitiness of the raspberry | A tiny amount mimics the flavor profile of professional pâtisserie |
If you are looking for other ways to use up your baking supplies, you might find that the creamy base of this dough reminds you of the richness in my White Chocolate Raspberry Cheesecake, which uses similar flavor profiles on a much larger scale.
Gathering Your Essentials
- 1 cup unsalted butter, softened: Why this? Provides the foundational flavor and a tender, melt in-your mouth shortbread texture.
- Substitute: Salted butter (just omit the extra 0.5 tsp salt from the recipe).
- 4 oz cream cheese, full fat block: Why this? Adds the signature cheesecake tang and creates a velvety, soft set crumb.
- Substitute: Mascarpone for a milder, even creamier finish.
- 1 cup granulated sugar: Why this? Sweetens the dough and helps create the crisp, golden edges through aeration.
- Substitute: Caster sugar for an even finer, smoother dough consistency.
- 1 large egg yolk: Why this? Acts as a binder and adds a luxurious richness without adding too much moisture.
- Substitute: 1 tablespoon of heavy cream if you need an egg free binder.
- 1 tsp vanilla extract: Why this? A foundational aromatic that bridges the flavors of the cream cheese and fruit.
- Substitute: Vanilla bean paste for those beautiful little black flecks.
- 1/4 tsp almond extract: Why this? The "secret" ingredient that makes the raspberry flavor truly pop and sing.
- Substitute: Lemon extract for a brighter, citrus forward profile.
- 2.5 cups all purpose flour: Why this? Provides the necessary structure to hold the "thumbprint" well without collapsing.
- Substitute: A 1:1 gluten-free flour blend (ensure it contains xanthan gum).
- 0.5 tsp salt: Why this? Balances the sweetness and enhances the depth of the butter and cream cheese.
- Substitute: Sea salt flakes for a more textured, gourmet finish.
- 0.5 cup raspberry preserves: Why this? The vibrant, tart center that provides a beautiful color contrast.
- Substitute: Apricot or blackberry jam for a different seasonal twist.
- 0.5 cup powdered sugar (for glaze): Why this? Creates a smooth, sweet finish that adds a professional look.
- Substitute: A drizzle of melted white chocolate for extra decadence.
- 2 tsp milk: Why this? Thins the glaze to the perfect drizzling consistency.
- Substitute: Lemon juice to add an extra layer of bright acidity.
- 1 drop vanilla extract: Why this? Seasons the glaze so it isn't just "flat" sweetness.
The Essential Tools for Success
To get that wonderful, professional look, you don't need a kitchen full of gadgets, but a few specific items make the process much easier. A stand mixer is your best friend here because it allows you to truly aerate the butter and sugar for the full two minutes without your arm getting tired.
If you don't have one, a handheld electric mixer works perfectly well too.
For measuring, I always recommend the "fluff and scoop" method or, better yet, using a kitchen scale. Not too much prep work, but start by weighing or measuring the sugar and set it aside. Next, measure the flour carefully to ensure your cookies don't turn out dry or crumbly. A small cookie scoop (about 1 tablespoon size) is also a game changer for ensuring all 24 cookies are the exact same size, which helps them bake evenly in the oven.
Master the step-by-step Process
- Cream the fats. Combine the softened butter and the 4 oz of cream cheese in your mixer bowl and beat on medium high until the mixture is pale, smooth, and looks like thick frosting.
- Aerate with sugar. Add the granulated sugar to the bowl and continue beating for exactly 2 minutes Note: This step incorporates the air needed for the cookie's lift.
- Incorporate aromatics. Mix in the egg yolk, vanilla, and almond extract on low speed until just combined and the yellow streak of the yolk disappears.
- Add dry ingredients. Whisk the flour and salt in a separate bowl, then gradually add to the wet mixture until no white streaks of flour remain.
- Chill the dough. Wrap the dough tightly in plastic wrap and flatten it into a disk; refrigerate for 1 hour until the dough feels firm and cold to the touch.
- Preheat and prep. Set your oven to 180°C (350°F) and line two large baking sheets with parchment paper or silicone mats.
- Roll and space. Scoop 1 tablespoon portions of the chilled dough and roll them into smooth, crack free balls; place them 5 cm (2 inches) apart on the sheets.
- Indent the centers. Use the back of a 1/2 teaspoon measuring spoon or your thumb to press a deep well into each ball until the dough forms a neat cup shape.
- Fill with fruit. Fill each indentation with approximately 1/2 teaspoon of raspberry preserves, being careful not to overfill.
- Bake to perfection. Bake for 11 to 13 minutes until the edges are set and the bottoms are a very light golden brown.
- Cool and glaze. Allow the cookies to rest on the pan for 5 minutes, then move to a wire rack; once completely cool, whisk the powdered sugar, milk, and vanilla and drizzle over the tops.
Troubleshooting Common Baking Hurdles
Even the most seasoned bakers can run into a few hiccups with thumbprints. The most common issue is the "exploding jam," where the preserves bubble over the sides of the cookie and make a sticky mess.
This usually happens if the jam is too thin or if the indentation wasn't deep enough to contain the expansion of the fruit's sugars.
Why Your Cookies Spread Too Much
If your cookies look more like pancakes than rounded thumbprints, the culprit is almost always temperature. If the butter was too warm when you started, or if you skipped the hour long chilling step, the fats will melt the moment they hit the heat of the oven.
If this happens, you can actually use a spoon to gently "scoot" the warm edges back toward the center immediately after taking them out of the oven.
| Problem | Root Cause | Solution |
|---|---|---|
| Cracking edges | Dough is too cold or too dry | Roll balls between warm palms to smooth surface before indenting |
| Rubbery texture | Over mixing after adding flour | Mix on low speed and stop as soon as flour disappears |
| Soggy bottoms | Jam was too watery | Use high-quality preserves or simmer jam for 2 mins to thicken before using |
Common Mistakes Checklist
- ✓ Ensure your cream cheese is the block variety, not the tub spread.
- ✓ Never skip the 60 minute chilling period; it’s vital for the cookie's height.
- ✓ Use a measuring spoon for the thumbprint to keep the wells consistent.
- ✓ Pat the dough balls smooth before pressing to prevent deep cracks.
- ✓ Don't overbake; these cookies should stay pale to keep that "cheesecake" feel.
Creative Variations for Your Cookies
While raspberry is the traditional choice, this dough is an incredibly versatile canvas for other flavors. If you want a more decadent experience, you could try filling the centers with a dollop of cheesecake filling before baking, similar to the technique used in Cookie Dough Cheesecake Cookies, which offers a double dose of cream cheese goodness.
The Lemon Zest Twist
Add the zest of one medium lemon to the butter and sugar while creaming. The citrus oils pair beautifully with the raspberry and cut through the richness of the cream cheese, making the cookies feel lighter and brighter for a spring gathering.
The Nutty Crunch
Before adding the jam, roll the dough balls in finely chopped walnuts or pecans. This adds a wonderful textural contrast to the velvety dough and mimics the crust of a traditional cheesecake. If you go this route, you might find the cookies bake slightly faster, so keep a close eye on them around the 10 minute mark.
| Method | Time | Texture | Best For |
|---|---|---|---|
| Standard Oven | 12 mins | Soft center, crisp edge | Classic thumbprint results |
| Toaster Oven | 10 mins | Very crisp edges | Small batches/quick cravings |
| Stovetop (Skillet) | 15 mins | Gooey, cookie cake style | Serving warm with ice cream |
If you are a fan of the classic combination of fruit and richness, you might also want to explore a Peanut Butter Jelly Cheesecake, which takes the "thumbprint" concept and turns it into a full scale dessert masterpiece.
Storage Guidelines and Freshness
To keep these cookies tasting like they just came out of the oven, you need to protect the moisture balance. Because they contain cream cheese, they are slightly more sensitive to heat than a standard chocolate chip cookie.
- Fridge: Store in an airtight container for up to 7 days. I actually think they taste even better on day two once the flavors have had a chance to marry.
- Freezer: You can freeze the baked cookies (without glaze) for up to 3 months. Thaw at room temperature and add the glaze just before serving for the freshest look.
- Zero Waste: If you have leftover raspberry preserves, stir them into your morning yogurt or use them as a glaze for a simple pound cake. Leftover glaze can be thinned with a little more milk and used as a fruit dip.
Artistic Presentation Techniques
Creating a beautiful plate of cookies is all about color balance and a little bit of garnish strategy. To make these truly shine, I suggest focusing on three specific color accents that will draw the eye.
First, the bright crimson of the raspberry preserves is your focal point. To make it pop, ensure you add the jam before baking so it gets that glossy, jeweled finish.
Second, the snow white glaze should be drizzled only after the cookies are completely cool; if the cookies are warm, the glaze will melt and become transparent. Third, a tiny sprig of fresh mint or a light dusting of lemon zest added just before serving provides a vivid green or yellow contrast that makes the plate look professionally styled.
If you are hosting a larger event, try serving these alongside a variety of textures. The soft, velvety nature of these thumbprints pairs wonderfully with something airy like Mousse Cakes for 8 recipe, creating a dessert spread that is as visually stunning as it is homemade and delicious.
Myths About Cheesecake Cookies
There is a common misconception that adding cream cheese to a cookie dough will make it "healthy" or lower in fat. In reality, the cream cheese is there for structural and flavor purposes, providing a unique tang that you simply cannot get from butter alone.
It doesn't reduce the calories, but it certainly improves the mouthfeel!
Another myth is that you must use a thumb to make the indentation. While it’s called a "thumbprint," using the back of a rounded measuring spoon actually results in a much more uniform well for the jam.
Your thumb is great for a rustic, homemade look, but the spoon is the secret to those perfectly circular, professional looking "caves" of raspberry goodness.
Finally, some believe that the jam will "soak in" and make the cookie soggy if added before baking. This is only true if you use a very thin, watery jelly. high-quality preserves or jams contain enough pectin to hold their shape, and the brief time in the oven actually helps set the jam into a stable, gummy bear like consistency that stays right where you put it.

Recipe FAQs
Is it true I must use jam instead of preserves for the filling?
No, this is a common misconception. Raspberry preserves are actually preferred because the fruit texture provides better structure, preventing the filling from bubbling over during the 11 13 minute bake time.
Why did my cookie centers spill over during baking?
You likely made the indentation too shallow. Ensure you press a deep well into the center of each 1-tablespoon dough ball, which allows the 1/2 teaspoon of preserves to sit securely without expanding beyond the rim.
How to prevent the dough from spreading into flat discs?
Refrigerate the dough for at least 1 hour before scooping. Chilling stabilizes the butter and cream cheese, ensuring the cookies maintain their shape in the 350°F oven; if you enjoyed mastering this fat-chilling technique, see how we apply similar temperature control in our 6 inch cheesecake recipe.
Can I skip the chilling step if I am in a hurry?
No, the dough will become impossible to handle. Chilling is essential to firm up the cream cheese and butter, which prevents the dough from sticking to your hands while you roll the balls.
How to tell when these cookies are finished baking?
Look for set edges and lightly golden bottoms. Remove them from the oven between 11 and 13 minutes, then leave them on the hot pan for 5 minutes to finish setting before moving to a wire rack.
Is it safe to store these cookies at room temperature?
No, they must be refrigerated. Because the dough includes a 4 oz block of cream cheese, store your finished cookies in an airtight container in the fridge for up to 7 days to ensure safety and texture.
How to freeze these for later use?
Freeze the baked cookies without the glaze for up to 3 months. Wait until you are ready to serve them to add the powdered sugar and milk glaze, which keeps the topping from becoming sticky or absorbed by the cookie during the thawing process.
Raspberry Cheesecake Thumbprint Cookies
Ingredients:
Instructions:
Nutrition Facts:
| Calories | 192 calories |
|---|---|
| Protein | 1.8 g |
| Fat | 9.5 g |
| Carbs | 25.1 g |
| Fiber | 0.4 g |
| Sugar | 14.8 g |
| Sodium | 64 mg |
