Red Velvet Rice Krispies: Velveteen Crunch Squares
- Red Velvet 'Velveteen' Crispy Squares with Cream Cheese Drizzle
- Capturing the Classic: Why Red Velvet Works as a No-Bake Treat
- The Science of Setting: Achieving the Perfect Crispy-Chewy Balance
- Essential Components for Red Velvet Crispy Squares
- Crafting Your Batch of Red Velvet Rice Krispies
- Troubleshooting and Expert Tips for Optimal Results
- Practical Guide: Keeping Your Squares Fresh
- Elevating the Experience: Pairings and Presentation
- Recipe FAQs
- 📝 Recipe Card
Red Velvet 'Velveteen' Crispy Squares with Cream Cheese Drizzle
This is it, friend. If you want a deeply satisfying, rich, and utterly gorgeous no-bake treat, stop scrolling now. The moment you stir the cocoa and the deep red gel paste into that butter, your kitchen transforms, smelling exactly like a bakery full of freshly baked, slightly tangy velvet cake.
When you pull out a perfect square, you get that glorious, messy, gooey stretch of marshmallow, followed by the satisfying shatter of the cereal. Seriously, making these Red Velvet Rice Krispies is a whole sensory experience.
I adore classic Red Velvet cake, but honestly, who has time for three separate cake layers on a Tuesday? This version is a lifesaver. It takes less than 20 minutes of active time and gives you that famous rich flavour profile that subtle hint of cocoa, that luxurious cream cheese tang without turning on your oven.
It's cheap, fast, impressive, and ridiculously scalable for parties. These Red Velvet Rice Krispies are simply the easiest way to achieve dessert hero status.
We aren't just dumping ingredients together, though. To capture that true "velvet" texture and deep red hue, we need to talk technique. There are specific secrets to getting that perfect chewy, non-rock hard texture, and I’m going to walk you through every single step to guarantee your Red Velvet Rice Krispies are the chewiest, most beautiful treats you’ve ever made.
Capturing the Classic: Why Red Velvet Works as a No-Bake Treat
The reason people fail at translating cake recipes into other formats is usually because they rely too much on the fat in the frosting and not enough on balancing the dry elements.
The magic of Red Velvet isn't just the red colour; it’s the dance between the slight tanginess (usually from buttermilk/vinegar) and the rich, dark flavour of cocoa. My recipe for Red Velvet Rice Krispies uses a heavy dose of vanilla and a pinch of salt to amplify the cocoa, convincing your brain it’s tasting cake batter.
The trick here is ensuring the marshmallow base itself carries the full flavour profile. We’re embedding the cocoa and the vibrant gel colouring right into the melted butter before the marshmallows even hit the pan. This step is critical.
It ensures the fat-soluble compounds (the flavour and colour) are perfectly dispersed, giving you a smooth, uniform red that looks exactly like a plush velvet sofa. These beautiful Red Velvet Rice Krispies shouldn't have any white streaks.
The Science of Setting: Achieving the Perfect Crispy Chewy Balance
The Magic of the 'Velveteen' Crunch
A great Rice Krispies treat and certainly these Red Velvet Rice Krispies —should be chewy, but not tough. The sound should be a light, airy crunch, not a hard thud. We achieve this by adding a few extra marshmallows right at the end, after removing the pan from the heat.
These stay intact and melt just slightly, creating pockets of sticky goodness that add incredible stretch and texture once cooled. This is the difference between a passable square and a truly remarkable one.
Decadent Flavor Profile Breakdown (Cocoa and Tang)
While the marshmallow provides the sweetness, the cocoa powder gives us the sophisticated Red Velvet backbone. I always use Dutch processed cocoa here because it’s less acidic than natural cocoa, which allows the red colouring to shine brighter. We get the necessary tang from the Cream Cheese Drizzle.
Seriously, don't skip the drizzle! It’s what transforms this from a basic crimson treat into true Red Velvet Rice Krispies .
What to Expect: Texture and Setting Time
Once you press the mixture into the pan, the squares will feel warm and slightly loose. Give them time. Room temperature setting (about 60– 90 minutes) yields the softest result.
If you must rush, a quick 30 minutes in the fridge is acceptable, but pull them out right away! Over chilling makes them brittle. We want chewy, fudgy squares of Red Velvet Rice Krispies , not bricks.
The Role of Butter Fat in Marshmallow Suspension
This is my biggest piece of advice, and it applies to any version of Rice Krispies treats, including our beloved Red Velvet Rice Krispies . Use high-quality butter, and use a generous amount. Fat is what keeps the sugar in the marshmallows soft and pliable once cooled.
If you overheat the marshmallow and evaporate too much moisture, or if you skimp on butter, the sugar crystallizes quickly when it cools, resulting in a tooth breaking treat. Keep the heat low, low, low.
Infusing Deep Red Hue Without Excess Liquid
The biggest mistake I made when I first attempted this recipe was using liquid food colouring. It diluted the mix, made the squares gritty, and resulted in a sad, pinkish orange disaster. You must use gel paste colouring.
A good gel paste (like AmeriColor Super Red or Wilton No-Taste Red) is incredibly concentrated, giving you that deep, intense 'velvet' red without introducing excess moisture. The vibrant colour is what makes these Red Velvet Rice Krispies stand out.
Balancing the Cocoa and Vanilla Notes
We use just two tablespoons of cocoa enough to give that depth without overpowering the vanilla. Vanilla extract is incredibly important for mimicking cake flavour. I use one full teaspoon, stirring it in with the butter and cocoa before adding the marshmallows.
This early infusion allows the vanilla flavour to mellow into the fat, deepening the overall taste of these fantastic Red Velvet Rice Krispies .
Essential Components for Red Velvet Crispy Squares
Sourcing the Best Ingredients (Cocoa and Color)
As mentioned, Dutch processed cocoa is your friend for color optimization. For the red gel, don't buy the cheap stuff from the grocery store check out aisle. Invest in a proper jar of professional grade gel paste.
It lasts forever and is truly non-negotiable for achieving the vibrant look these Red Velvet Rice Krispies demand.
Dairy Decisions: Butter vs. Margarine
Always use real butter. Period. Butter is what provides the rich mouthfeel and necessary fat structure that keeps the marshmallow soft and chewy. Margarine often contains more water, which can contribute to a tougher final texture, and really diminishes the flavour of your Red Velvet Rice Krispies .
| Ingredient | My Recommendation | Viable Substitution | Notes |
|---|---|---|---|
| Unsalted Butter | Unsalted Dairy Butter | Salted Butter (Omit added salt) | Flavor and texture integrity. |
| Marshmallows | Mini Marshmallows | Standard Large Marshmallows | Chop large ones into quarters to speed up melting time. |
| Rice Crispy Cereal | Standard Plain Cereal | Puffed Rice, Corn Flakes | Ensure it's certified GF if necessary. |
| Cocoa Powder | Dutch Processed | Natural Cocoa (Color will be slightly browner) | Dutch processed yields a darker, more stable red. |
| Red Food Coloring | Gel Paste (Super Red) | Deep Red Powdered Food Coloring | Avoid liquid coloring entirely. |
Swaps and Dietary Adjustments (gluten-free Cereal Options)
The wonderful thing about this type of recipe is how forgiving it is. If you need a certified gluten-free square, simply ensure the puffed rice cereal you choose is explicitly labeled GF. Some major brands make these now.
The rest of the ingredients butter, sugar, cocoa are naturally gluten-free, making these a simple switch for anyone avoiding gluten. Making fantastic Red Velvet Rice Krispies for everyone is totally doable.
Recipe Requirements for the Tangy Cream Cheese Glaze
I know some purists would argue these Red Velvet Rice Krispies don’t need frosting, but they are wrong. The tanginess of the cream cheese glaze is essential to replicating the true Red Velvet experience. Make sure your cream cheese and butter are completely softened to room temperature.
This is the only way to avoid annoying little lumps of cream cheese in your beautiful drizzle. If the icing looks too thick, add milk 1 teaspoon at a time; you want it loose enough to drizzle but thick enough that it doesn't soak entirely into the squares.
Crafting Your Batch of Red Velvet Rice Krispies
This whole process should feel swift and smooth. The key is setting up your pan and measuring your cereal before you even turn on the stove. Once the marshmallows start melting, things move very fast!
Phase 1: Preparing the Deep Red Marshmallow Base
Start the heat on low. Seriously, use the lowest setting your stove allows. Melt the butter until it’s shimmering, then whisk in the cocoa, salt, and vanilla. Let this cook just for 30 seconds until your kitchen smells rich and warm. Now, quickly whisk in that powerful red gel.
It should immediately transform the butter mixture into a vibrant, dark crimson paste. Add the marshmallows and keep stirring constantly until about 80% are melted. Remove the pot from the heat and let the residual warmth melt the last bits.
This over low heat technique ensures your final Red Velvet Rice Krispies squares remain perfectly chewy.
Phase 2: Folding and Pressing Technique
This is where the structure of your Red Velvet Rice Krispies is defined. Pour the cereal into the marshmallow base. Immediately begin folding with a rubber spatula, scraping from the bottom and bringing the mixture up and over. Do this quickly but gently.
The goal is to coat every piece of cereal without crushing the delicate rice puffs. Once it is just combined stop stirring! Get it into the pan right away.
Chef’s Note: Use lightly buttered hands or a separate piece of parchment paper to press the mixture into the pan. Use minimal pressure. You are evening out the surface, not compacting it.
Compacting them is the fastest way to get hard, dense Red Velvet Rice Krispies instead of the soft ones we crave.
Phase 3: Whipping Up the Cream Cheese Drizzle
While the treats are cooling, prepare the drizzle. Ensure your cream cheese and butter are ultra soft. Start by whipping the two together until they are cloud like and perfectly smooth. This should take a minute or two with a handheld whisk. Add the powdered sugar slowly, mixing until you have a thick paste.
Then, add the milk drop by drop. You might only need 1 tablespoon. You want a thick ribbon consistency that looks exactly like classic cream cheese frosting.
Crucial Cooling and Cutting Guidelines
Resist the urge to cut these squares early! They need time for the marshmallow matrix to fully set and solidify around the cereal. Room temperature is ideal. If you cut them too soon, they will sag and lose their crisp structure.
Once they feel firm to the touch, lift the block of Red Velvet Rice Krispies out using the parchment paper overhang, place it on a cutting board, and drizzle generously. Let the drizzle set for another 10 minutes before slicing into sharp squares.
Troubleshooting and Expert Tips for Optimal Results
Avoiding the "Too Hard" Treat Problem (Overcooking Marshmallows)
This is the number one issue in all crispy treats. If the marshmallow mixture boils, or if it cooks over medium or high heat, the sugar molecules become too concentrated and evaporate essential moisture. When they cool, they seize up and become like cement.
Fix: Always melt the marshmallows over the lowest heat possible. If you think the pan is getting too hot, pull it off the burner entirely and continue stirring. The goal is melted , not cooked .
Maximizing Color Saturation Safely
You want a deep, almost maroon red for these Red Velvet Rice Krispies . If your color looks too pink after step 3, add another half teaspoon of gel paste directly to the butter and cocoa mixture before the marshmallows go in.
It’s much easier to adjust the colour now than trying to fix a pale batch later. Never add liquid coloring, even if you are desperate!
The Pressing Trap: Gentle Handling is Key
I know I’ve said it before, but it bears repeating. When you press the mixture into the pan, be gentle. When I tried making these Red Velvet Rice Krispies years ago, I packed them down so hard they were dense and chewy, like taffy.
Instead, think of it like tucking the squares into bed just a light pat to ensure they fill the space evenly.
Fixing a Drizzle That Is Too Thin or Too Thick
If your cream cheese drizzle is too thin, sift in an extra tablespoon of powdered sugar and whisk vigorously. If it is too thick and won't pour easily, add milk three drops at a time until you reach the desired consistency.
It’s incredibly easy to overshoot the target with the liquid, so proceed with caution!
Practical Guide: Keeping Your Squares Fresh
You've made the perfect batch of Red Velvet Rice Krispies —now how do you keep them tasting amazing for days?
Short Term Counter Storage Best Practices
These treats keep best at room temperature, provided they are stored properly. Place the cut squares in an airtight container lined with wax paper or parchment paper. Layer them gently, separated by paper, to prevent them from sticking. They will stay perfectly soft and chewy on the counter for 3 to 4 days.
If you keep them in the fridge long term, they will harden.
Can You Freeze Red Velvet Crispy Treats?
Absolutely! This is one of the best make-ahead party treats around. To freeze your Red Velvet Rice Krispies , let them set fully, cut them into squares, and allow the cream cheese drizzle to fully harden (about 30 minutes in the freezer).
Wrap each square individually and tightly in plastic wrap, then place them all into a freezer safe bag or container. They will keep well for up to 3 months. To serve, thaw them overnight at room temperature on the counter. Do not microwave them from frozen, or you’ll end up with a melted, crushed mess.
Elevating the Experience: Pairings and Presentation

These treats are gorgeous all on their own, but if you want to take your presentation up a notch for a holiday party maybe alongside my famous Street Tacos: Proper Carne Asada, Zesty Charred Recipe — consider these ideas.
For a dramatic, deep red dessert, sometimes I’ll melt 4 ounces of white chocolate and stir in a tiny bit of the red gel for a pink candy coating on the bottom, then drizzle the cream cheese on top. It adds another layer of crunch and richness to the Red Velvet Rice Krispies . If you want a savory palate cleanser after all this sweetness, you might consider something like my pan-seared Swordfish Recipe: Pan-Seared with Lemon Caper Butter .
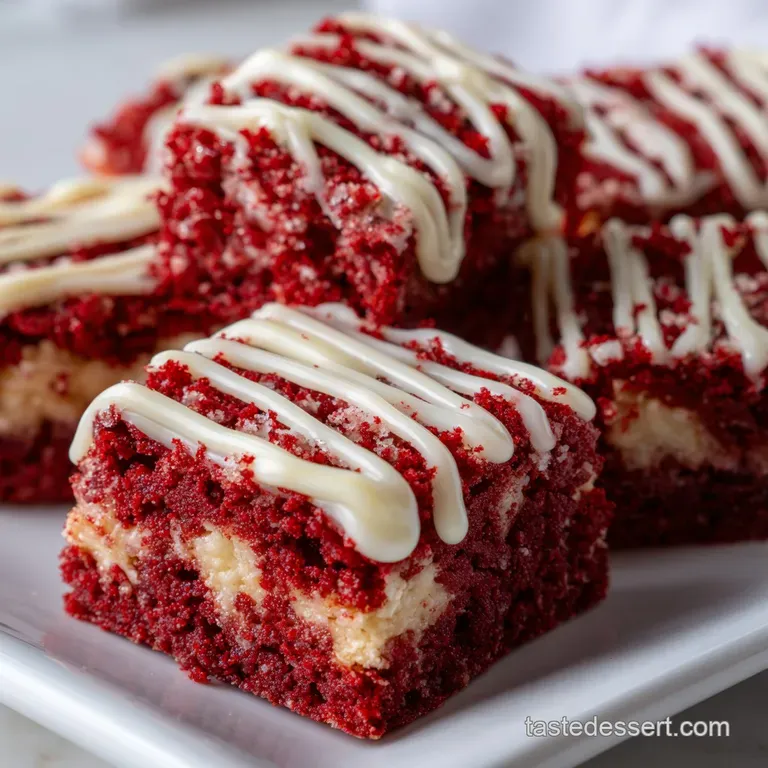
But really, the classic presentation works best: simply serve these beautiful, deeply crimson Red Velvet Rice Krispies squares on a clean white platter, showcasing that velvety red colour and the pristine white drizzle. The colour alone makes these a jaw-dropping addition to any dessert spread, perfect for Christmas or Valentine's Day. If you're looking for another crispy, comforting option, my Sizzling Rice Soup: The Crispy Chinese Comfort Recipe hits a different note, but uses that same satisfying crunch principle. Making these ultimate Red Velvet Rice Krispies is always a winner. Now go make some magic!## Red Velvet 'Velveteen' Crispy Squares with Cream Cheese Drizzle
This is it, friend. If you want a deeply satisfying, rich, and utterly gorgeous no-bake treat, stop scrolling now. The moment you stir the cocoa and the deep red gel paste into that butter, your kitchen transforms, smelling exactly like a bakery full of freshly baked, slightly tangy velvet cake.
When you pull out a perfect square, you get that glorious, messy, gooey stretch of marshmallow, followed by the satisfying shatter of the cereal. Seriously, making these Red Velvet Rice Krispies is a whole sensory experience.
I adore classic Red Velvet cake, but honestly, who has time for three separate cake layers on a Tuesday? This version is a lifesaver. It takes less than 20 minutes of active time and gives you that famous rich flavour profile that subtle hint of cocoa, that luxurious cream cheese tang without turning on your oven.
It's cheap, fast, impressive, and ridiculously scalable for parties. These Red Velvet Rice Krispies are simply the easiest way to achieve dessert hero status.
We aren't just dumping ingredients together, though. To capture that true "velvet" texture and deep red hue, we need to talk technique. There are specific secrets to getting that perfect chewy, non-rock hard texture, and I’m going to walk you through every single step to guarantee your Red Velvet Rice Krispies are the chewiest, most beautiful treats you’ve ever made.
I once made a pale pink, hard batch, and I learned from my mistakes so you don't have to!
Capturing the Classic: Why Red Velvet Works as a No-Bake Treat
The reason people fail at translating cake recipes into other formats is usually because they rely too much on the fat in the frosting and not enough on balancing the dry elements.
The magic of Red Velvet isn't just the red colour; it’s the dance between the slight tanginess (usually from buttermilk/vinegar) and the rich, dark flavour of cocoa. My recipe for Red Velvet Rice Krispies uses a heavy dose of vanilla and a pinch of salt to amplify the cocoa, convincing your brain it’s tasting cake batter.
The trick here is ensuring the marshmallow base itself carries the full flavour profile. We’re embedding the cocoa and the vibrant gel colouring right into the melted butter before the marshmallows even hit the pan. This step is critical.
It ensures the fat-soluble compounds (the flavour and colour) are perfectly dispersed, giving you a smooth, uniform red that looks exactly like a plush velvet sofa. These beautiful Red Velvet Rice Krispies shouldn't have any white streaks.
This Red Velvet Rice Krispies recipe truly maximizes the flavor payoff for minimal effort.
The Science of Setting: Achieving the Perfect Crispy Chewy Balance
The Magic of the 'Velveteen' Crunch
A great Rice Krispies treat and certainly these Red Velvet Rice Krispies —should be chewy, but not tough. The sound should be a light, airy crunch, not a hard thud. We achieve this by adding a few extra marshmallows right at the end, after removing the pan from the heat.
These stay intact and melt just slightly, creating pockets of sticky goodness that add incredible stretch and texture once cooled. This is the difference between a passable square and a truly remarkable one.
You'll recognize the success of these Red Velvet Rice Krispies immediately upon first bite.
Decadent Flavor Profile Breakdown (Cocoa and Tang)
While the marshmallow provides the sweetness, the cocoa powder gives us the sophisticated Red Velvet backbone. I always use Dutch processed cocoa here because it’s less acidic than natural cocoa, which allows the red colouring to shine brighter. We get the necessary tang from the Cream Cheese Drizzle.
Seriously, don't skip the drizzle! It’s what transforms this from a basic crimson treat into true Red Velvet Rice Krispies . These are a massive hit for a Halloween Party Rice Crispy Treats spread because of their intense color.
What to Expect: Texture and Setting Time
Once you press the mixture into the pan, the squares will feel warm and slightly loose. Give them time. Room temperature setting (about 60– 90 minutes) yields the softest result.
If you must rush, a quick 30 minutes in the fridge is acceptable, but pull them out right away! Over chilling makes them brittle. We want chewy, fudgy squares of Red Velvet Rice Krispies , not bricks.
This Red Velvet Rice Krispie Treats Recipe is all about patience in the cooling phase.
The Role of Butter Fat in Marshmallow Suspension
This is my biggest piece of advice, and it applies to any version of Rice Krispies treats, including our beloved Red Velvet Rice Krispies . Use high-quality butter, and use a generous amount. Fat is what keeps the sugar in the marshmallows soft and pliable once cooled.
If you overheat the marshmallow and evaporate too much moisture, or if you skimp on butter, the sugar crystallizes quickly when it cools, resulting in a tooth breaking treat. Keep the heat low, low, low.
Infusing Deep Red Hue Without Excess Liquid
The biggest mistake I made when I first attempted this recipe was using liquid food colouring. It diluted the mix, made the squares gritty, and resulted in a sad, pinkish orange disaster. You must use gel paste colouring.
A good gel paste (like AmeriColor Super Red or Wilton No-Taste Red) is incredibly concentrated, giving you that deep, intense 'velvet' red without altering the texture. The vibrant colour is what makes these Red Velvet Rice Krispies stand out.
This is how to make red rice krispie treats that truly pop!
Balancing the Cocoa and Vanilla Notes
We use just two tablespoons of cocoa enough to give that depth without overpowering the vanilla. Vanilla extract is incredibly important for mimicking cake flavour. I use one full teaspoon, stirring it in with the butter and cocoa before adding the marshmallows.
This early infusion allows the vanilla flavour to mellow into the fat, deepening the overall taste of these fantastic Red Velvet Rice Krispies . If you are looking for a true Red Velvet Cake Rice Krispie Treats flavor, vanilla is key.
Essential Components for Red Velvet Crispy Squares
Sourcing the Best Ingredients (Cocoa and Color)
As mentioned, Dutch processed cocoa is your friend for color optimization. For the red gel, don't buy the cheap stuff from the grocery store check out aisle. Invest in a proper jar of professional grade gel paste.
It lasts forever and is truly non-negotiable for achieving the vibrant look these Red Velvet Rice Krispies demand. A poorly made batch of Red Velvet Rice Krispies is sadly dull.
Dairy Decisions: Butter vs. Margarine
Always use real butter. Period. Butter is what provides the rich mouthfeel and necessary fat structure that keeps the marshmallow soft and chewy. Margarine often contains more water, which can contribute to a tougher final texture, and really diminishes the flavour of your Red Velvet Rice Krispies .
Stick to the good stuff for the best Velvet Rice Krispies .
| Ingredient | My Recommendation | Viable Substitution | Notes |
|---|---|---|---|
| Unsalted Butter | Unsalted Dairy Butter | Salted Butter (Omit added salt) | Flavor and texture integrity. |
| Marshmallows | Mini Marshmallows | Standard Large Marshmallows | Chop large ones into quarters to speed up melting time. |
| Rice Crispy Cereal | Standard Plain Cereal | Puffed Rice, Corn Flakes | Ensure it's certified GF if necessary. |
| Cocoa Powder | Dutch Processed | Natural Cocoa (Color will be slightly browner) | Dutch processed yields a darker, more stable red. |
| Red Food Coloring | Gel Paste (Super Red) | Deep Red Powdered Food Coloring | Avoid liquid coloring entirely. |
Swaps and Dietary Adjustments (gluten-free Cereal Options)
The wonderful thing about this type of recipe is how forgiving it is. If you need a certified gluten-free square, simply ensure the puffed rice cereal you choose is explicitly labeled GF. Some major brands make these now.
The rest of the ingredients butter, sugar, cocoa are naturally gluten-free, making these a simple switch for anyone avoiding gluten. Making fantastic Red Velvet Rice Krispies for everyone is totally doable.
Recipe Requirements for the Tangy Cream Cheese Glaze
I know some purists would argue these Red Velvet Rice Krispies don’t need frosting, but they are wrong. The tanginess of the cream cheese glaze is essential to replicating the true Red Velvet experience. Make sure your cream cheese and butter are completely softened to room temperature.
This is the only way to avoid annoying little lumps of cream cheese in your beautiful drizzle. If the icing looks too thick, add milk 1 teaspoon at a time; you want it loose enough to drizzle but thick enough that it doesn't soak entirely into the squares.
This Red Velvet Rice Krispie Treats with Cream Cheese Frosting is truly indulgent.
Crafting Your Batch of Red Velvet Rice Krispies
This whole process should feel swift and smooth. The key is setting up your pan and measuring your cereal before you even turn on the stove. Once the marshmallows start melting, things move very fast! This is the core instruction set for your Red Velvet Rice Krispies .
Phase 1: Preparing the Deep Red Marshmallow Base
Start the heat on low. Seriously, use the lowest setting your stove allows. Melt the butter until it’s shimmering, then whisk in the cocoa, salt, and vanilla. Let this cook just for 30 seconds until your kitchen smells rich and warm. Now, quickly whisk in that powerful red gel.
It should immediately transform the butter mixture into a vibrant, dark crimson paste. Add the marshmallows and keep stirring constantly until about 80% are melted. Remove the pot from the heat and let the residual warmth melt the last bits.
This over low heat technique ensures your final Red Velvet Rice Krispies squares remain perfectly chewy.
Phase 2: Folding and Pressing Technique
This is where the structure of your Red Velvet Rice Krispies is defined. Pour the cereal into the marshmallow base. Immediately begin folding with a rubber spatula, scraping from the bottom and bringing the mixture up and over. Do this quickly but gently.
The goal is to coat every piece of cereal without crushing the delicate rice puffs. Once it is just combined stop stirring! Get it into the pan right away.
Chef’s Note: Use lightly buttered hands or a separate piece of parchment paper to press the mixture into the pan. Use minimal pressure. You are evening out the surface, not compacting it.
Compacting them is the fastest way to get hard, dense Red Velvet Rice Krispies instead of the soft ones we crave.
Phase 3: Whipping Up the Cream Cheese Drizzle
While the treats are cooling, prepare the drizzle. Ensure your cream cheese and butter are ultra soft. Start by whipping the two together until they are cloud like and perfectly smooth. This should take a minute or two with a handheld whisk. Add the powdered sugar slowly, mixing until you have a thick paste.
Then, add the milk drop by drop. You might only need 1 tablespoon. You want a thick ribbon consistency that looks exactly like classic cream cheese frosting, perfect for topping these amazing Red Velvet Rice Krispies .
Crucial Cooling and Cutting Guidelines
Resist the urge to cut these squares early! They need time for the marshmallow matrix to fully set and solidify around the cereal. Room temperature is ideal. If you cut them too soon, they will sag and lose their crisp structure.
Once they feel firm to the touch, lift the block of Red Velvet Rice Krispies out using the parchment paper overhang, place it on a cutting board, and drizzle generously. Allow the drizzle to set for another 10 minutes before slicing into sharp squares.
This makes the final presentation of the Red Velvet Rice Krispies so much cleaner.
Troubleshooting and Expert Tips for Optimal Results
Avoiding the "Too Hard" Treat Problem (Overcooking Marshmallows)
This is the number one issue in all crispy treats. If the marshmallow mixture boils, or if it cooks over medium or high heat, the sugar molecules become too concentrated and evaporate essential moisture. When they cool, they seize up and become like cement.
Fix: Always melt the marshmallows over the lowest heat possible. If you think the pan is getting too hot, pull it off the burner entirely and continue stirring. The goal is melted , not cooked .
This ensures your Red Velvet Rice Krispies remain pliable.
Maximizing Color Saturation Safely
You want a deep, almost maroon red for these Red Velvet Rice Krispies . If your color looks too pink after step 3, add another half teaspoon of gel paste directly to the butter and cocoa mixture before the marshmallows go in.
It’s much easier to adjust the colour now than trying to fix a pale batch later. Never add liquid coloring, even if you are desperate!
The Pressing Trap: Gentle Handling is Key
I know I’ve said it before, but it bears repeating. When you press the mixture into the pan, be gentle. When I tried making these Red Velvet Rice Krispies years ago, I packed them down so hard they were dense and chewy, like taffy.
Instead, think of it like tucking the squares into bed just a light pat to ensure they fill the space evenly.
Fixing a Drizzle That Is Too Thin or Too Thick
If your cream cheese drizzle is too thin, sift in an extra tablespoon of powdered sugar and whisk vigorously. If it is too thick and won't pour easily, add milk three drops at a time until you reach the desired consistency.
It’s incredibly easy to overshoot the target with the liquid, so proceed with caution! A perfect drizzle is the crown jewel of these Red Velvet Rice Krispies .
Practical Guide: Keeping Your Squares Fresh
You've made the perfect batch of Red Velvet Rice Krispies —now how do you keep them tasting amazing for days?
Short Term Counter Storage Best Practices
These treats keep best at room temperature, provided they are stored properly. Place the cut squares in an airtight container lined with wax paper or parchment paper. Layer them gently, separated by paper, to prevent them from sticking. They will stay perfectly soft and chewy on the counter for 3 to 4 days.
If you keep them in the fridge long term, they will harden. These Velvet Rice Krispies love the dark, cool pantry.
Can You Freeze Red Velvet Crispy Treats?
Absolutely! This is one of the best make-ahead party treats around. To freeze your Red Velvet Rice Krispies , let them set fully, cut them into squares, and allow the cream cheese drizzle to fully harden (about 30 minutes in the freezer).
Wrap each square individually and tightly in plastic wrap, then place them all into a freezer safe bag or container. They will keep well for up to 3 months. To serve, thaw them overnight at room temperature on the counter. Do not microwave them from frozen, or you’ll end up with a melted, crushed mess.
Elevating the Experience: Pairings and Presentation
These treats are gorgeous all on their own, but if you want to take your presentation up a notch for a holiday party maybe alongside my famous Street Tacos: Proper Carne Asada, Zesty Charred Recipe — consider these ideas.
For a dramatic, deep red dessert, sometimes I’ll melt 4 ounces of white chocolate and stir in a tiny bit of the red gel for a pink candy coating on the bottom, then drizzle the cream cheese on top. It adds another layer of crunch and richness to the Red Velvet Rice Krispies . If you want a savory palate cleanser after all this sweetness, you might consider something like my pan-seared Swordfish Recipe: Pan-Seared with Lemon Caper Butter .
But really, the classic presentation works best: simply serve these beautiful, deeply crimson Red Velvet Rice Krispies squares on a clean white platter, showcasing that velvety red colour and the pristine white drizzle. The colour alone makes these a jaw-dropping addition to any dessert spread, perfect for Christmas or Valentine's Day. If you're looking for another crispy, comforting option, my Sizzling Rice Soup: The Crispy Chinese Comfort Recipe hits a different note, but uses that same satisfying crunch principle. Making these ultimate Red Velvet Rice Krispies is always a winner. Now go make some magic!

Recipe FAQs
Why did my Red Velvet Crispy Squares turn out too hard or dry?
Hardness usually results from cooking the marshmallows and butter mixture for too long, causing the sugar to caramelize past the soft ball stage. Ensure you melt the mixture just until smooth and remove it from the heat immediately before folding in the cereal and cocoa powder.
Additionally, be careful not to over compress the mixture when pressing it into the pan; a gentle, even touch is best for a tender square.
Can I omit the red food coloring or the cocoa powder?
While you can omit the vibrant red coloring, the treats will not have the classic Red Velvet aesthetic, functioning instead as a 'subtly spiced' vanilla crisp. We strongly advise against skipping the cocoa powder, as that ingredient combined with the acidic vanilla and butter is fundamental to achieving the iconic, slightly tangy flavor profile of Red Velvet cake.
Use high-quality Dutch process cocoa for the deepest flavor.
How should I store these crispy treats, and how long do they last?
For optimal freshness and crunch, store the squares in an airtight container at room temperature for up to three days. If you have already applied the cream cheese drizzle, refrigeration is necessary to prevent spoilage.
If refrigerated, allow the treats to sit at room temperature for about 15 minutes before serving to soften the marshmallow base.
My cream cheese drizzle is too runny. What went wrong?
A runny drizzle usually means too much liquid was incorporated or the cream cheese was too warm. Always ensure your cream cheese is softened but not melted, and start with only half the required liquid (milk or cream) listed in your glaze recipe.
Add the remaining liquid in very small increments until you achieve a thick, slow dripping consistency, ideal for piping or drizzling.
Can I make these Red Velvet Crispy Squares vegan or dairy-free?
Absolutely. Swap the traditional butter for a high-quality vegan butter substitute, and replace conventional marshmallows with a certified vegan brand, which typically use agar agar instead of gelatine. For the cream cheese drizzle, use a vegan cream cheese alternative mixed with plant based milk and powdered sugar.
Can I freeze the Red Velvet Rice Krispies for later?
Freezing is generally not recommended for marshmallow treats, as the texture can become excessively chewy and crystalline after thawing. If storage beyond a few days is necessary, wrap individual squares very tightly in plastic wrap, then aluminum foil, and store in a sealed container for up to six weeks.
Thaw them overnight in the refrigerator and allow them to reach room temperature before consuming for the best flavor.
I only have gel food coloring, not liquid. Is that okay?
Gel food coloring is highly recommended over liquid, especially for achieving the deep, rich 'velvet' red without introducing excess moisture. Start with a small amount of gel coloring it is far more concentrated and mix it thoroughly into the melted marshmallow mixture before adding the cocoa powder and cereal.
This prevents streaking and ensures a uniform color.
Red Velvet Crispy Squares Recipe

Ingredients:
Instructions:
Nutrition Facts:
| Calories | 215 calories |
|---|---|
| Fat | 8 g |
| Fiber | 1 g |
