Sloppy Joe Sliders: Crowd-Pleasing Snack
- Time: Active 15 minutes, Passive 25 minutes, Total 40 minutes
- Flavor/Texture Hook: Tangy, velvety beef against a buttery, shatter crisp roll top.
- Perfect for: Game day gatherings or nostalgic weeknight family dinners.
- Nostalgic Homemade Sloppy Joe Sliders
- The Secret to Balanced Flavor
- Analyzing Our Core Components
- Gathering Your Essential Elements
- Specialized Equipment for Success
- Step By Step Assembly Guide
- Avoiding Common Kitchen Disasters
- Simple Methods for Scaling
- Flavor Variations and Swaps
- Proper Storage and Reheating
- How to Serve and Enjoy
- Debunking Kitchen Myths
- Recipe FAQs
- 📝 Recipe Card
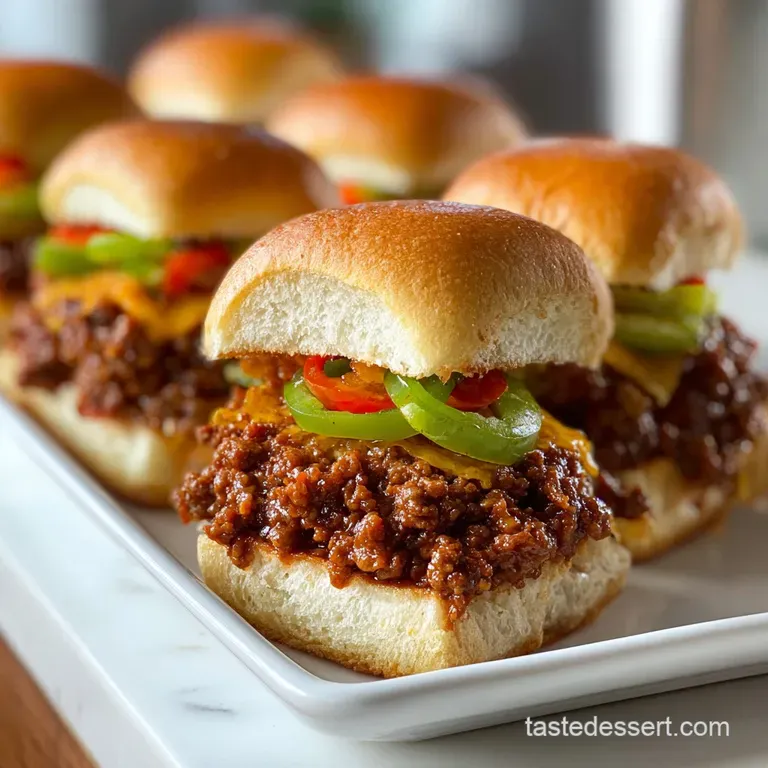
Nostalgic Homemade Sloppy Joe Sliders
The kitchen fills with that familiar, savory aroma the moment the beef hits the hot stainless steel. It's a smell that takes me right back to Tuesday nights at my grandmother’s laminate kitchen table, waiting for a mess of meat and sauce to land on a plate.
But let's be honest, the old school version usually meant a soggy bun that fell apart before the second bite. I wanted to capture that timeless flavor while fixing the structural issues that plague most Joe Sliders.
We've all been there: you take a bite, and the entire filling slides out the back of the roll. It's frustrating. These sliders solve that with a thick, reduced sauce and a strategic layer of sharp cheddar that acts as a moisture shield.
You're getting the deep, complex notes of balsamic and smoked paprika, tucked inside a roll that actually holds its shape.
This isn't just another meat and ketchup recipe. We're using lean beef and a scratch made sauce that ditches the corn syrup found in canned versions. It's a more refined take on a cherished favorite, designed to feed a hungry crowd without the typical kitchen chaos.
Trust me, once you see how the cheese melts into the meat, you'll never go back to the stuff in a can.
The Secret to Balanced Flavor
A great slider relies on the contrast between the sharp, acidic filling and the sweet bread. When we cook down the tomato paste and balsamic vinegar, we're creating a concentrated base that stands up to the rich beef. Unlike the thinner sauces in my Crock Pot Italian recipe, this filling is designed to be tight and clingy so it stays put.
- Maillard Reaction: Browning the beef until it forms a dark crust creates new flavor molecules that raw meat lacks.
- Emulsification: The mustard and tomato paste act as binders, holding the fat and liquid together for a velvety finish.
- Hygroscopic Properties: Maple syrup attracts moisture, keeping the beef succulent even after it spends time in the hot oven.
- Acid Brightening: Balsamic vinegar breaks down tough fibers and cuts through the heavy fat for a cleaner palate.
| Method | Time | Texture | Best For |
|---|---|---|---|
| Stovetop | 15 minutes | Loose and saucy | Traditional messy sandwiches |
| Oven Baked | 25 minutes | Crispy tops, fused | Sliders and party snacks |
| Slow Cooker | 4 hours | Deeply infused | Large batches for meal prep |
Cooking the meat on the stovetop first is non negotiable for flavor, but the oven finish is what creates the "pull apart" magic. This dual stage process ensures the vegetables are soft and the bread develops a golden, crackling exterior.
If you skip the oven, you miss out on that satisfying crunch that contrasts with the tender meat inside.
Analyzing Our Core Components
Choosing the right ingredients makes the difference between a greasy mess and a polished appetizer. We use 93/7 lean beef because we want the flavor of the meat without a pool of oil soaking into the bottom of the Hawaiian rolls.
Since we aren't draining the pan after adding the aromatics, starting lean is a strategic move for a cleaner finished product.
| Ingredient | Science Role | Pro Secret |
|---|---|---|
| Tomato Paste | Umami Concentrator | Fry it in the center of the pan until it turns brick red for maximum depth. |
| Balsamic Vinegar | Acidic Balance | Use a mid tier vinegar; the sugars caramelize during the simmer to add a dark, woody sweetness. |
| Sharp Cheddar | Fat Emulsifier | Thin slices melt faster and more evenly than thick chunks, creating a better "glue." |
| Hawaiian Rolls | Sugar/Starch Base | Don't pull them apart before slicing; keeping the slab whole prevents the sauce from leaking. |
The maple syrup might seem like a small addition, but it provides a rounded sweetness that white sugar can't match. It bridges the gap between the tangy tomato sauce and the sweet rolls. If you've tried my standard Sloppy Joe Recipe, you know that the balance of sweet and heat is what makes this dish legendary.
Gathering Your Essential Elements
Everything here is a pantry staple, but the quality of your spices matters. Make sure your smoked paprika is fresh so it lends that woody, campfire note to the beef. I once used old paprika that had lost its punch, and the whole dish felt flat. Don't let that happen to your Joe Sliders.
- 1 lb 93/7 Lean Ground Beef: Why this? Prevents the rolls from becoming greasy during the oven baking stage.
- 1 small Yellow Onion, finely minced: Why this? Provides sweetness and texture that blends into the meat.
- 1 Green Bell Pepper, finely minced: Why this? Offers a classic, slightly bitter contrast to the sweet sauce.
- 2 cloves Garlic, grated: Why this? Grating releases more oils for a more intense aromatic punch.
- 0.5 tsp Sea Salt: Why this? Enhances all other flavors without being overly salty.
- 0.5 tsp Cracked Black Pepper: Why this? Adds a subtle, lingering floral heat.
- 0.5 cup Tomato Sauce, no salt added: Why this? Acts as the liquid base for our savory simmer.
- 2 tbsp Tomato Paste: Why this? Thickens the sauce and adds a concentrated tomato punch.
- 2 tbsp Balsamic Vinegar: Why this? Adds a complex acidity that cuts through the beef's richness.
- 1 tbsp Dijon Mustard: Why this? Provides tang and acts as a natural sauce emulsifier.
- 1 tbsp Maple Syrup: Why this? Balances the vinegar with a rich, caramel like sweetness.
- 1 tsp Smoked Paprika: Why this? Gives the filling a cherished, slow cooked smoky flavor.
- 0.25 tsp Cayenne Pepper: Why this? Just enough heat to wake up the taste buds.
- 12 Hawaiian Sweet Rolls: Why this? Their soft, sugary crumb is the perfect vessel for savory beef.
- 6 slices Thinly Sliced Sharp Cheddar: Why this? Creates a moisture barrier and adds a sharp salty note.
- 2 tbsp Salted Butter, melted: Why this? Helps the "Everything" seasoning stick and crisps the tops.
- 1 tsp Everything Bagel Seasoning: Why this? Adds a salty, oniony crunch to every single bite.
| Original Ingredient | Substitute | Why It Works |
|---|---|---|
| Lean Ground Beef | Ground Turkey (93% lean) | Similar texture. Note: Needs an extra pinch of salt as turkey is leaner. |
| Maple Syrup | Honey or Brown Sugar | Provides the necessary sweetness to balance the balsamic vinegar. |
| Hawaiian Rolls | Savory Slider Buns | Best for those who prefer a less sweet, more bread forward slider. |
Specialized Equipment for Success
You don't need a professional kitchen for this, but a few specific tools will make the process much smoother. I highly recommend a large stainless steel or cast iron skillet for the beef. Non stick pans are fine, but they don't produce the same level of browning (the fond) that we want for a deep flavor.
A long, serrated bread knife is also vital. You need to slice the entire slab of rolls in half at once. If you try to do them individually, they'll be uneven, and the assembly will be a nightmare. Finally, a 9x13 inch baking dish is the perfect size for 12 rolls.
It keeps them snug so they steam slightly in the middle while the edges get crispy.
Chef Tip: Freeze your butter for 10 minutes before melting it. Cold stored butter often has a better water to fat ratio that leads to a crispier bun top once brushed on and baked.
step-by-step Assembly Guide
- Brown the beef. Place the 1 lb ground beef in a large skillet over medium high heat until a dark crust forms.
- Soften the aromatics. Add the minced onion and green pepper to the pan. Note: The moisture from the veggies will help deglaze the beef bits.
- Aromatize with garlic. Stir in the grated garlic and cook for 60 seconds until the scent fills the kitchen.
- Toast the paste. Clear a small circle in the middle, add the 2 tbsp tomato paste, and fry for 2 minutes until it turns dark red.
- Build the sauce. Pour in the tomato sauce, balsamic vinegar, Dijon, maple syrup, salt, pepper, paprika, and cayenne.
- Simmer and thicken. Reduce the heat to low and simmer for 10 minutes until the sauce is velvety and thick.
- Prepare the rolls. Slice the entire pack of 12 Hawaiian rolls in half horizontally and place the bottom half in a baking dish.
- Layer the cheese. Lay the 6 slices of sharp cheddar over the bottom buns. Note: This creates a barrier so the bread doesn't get soggy.
- Add the filling. Spoon the beef mixture over the cheese and place the top buns back on.
- Butter and bake. Brush with melted butter, sprinkle with seasoning, and bake at 350°F for 15 minutes until the tops are golden and the cheese has melted.
Avoiding Common Kitchen Disasters
The biggest hurdle with Sloppy Joe Sliders is moisture management. If your sauce is too runny, the bottom bun will turn into a sponge before you can even serve it. This is why we simmer the sauce until it's thick and clings to the meat.
Also, keep an eye on the oven; those sweet rolls have a high sugar content and can go from golden to burnt in a matter of seconds.
Techniques to Prevent Sogginess
One trick I learned after a disastrous "soggy bottom" incident at a potluck is the cheese barrier method. By placing the cheese directly onto the bottom bun before adding the hot meat, the cheese melts and forms a waterproof seal. This keeps the juices in the meat layer and out of the bread.
Managing Oven Temperature Spikes
If your oven runs hot, the tops of the rolls might brown before the cheese in the middle has fully melted. If you see the tops getting too dark, simply tent a piece of aluminum foil loosely over the pan. This allows the heat to continue melting the cheese while protecting the delicate bread from direct heat.
| Problem | Root Cause | Solution |
|---|---|---|
| Soggy Bottoms | Sauce was too thin or no cheese barrier used. | Simmer sauce longer and always place cheese under the meat. |
| Dry Filling | Beef was overcooked before adding sauce. | Remove from heat as soon as the sauce reaches a "clinging" consistency. |
| Burnt Roll Tops | Sugar in the Hawaiian rolls caramelized too fast. | Tent with foil or move to a lower oven rack. |
Common Mistakes Checklist
- ✓ Pat the beef dry with a paper towel before browning (prevents steaming).
- ✓ Mince the onions and peppers very finely so they cook at the same rate as the beef.
- ✓ Don't skip the tomato paste "toasting" step; it removes the raw metallic taste.
- ✓ Let the sliders rest for 5 minutes after baking to let the sauce set.
- ✓ Use a serrated knife for the cleanest cuts through the baked sliders.
Simple Methods for Scaling
If you're hosting a big party, you can easily double or triple this recipe. For a double batch (24 sliders), use a larger skillet to brown the meat so you don't overcrowd the pan. Overcrowding leads to steaming rather than browning, and we want that Maillard flavor.
When baking two trays at once, rotate them halfway through the cooking time to ensure even browning.
When scaling down for a quiet dinner for two, you can use a small toaster oven pan. For a half batch, use 6 rolls and keep the spice measurements the same, but be careful with the salt. Small batches can become overly salty very quickly.
For the egg wash or butter topping, you won't need the full 2 tablespoons of butter; 1 tablespoon will be plenty.
Flavor Variations and Swaps
While the classic beef version is my favorite, you can get creative with the proteins and spices. If you want something a bit lighter, ground turkey or chicken works beautifully. Just remember that poultry is leaner, so you might need a tiny splash of olive oil in the pan to get the onions started.
White Meat Alternatives
Using ground turkey can sometimes lack the "heft" of beef. To fix this, add a dash of Worcestershire sauce or a teaspoon of soy sauce to the filling. This boosts the umami profile and makes the turkey version taste just as cherished as the original beef.
Garden Style Options
For a vegetarian twist, use a plant based ground meat or finely chopped sautéed mushrooms. Mushrooms are incredible because they release a lot of moisture, which you'll need to cook off entirely before adding the sauce. The balsamic vinegar pairs exceptionally well with the earthy tones of mushrooms.
- For a spicier kick: Double the cayenne or add a tablespoon of minced jalapeños to the onion mix.
- For a smoky BBQ vibe: Swap the tomato sauce for your favorite BBQ sauce and reduce the maple syrup.
- For a cheesier pull: Use a mix of sharp cheddar and shredded mozzarella for maximum stretch.
Proper Storage and Reheating
If you happen to have leftovers though in my house, that’s rare they store surprisingly well. Keep them in an airtight container in the fridge for up to 3 days. To reheat, avoid the microwave if you can. The microwave turns the bread rubbery.
Instead, wrap them loosely in foil and pop them in a 350°F oven for 10 minutes. This brings back that initial crunch.
For zero waste, if you have leftover meat filling but no rolls, it makes a fantastic topping for a baked potato or even swirled into Mac and cheese. I’ve even used the leftover Joe Sliders filling as a quick "chili" base by adding a can of kidney beans.
The stems from your bell peppers and onion skins can be saved in a freezer bag for your next batch of homemade vegetable stock.
How to Serve and Enjoy
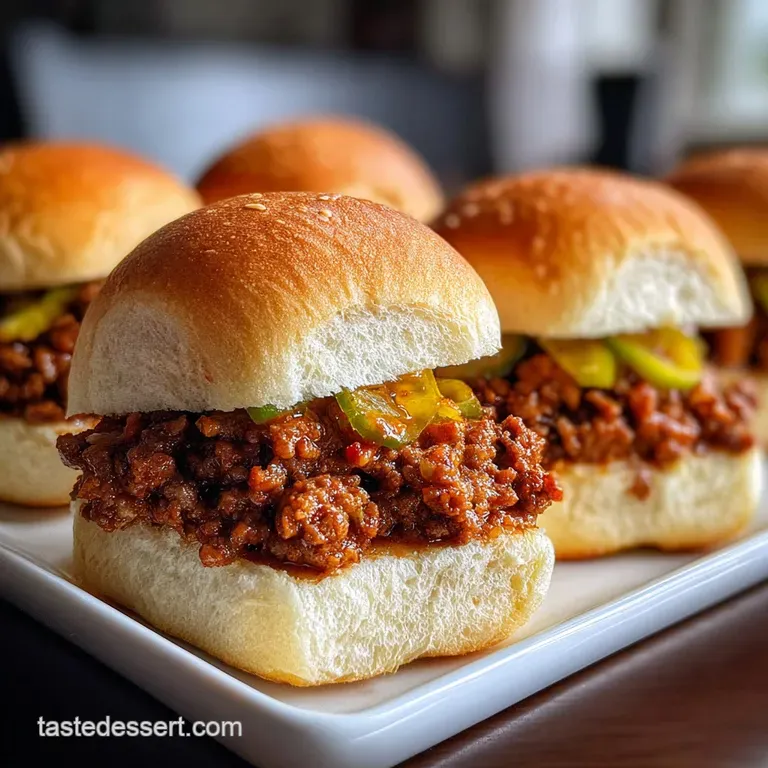
Presentation is everything with sliders. I love serving these right in the baking dish for a rustic, family style feel. It keeps them warm longer and makes it easy for people to pull away their own portions.
Pair them with something crunchy and acidic to balance the richness, like a side of vinegar based coleslaw or some crispy dill pickles.
If you’re looking for a full spread, these Joe Sliders sit perfectly next to a The Captains Treasure recipe for a high low appetizer mix. The contrast between the warm, beefy sliders and a cool, creamy dip is always a hit. Just make sure you have plenty of napkins they aren't called "sloppy" for nothing!
Debunking Kitchen Myths
A common misconception is that Sloppy Joes are just "hamburger meat in ketchup." A true, chef level filling relies on a balanced "gastrique" (a reduction of sugar and vinegar). By using balsamic vinegar and maple syrup, we are creating a sophisticated flavor profile that a bottle of ketchup simply can't replicate.
Another myth is that you must use high fat beef for flavor. While fat is flavor, in a slider, excess fat is the enemy of the bread. The 93/7 lean beef provides plenty of protein structure, and we build the "moistness" back in using the tomato sauce and balsamic reduction.
This results in a much cleaner, more enjoyable eating experience that doesn't leave your hands coated in grease.

Recipe FAQs
What's the difference between sloppy joes and Sloppy Jane?
Sloppy Jane is typically a vegetarian or vegan version. While a classic Sloppy Joe uses ground beef, a Sloppy Jane substitutes meat with ingredients like lentils, mushrooms, or plant based crumbles. The flavor profile aims to mimic the tangy, savory sauce of a traditional Sloppy Joe.
What's the secret to juicy sliders?
Don't overcook the meat filling and use a moisture barrier. Simmer the meat mixture until it's thick and clings to itself, ensuring it doesn't become watery. Layering cheese on the bottom bun before adding the meat also prevents the bread from becoming soggy.
What are the best buns to use for sloppy joes?
Hawaiian sweet rolls are the best choice. Their soft, slightly sweet crumb holds up well to the savory filling, and their size is perfect for sliders. Other good options include potato rolls or brioche buns.
What's the secret to a flavorful sloppy joe?
A balanced sauce with depth and tang. Browning the meat thoroughly, toasting the tomato paste, and using ingredients like balsamic vinegar and Dijon mustard create a complex flavor that goes beyond just ketchup. The Maillard reaction on the beef is crucial for developing rich taste.
Can I make the sloppy joe filling ahead of time?
Yes, absolutely. The meat filling can be made up to 48 hours in advance and stored in an airtight container in the refrigerator. This allows the flavors to meld even further, making your sliders even tastier when assembled and baked.
How do I prevent my sloppy joe sliders from getting soggy?
Use a cheese barrier and ensure the filling is thick. Placing slices of cheddar cheese directly on the bottom bun before adding the meat filling creates a protective layer. Also, simmer the meat sauce until it’s thick and rich, not watery, to avoid excess liquid.
Is it okay to use ground turkey instead of beef for Sloppy Joes?
Yes, ground turkey is a great substitute. If you enjoyed the flavor building techniques in our classic beef version, you'll find turkey responds well to the same flavor enhancers.
To boost umami, consider adding a dash of Worcestershire sauce or soy sauce to the turkey filling, similar to how we build flavor in other savory dishes.
Sloppy Joe Sliders
Ingredients:
Instructions:
Nutrition Facts:
| Calories | 219 kcal |
|---|---|
| Protein | 13.6 g |
| Fat | 9.8 g |
| Carbs | 18.7 g |
| Fiber | 0.7 g |
| Sugar | 6.2 g |
| Sodium | 348 mg |
