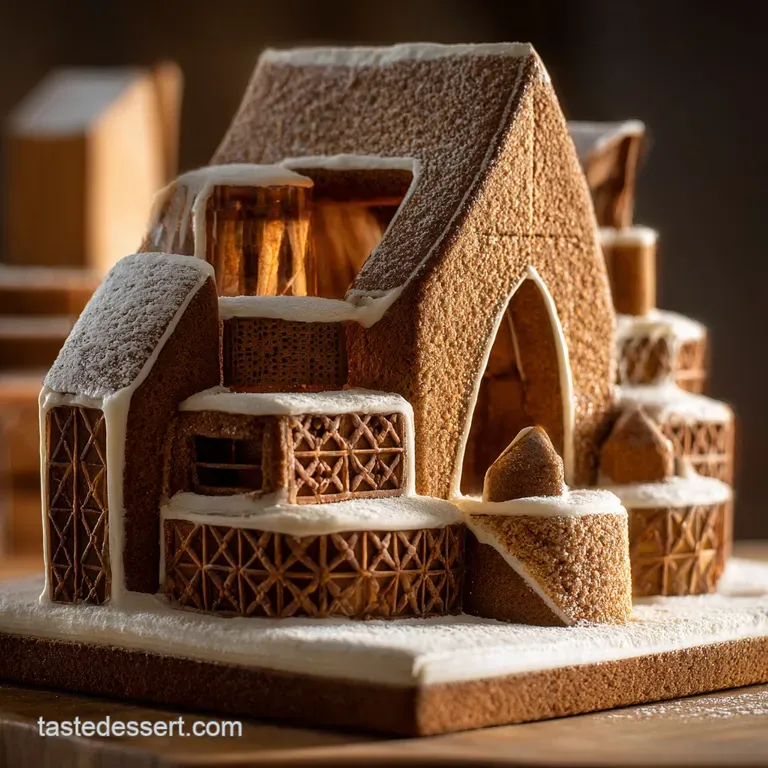
The Architects Gingerbread Manor a Sturdy Spiced Centerpiece
- Why Most Gingerbread Houses Fail the Structural Test
- The Blueprint for Structural Success: Designing for Durability
- Essential Building Materials and Architect's Tools
- Choosing the Master Baker's Supplies
- The Six Phases of Gingerbread Construction
- Following the Sturdy Gingerbread House Blueprint
- Maintenance and Advanced Decorating Techniques
- Storing Your Gingerbread House Masterpiece
- Recipe FAQs
- 📝 Recipe Card
Why Most Gingerbread Houses Fail the Structural Test
The common gingerbread house failure is often rooted in using the wrong foundational materials. Many recipes rely on soft cookie dough meant for eating, which spreads excessively in the oven and lacks the necessary structural density.
When walls spread even slightly, the precise angles needed for assembly are lost, leading to weakened joints. On top of that,, the single biggest error is rushing the crucial curing time required for the royal icing mortar to fully set.
The physical forces acting on a structure are unforgiving, especially when the roof is added prematurely. The weight of heavy roof panels on uncured icing forces the walls outward, causing catastrophic collapse.
Humidity is also a silent destroyer; moisture from the surrounding environment is absorbed by the baked dough and the sugar based icing, leading to a slow, inevitable softening of the crucial anchor points.
The Blueprint for Structural Success: Designing for Durability
Successful Homemade Gingerbread House construction begins with meticulous architectural planning, treating the baked pieces as true building components. We must prioritize rigidity and non-expansion characteristics in the dough to ensure pieces fit together without gaps.
Choosing specific ingredients that inhibit spreading and require extended curing times guarantees a stable structure that lasts well beyond the holiday season. Following a robust Gingerbread House Template prevents misaligned cuts that compromise the integrity of the whole display.
Understanding the Importance of the Low-Rise Dough
Our specialized dough is engineered to be low-rise, achieved by strictly limiting the amount of chemical leavening agent used. We include only one teaspoon of baking soda to ensure minimal spread and puff while baking.
This formulation creates a dense, non-porous structure perfect for load bearing walls and sturdy roof panels. The resulting pieces bake hard and flat, providing perfectly plumb surfaces for the assembly phase.
The Royal Icing Anchor: More Than Just Decoration
The royal icing used in this Gingerbread House Recipe functions as high strength concrete, not mere glue. It must be whipped to an extremely stiff consistency, capable of holding sharp peaks without drooping whatsoever.
Meringue powder is essential here, providing the stability and safety required for a secure, long term bond. This solid "mortar" is the only thing capable of resisting the downward shear force exerted by heavy roof panels and decorations.
Maximizing Flavor While Maintaining Rigidity
We incorporate high levels of dark molasses, or black treacle, into the dough mixture for a critical combination of flavor depth and structural benefit. This ingredient imparts a deep, caramelized flavor while contributing to the dense, firm texture when fully baked.
The concentrated spices ginger, cinnamon, and clove ensure that while the pieces are incredibly rigid, the final taste remains warmly aromatic and unmistakably festive.
Essential Building Materials and Architect's Tools
A quality construction job requires quality tools tailored for precision and efficiency in creating a stable Gingerbread House . Beyond the standard mixing bowls, having the right equipment ensures that every step, from rolling to cutting to smoothing, contributes positively to the structure's final strength.
These tools help manage the difficult requirements of working with a cold, stiff dough and ensure the high standards required for this project.
- Rolling Pin with thickness guides to guarantee consistent 5mm depth.
- Sharp Paring Knife or Pizza Cutter for precise trimming and cutting windows.
- Sanding Block or Microplane to level and smooth any uneven baked edges.
- Piping Bags and strong tips (like Wilton #10) dedicated solely for structural icing application.
Choosing the Master Baker's Supplies

The selection of ingredients is paramount because certain culinary components play a dual role as both flavor agents and structural stabilizers. We specifically choose supplies that enhance the density and reduce the volatility of the dough during the heat of the oven.
Ensuring all components are measured precisely, particularly the liquid amounts, is critical for achieving the correct dough stiffness before chilling.
Dry Goods: The Foundation of Dough Integrity
The precise four cups of all-purpose flour provide the necessary backbone and protein content required to build the dough structure. Combining the flour with the robust blend of ground ginger, cinnamon, and cloves creates a richly spiced foundation.
We must ensure the confectioner's sugar for the icing is meticulously sifted, as any lumps can prevent the royal icing from achieving its essential smooth, stiff consistency.
Wet Elements: Achieving Optimal Moisture Levels for Rolling
Black treacle is non-negotiable for achieving the deep color and superior structure inherent in this recipe design. This ingredient binds the dough tightly, resulting in pieces that are less prone to breaking or crumbling during handling.
Using slightly softened butter, along with a room temperature egg, helps to ensure that all wet elements emulsify seamlessly into the dry goods, creating a uniform, cohesive dough mass.
Structural Adhesives: Perfecting the Royal Icing Ratio
The high content of meringue powder, four tablespoons, is the key ingredient that gives the royal icing its incredible setting power and food safe stability. We introduce only half a cup of warm water to four cups of sugar, creating a highly concentrated paste when beaten thoroughly.
This ratio is specifically designed to create a fast curing, concrete like adhesive essential for holding the heavy elements of a large Homemade Gingerbread House together.
Specialized Equipment for Precision Cuts and Baking
The use of a specific Gingerbread House Template allows the builder to cut pieces with perfect, reproducible angles every single time. A ruler or straight edge is vital not just for checking dough depth but also for verifying the plumb alignment of the walls during initial assembly.
On top of that,, having quality parchment paper ensures the delicate, cut pieces can be transferred from the countertop to the baking sheet without stretching or distortion.
Related Recipes Worth Trying
- Chewy Spicy Molasses Gingerbread Cookie Bars Recipe — Ditch the cookie cutters This easy Gingerbread Cookie Bars Recipe gives you chewy deeply spiced results perfect for your Holiday Baking list
- The Ultimate Gooey Tuscaloosa Toll House Pie Recipe — Bake the legendary Tuscaloosa Toll House Pie This chocolate chip pecan pie filling is richly gooey and sits in a flaky homemade crust Foolproof tips inside
- Bake Like a Pro Lofthouse Cookie Recipe Soft Cakey — Craving soft frosted cookies This Lofthouse cookie recipe delivers bakerystyle treats at home Easy sugar cookie recipe for the perfect cakey meltinyourmouth...
The Six Phases of Gingerbread Construction
Building this magnificent Gingerbread House is an extended project requiring systematic dedication over several hours, spread across a day or more. The process moves methodically, starting with the chilling of the foundational ingredients and ending only when the icing has reached a completely dry, rock hard state.
Skipping any passive setting time will result in structural instability, making adherence to the curing schedule mandatory.
Following the Sturdy Gingerbread House Blueprint
This blueprint outlines the specialized approach required to successfully Make A Gingerbread House that stands proudly all season long. Every stage, from the mixing of the dough to the final placement of the roof, demands precision and attention to temperature.
The success of the final construction rests entirely on the execution of these detailed steps.
Phase I: Mixing and Maturing the Durable Dough
The initial step involves properly creaming the butter and sugar before incorporating the liquid elements, ensuring a dense, stable fat base. Once the stiff dough is formed, divide it and wrap it tightly, placing it in the refrigerator for at least two hours of maturation.
This chilling period is non-negotiable, as it solidifies the fats, resulting in a cleaner cut and dramatically reducing the risk of pieces spreading in the oven.
Phase II: Precision Rolling and Template Cutting
Roll the chilled dough evenly between sheets of parchment paper, targeting a uniform thickness of precisely 5mm using rolling pin guides. Place the pre-cut Gingerbread House Template pieces onto the dough and use a sharp tool to cut precisely around all edges.
Immediately remove the excess scrap dough, leaving the perfectly cut components resting on the parchment paper for immediate transfer to the baking sheet.
Crucial Warning: Do not attempt to move the cut dough pieces themselves; always slide the parchment paper directly onto the baking tray to prevent stretching or warping the precise shapes.
Phase III: The Low-and-Slow Baking Schedule
Bake the pieces at a moderate 350° F ( 175° C) until the edges are dark golden brown and the centers are firm to the touch, which typically takes 12 to 15 minutes.
Once removed from the oven, immediately place the templates back onto the still hot pieces and trim the edges again while the dough is pliable. This technique guarantees razor sharp, perfectly straight edges, which are absolutely vital for creating tight seams during assembly.
Phase IV: Curing and Assembly: The Critical 24-Hour Rule
Using piping bags filled with the extremely stiff royal icing, assemble the four vertical walls firmly onto the sturdy base, using cans or jars to brace and support them instantly.
Once all four walls are attached, they must be allowed to cure for a minimum of two hours, or until they feel completely rigid and unmoving. Only after the walls are rock hard should the heavy roof panels be attached and allowed a further overnight cure, completing the structural bonding phase.
Maintenance and Advanced Decorating Techniques
Once the structure is completely stable, you can transition to using thinner icing consistencies for detailed Gingerbread House Decorations . The focus shifts from load bearing mortar to finesse, utilizing smaller piping tips to create realistic details like windowpanes, decorative cornices, and roof shingles.
This stage is where your personal creative Gingerbread House Ideas fully materialize, transforming the architecture into an ornate holiday display.
Storing Your Gingerbread House Masterpiece
Protecting your completed Gingerbread House involves controlling the environment in which it is displayed. Avoiding moisture is the single most important rule to maintain its firmness and prevent the sugar components from softening.
A house created with this sturdy Gingerbread House Recipe deserves careful placement to ensure its longevity throughout the viewing season.
Troubleshooting Common Gingerbread House Collapse Points
The most frequent source of failure after assembly is inadequate curing time, specifically related to the roof application. If the walls were not allowed sufficient setting time, the stress from the roof panels will cause the initial icing joints to crumble and shear.
Always confirm the walls are completely rigid before proceeding, and if a joint begins to fail, gently hold the pieces in place and reinforce the seam with a large bead of fresh, stiff royal icing.
Maximizing Shelf Life: Humidity Control for Your Structure
To keep the structure looking fresh and firm, display it in the coolest, driest part of your home, away from high traffic, moist areas like entryways or kitchens. If the local climate is very humid, a common solution is to place the entire base and house on a silver tray with a small amount of decorative rice or food safe desiccants discreetly placed underneath.
This proactive moisture control ensures the royal icing remains hard and supportive.
Alternative Foundation Design and Bases
While a simple cutting board works well, for larger or complex Gingerbread House Designs , consider upgrading the base to thick foam core board wrapped securely in aluminum foil. Foam core offers lightness combined with high rigidity, making it easier to transport the finished structure.
Ensure the selected base extends several inches beyond the walls, creating a perimeter for future decorative snow drifts and candy fencing elements.
Scaling the Project: Adjusting the Blueprint for Size
When choosing to scale up and Make A Gingerbread House significantly larger than the standard blueprint, a proportional increase in ingredient quantities is vital.
Crucially, larger pieces inherently require more tensile strength, so increase the dough thickness slightly from 5mm to 6mm to prevent sagging during baking. Always use extra large templates and plan for double the required curing time, as the sheer weight of larger roof panels increases the risk of initial joint failure.

Recipe FAQs
Crikey, my house keeps collapsing! What's the secret to keeping the walls up?
The key is patience, mate! Your royal icing must be as stiff as cement; if it droops when you lift your whisk, it’s too wet. You absolutely must let the assembled walls cure (dry) for a minimum of two hours before even thinking about adding the roof don't try to pull a fast one!
My walls warped badly in the oven. How do the pros get those perfect, flat pieces for a sturdy Gingerbread House?
Precision is everything, darling. Roll the dough to a precise, consistent thickness (use rolling pin guides if you have them) and chill the cut shapes thoroughly before baking. Crucially, immediately re-cut the pieces with your templates as soon as they come out of the oven; this corrects any slight warping before the pieces cool and harden like concrete.
I'm planning this project for Christmas. How far in advance can I bake and store the pieces?
You can bake the structural pieces up to three weeks ahead! Once they are cooled completely, store them flat in an airtight container at room temperature, making sure they are protected from humidity, or they’ll go a bit soft, like a forgotten biscuit.
The recipe calls for black treacle. Can I use golden syrup or something lighter instead?
While you can use a lighter molasses or golden syrup, the black treacle is vital for both the intense, deep spice flavour and the necessary structural density of the dough, ensuring the pieces bake up sturdy and resistant to sagging. Using a lighter syrup might compromise the architectural integrity of your manor.
If we keep the house on display for weeks as a centrepiece, is it still safe to scoff down afterwards?
Due to the high sugar content and thorough baking, the gingerbread itself is safe indefinitely, but food safety guidelines suggest consuming the house within two weeks of assembly, particularly if using structural icing made with meringue powder or fresh egg whites.
Sturdy Gingerbread House Blueprint

Ingredients:
Instructions:
Nutrition Facts:
| Calories | 30002 kcal |
|---|---|
| Protein | 102.9 g |
| Fat | 388.6 g |
| Carbs | 1262.5 g |
| Fiber | 35.2 g |
| Sugar | 495.3 g |
| Sodium | 4065 mg |
