The Perfect Sunday Joint Tender Roast Beef with Rich Silky Pan Gravy
- Mastering the Sunday Joint: Why This Roast Beef with Pan Gravy Stands Apart
- Sourcing Superior Components for Your Roast and Gravy Base
- Essential Equipment for Flawless Execution
- The Step-by-Step Method: From Prep to Plate
- Crafting the Velvety Pan Gravy After the Roast Rests
- Elevating Your Roast Beef with Pan Gravy: Serving Suggestions
- Storage Secrets and Reheating Mastery
- Recipe FAQs
- 📝 Recipe Card
Mastering the Sunday Joint: Why This Roast Beef with Pan Gravy Stands Apart
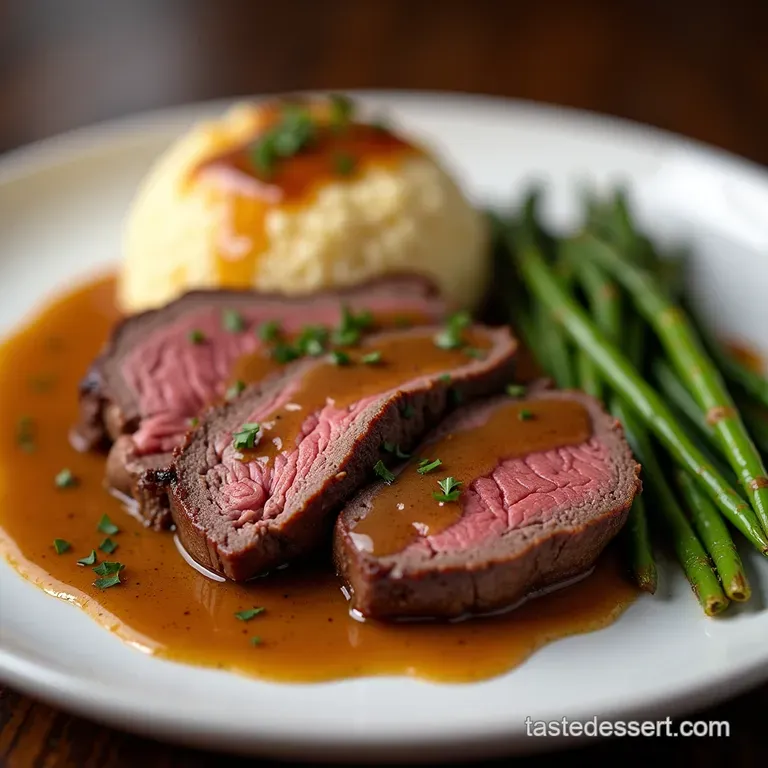
There is something profoundly comforting and celebratory about a perfectly cooked joint of beef resting on the table, ready to be carved. This Roast Beef with Pan Gravy isn't just a meal; it’s the cornerstone of the traditional Sunday roast, bringing families together.
Our method focuses on simplicity married with precision, ensuring that even if you consider yourself a novice, you can achieve a spectacular result. We aim for that elusive sweet spot: a beautifully browned exterior yielding to an interior that is moist, tender, and blushing pink.
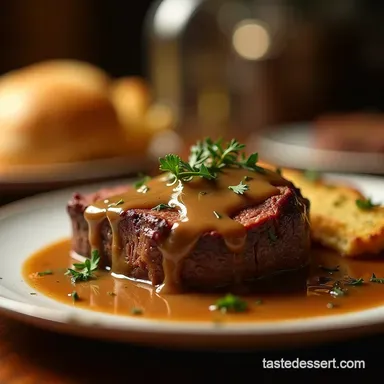
This robust flavour profile, amplified by a rich, velvety gravy made right in the roasting tin, is what separates a good roast from a truly memorable one.
Setting the Stage: Achieving That Perfect Pink Centre
The key to exquisite texture lies not in aggressive heat, but in patience and temperature control. We begin by using a dry rub a blend of salt, pepper, and aromatic herbs which seasons the meat deeply during an initial resting period, allowing the salt to penetrate the muscle fibres.
After a quick, high heat sear to lock in colour, the temperature is dropped significantly. This slow roasting approach prevents the exterior from drying out while the centre gradually, evenly cooks.
Monitoring the internal temperature with a reliable meat thermometer is the only way to guarantee medium rare perfection every single time.
Demystifying the Classic British Dinner Centrepiece
For many home cooks, preparing the main event for a Sunday Roast Beef gathering feels intimidating. However, the process is actually quite hands off once the initial prep is complete.
The true magic of this recipe unfolds in the final stages when we transform the flavour packed remnants in the roasting pan into a magnificent sauce. Understanding how to capture those browned bits, known as fonds , is the secret weapon in creating an authentic Classic Roast Beef Gravy that rivals any restaurant version.
If you’ve ever searched online for tips akin to watching Natashas Kitchen Roast Beef tutorials, know that the principle remains the same: excellent ingredients plus meticulous timing equals success.
Our Commitment: Zero Lumps in Your Finished Gravy
Let’s address the elephant in the room: lumpy gravy. Nobody wants to serve a sauce marred by undissolved flour pockets. Our technique for creating the roast beef pan gravy recipe is designed explicitly to prevent this textural failure.
We start by creating a smooth roux a paste of fat and flour cooked out gently before introducing any liquid. The critical next step involves adding warm beef stock gradually while constantly whisking.
This slow integration of hot liquid into the hot roux emulsifies the ingredients perfectly, leading directly to a silky, pourable roast beef pan sauce that is utterly satisfying.
Sourcing Superior Components for Your Roast and Gravy Base
The final quality of your meal is inherently linked to the quality of your starting components. For the beef, opt for a well marbled cut such as a Topside, Sirloin, or Rib of Beef, ensuring it’s trimmed of any excessively hard exterior fat but leaving a thin cap of fat on top to baste the meat as it cooks.
For the gravy base, the quality of your stock is paramount. While homemade is always superior, a good quality, low-sodium beef stock forms the backbone of the liquid component. Don't overlook the splash of dry red wine; this is crucial for deglazing and adding a sophisticated depth that lifts the overall flavour profile of the roast beef pan drippings gravy .
Essential Equipment for Flawless Execution
While elaborate machinery isn’t required, a few key tools significantly improve your chances of achieving flawless results. The most important piece of kit is a reliable instant read meat thermometer. This eliminates guesswork entirely when aiming for that ideal medium rare temperature.
You will also need a sturdy roasting pan, preferably one with a rack so the meat is elevated, allowing air to circulate and ensuring the bottom doesn't stew in its own juices. Finally, for the gravy, a small saucepan and a good balloon whisk are essential for ensuring that smooth, lump free consistency we are aiming for.
The Beef Rub: Building Deep Flavour Before Roasting
Before the meat even sees the oven, it must be seasoned aggressively. We create a dry rub using coarse sea salt, freshly ground black pepper, garlic powder, dried rosemary, and thyme. Mix these components thoroughly. The oil helps the rub adhere, but the salt is the workhorse here.
Rubbing the beef generously with this mixture and allowing it to sit in the refrigerator, uncovered, for several hours (or overnight) acts as a dry brine. This process draws moisture out, then pulls the seasoned moisture back in, tenderising the meat fibres internally well before the heat even begins its work.
What Cut Reigns Supreme for a Succulent Outcome?
When selecting your meat for this Roast Beef Recipes Videos staple, aim for a cut that balances tenderness with structure. Topside is economical and excellent for slicing thin. Sirloin offers superior tenderness, perfect if you prefer a slightly richer flavour.
Rib of Beef, while pricier, is arguably the most decadent, often featuring more intramuscular marbling. Regardless of your choice, ensure the joint is relatively uniform in thickness; this helps it cook evenly throughout the process.
The Liquids Required for Silky Gravy Development
The foundational liquid for the Pot Roast Gravy Recipe style sauce is a combination of what naturally renders out of the beef and what we add back in. We reserve all the rendered fat and glorious browned sediment from the roasting pan.
To this, we add two cups of warm beef stock and, for added complexity, half a cup of dry red wine. Using warm stock is a professional trick; it prevents the hot roux from seizing up when the liquid is introduced, making the whisking process much smoother and immediately preventing lumps.
Related Recipes Worth Trying
- Fluffy Buttermilk Pancakes from Scratch The Perfect Weekend Breakfast — Tired of flat breakfast discs Master these homemade buttermilk pancakes for a truly fluffy stack every time Easy technique for weekend pancakes Cooking time...
- Blistered Shishito Peppers with Quick Smoked Paprika Aioli — Learn how to easily blister shishito peppers for a perfect appetizer Served with a creamy quick smoked paprika aioli these are utterly addictive
- Foolproof NoBake Mascarpone Cheesecake with Strawberry Topping — Make this incredibly smooth NoBake Mascarpone Cheesecake with Strawberry Topping Its an easy no bake cheesecake that tastes utterly luxurious Get the simple...
The step-by-step Method: From Prep to Plate

To begin this journey towards the perfect Sunday Roast Beef , first temper your beef by taking it out of the fridge two hours before you plan to roast it. While it warms slightly, prepare your herb rub and coat the entire joint thoroughly.
Once seasoned, let it rest on a rack inside your roasting pan. The cooking phase starts with a fierce blast at 425° F ( 220° C) for just 15 minutes this creates that desirable crust.
Immediately after, drop the oven temperature down to 325° F ( 160° C) and continue cooking slowly until your thermometer signals the desired level of doneness.
This two-stage temperature approach is key for achieving that tender interior while still developing deep exterior flavour.
Crafting the Velvety Pan Gravy After the Roast Rests
Once the beef is removed from the oven, the focus shifts entirely to harnessing the flavour left behind. This is where we move from roasting technique to stovetop finesse to create our exceptional roast beef pan gravy recipe .
Phase One: Preparing the Meat for Optimum Browning
Before the high heat start, ensure the beef surface is completely dry. Patting it down with paper towels helps achieve a superior crust during that initial 15-minute blast. If you are nervous about searing, you can skip the high initial heat and simply roast the entire time at 325° F ( 160° C), but you will sacrifice some of the rich caramelisation that builds the flavour foundation for the gravy.
Calculating Cooking Times for Precise Doneness
For a 3lb joint, a good guideline for medium rare is approximately 18 to 20 minutes per pound at the lower temperature ( 325° F/ 160° C), after the initial searing. However, never rely solely on time; use the thermometer.
We aim to pull the beef when the internal temperature hits 125° F ( 52° C). This will yield a final temperature closer to 130– 135° F (54– 57° C) after resting, which is the hallmark of perfectly cooked, juicy roast beef.
The Crucial Resting Period: Don't Skip This Step!
After removing the beef, transfer it to a clean carving board and cover it loosely with foil. Allow a minimum of 20 minutes for resting. During this time, the muscle fibres, which tightened under the oven’s heat, relax and redistribute their internal moisture.
If you carve too early, all those precious juices will simply run out onto the board, leaving you with dry slices. This rest is also the perfect window to dedicate your attention fully to the gravy.
Deglazing the Pan: Capturing Every Bit of Flavour
With the beef resting, place the roasting pan directly onto your stovetop burner over medium low heat. Carefully pour off the excess rendered fat, reserving about two tablespoons in the pan, leaving all the beautiful, stuck-on brown bits that’s pure flavour gold.
Whisk in two tablespoons of flour to form your roux, cooking it for one minute. Next, pour in the red wine to deglaze, scraping up every particle. Once this reduces slightly, slowly whisk in the warm beef stock until the sauce is smooth and ready to simmer into a final, glorious roast beef pan sauce .
Elevating Your Roast Beef with Pan Gravy: Serving Suggestions
This spectacular main dish deserves equally impressive accompaniments. For the ultimate comfort experience, you must have crisp, golden roast potatoes ideally cooked in beef fat or goose fat to act as the perfect vessel for soaking up the gravy.
Alongside these, tender steamed green beans or lightly buttered savoy cabbage add necessary freshness and colour. And, of course, no Sunday Roast Beef is complete without piping hot, dramatically puffed Yorkshire puddings, designed structurally to hold copious amounts of that rich roast beef and pan gravy for beginners will master easily.
Finish the plate with a dollop of sharp horseradish cream to provide a contrasting zing.
Storage Secrets and Reheating Mastery
Leftovers from a glorious roast can often be even better the next day. Store any leftover beef slices and the remaining gravy separately in airtight containers in the refrigerator for up to three days. The flavour of the gravy, in fact, often deepens overnight.
When reheating, gently warm the gravy in a saucepan over low heat, whisking occasionally to maintain its texture. For the beef, slice it thinly against the grain, then briefly dunk the slices into the hot gravy just before serving; this warms the meat without drying it out, ensuring it stays moist.
Perfect Pairings: Side Dishes That Complete the Meal
Beyond the potatoes and greens, consider adding roasted root vegetables like parsnips or carrots to your roasting pan during the last hour of cooking. Their natural sweetness contrasts beautifully with the savoury beef.
A homemade English mustard served on the side adds the necessary sharp counterpoint to the richness of the beef and gravy.
Troubleshooting Common Roast Beef Challenges
If your beef is slightly overcooked, the best remedy is to ensure the gravy is exceptionally flavourful and serve the meat very thinly sliced, as thin slices appear less dry. If your gravy is too thin after simmering, simply mix a teaspoon of cornflour with a tablespoon of cold water to create a slurry, whisk it into the simmering gravy, and cook for another minute until thickened.
If you find the pan drippings are too salty, use half and-half vegetable stock and beef stock for the liquid base next time.
Can This Recipe Be Successfully Frozen for Later?
Yes, absolutely! Both the roast beef slices and the gravy freeze exceptionally well. Ensure the gravy is completely cooled before transferring it to a freezer safe bag or container, leaving a little headspace for expansion.
When freezing the beef, try to layer the slices between parchment paper before bagging to prevent them from freezing into one solid, unmanageable block. Thaw overnight in the refrigerator before reheating gently on the stovetop.
Adjusting Quantities for Smaller or Larger Gatherings
This recipe scales very well. For a smaller meal, simply reduce the size of the beef joint and scale down the accompanying rub and gravy ingredients proportionally. When increasing quantities for a crowd, be mindful of your oven space; if you roast two large joints simultaneously, you may need to increase the cooking time slightly, as the overall temperature inside the oven drops when larger masses of food are introduced.
Always, always rely on that meat thermometer, regardless of the scale of your Roast Beef Recipes Videos adventure!

Recipe FAQs
What temperature should I cook my Roast Beef to for it to be perfectly pink and tender?
For that classic medium rare finish, you'll want to pull your roast out of the oven when your meat thermometer reads 125°F (52°C). Remember the golden rule: resting is key! It will carry overcook to about 130-135°F while resting, which is spot on for tender, juicy results.
Don't forget to rest it for at least 20 minutes before carving!
My pan gravy always ends up lumpy how do I get a silky smooth sauce when making Roast Beef with Pan Gravy?
The secret to smooth gravy lies in two steps: ensuring your beef stock is warm before adding it, and whisking constantly. After making your roux (flour and fat paste), add the liquid in a slow trickle while whisking vigorously to prevent lumps from forming.
If all else fails, a quick blitz with a hand blender or straining it through a fine sieve will sort it right out.
Can I make the dry rub for the Roast Beef ahead of time, and does marinating really make a difference?
Absolutely, preparing the dry rub ahead of time is brilliant as it allows the salt to work its magic (dry-brining) deep into the meat, resulting in better moisture retention. Ideally, leave the seasoned beef uncovered in the fridge overnight or for at least four hours.
This slightly dries the exterior, helping you achieve a much better crust when roasting.
My roasting tin is full of drippings; how do I separate the fat from the flavourful brown bits (the fonds) for the best gravy?
After the beef has been removed to rest, pour the majority of the fat into a heatproof jug, leaving only about two tablespoons and all those glorious browned bits behind in the tin. These dark bits are pure flavour gold for your roux!
You can skim the separated fat off the top of the jug later if you are watching your calories, but keep that rich layer of fonds for the gravy base.
I'm not a fan of red wine; what can I substitute in the pan gravy for flavour?
If you’re avoiding alcohol, don't fret; you can still achieve lovely depth in your gravy! Simply skip the red wine step, but slightly increase your beef stock volume and add a teaspoon of balsamic vinegar or a splash more Worcestershire sauce.
This will mimic the acidity and dark flavour notes that the wine usually provides.
Tender Roast Beef Gravy
Ingredients:
Instructions:
Nutrition Facts:
| Calories | 771 kcal |
|---|---|
| Protein | 11.2 g |
| Fat | 24.1 g |
| Carbs | 61.3 g |
| Fiber | 19.5 g |
| Sodium | 6835 mg |
