Apple Pie: the Ultimate Butter Shortening Flaky Crust Recipe
- Setting the Gold Standard for Homemade Baking
- The Great Pastry Debate: Why Shortening and Butter Win
- Ditching the Dough Stress: An Approachable Apple Pie Recipe
- Essential Provisions: Everything Needed for the Perfect Apple Pie
- Assembly of the Baking Arsenal: Tools That Make the Job Easier
- Selecting the Star Fruit: The Best Apples for a Balanced Filling
- Crafting the Butter and Shortening Crust: From Shards to Shimmer
- Bringing the Best Apple Pie Filling Together: No More Soggy Bottoms
- The Final Bake: Achieving Golden Perfection and the Telltale Sizzle
- Common Apple Pie Problems Solved: Troubleshooting Your Bake
- Preservation and Serving: Storing Your Homemade Triumph
- Beyond the Classic: Deeper Dishes and Alternative Crust Styles
- Recipe FAQs
- 📝 Recipe Card
Setting the Gold Standard for Homemade Baking
Honestly, if you can nail a proper apple pie, you can bake anything. This isn't just dessert; it’s a standard. It’s the smell of autumn, the crunch of a perfect crust, the balance of sharp apple and warming spice.
And if you’ve been chasing that perfect flaky top but keep ending up with a sad, wet bottom crust, take a deep breath. We’ve all been there. I once served a pie so runny it looked more like spiced apple soup in a bowl of biscuit. It was tragic.
But learning from those disasters is the whole point of this blog, right? This recipe isn’t fancy, it’s just effective. It’s what happens when a home cook ignores the complicated cookbooks and figures out what truly makes butter, flour, and fruit cooperate.
The Great Pastry Debate: Why Shortening and Butter Win
You hear people arguing about all and butter crusts. They smell incredible, sure. But let’s be real: butter melts too quickly. It's 80% fat, 20% water. If it melts before the pie hits the oven, you lose those layers, and you get a tough crust, not a flaky one.
Enter the noble vegetable shortening. It’s 100% fat and holds its shape much better under heat, guaranteeing those beautiful air pockets that make the crust shatter when you cut it. You need both. The butter is for flavour (obviously) and the shortening is for structure. It's a team effort.
If anyone tells you a great crust only needs butter, they are probably lying, or they live in an arctic climate.
The real secret to a flaky crust is not the ingredients, but the temperature. Everything must be aggressively cold.
Ditching the Dough Stress: An Approachable Apple Pie Recipe
We're going to approach this dough like we're handling precious jewels, not like we’re kneading bread. Less touching, more chilling. The goal is minimum interaction and maximum rest time. This recipe is divided into small, manageable stages because rushing the dough is the absolute fastest way to ruin your day.
Take your time. Put on some music. Have a cup of tea while the dough rests. It’s part of the process.
The Crucial Difference in Filling Texture
So, how do we thicken the filling? Flour is the old and school choice, but it can sometimes make the juices a bit cloudy. If you want that gorgeous, clear, glossy filling that looks like caramelized apple syrup, you need to switch to cornstarch or, even better, tapioca starch.
Tapioca thickens beautifully without imparting any flavour, and it handles the acidity of the apples really well. I keep a jar of it solely for pie season.
From Freezer to Flake: Chilling Techniques Explained
The moment those fat particles hit the heat, they release steam and lift the surrounding flour layers. That’s flakiness. If your butter and shortening are warm, they just blend into the flour, resulting in a single, dense sheet.
I actually chuck my cut fat pieces into the freezer for 15 minutes before mixing. I also use vodka instead of some of the water. Alcohol evaporates faster than water and inhibits gluten formation. It’s brilliant. Don't worry, you don't taste the vodka at all. You only taste the flake.
Measuring Success: Why Weight Matters More Than Volume
Seriously, ditch the measuring cups for flour. Just ditch them. Flour compacts differently based on humidity and how you scoop it. You might think you're getting one cup, but you're actually getting 150 grams when you only needed 125.
Those extra grams of flour will drink up the fat and water, making your dough dry, crumbly, and a nightmare to roll out. Use a cheap kitchen scale. It’s the single best upgrade you can make to your baking life.
Essential Provisions: Everything Needed for the Perfect Apple Pie
I'm assuming you have the basics, but here’s what can’t be substituted: proper unsalted butter (European style is great if you can swing it, higher fat content means better flavour), pure vegetable shortening (Crisco is the standard, though lard is also amazing if you aren't vegetarian), and fresh spices.
Do not use that jar of cinnamon that’s been sitting in the cupboard since 2018. If you can’t smell it strongly, it’s useless.
Assembly of the Baking Arsenal: Tools That Make the Job Easier
You absolutely need a rolling pin and a deep and dish pie plate (glass or ceramic is my preference). But a few specific tools really speed things up:
- Pastry Blender: Yes, you can use two knives, but a pastry blender cuts the fat in quickly without warming it up with your hands.
- Pie Shield: This is a rubber or silicone ring that sits over the crust edges. The edges always brown before the middle. If you don't have one, foil works, but a shield is so much easier.
- Baking Sheet: Always, always bake the pie on a large baking sheet. Why? Because the filling will bubble over, and you don’t want apple cement glued to the bottom of your oven.
Selecting the Star Fruit: The Best Apples for a Balanced Filling
Apple pie needs tension. It needs that sharp bite to cut through the sugar and fat of the crust. If you use all sweet apples (like Gala or Fuji), the pie ends up tasting flat. I swear by a 2:1 ratio: two parts tart apples (Granny Smith are the gold standard) and one part sweet, crisp apple (like Honeycrisp or Braeburn).
The Granny Smiths hold their shape during the long bake, and the sweeter apples melt down slightly, creating that thick, saucy consistency.
The Spice Rack Strategy: Cinnamon, Nutmeg, and the Secret Kick
Cinnamon and nutmeg are mandatory, obviously. But the secret kick? A tiny, tiny pinch of freshly ground cardamom. Cardamom brings a floral, almost citrusy warmth that lifts the whole flavour profile and makes people ask, "What is that amazing thing I'm tasting?"
Achieving the ‘Sharp Sweet’ Balance in Your Filling
This is where lemon juice comes in. Lemon juice isn’t just about balancing the sugar; it also prevents the apples from browning while you're slicing and prepping the rest of the pie. Don't skip it, even if you’re using very tart apples.
The Humble Pie Plate: Choosing Your Vessel Wisely
I know metal pans conduct heat brilliantly, but I stick with Pyrex or ceramic glass dishes. Why? Because you can physically look through the side of the dish and see the colour of the bottom crust. Once you see it turning from beige to a light golden brown, you know you’re safe from the soggy bottom menace.
Dealing with Stubborn Granny Smiths: Pre and Cooking vs. Raw
When you bake raw apples, they release their moisture and shrink. This creates the dreaded "dome and gap," where the beautiful top crust collapses onto a shrunken filling.
You have two options to avoid this:
- Over and mound: Pile the apples much higher than you think you should (they will shrink down).
- Par and cook (My preference): Gently sauté about half of your sliced apples with the sugars for about 5 minutes until they start to soften slightly. Cool them down immediately before adding the rest of the raw apples and spices. This accounts for shrinkage and kick and starts the juice release.
Related Recipes Worth Trying
- Mini Pumpkin Pies Easy Creamy Recipe for Individual Fall Treats — Mini Pumpkin Pies are the ultimate individual dessert for Fall Use this easy mini pumpkin pie recipe baked in a muffin tin for Thanksgiving Desserts No...
- Apple Crisp Mini Cheesecakes Easy Recipe for the Perfect Fall Treat — Apple Crisp Mini Cheesecakes are the perfect individual fall dessert Get the easy recipe for these mini apple cheesecakes featuring a crispy oat topping
- Apple Walnut Salad Recipe Easy Crisp Creamy Autumn Delight — Get the recipe for the perfect Apple Walnut Salad This healthy salad with apples and nuts features creamy goat cheese and a homemade apple walnut salad...
Crafting the Butter and Shortening Crust: From Shards to Shimmer
When cutting the cold fat into the flour mixture, you should aim for two distinct sizes of fat clumps. You want most of it to look like coarse sand (this provides tenderness), but you need some chunks the size of small peas or flattened almonds (these create the massive flake).
If you can still see little white chunks of fat, you are doing it right. If it looks like smooth, yellow flour, you have melted the fat and failed. Chill it immediately and start over if necessary.
Bringing the Best Apple Pie Filling Together: No More Soggy Bottoms
The biggest mistake people make is mixing the apple filling, walking away to do laundry, and then coming back to a bowl of soupy, weeping fruit. The salt and sugar immediately begin drawing moisture out of the apples through osmosis.
Rule of Thumb: Do not mix the filling until the moment you are ready to pour it into the rolled and out bottom crust. This gives the thickener (flour/tapioca) the best chance to absorb the moisture released in the oven, not on the counter.
Also, make sure you dot the top of the filling with those small cubes of butter it melts into the fruit, enriching the flavour and helping the overall set.
The Final Bake: Achieving Golden Perfection and the Telltale Sizzle
We use the two and temperature method for a reason. That initial blast of 425°F (220°C) is aggressive. It sets the bottom crust instantly and creates a massive rush of steam, ensuring maximum lift and flakiness.
Then, we drop the temperature down to 375°F (190°C) to actually cook the apples without burning the pastry.
The Pea and Sized Fat Rule: Incorporating the Cold Lumps
Remember those chunks of fat? When you roll the dough, those fat pieces flatten out into thin sheets layered between the flour. This is the lamination. If you overwork the dough and destroy these chunks, you eliminate the flake. Roll quickly, turn often, and stop when it’s big enough. A few ragged edges are fine.
Hydration Control: Adding Water Without Developing Gluten
When you add the ice water, you must do it one tablespoon at a time. The dough should look shaggy and barely hold together. If you add too much water, the flour absorbs it, gluten strands form, and your crust gets tough and chewy. If you squeeze a piece and it holds its shape, stop adding water.
Even if it looks a little dry, that's better than wet.
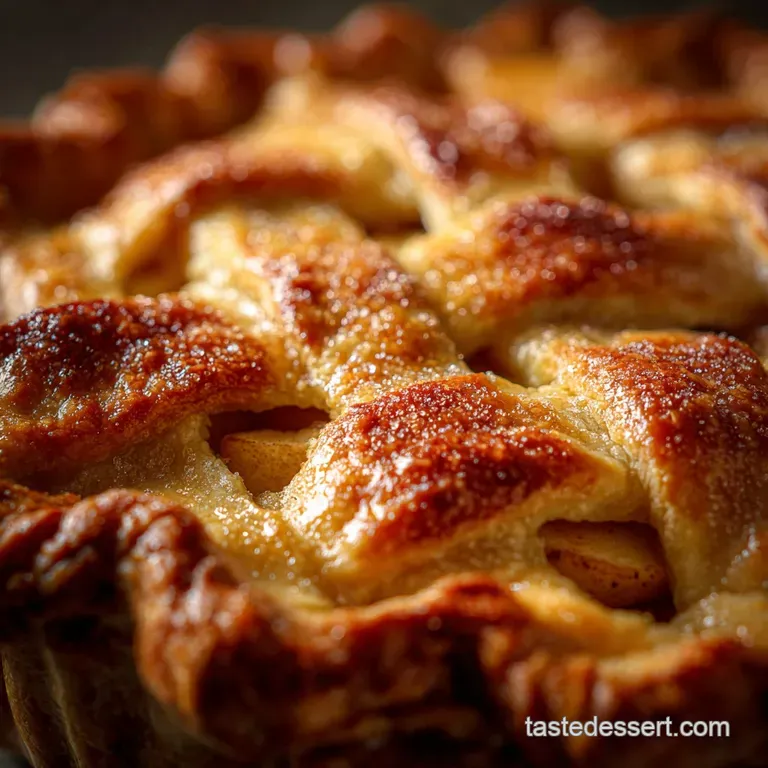
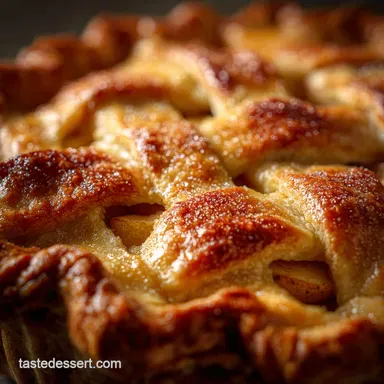
Sealing the Deal: The Crimping Technique for Steam Venting
Crimping is about looking pretty, yes, but mostly it's about sealing the pie tight so the juices stay in and the steam comes out exactly where you want it. Use your thumb and forefinger to press down, then use the index finger of your other hand to push the ridge up into a peak.
Make sure your vents (slits on the top crust) are wide enough. If steam can't escape, the pie can explode, or worse, the top crust will just lift and look sloppy.
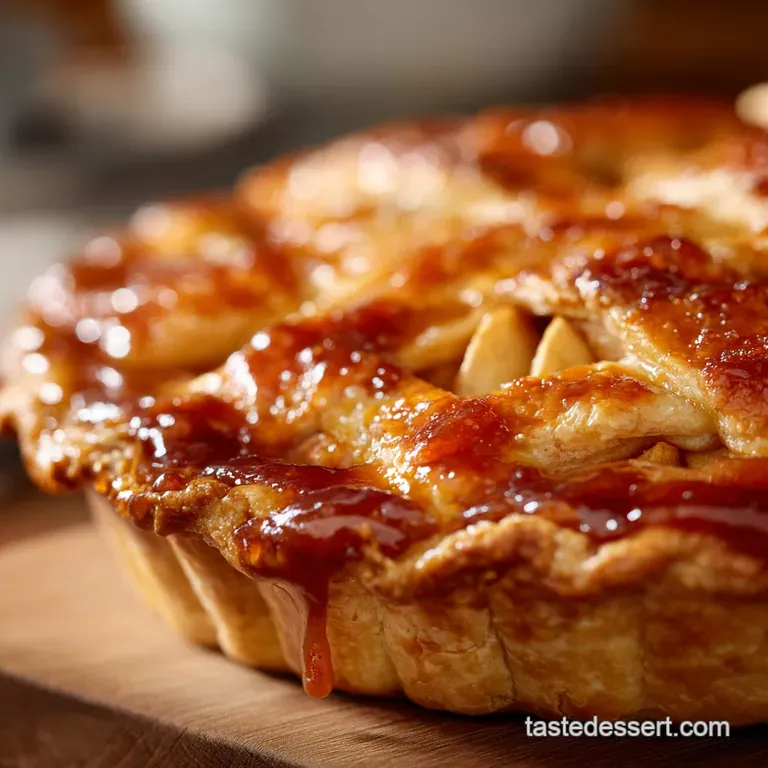
Egg Wash vs. Cream Brush: Ensuring a Beautifully Browned Top
An egg wash (one egg beaten with a splash of milk or water) gives you that deep, intense mahogany shine. It's high drama. A simple brush of heavy cream gives you a more matte, rustic golden brown.
Both work beautifully, but if you want that sparkly, sugar and crusted finish, you need the egg wash to make the coarse sugar stick.
Common Apple Pie Problems Solved: Troubleshooting Your Bake
| Problem | Likely Cause | Quick Fix/Prevention |
|---|---|---|
| Soggy Bottom | Pie plate too cold; filling too wet; baked too low. | Pre and heat a baking stone/sheet; bake at high heat first (425°F). |
| Gaps Under Crust | Apples shrunk during baking. | Par and cook some apples or aggressively over and mound the filling. |
| Burnt Edges | Heat distribution uneven. | Use an aluminum foil ring or pie shield immediately after the first 15 mins. |
| Runny Filling | Sliced too early; insufficient thickener. | Increase thickener slightly next time; Cool for at least 3- 4 hours! |
Preservation and Serving: Storing Your Homemade Triumph
I know the anticipation is torture, but if you slice this magnificent creation too early, the filling will run out like lava, and you'll lose all that beautiful structure. The pie needs time for the starches to fully hydrate and set.
- Cooling Time: Minimum 3 hours, preferably 4. The patience is worth the perfect slice.
- Storage: Covered lightly (a cake dome is perfect) at room temperature for up to 2 days. If you still have leftovers after that (unlikely, let's be honest), move them to the fridge for up to 5 days. Reheat individual slices gently in the microwave or a low oven before serving.
Beyond the Classic: Deeper Dishes and Alternative Crust Styles
If you have a very deep and dish plate (10 inch or more), you need to increase the filling ingredients by about 25% and bake it for an extra 10– 15 minutes. The thicker volume of fruit takes longer to reach setting temperature.
Preventing Dough Shrinkage: The Importance of Resting
Once you roll out the bottom crust and place it in the plate, trim the overhang, and put the whole thing back in the fridge for 30 minutes before filling. This "second chill" allows the gluten strands, which were stressed during rolling, to relax fully, preventing the crust from shrinking away from the sides during the initial hot bake.
Quick Fix for Runny Filling
You’ve sliced it too soon. It’s okay. Scoop the runny slice onto a bowl, put the rest of the pie back in the oven at 300°F (150°C) for 15 minutes to re and set the starches, and leave it alone for another hour.
Freezing an Unbaked Pie: Preparation for Busy Weeks
This is a great make and ahead technique. Assemble the entire pie, including the egg wash and sugar sprinkle, then wrap it tightly in two layers of plastic wrap followed by aluminum foil. Freeze for up to 3 months.
When ready to bake, unwrap and bake directly from frozen, adding about 20– 30 minutes to the total baking time. (Still start at 425°F/220°C).
Serving Suggestions: Ice Cream, Custard, or Clotted Cream?
It's a serious debate, isn't it? Here are the best ways to enjoy your triumph:
| Style of Serving | Best Pairing | Notes |
|---|---|---|
| A la Mode | High and Quality Vanilla Ice Cream | The classic American combination. Hot pie, cold cream. |
| The British Way | Warm Crème Anglaise (Custard) | The warm vanilla sauce complements the spice beautifully. |
| Rustic | Dollop of Clotted Cream | Surprisingly rich and tangy; elevates the simple flavour. |
| Just Pie | Strong Black Coffee | For when the pie is simply perfect, and nothing else is needed. |

Recipe FAQs
Blimey, how do I avoid that dreadful soggy bottom on my Apple Pie?
The trick is extreme heat and cold: ensure all pastry ingredients are ice-cold, and when baking, start the pie on a preheated baking stone or dark tray to give the bottom crust a proper blast of heat right from the off.
I'm popping down to the shops; which apples are the best for a proper baked Apple Pie?
A mix is best for the filling: use firm, tart varieties like Granny Smiths for structure and zing, paired with a sweeter apple like Honeycrisp or Braeburn to balance the flavour beautifully without turning to mush.
Can I make this Ultimate Apple Pie ahead of time, and how long will it keep?
Yes, you can assemble the whole unbaked Apple Pie and freeze it, wrapped tightly, for up to three months; once baked, store leftovers covered at cool room temperature for up to two days, though they seldom last that long!
My filling was terribly runny when I cut the first slice what went wrong?
Patience, dear baker, is key! The pie must cool completely for at least three to four hours for the starch thickeners to properly gel and set the juices; cutting it warm almost guarantees a chaotic, runny mess.
Any tips for serving this classic, or perhaps a less traditional twist?
While nothing quite beats serving it lukewarm with a generous helping of warm vanilla custard (Crème Anglaise), you could also try the New England variation by grating sharp cheddar cheese directly into the pastry dough for a surprisingly delicious, savoury tang.
Ultimate Flaky Apple Pie Recipe
Ingredients:
Instructions:
Nutrition Facts:
| Calories | 420 kcal |
|---|---|
| Protein | 4.0 g |
| Fat | 18.0 g |
| Carbs | 63.0 g |
