Peanut Milk: the Ultimate Creamy Homemade Recipe
- Why Homemade Peanut Milk Is Superior
- The Science Behind Silky Smooth Plant-Based Dairy
- Essential Components and Substitutions for the Best Homemade Nut Drink
- How to Make High-Protein Peanut Milk: Step-by-Step Method
- Expert Tips for Perfect Results Every Time
- Storing Your Freshly Prepared Plant-Based Beverage
- The Best Ways to Use Your Homemade Dairy Substitute
- Recipe FAQs
- 📝 Recipe Card
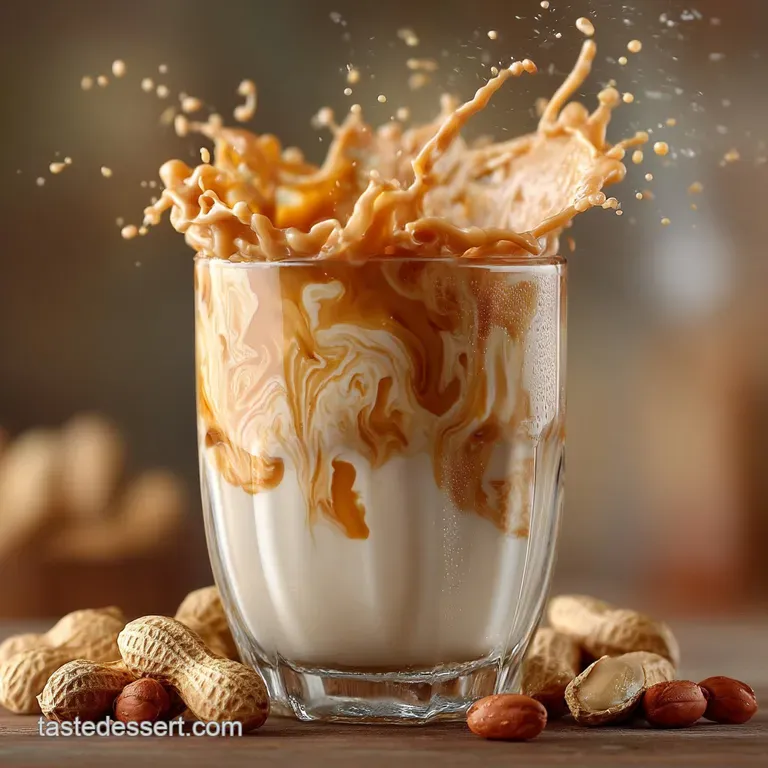
Forget everything you think you know about plant milks. When you pour a glass of fresh, homemade Peanut Milk , the texture is instantly different; it’s thick, gorgeously white, and smells subtly of sweet, roasted nuts even though we only use raw peanuts.
This isn't the thin, watery stuff you buy in a carton; this is rich, high fat, high protein goodness that coats your tongue exactly like whole dairy milk.
I know, store-bought almond milk is easy, but have you checked the prices lately? Making your own Peanut Milk is dramatically cheaper, wildly more nutritious, and takes about ten minutes of actual work (the rest is just waiting for the soak).
Seriously, ditch the expensive organic oat milk habit; this recipe uses one inexpensive staple ingredient and transforms it into liquid gold.
We are skipping the stabilizers, the sugars, and the strange thickeners. This recipe is streamlined, focusing on achieving that perfect creamy emulsion without compromise. Let’s dive into exactly why this homemade Peanut Milk recipe works so incredibly well, and how you can avoid the watery mistakes I definitely made when I started.
Why Homemade Peanut Milk Is Superior
Homemade is always better, but with plant milk, the difference is night and day. You control the flavor, the sweetness, and most importantly, the consistency. store-bought options often have unnecessary fillers to prevent separation, but we don't need those chemical tricks when we make creamy Peanut Milk fresh at home.
The best part? You get that super high protein content that peanuts are famous for, which is something lacking in thinner milks like rice or even many almond varieties. If you’re trying to use fewer dairy products but still need substantial protein in your morning coffee or smoothie, this easy Peanut Milk is your new secret weapon.
The Science Behind Silky Smooth Plant Based Dairy
This isn't just throwing things in a blender; there's a reason why some batches of nut milk are glorious and others look like separation anxiety in a jar. We’re aiming for perfect emulsification, which means blending the fat and water so completely that they bond into a stable, silky liquid.
That rich mouthfeel we crave in homemade Peanut Milk is all about technique.
High Protein Power: Meeting Your Daily Macros
Peanuts are legumes, not true tree nuts, and they deliver a massive protein punch. This inherent high protein content is actually what helps the finished Peanut Milk feel so substantial and satisfying, unlike many store-bought beverages that are mostly water and trace ingredients.
A quick glass provides serious fuel, keeping you full much longer than standard milk alternatives.
Unlocking the Creamiest Texture Possible
The secret to creaminess lies in the fat. Peanuts have a naturally high fat content, and when you blend them at high speed, those fats are released and dispersed throughout the water molecules.
The longer you blend, the smaller the particles become, leading to a tighter, more stable emulsion that results in genuinely creamy Peanut Milk .
Cost Efficiency Compared to store-bought Options
This recipe uses basic, raw peanuts which are incredibly cheap to buy in bulk. Compare that to the shelf price of fancy branded cashew milk or specialty vegan milks. You can produce a week's worth of superior, high protein Peanut Milk for a fraction of the cost, making it an excellent budget hack.
The Non-Negotiable Step: Why We Soak the Peanuts
Soaking is the absolute key, guys. When you soak the raw peanuts overnight, you're not just softening them for the blender; you’re actually reducing phytic acid, which makes the nutrients easier for your body to absorb.
Plus, soaking yields a cleaner, sweeter flavor and a much smoother overall finished texture for our homemade Peanut Milk .
Emulsification Mastery: Blending for Maximum Richness
We need power here. A weak blender will give you watery, gritty milk because it simply can’t break down the solids enough to properly distribute the oils. Running your high speed blender for a full 90 seconds creates the friction necessary to fully emulsify the fats, ensuring you get that gorgeously rich and stable Peanut Milk texture.
Achieving Natural Sweetness Without Refined Sugar
I prefer using a touch of maple syrup because it integrates instantly and has a lovely depth of flavor. However, you can achieve natural sweetness simply by using two or three pitted dates during the blend.
Since the raw peanuts already have a slightly sweet, mild flavor after soaking, you really don't need much added sugar for perfect homemade Peanut Milk .
Essential Components and Substitutions for the Best Homemade Nut Drink
Don’t skimp on quality when it comes to the few ingredients in this simple recipe. Quality water and good peanuts make all the difference in achieving the best flavor profile for your high protein beverage.
Selecting the Right Peanuts (Raw vs. Lightly Roasted)
Warning: Always use raw, unsalted peanuts for this Peanut Milk recipe. Roasted peanuts have already had their oils heated and partially oxidized, which can result in a slightly bitter, often separated milk that just doesn't emulsify well. If you can only find lightly roasted, make sure they are completely salt free, but raw is truly non-negotiable for the best result.
Water Quality and Temperature Considerations
Since water is the dominant ingredient, using filtered water is essential for a clean, fresh taste. I also highly recommend using cold or chilled water for the final blend. High speed blending generates heat, and that heat can slightly "cook" the nuts and give the finished Peanut Milk a slightly off-flavour, so keep everything cold initially.
Optional Flavor Boosters and Natural Sweeteners
While the standard recipe is delicious plain, here are a few ideas for adding some flair:
- Substitute: Instead of maple syrup, use honey (if not vegan) or agave nectar.
- Spice: Add a dash of cinnamon or nutmeg for a warming winter milk.
- Richness: Throw in 1/4 cup of raw cashews for an even richer, slightly thicker Peanut Milk (this is overkill, but delicious).
| Ingredient | My Preferred Choice | Viable Substitution |
|---|---|---|
| Peanut Base | Raw, unsalted peanuts | Raw, unsalted cashews or blanched almonds (less creamy) |
| Sweetener | Maple Syrup | Pitted dates (3 4), Agave, or plain White Sugar |
| Vanilla | Pure Vanilla Extract | 1/4 tsp Almond Extract (use sparingly!) |
The Role of Salt in Enhancing Flavor Balance
You might think salt is weird in a sweet drink, but trust me, it’s necessary. That tiny pinch of fine sea salt doesn’t make the Peanut Milk taste salty; it actually wakes up and intensifies the natural sweetness of the peanuts and the maple syrup.
It provides crucial flavour balance, preventing the final product from tasting flat.
How to Make High Protein Peanut Milk: step-by-step Method

This entire process is active for about 12 minutes, making this an incredibly easy high protein option compared to tedious stovetop cooking.
Prepping: Soaking, Draining, and Rinsing the Base Ingredient
- The Initial Rinse: Place 1 cup of raw peanuts into a bowl and rinse them quickly under running water to remove any surface dust or debris.
- Soak Time: Cover the peanuts with at least 3 cups of fresh, filtered water. Let them soak, covered, for a minimum of 8 hours or overnight. This is where the magic happens for your future creamy Peanut Milk .
- The Crucial Drain: Pour off the soaking water immediately. Do not use this water for blending it contains the enzyme inhibitors we want to remove. Rinse the peanuts thoroughly under cold water one last time until the water runs completely clear.
The Critical Blending Phase (Speed and Duration)
- Load Up: Transfer the soaked and rinsed peanuts to your high speed blender carafe. Add 4 cups of fresh, cold water, the optional sweetener (maple syrup), vanilla extract, and the small pinch of salt.
- Start Slow, Finish Fast: Begin blending on a low setting for 10 seconds to incorporate everything. Then, crank the speed up to the absolute highest setting.
- Full Emulsification: Blend the mixture continuously for 60 to 90 seconds. You want the mixture to look uniformly white, frothy, and completely smooth; if you see any small specks remaining, blend for another 30 seconds. This is how you guarantee maximum creaminess in your high protein Peanut Milk .
Chef’s Note: If your blender gets extremely hot during this high speed phase, stop briefly. Excessive heat can alter the delicate flavour profile of the finished Peanut Milk .
Straining Techniques for Zero Pulp (Nut Milk Bag vs. Fine Mesh)
- Set Up: Place your nut milk bag over a large, clean vessel, like a deep bowl or a measuring jug. If you don't have a bag, use 3 layers of fine cheesecloth instead a sieve alone won't cut it.
- Pour and Squeeze: Pour the blended liquid slowly into the bag, leaving room at the top. Gather the opening of the bag and gently twist it closed. Squeeze the bag using medium, steady pressure to extract all the creamy liquid. Don't force it aggressively , or fine sediment will sneak through, making your Peanut Milk slightly gritty.
- Repeat: Repeat until all the blended liquid has been processed and you are left with only the thick peanut okara (pulp).
Final Taste Testing and Texture Adjustments
Once strained, taste your fresh Peanut Milk . Does it need more sweetness? Stir in a teaspoon more maple syrup until dissolved. Is it too thick for your preference? Whisk in 1/4 cup of cold water until you reach your ideal consistency. Remember, it will thicken slightly once fully chilled.
Expert Tips for Perfect Results Every Time
Making perfect Peanut Milk is simple, but perfection requires attention to detail.
Troubleshooting: Why Your Milk Is Too Thin or Separated
Usually, thin milk happens for two reasons: poor soaking or insufficient blending time. If you didn't soak the peanuts long enough, they were too hard to break down fully, leaving the fat locked inside.
If you notice separation after chilling, it means the emulsion was weak; next time, blend on high for the full 90 seconds and ensure you are using cold water.
Maximizing Shelf Life and Preventing Early Spoilage
Since we aren't pasteurizing this Peanut Milk , its shelf life is short typically 4 to 5 days, max. Always store it immediately in the coldest part of your fridge (usually the bottom shelf, toward the back).
Use clean, sterilized glass bottles or jars with tight fitting lids to minimize bacterial exposure.
Should You Reuse or Repurpose the Remaining Pulp?
Absolutely! That leftover peanut pulp (okara) is fibrous, protein packed gold. Spread it thinly on a baking sheet and bake it low and slow (around 200°F / 93°C) until it's completely dry.
You can then grind it into a high protein, gluten-free flour for baking, or mix it straight into energy bars or homemade dog treats. Waste not, want not.
Ideal Refrigeration Times and Container Choices
Chill your fresh Peanut Milk immediately for at least 2 hours before drinking. Chilling allows the fats to stabilize and results in a much more satisfying texture.
Glass bottles are the best storage choice as they are non-porous and easy to sanitize completely between batches of Peanut Milk .
Freezing Milk Cubes for Smoothies and Coffee Concentrates
But does it freeze well? You bet. If you know you won't use the whole batch within 4 days, pour some into ice cube trays. These frozen cubes are phenomenal for adding instant creamy richness and a protein boost to your morning smoothies without watering them down.
They are also brilliant for making strong coffee concentrates for iced lattes made with delicious Peanut Milk .
Foaming and Steaming Notes for Lattes and Hot Drinks
Because of its naturally higher fat and protein content compared to oat or almond milk, fresh Peanut Milk actually steams beautifully. It produces a stable microfoam that holds up well in lattes and cappuccinos.
Just make sure to heat it slowly and avoid boiling it, or it might lose some of that coveted creamy texture.
Storing Your Freshly Prepared Plant Based Beverage
Always handle this like fresh produce. Keep your bottle of creamy Peanut Milk sealed tightly and tucked away from the fridge door, where temperatures fluctuate too much. If you notice any sour smell or thickening beyond the usual chill factor, it’s time to toss it. Freshness is key here.
The Best Ways to Use Your Homemade Dairy Substitute
I use this stuff daily! It’s not just for pouring over cereal (though it’s great for that).
We love using this creamy beverage as the base for our Peanut Colada: Salty, Sweet Tropical Bliss Drink — it amps up the tropical sweetness beautifully. It’s also the secret ingredient in my Vegan Pancakes: The Ultimate Fluffy Buttermilk Stack (30 Min) when I need a ridiculously rich, plant based buttermilk substitute.
- Hot Cocoa: Warm it gently with cocoa powder and a touch more sweetener for the most decadent, high protein hot chocolate.
- Oatmeal Base: Cook your morning steel cut oats using Peanut Milk instead of water for instant richness and protein.
- Blender Magic: Use it in any smoothie recipe where you normally use dairy milk; the subtle nutty flavor pairs perfectly with bananas and berries.
Making your own delicious, creamy Peanut Milk is one of the easiest, most rewarding things you can do in your kitchen, and I promise, once you try this high protein version, you’ll never look back at the store-bought cartons again. Get soaking!

Recipe FAQs
Why is my homemade peanut milk gritty or separating quickly?
Grittiness is usually a result of insufficient blending time or inadequate straining. Ensure you blend the mixture for a full 60 90 seconds to properly emulsify the fats and then use a fine mesh nut milk bag to maximize smoothness.
Natural separation is normal after storage; simply shake the container well before each use.
Can I use roasted peanuts instead of raw, unsalted ones?
While you certainly can use roasted peanuts, they will impart a much stronger, deeper, and sometimes slightly bitter flavor to the milk. For the purest, cleanest flavor profile that works best in coffee and tea, it is highly recommended to stick with raw, unsalted peanuts.
If using roasted, avoid heavily salted varieties.
How long will homemade peanut milk last, and can I freeze it?
Homemade peanut milk, free of stabilizing gums and preservatives, should be stored in an airtight container in the refrigerator for 3 to 5 days maximum. Freezing is possible, but the texture will change significantly upon thawing, often becoming grainy due to the fat separating.
If you must freeze, reserve it for use in smoothies or baked goods.
Do I absolutely have to soak the peanuts before blending?
Soaking is highly recommended as it softens the peanuts, making them easier to blend into a truly creamy liquid, and aids in better overall digestibility. If you are short on time, you can skip the soak if you have a commercial grade high speed blender, but the yield and smoothness might be slightly compromised.
How can I customize the flavor and sweetness of my peanut milk?
Flavor adjustments are simple: add a small pinch of sea salt while blending to enhance and balance the natural sweetness of the peanuts. You can also add natural flavorings like vanilla extract, a few pitted dates, or a teaspoon of maple syrup for added sweetness and warmth.
Try cinnamon or nutmeg for a spiced variation.
Can I compost or reuse the leftover peanut pulp (Okara)?
Absolutely, the leftover pulp is a fantastic resource! It can be dried out and incorporated into baking recipes like muffins or quick breads to boost protein and fiber content. If you don't plan to use it immediately, you can simply add it to your kitchen compost.
Is peanut milk suitable for use in hot coffee or tea?
Due to its high fat content and lack of stabilizers, homemade peanut milk may sometimes "break" or curdle when added directly to very hot, acidic liquids like coffee. To minimize this risk, always gently pre-warm the peanut milk before pouring it into your hot beverage.
It performs best in lattes, smoothies, or recipes where it is heated gradually.
Ultimate Homemade Peanut Milk
Ingredients:
Instructions:
Nutrition Facts:
| Calories | 246 kcal |
|---|---|
| Protein | 9.8 g |
| Fat | 18.5 g |
| Carbs | 13.7 g |
