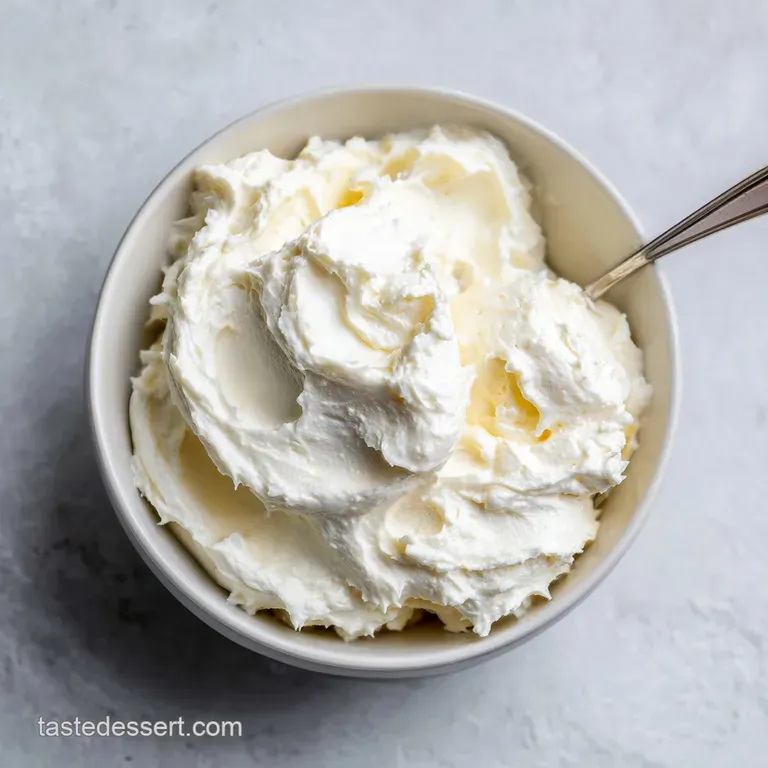
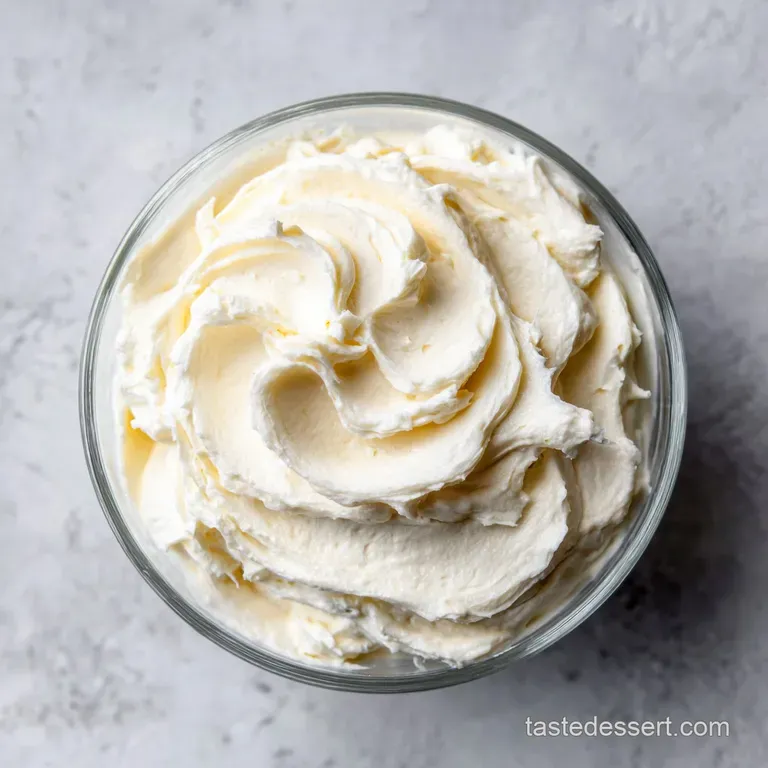
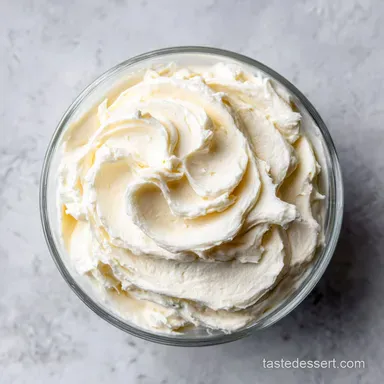
Whipped Cream Cheese Frosting: Light and Stable
- Time: Active 15 minutes, Passive 0 minutes, Total 15 minutes
- Flavor/Texture Hook: Billowy, tangy, and velvety texture
- Perfect for: Layer cakes, cupcakes, and elegant dessert garnishing
- Master the Ultimate Whipped Cream Cheese Frosting
- Why This Works
- Precise Measurements for Success
- Selecting Your Best Ingredients
- Tools Needed for Stability
- Steps for Perfect Texture
- Fixing Common Frosting Issues
- Delicious Flavor Variation Ideas
- Storing and Maintaining Freshness
- Aesthetic Garnish and Decorating Tips
- Recipe FAQs
- 📝 Recipe Card
Master the Ultimate Whipped Cream Cheese Frosting
We have all been there. You spend all afternoon baking a beautiful cake, only to have the frosting turn into a soupy, sliding mess the moment you try to pipe a swirl. I once tried to frost a warm ish carrot cake for a birthday party, and within ten minutes, the entire topping had literally slumped onto the platter like a melting ice cream cone.
It was heartbreaking, and honestly, a bit of a sticky disaster.
The problem usually stems from two things: over softened cream cheese or improper aeration. Most recipes tell you to leave your cream cheese out until it is room temperature, but that is often the first step toward a puddle. When the cheese is too warm, it loses its ability to hold onto air bubbles.
This specific method fixes that by keeping everything cold and structured.
This recipe is the targeted fix for anyone who wants that signature cheesecake like tang but needs a texture that is light, billowy, and stable enough for high altitude piping. We are skipping the heavy, butter laden traditional versions in favor of something that feels like a silky cloud.
You will get a finish that is stable, beautifully white, and ready to be the star of your next dessert.
Why This Works
The secret to this success lies in the temperature control and the order of operations. We are essentially creating a stabilized whipped cream where the cream cheese acts as the structural anchor. It is a bit of kitchen magic that happens in under 15 minutes.
- Fat Stabilization: Using cold cream cheese provides a firm foundation that prevents the heavy cream from deflating during the high speed whipping process.
- Sugar Suspension: Sifting the powdered sugar ensures it dissolves instantly into the moisture of the cheese, preventing any gritty texture in the final product.
- Air Incorporation: Starting with a smooth cheese paste allows the heavy cream to wrap around tiny air pockets, creating a voluminous, light structure.
- Salt Balance: A tiny pinch of sea salt cuts through the richness of the dairy, making the vanilla and tangy cheese notes pop.
| Feature | Fresh Homemade Version | store-bought Shortcut |
|---|---|---|
| Texture | Billowy and cloud like | Dense and greasy |
| Flavor | Bright, tangy, real vanilla | Artificial and overly sweet |
| Stability | High (if kept cold) | Variable (often sags) |
There is a massive difference between making this from scratch and grabbing a tub from the shelf. While the shortcut might save five minutes, it lacks the structural integrity needed for beautiful presentation.
The fresh version uses real dairy fats that provide a clean mouthfeel, whereas shortcuts often rely on palm oils that leave a waxy film on the roof of your mouth.
Precise Measurements for Success
Accuracy is your best friend when you want a frosting that doesn't weep. While some cooks like to "measure with their heart," baking and frosting usually require a bit more discipline to get that velvety consistency every single time.
We are using standard kitchen weights and volumes to ensure your batch looks exactly like the photos.
| Component | Science Role | Pro Secret |
|---|---|---|
| Cream Cheese | Structural base and tang | Use full fat brick style only |
| Powdered Sugar | Sweetener and stabilizer | Sift twice for maximum silkiness |
| Heavy Cream | Aeration and volume | Must be at least 36% fat |
When you are selecting your ingredients, the fat content is the most important factor. If you try to use a "light" cream cheese or a low-fat whipping cream, the frosting will lack the internal strength to hold its peaks.
The 36% fat in the heavy cream is what allows those bubbles to stay trapped in the matrix of the frosting.
Selecting Your Best Ingredients
You only need five simple items for this recipe, so the quality of each one really matters. Since we aren't cooking these ingredients, their raw flavors will be very prominent.
- 8 oz Full fat brick cream cheese: Keep this cold from the fridge. Avoid the spreadable tubs, as they contain extra water and stabilizers that will ruin the texture. Why this? The brick form has the density needed for structural stability.
- 1 cup Powdered sugar: Always sift this. Even small lumps can create "craters" in your piped designs. Why this? Fine particles dissolve quickly without adding graininess.
- 1.5 tsp Pure vanilla extract: Use the good stuff here. A clear vanilla can be used if you want a stark white frosting. Why this? Enhances the dairy notes without overpowering the tang.
- 1 pinch Fine sea salt: Just a tiny amount is needed to balance the sugar. Why this? Salt is a flavor enhancer that makes the creaminess feel richer.
- 1.5 cups Heavy whipping cream: This must be very cold, ideally from the back of the fridge. Why this? Cold fat globules bond together more easily to create stiff peaks.
| Original Ingredient | Substitute | Why It Works |
|---|---|---|
| Pure Vanilla Extract | Vanilla Bean Paste | Adds beautiful black specks and a deeper, more floral aroma. |
| Powdered Sugar | Monk Fruit Powder | Similar texture for a lower carb option, though it may feel "cooler" on the tongue. |
| Sea Salt | Kosher Salt | Provides the same flavor balance. Note: Use a very fine grain so it dissolves. |
Choosing the right vanilla can actually change the "mood" of your dessert. If you use a Madagascar Bourbon vanilla, you get those deep, woody notes that pair perfectly with a dark chocolate cake. If you opt for a Tahitian vanilla, it leans more floral and fruity, which is incredible on a lemon or berry filled cupcake.
Tools Needed for Stability
You don't need a professional kitchen, but having the right gear makes this process much smoother. I've tried making this with a hand whisk before, and let's just say my arm felt like it was going to fall off before I even got to soft peaks.
- Stand Mixer: Using a stand mixer, like a KitchenAid, allows for constant, high speed aeration which is vital for this recipe.
- Whisk Attachment: This is essential for incorporating the air needed to make the frosting light and billowy.
- Sifter: A fine mesh strainer or a dedicated flour sifter is necessary to keep the powdered sugar light.
- Rubber Spatula: You will need this to scrape the bottom of the bowl to ensure no cream cheese lumps are hiding.
Chef's Tip: Put your mixing bowl and whisk attachment in the freezer for 10 minutes before you start. A chilled bowl keeps the fat in the cream from warming up, which results in a much faster and more stable whip.
Steps for Perfect Texture
- Place the cold block of cream cheese in your mixing bowl. Use the whisk attachment to beat on medium high speed until completely smooth and free of lumps, which takes about 2 minutes. Note: This creates the smooth base needed for the cream to cling to.
- Sift the powdered sugar directly into the bowl. Add the vanilla and salt.
- Turn the mixer to low speed and beat until the sugar is fully incorporated into the cheese.
- Increase the speed to medium high and whip for another minute until the mixture forms a thick, uniform paste.
- Turn the mixer back down to low speed. This is crucial for the next step.
- Very slowly pour the cold heavy whipping cream down the side of the bowl in a steady stream while the mixer is running.
- Scrape the sides and bottom of the bowl once with a spatula to ensure everything is combined.
- Increase the speed to medium high. Watch closely as the mixture begins to thicken and grow in volume.
- Continue whipping until stiff peaks form and the whisk leaves clear tracks in the frosting.
- Stop immediately once it is firm. The frosting should look matte and hold its shape when the whisk is lifted.
Fixing Common Frosting Issues
Even with the best intentions, dairy can be finicky. The most common hurdle people face is a texture that feels more like a glaze than a frosting. Usually, this happens if the cream wasn't cold enough or if the cream cheese was beaten too long after the liquid was added.
Why Your Frosting Is Runny
If your mixture looks like thick milk rather than frosting, the temperature is likely too high. If the friction from the mixer warms the fats, they won't trap air. You can try putting the whole bowl in the fridge for 20 minutes and then attempt to whip it again.
Why Your Frosting Is Lumpy
This usually happens in step one. If you add the sugar and cream before the cream cheese is perfectly smooth, those tiny cheese "beads" will never fully disappear. Always make sure that initial paste is silky before moving on.
| Problem | Root Cause | Solution |
|---|---|---|
| Grainy texture | Un sifted sugar | Sift sugar and whip 1 min longer to dissolve. |
| Yellowish tint | Room temp cheese | Use cold cheese and clear vanilla extract. |
| Broken/Curdled | Over whipping | Fold in 2 tbsp of liquid cream to smooth it out. |
Common Mistakes Checklist
- ✓ Never use "tub" cream cheese; the water content is too high for stability.
- ✓ Ensure your heavy cream has at least 36% milk fat (check the label).
- ✓ Stop whipping the moment you see stiff peaks to avoid making "sweet butter."
- ✓ Always scrape the very bottom of the bowl to catch unmixed cream cheese.
- ✓ Don't skip the sifting step, even if the sugar looks fine in the bag.
If you find yourself with a batch that is slightly too soft for piping, don't panic. You can often save it by adding another half cup of sifted powdered sugar, though this will make it sweeter. Alternatively, using this as a filling for a Pumpkin Roll is a great way to use a softer batch since the cake roll helps hold the shape.
Delicious Flavor Variation Ideas
Once you have the base down, this recipe is a blank canvas. You can easily adapt it to match the flavor profile of whatever you are baking. For a chocolate version, sift in 1/4 cup of high-quality cocoa powder along with the powdered sugar. The extra solids in the cocoa actually make the frosting even more stable.
If you are looking for a citrus twist, add the zest of two lemons and a teaspoon of lemon juice during the final whipping stage. The acid in the lemon juice reacts with the proteins in the cream to help it set even firmer. For a warm, spiced version that pairs perfectly with Cinnamon Roll Cupcakes, add a teaspoon of ground cinnamon and a dash of nutmeg.
- If you want a stiffer pipe, add 2 tablespoons of instant vanilla pudding mix.
- If you want a fruit flavor, fold in 2 tablespoons of freeze dried fruit powder.
- If you want a nutty finish, swap the vanilla for almond extract.
Storing and Maintaining Freshness
Because this frosting is loaded with fresh dairy, it needs to be handled with care. You can't leave a cake frosted with this on the counter for hours in a warm room. It will stay fresh and beautiful in the refrigerator for up to 3 days.
If you are making it ahead of time, store it in an airtight container with a piece of plastic wrap pressed directly against the surface to prevent a skin from forming.
You can actually freeze this frosting, which is a total lifesaver for meal prep. Place it in a freezer safe bag and press out all the air. It will keep for about 2 months. When you are ready to use it, thaw it overnight in the fridge.
You might need to give it a quick 30 second whip with a hand mixer to bring back that billowy volume before piping.
For zero waste, if you have a little bit left over, it makes an incredible dip for fresh strawberries or Graham crackers. You can also dollop small rounds onto a parchment lined sheet, freeze them, and then drop them into hot chocolate for a tangy, creamy melt.
Aesthetic Garnish and Decorating Tips
Presentation is where this frosting truly shines. Because it is so white and matte, it provides the perfect backdrop for vibrant colors. When garnishing, I like to follow a "Rule of Three" for color balance to make the dessert look professional and inviting.
First, consider a Fresh Herb Accent. A small sprig of bright green mint or even lemon thyme provides a vivid contrast against the white frosting. Add these just before serving so they don't wilt. Second, use Edible Flowers.
Soft purple pansies or yellow marigolds add an organic, high end feel. They bring a delicate color balance that feels much more sophisticated than sprinkles.
Finally, don't overlook Citrus Zest. Long curls of orange or lime zest add a pop of neon color and a hit of fresh aroma. These should be added right on top of the piped swirls.
The combination of the white Whipped Cream Cheese Frosting, the green herbs, and the bright citrus creates a visual harmony that is hard to beat.
Remember to keep your garnishes light. The beauty of this frosting is its airy, billowy texture. You don't want to weigh it down with heavy candies. A light dusting of freeze dried raspberry powder can also provide a stunning pink "blush" that looks incredible on camera and tastes even better.

Recipe FAQs
Can I use whipped cream cheese for frosting?
No, avoid using whipped cream cheese. The high air and water content in tub versions prevents the frosting from setting properly and leads to a runny, unstable texture.
Is whipped cream cheese frosting stable?
Yes, when made with brick style cream cheese and heavy whipping cream, it is quite stable. Keep it refrigerated until serving, as the fresh dairy content makes it sensitive to warm room temperatures.
How do I make cream cheese frosting firmer?
Add an additional half cup of sifted powdered sugar. If you enjoyed mastering the stiff peak technique here, you can use that same sensory observation to gauge when the frosting is ready to pipe without needing further adjustments.
Can I whip cream and cream cheese together?
Yes, but they must be added in the correct sequence. Always beat the brick cream cheese until smooth first, then slowly pour in the cold heavy whipping cream while the mixer is running to ensure a stable emulsion.
How long does this frosting last in the fridge?
It stays fresh for up to 3 days. Store it in an airtight container with plastic wrap pressed against the surface to prevent a skin from forming.
Is it true I can freeze leftover cream cheese frosting?
Yes, freezing is a great way to save leftovers. Place the frosting in a freezer safe bag, press out all the air, and store it for future use.
How to avoid making sweet butter during whipping?
Stop the mixer the moment stiff peaks form. Watching for this specific texture change is critical, as over processing the cream will cause the fat to separate and turn the mixture into butter.
Whipped Cream Cheese Frosting
Ingredients:
Instructions:
Nutrition Facts:
| Calories | 104 kcal |
|---|---|
| Protein | 0.9 g |
| Fat | 8.6 g |
| Carbs | 5.8 g |
| Fiber | 0 g |
| Sugar | 5.5 g |
| Sodium | 38 mg |
