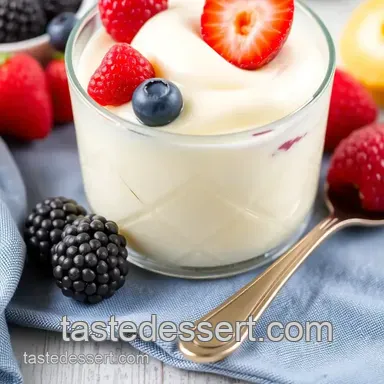
Whisked Vanilla Pudding with Berries Delight

- Look into into the Sweet World of Whisked Vanilla Pudding with Berries Delight
- A Sweetly Whipped History
- Why This Pudding Is a Winner
- Diving into the Ingredients
- Essential Ingredients Guide
- Signature Seasoning Blend
- Smart Substitutions
- Kitchen Equipment Essentials
- Professional Cooking Method Made Easy
- Pro Tips & Secrets for Whisked Vanilla Pudding with Berries Delight
- Perfect Presentation to Impress
- Storage & Make-Ahead Tips
- Creative Variations for a Unique Twist
- Complete Nutrition Guide
- Conclusion: Get Ready to Indulge
- Frequently Asked Questions
- 📝 Recipe Card
Look into into the Sweet World of Whisked Vanilla Pudding with Berries Delight
Ever have those days that just scream for a sweet treat ? you know, the kind where the sunshine is shining, and you’re just craving something cool, creamy, and delicious? that’s when i dive into my all-time favorite dessert: whisked vanilla pudding with berries delight .
Seriously, this dessert has a way of wrapping you up in a blanket of nostalgia. i remember sitting on my grandma's porch, savoring every fruity bite ah, pure magic!
So, let’s get personal. what's your go-to dessert when you want to treat yourself? if it’s not a classic pudding topped with luscious, fresh fruit, we need to talk! for me, this recipe is a game changer.
It’s like a comforting hug and a burst of summer all rolled into one bowl.
A Sweetly Whipped History
Now let’s set the scene. vanilla pudding has been around for ages, like since the 18th century! can you believe that? it's come a long way from the old-school kitchens to being a staple in modern day desserts.
Today, it's a top pick for family friendly recipes and shows up at everything from birthday parties to picnics. seriously, who doesn’t love a no-bake dessert that can fill your belly and lift your spirits?
This recipe is straightforward perfect for novice chefs or anyone looking to whip up a quick dessert. you’ll be in and out of the kitchen in under an hour.
It yields about four servings, which makes it just right for sharing...or not. you might want to keep it all to yourself, especially when you see the vibrant colors of those berries on top!
Why This Pudding Is a Winner
Let’s talk about the health perks, shall we? homemade pudding is often way healthier than those fancy store-bought options full of who-knows what.
This creamy concoction has nutritional dessert options that are way more wholesome. you’re snagging some protein from the milk, and with all those berries, you get a healthy dose of nutrients and antioxidants.
Really, why wouldn’t you want to dig in?
Plus, this creamy pudding recipe is so versatile. you can jazz it up for any occasion from casual family dinners to a swanky dinner party.
Just imagine the elegant dessert presentations you’ll be the star of the show! your guests will be wowed with the color explosion from the berry topping.
Honestly, it’s a dessert that looks as good as it tastes.
Another bonus? this pudding is super simple to personalize. you can experiment with different pudding variations , mix in chocolate, or even try spices like cinnamon for a twist.
But let’s be real, there’s something about that vanilla flavor profile mixed with fresh berries that feels like summertime in your mouth.
Diving into the Ingredients
So now, who’s ready to whip up this amazing whisked vanilla pudding with berries delight ? stick around, because up next, we’re diving into the holy grail of ingredients that make this dessert sing.
Grab your mixing bowl, and let’s make some magic!
Essential Ingredients Guide
Cooking is all about the right ingredients , am i right? let’s dive into the premium core components that make the magic happen in your kitchen.
Each one plays a role, so knowing what to look for can truly elevate your dishes like a gourmet chef.
Know Your Measurements
When it comes to baking or whipping up something delicious, measurements are key. whether you’re grabbing that 2 cups of whole milk or just a smidge 1/4 teaspoon of salt , getting it right is essential.
For those of us who prefer a little finesse, the us system works well, but don't forget about metrics. in europe, 475ml sounds much cooler, doesn’t it? keep a conversion chart handy.
It’s super useful!
Quality Counts
Not all ingredients are created equal! you should definitely look for quality indicators . for milk, it’s best to choose whole or organic if you can.
Check those expiration dates on dairy items and look for that creamy texture. freshness goes a long way in making decadent homemade pudding, like our star dish, whisked vanilla pudding with berries delight .
Now, who wouldn’t want to show off that recipe at their next barbecue?
Storage and Shelf Life
Put your culinary treasures in the right spot! store your vanilla extract in a cool, dark place. and your spices? store those in airtight containers away from heat and light.
Most dry spices can last about 1-3 years , while whole spices can stick around for 4 years or more.
You want them fresh when you're creating your climatic berry dessert!
Selecting the Right Herbs and Spices
When it’s time to season your vanilla pudding, consider fresh herbs like mint which go perfectly with the rich flavors of vanilla.
Remember, experimenting is half the fun. don't just stick to what the recipe says. try adding rosemary or basil for a different flair.
Who knew some seasons could also mean a whole new dessert experience?
Signature Seasoning Blend
Okay, let’s talk about creating that signature seasoning blend ! it’s what gives your dishes personality. a basic blend of cinnamon, nutmeg , and a pinch of cardamom can whisk your simple vanilla pudding to elegant heights .
Spice Combinations
Everyone talks about their "secret" spice combo. mine? a blend of vanilla with a hint of lemon zest . the citrus kick is pure magic.
And don't underestimate ground ginger for that extra zing!
Smart Substitutions
Sometimes you find yourself in a bind. no cornstarch? no problem! all-purpose flour can step in as an alternative. got allergies or special diets? don’t sweat it! use almond milk instead of dairy for a dairy-free option .
Seasonal Options
Summer means a bounty of fresh fruit! use those straight from-the-farm strawberries or juicy peaches instead of berries when they’re in season for a twist on your classic pudding with berries recipe.
You can craft a berry salad too!
Kitchen Equipment Essentials

Alright, let’s get down to business about tools. you don’t need a fancy kitchen. just some must have tools will do the trick.
A medium saucepan , a trusty whisk , and a solid mixing bowl are your kitchen besties.
Preparation Tips
When cooking your pudding, keep your whisk in hand! the best thing is to keep it moving so everything blends perfectly.
Trust me, no one likes a lumpy pudding! if you want an ultra smooth texture, strain it just like that fancy restaurant would do.
Chill it properly before serving as a no-bake dessert for that creamy delight.
Storage Solutions
Leftovers? Store them in airtight containers and pop them in the fridge. They usually last about 3-5 days . But honestly, who are we kidding? This is a dessert that might not stick around long!
Now that you've got the lowdown on all the essentials, it’s time to whip up that whisked vanilla pudding with berries delight and impress your friends and family.
Let’s get to those step-by-step instructions that make this sweet treat come to life!
Professional Cooking Method Made Easy
Hey there, fellow foodies! let’s chat about transforming your kitchen into a mini professional cooking space. you don’t need to go to culinary school to whip up a delightful dish like whisked vanilla pudding with berries delight .
Let’s break it down together with some simple pro tips and tricks that even your grandma would approve of.
Essential Preparation Steps
First things first, let’s talk about mise en place . it’s just a fancy way of saying "everything in its place.
" gather all your ingredients before starting. for our vanilla pudding, you’ll need 2 cups of whole milk , 0.
5 cup of sugar , and so on. trust me, it’ll save you from scrambling in the middle of cooking!
Now, time management is key. once you know what you’re making, set a timer. for example, once you start cooking the pudding like when the stove is on medium heat set a timer for 10 minutes .
That’s how long you'll need to whisk and keep an eye on your pudding as it thickens.
Staying organized is just as important. keep your kitchen tidy; it makes for less mess and a more pleasant cooking experience! and don’t forget to practice safety.
Always be aware of your surroundings. use oven mitts when handling hot pots and be careful with those knives.
Step-by-step Process
Alright, let’s jump in! Here’s how to make that creamy vanilla pudding and beautiful berry topping.
Prepare the Pudding Base: In a medium saucepan, combine 2 cups whole milk , 0.5 cup granulated sugar , 3 tablespoons cornstarch , and 0.25 teaspoon salt .
Whisk until smooth.
Cook the pudding: place the saucepan over medium heat. whisk continuously until the mixture thickens (about 10 minutes ). the pudding should coat the back of a spoon.
Keep whisking ! no one likes lumpy pudding.
Finish it off: after it’s thickened, stir in 1 tablespoon butter and 2 teaspoons pure vanilla extract . if you want it extra smooth, pour it through a strainer for a silky finish.
Chill Time: Transfer the pudding into serving dishes, cover it with plastic wrap, and refrigerate for at least 30 minutes .
Berry bliss: while your pudding is chilling, wash and slice up 1 cup of mixed berries be it strawberries, blueberries, or raspberries.
Toss them in a bowl, and if you're feeling sweet, drizzle with honey or syrup.
Serve: Once the pudding is chilled, top it with your berry mixture. You can even add a dollop of whipped cream if you're feeling fancy!
Expert Techniques
Here are some pro tips to really nail that pudding. The key is to whisk vigorously during cooking to avoid lumps. This is where your whisking technique shines.
Make sure to check the quality of your ingredients . Fresh, ripe berries make all the difference, giving you a dangerously good dessert garnished with flavor .
And if it doesn’t turn out right? no worries! just remember, if the pudding seems too thin, it might need a few more minutes on the heat.
If it’s too thick, a splash of milk can help loosen things up.
Success Strategies
A common mistake? not giving your pudding enough time to chill. it’s all about that set trust me, the chilling is what gets the right texture.
And if you’re looking to impress, consider making it ahead of time. it can chill overnight!
Test your pudding's consistency for that creamy perfection, and adjust sweetness to your liking. whether you're making a berry salad or a full fledged vanilla custard , the goal is to hit that sweet spot.
You can get creative with pudding variations too! Think chocolate, citrus, or whatever fruit is in season.
Additional Information
As you can see, making whisked vanilla pudding with berries delight isn’t just a summer dessert ( though it totally rocks in warmer weather ).
It’s about embracing the joy of cooking and enjoying sweet treats that you made with your own hands. the satisfaction you’ll get from serving it up will make you feel like a culinary rockstar!
So, next time you want to create a dessert that brings the comforts of home, remember: whisk, chill, and enjoy! And if you're craving some extra help or variations, stay tuned for more ideas in my upcoming section! Happy cooking, friends!
Pro Tips & Secrets for Whisked Vanilla Pudding with Berries Delight
Hey there, dessert lovers! honestly, if you’ve never tried making whisked vanilla pudding with berries delight , you’re totally missing out.
This creamy pudding is not just a treat; it’s a total crowd pleaser! here are some of my top pro tips to help you nail it in the kitchen.
First off, don’t rush the whisking. whisk vigorously when cooking the pudding. it helps to mix all those ingredients smoothly and prevents any pesky lumps.
I learned the hard way that a lumpy pudding isn’t so elegant. and speaking of elegance, if you want to stand out, consider plating techniques .
Just take a moment to spoon that velvety pudding gently into a fancy dish. the presentation matters more than you'd think!
Here’s a time saving technique : instead of chilling the pudding in separate bowls, you can use a large dish. just pour it all in and then scoop it out when you're ready to serve.
And if you want to up the ante, add a splash of vanilla extract to those berries. it really enhances the overall profile of your berry dessert!
Perfect Presentation to Impress
When it comes to the perfect presentation , think about color combinations! a vibrant mix of strawberries, blueberries, and raspberries not only tastes amazing but also looks gorgeous against the creamy vanilla pudding.
Use dessert garnishes like mint leaves or a sprinkle of powdered sugar to give it a sophisticated finish, too.
Oh, and you know those trendy pinterest inspired plating techniques? try using a squeeze bottle for a fun swirl of berry sauce around your dish.
It adds that “wow factor” that will make your guests think you got it straight from a restaurant!
Storage & make-ahead Tips
Now let's talk about keeping that delicious pudding fresh! if you’re looking to make this ahead, storage guidelines say that the pudding can sit in the fridge for about 3-4 days if sealed properly.
Just cover the surface of the pudding with plastic wrap to keep that pesky skin from forming. trust me, it’s a game changer.
If you want to reheat it (though it’s best served chilled), you can do so slowly in a saucepan over low heat.
Just stir it constantly so it doesn't thick nobody likes a burnt pudding, am i right? and if you make it last minute, remember, it needs at least 30 minutes to chill for maximum creaminess.
Creative Variations for a Unique Twist
Here’s where it gets fun creative variations are your best friend! if you're not into plain vanilla pudding, try adding some cocoa powder for a chocolate twist.
You could even use almond milk for a dairy-free version. get crazy and throw in some citrus zest! orange or lemon zest really brightens up the flavors.
Also, think about seasonal fruits. If you’re making it in the fall, how about some poached pears on top? And in winter, a mix of spiced fruits can elevate your pudding like nothing else!
Complete Nutrition Guide
Thinking about nutrition ? this whisked vanilla pudding isn’t just about being a delightful dessert; it has its perks too! each serving packs around 250 calories not bad for a creamy treat!
And don’t sweat it if you’re watching sugar; you can always adjust the sweetness based on your preference and the berries you’re using.
Remember that portion guidance is key here. Stick to 1 serving to keep it reasonable, and you can totally indulge guilt free!
Conclusion: Get Ready to Indulge
So, whether you're hosting a summer barbecue or just craving something sweet for movie night, this whisked vanilla pudding with berries delight is the perfect answer! it’s a sweet comfort dessert that’s easy to whip up and endlessly customizable.
Trust me, once you master this classic recipe, you’ll find yourself coming back to it over and over. So grab those mixing bowls and whisk it up! Happy cooking, friends!
Frequently Asked Questions
What is the best way to make Whisked Vanilla Pudding with Berries Delight?
The best way to make Whisked Vanilla Pudding with Berries Delight is to follow the recipe's directions carefully. Start by whisking the dry ingredients into the milk thoroughly to avoid lumps, and then cook over medium heat while continuously whisking until the mixture thickens.
After chilling, layer your homemade pudding with fresh berries for a delicious dessert.
Can I use frozen berries for the topping?
Yes, you can use frozen berries for the topping of your Whisked Vanilla Pudding with Berries Delight. Just be aware that frozen berries may release extra moisture as they thaw, so you might want to drain them lightly before adding them to the pudding.
Fresh berries will provide a firmer texture and vibrant flavor, but frozen can still work well in a pinch.
How do I store leftover Whisked Vanilla Pudding with Berries Delight?
Leftover Whisked Vanilla Pudding with Berries Delight can be stored in an airtight container in the refrigerator for up to 3 days. It’s best to keep the berry topping separate until you're ready to serve to maintain their texture and freshness.
If the pudding thickens too much in the fridge, you can whisk in a splash of milk to loosen it before serving.
Can I make Whisked Vanilla Pudding with Berries Delight dairy-free?
Yes, you can easily make a dairy-free version of Whisked Vanilla Pudding with Berries Delight by substituting the whole milk with almond milk, coconut milk, or any other dairy-free milk alternative. Make sure to also check the butter or use coconut oil as a substitute to ensure that the dessert remains dairy-free.
What are some variations I can try with the pudding?
There are many delicious variations you can try! For example, add cocoa powder for a chocolate twist or lemon zest for a fresh citrus flavor. You could also create a tropical version by using mango or pineapple with coconut milk, or experiment with different combinations of berries for a unique taste each time.
How can I ensure my pudding comes out smooth and creamy?
To ensure your pudding is smooth and creamy, whisk the mixture vigorously while cooking to prevent lumps. Also, consider straining the pudding through a fine mesh strainer before chilling, which will remove any lumps and create an ultra smooth texture.
Lastly, letting the pudding chill in the refrigerator for the recommended time allows it to set beautifully.
Whisked Vanilla Pudding With Berries Delight