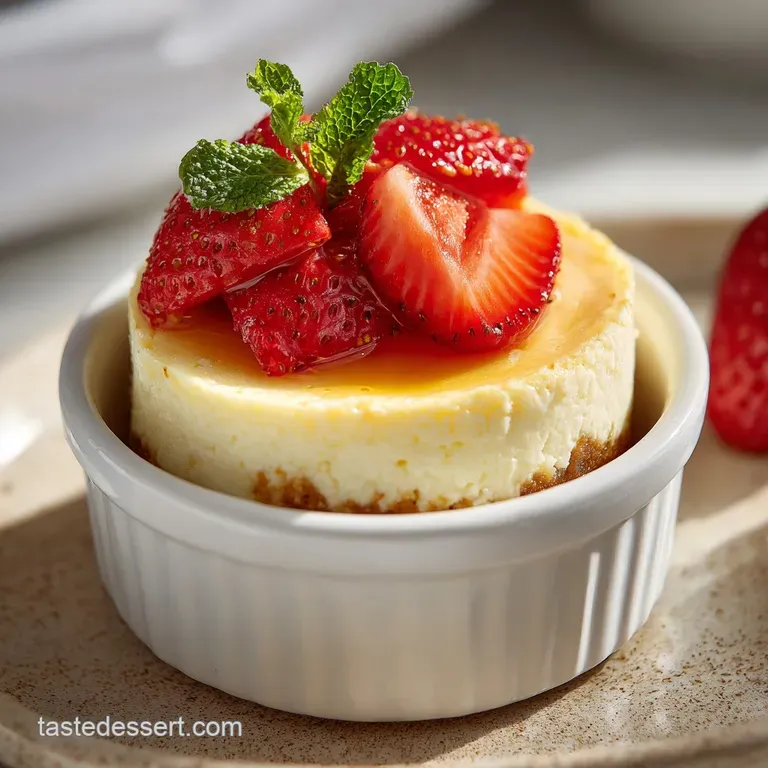
6 Inch Vanilla Cheesecake: Creamy and Silky
- Time: Active 25 minutes, Passive 60 minutes, Total 85 minutes
- Flavor/Texture Hook: Silky, vanilla forward custard with a crisp, toasted graham cracker base.
- Perfect for: Intimate celebrations, date nights, or a weekend baking project.
- The Best Inch Cheesecake Recipe with Vanilla
- Reasons This Small Batch Recipe Works
- Essential Specs for This Vanilla Bake
- Necessary Ingredients for Silky Filling
- Tools Required for Professional Results
- Executing the Perfect Cheesecake Method
- Solving Your Common Baking Issues
- Creative Variations for Your Dessert
- Storage Practices for Creamy Results
- Presentation Ideas for Stunning Slices
- Recipe FAQs
- 📝 Recipe Card
The Best Inch Cheesecake Recipe with Vanilla
Forget everything you have ever heard about the necessity of giant, towering cheesecakes that feed an entire neighborhood. For years, I believed that the only way to get that authentic, dense, and creamy consistency was to commit to a massive 10 inch springform pan that required a small mountain of expensive cream cheese.
I thought the smaller versions would always end up dry or "cupcake like" in texture. I was completely wrong. This specific 6 inch scale is actually the superior way to bake at home because the heat penetrates the center much more evenly, reducing the risk of those frustrating cracks that haunt every baker's dreams.
When you pull this out of the oven, the aroma of toasted butter and pure vanilla extract fills the kitchen in a way that feels incredibly cozy. There is something deeply satisfying about the ritual of pressing the crumbs into the pan and watching the batter transform from lumpy cheese into a glossy, liquid silk.
This isn't just a "mini" version of a recipe; it is a refined, concentrated experience of what a vanilla dessert should be. You do not need a professional degree or a commercial kitchen to achieve that restaurant quality finish.
The secret to this Inch Cheesecake Recipe with Vanilla lies in the details the temperature of your ingredients, the seal on your foil, and the patience you show during the cooling phase. We are looking for a result that is substantial enough to hold its shape but soft enough to melt on the tongue.
It is the kind of treat that makes you want to close your eyes while you eat it, focusing entirely on the interplay between the salty crust and the sweet, tangy filling. Let's get into why this particular method works so well for the home cook.
Reasons This Small Batch Recipe Works
Building a successful cheesecake is less about luck and more about managing the way proteins and fats interact under heat. By scaling down to a 6 inch pan, we change the thermodynamics of the bake, allowing for a more consistent internal temperature without overcooking the outer edges.
- Fat Emulsification: Combining full fat cream cheese with sour cream creates a complex fat structure that stays stable even as the egg proteins begin to set and firm up.
- Thermal Buffering: The water bath (bain marie) acts as a literal shield, preventing the oven's dry, harsh heat from touching the delicate eggs, which ensures a velvety rather than rubbery texture.
- Acid Stabilization: The lactic acid in the sour cream helps to tenderize the proteins in the cream cheese, leading to a much smoother "mouthfeel" that lacks any graininess.
- Maillard Foundation: Par baking the graham cracker crust for 8 to 10 minutes creates a moisture barrier and develops toasted notes that contrast beautifully with the cool vanilla filling.
| Servings | Ingredient Adjustments | Pan Size | Cook Time |
|---|---|---|---|
| 4 people | Use half the recipe (1 egg) | 4 inch pan | 45 minutes |
| 8 people | Use standard recipe (2 eggs) | 6 inch pan | 60 minutes |
| 12 people | Double the recipe (4 eggs) | 9 inch pan | 75 minutes |
This serving size calculator helps you decide exactly how much to prepare based on your guest list. While the 6 inch pan is the "sweet spot" for texture, you can certainly scale this up or down as long as you adjust your bake times to account for the depth of the batter.
Essential Specs for This Vanilla Bake
When we talk about the components of a great dessert, we have to look at the "why" behind each choice. Selecting specific brands or types of ingredients isn't just about being picky; it’s about ensuring the water content and fat percentages are exactly where they need to be for structural integrity.
| Component | Science Role | Pro Secret |
|---|---|---|
| Philadelphia Cream Cheese | Provides the structural fat and protein base. | Always use the block form, never the whipped tub variety, for density. |
| Large Eggs | Act as the primary binder and thickener. | Beat them as little as possible to prevent "souffléing" or rising. |
| Pure Vanilla Extract | High alcohol content carries flavor through the fat. | Add it at the very end of mixing to preserve the volatile aromatics. |
Understanding these roles helps you troubleshoot on the fly. For instance, if you used a low-fat cream cheese, you would immediately notice a lack of "body" because the water to fat ratio is too high, leading to a weeping or collapsing cake.
Using the full fat block ensures that the cheesecake remains firm yet creamy once it hits room temperature.
For another masterclass in creamy textures, you might want to look at how we handle dairy in my perfect homemade éclairs, where the pastry cream relies on similar temperature sensitive emulsification.
Necessary Ingredients for Silky Filling
To get the best results, every single item in your Inch Cheesecake Recipe with Vanilla should be at room temperature before you even turn on the mixer. If your cream cheese is cold, you will end up with tiny white lumps that no amount of whisking can fully remove.
- 1 cup (110g) Graham cracker crumbs: These provide the structural "shatter" for the base. Why this? They absorb butter perfectly while maintaining a distinct, toasted crunch.
- 2 tbsp (25g) Granulated sugar (crust): Helps bind the crumbs together.
- 3 tbsp (42g) Unsalted butter, melted: The glue for your foundation. Why this? Unsalted allows you to control the exact saltiness with your own kosher salt.
- 1/4 tsp Kosher salt (crust): Balances the sweetness.
- 16 oz (450g) Full fat Philadelphia Cream Cheese: The heart of the dish. Why this? This brand has a specific stabilizer content that ensures a consistent, predictable set.
- 1/2 cup (100g) Granulated sugar (filling): Sweetens without adding extra moisture.
- 1/2 cup (120g) Full fat sour cream: Adds the necessary tang and moisture. Why this? Sour cream provides a smoother finish than heavy cream in this specific ratio.
- 1 1/2 tsp Pure vanilla extract: The primary flavor profile.
- 1/4 tsp Kosher salt (filling): Enhances the vanilla notes.
- 2 Large eggs: Provides the lift and setting power.
| Original Ingredient | Substitute | Why It Works |
|---|---|---|
| Sour Cream | Greek Yogurt (Full fat) | Similar acidity and thickness. Note: Results in a slightly tangier finish. |
| Graham Crackers | Biscoff Cookies | Adds a deep cinnamon caramel flavor profile to the base. |
| Granulated Sugar | Cane Sugar | Nearly identical behavior. Note: May add a very slight molasses undertone. |
Choosing the right substitute can slightly alter the final profile, but the science of the bake remains the same. If you choose Greek yogurt, make sure it is the thick, strained variety so you don't introduce excess liquid into the batter.
Tools Required for Professional Results
You don't need a huge arsenal of gadgets, but a few specific tools will make your life much easier and your results much more consistent. The most important is a high-quality 6 inch springform pan. This allows you to remove the delicate cake without having to flip it over, which would surely ruin the top.
A stand mixer or a reliable hand mixer (like a KitchenAid) is also essential for getting that cream cheese truly smooth. While you can do this by hand with a sturdy spatula and some elbow grease, the mixer ensures that the sugar is fully dissolved into the fat.
You will also need heavy duty aluminum foil the thin stuff often tears, and even a single pinhole can let water into your crust, turning it into a soggy mess.
Finally,, make sure you have a roasting pan or a large cake pan that can comfortably hold your 6 inch springform with at least an inch of space all around. This is for your water bath.
A digital kitchen scale is also a "nice to have" because measuring ingredients like flour or crumbs by weight is significantly more accurate than using cups, which can vary based on how tightly you pack them.
Executing the Perfect Cheesecake Method
The process of making this Inch Cheesecake Recipe with Vanilla is a sequence of gentle movements. We start with the high heat of the crust par bake and move into the low, slow environment of the filling bake.
- Prep the environment. Preheat your oven to 325°F (163°C). Combine your graham cracker crumbs, 2 tbsp sugar, 1/4 tsp salt, and the melted butter. It should feel like wet sand that holds its shape when squeezed.
- Form the base. Press the mixture firmly into the bottom and about 1/2 inch up the sides of your 6 inch springform pan. Use the bottom of a measuring cup to get a flat, even surface. Bake for 8–10 minutes until golden and smelling like toasted honey. Let it cool completely.
- Waterproof the pan. Wrap the outside of the cooled springform pan in three layers of heavy duty aluminum foil. Crisscross the layers to ensure no seams are exposed to the water.
- Cream the cheese. In a large bowl, beat the softened cream cheese and 1/2 cup sugar. You want to see it become smooth and velvety with no visible lumps.
- Add the aromatics. Mix in the sour cream, vanilla, and salt. Scrape the sides of the bowl frequently to ensure every bit is incorporated.
- Incorporate the eggs. Add the eggs one at a time on low speed. Mix just until you can't see any more yellow streaks. Note: Over mixing here adds air bubbles that cause the cake to crack as they escape during baking.
- Assemble the bath. Pour the filling over the cooled crust. Place the foil wrapped pan into the roasting pan and fill the outer pan with hot water halfway up the sides of the cheesecake.
- The gentle bake. Bake for 60 minutes. It is done when the edges are set but the center still wobbles like Jell O.
- The gradual cool. Turn off the oven, crack the door slightly, and let the cake sit inside for 1 hour. This prevents the thermal shock that causes surface tension cracks.
- Final chill. Remove from the water bath and refrigerate for at least 6 hours (overnight is better). This is when the fats truly solidify into that iconic texture.
| Method | Time | Texture | Best For |
|---|---|---|---|
| Oven (Standard) | 60 mins | Dense and silky | Professional, classic results. |
| Stovetop (Steam) | 50 mins | Ultra soft, mousse like | When you don't want to heat the whole kitchen. |
While the oven is the gold standard for this recipe, some people enjoy the "steamed" version on the stovetop. However, the oven provides a more even, ambient heat that gives you that perfectly flat, pale top that makes people ask if you bought it from a bakery.
Solving Your Common Baking Issues
Even with the best intentions, cheesecake can be finicky. Most of the problems people run into are related to temperature management or air incorporation. If your batter looks broken or curdled early on, it's likely because your cream cheese was still too cold to bond with the sugar.
Solving Surface Cracking Issues
Cracks usually happen for two reasons: the cake was overbaked, or it cooled down too fast. When the cake gets too hot, the egg proteins tighten and pull away from each other. If you see the cake rising significantly (like a soufflé), your oven is too hot, or you've whipped too much air into the eggs.
Fixing Lumpy Batter Problems
If you find yourself with lumps after adding the eggs, do not keep mixing on high speed. Instead, you can pass the batter through a fine mesh sieve. It takes a few extra minutes, but it will save the texture of the final product.
| Problem | Root Cause | Solution |
|---|---|---|
| Surface Cracks | Overbaking or rapid cooling | Turn off oven earlier; let cool in the oven with the door cracked. |
| Soggy Crust | Leaky foil in water bath | Use heavy duty foil and ensure layers are high and seamless. |
| Lumpy Filling | Cold ingredients | Ensure cheese and eggs are at room temperature for at least 2 hours. |
Common Mistakes Checklist:
- ✓ Never skip the par bake of the crust; it prevents the butter from soaking into the crumbs and making them mushy.
- ✓ Use hot water (not boiling) for the water bath to ensure the temperature starts stabilizing immediately.
- ✓ Don't open the oven door during the first 45 minutes of baking, as this drops the humidity level.
- ✓ Always scrape the very bottom of the mixing bowl; sugar and cheese love to hide there and remain unmixed.
- ✓ Check the "jiggle" at 60 minutes if it looks liquid, give it 5 more minutes, but don't wait for it to be firm.
Creative Variations for Your Dessert
Once you have mastered the base Inch Cheesecake Recipe with Vanilla, you can start playing with the flavor profiles. The beauty of a 6 inch cake is that it’s low risk, making it the perfect canvas for experimentation.
For Restaurant Quality Flavor
Try using a fresh vanilla bean instead of extract. Slice the bean lengthwise, scrape out the millions of tiny black seeds, and cream them directly into the sugar and cream cheese. The visual of those "specks" immediately signals to your guests that they are eating something premium.
For a Decadent Crunch
Swap the graham crackers for crushed Biscoff cookies or ginger snaps. This adds a warm, spicy note that pairs beautifully with the cool vanilla filling. If you go this route, you can often reduce the sugar in the crust by half, as these cookies are naturally sweeter than standard grahams.
For a gluten-free Alternative
You can easily find gluten-free graham style crumbs at most grocery stores. Because there is no flour in the filling itself, this recipe is naturally very friendly to those with gluten sensitivities just ensure your vanilla extract is a certified brand.
| Premium | Budget | Flavor Impact | Savings |
|---|---|---|---|
| Vanilla Bean | Vanilla Extract | Intense, floral, visual specks | Save $5-8 |
| European Butter | Standard Butter | Slightly richer, saltier crust | Save $2 |
| Homemade Fruit Compote | Canned Topping | Brighter, less sugary finish | Save $1-2 |
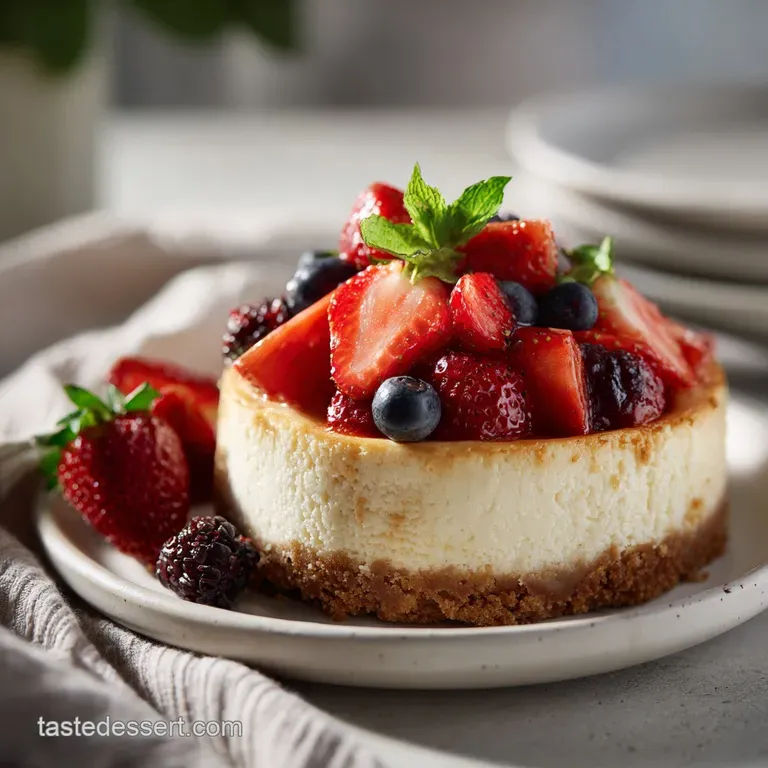
For a fruit forward variation, I highly recommend drizzling a glossy homemade strawberry sauce over the top. The acidity of the berries cuts through the richness of the Philadelphia cream cheese in a way that is absolutely balanced.
Storage Practices for Creamy Results
Because of the high dairy content, you must keep this cheesecake refrigerated. It is actually one of those rare dishes that tastes significantly better on day two. The flavors have time to meld, and the texture becomes more cohesive and "set."
Fridge Storage: Keep the cheesecake in its springform ring (with the sides removed if you like) and wrap the whole thing tightly in plastic wrap. It will stay fresh and delicious for up to 5 days.
Freezer Storage: Cheesecake freezes remarkably well. You can freeze the entire cake or individual slices. Wrap them first in plastic wrap, then in a layer of foil to prevent freezer burn. It will last for up to 2 months.
To thaw, simply move it to the fridge 24 hours before you plan to eat it.
Zero Waste Tip: If you find yourself with leftover crust crumbs that didn't make it into the pan, don't toss them! Toast them in a pan with a little extra butter and sprinkle them over vanilla ice cream or yogurt for a quick "deconstructed" treat.
Presentation Ideas for Stunning Slices
How you present this Inch Cheesecake Recipe with Vanilla can transform it from a simple home baked good into a center piece. Since this is a smaller cake, focus on height and color to make it pop.
Plating Level: Simple
Serve a clean wedge on a small white plate. To get that "perfect" slice, dip a sharp knife in hot water, wipe it dry, and make your cut. Repeat the dipping and wiping for every single slice to prevent the cheese from sticking to the blade.
Plating Level: Polished
Add a dollop of freshly whipped cream (unsweetened or lightly sweetened) to the side. Top the cream with a single fresh raspberry or a mint leaf. This adds a bit of "lift" to the plate and provides a fresh contrast to the dense cake.
Plating Level: Restaurant
Create a "smear" of fruit coulis on the plate first, then place the cheesecake slice on top. Garnish with a few white chocolate shavings or a sprig of sugared currants.
| Plating Level | Key Addition | Visual Goal |
|---|---|---|
| Simple | Clean cuts | Minimalism and focus on texture. |
| Polished | Whipped cream | Classic "Sunday dinner" elegance. |
| Restaurant | Fruit coulis & garnish | High contrast, professional aesthetic. |
- 1. Oven Temperature
- Verify with an internal thermometer that your oven is truly at 325°F; many home ovens run 25 degrees hot.
- 2. Internal Jiggle
- The center 2 inches of the cake should move slightly when the pan is nudged at the 60 minute mark.
- 3. Chill Time
- Do not attempt to slice this before the 6 hour mark; the internal structure needs that time to finish setting through "carryover cooling."
If you find yourself craving more vanilla based projects, you should definitely check out my Cherry Cheesecake Lush, which uses a similar flavor profile but in a much more casual, layered format.
Decision Shortcut: If you want a taller cake, use an extra 8oz of cream cheese and 1 extra egg, but increase the bake time by 15 minutes. If you want a lighter texture, fold in 1/4 cup of whipped heavy cream to the batter at the very end.
If you want a No Bake version, omit the eggs and water bath, and set the filling with 1 tsp of bloomed gelatin instead.
This Inch Cheesecake Recipe with Vanilla is proof that the best things really do come in small packages. It is manageable, impressive, and most importantly, it captures the true essence of homemade joy in every creamy bite. Happy baking!

Recipe FAQs
How to ensure the cheesecake batter is perfectly smooth?
Beat your softened cream cheese and sugar together until completely emulsified before adding other ingredients. Mixing on low speed after adding the eggs ensures you avoid incorporating excess air, which prevents cracks during baking.
Is it true I can bake this without a water bath?
No, this is a common misconception. A water bath provides the gentle, consistent heat necessary to prevent the edges from setting faster than the center, which is the secret to a silky classic NY cheesecake texture.
How to tell when the cheesecake is finished baking?
Look for set edges and a slightly jiggly center. The cake will continue to firm up significantly during the hour it spends cooling inside the turned off oven and the subsequent 6 hours in the refrigerator.
How to prevent the crust from becoming soggy?
Bake the crust for 8 10 minutes until golden before adding the filling. Ensuring the crust is completely cooled before pouring in the batter also creates a necessary barrier that maintains crunch.
How to keep the cheesecake from cracking?
Avoid over mixing the eggs and allow the cake to cool gradually. Cracks often form from temperature shock, so leaving the cake in the oven with the door cracked for an hour is essential for a smooth surface.
Is it better to serve this immediately?
No, the flavors and texture improve significantly after resting. Refrigerating for at least 6 hours or overnight allows the ingredients to meld and the structure to become fully cohesive.
How to properly store leftovers?
Wrap the cheesecake tightly in plastic wrap while it is still in the springform ring. It will remain fresh and creamy in your refrigerator for up to 5 days.
6 Inch Vanilla Cheesecake

Ingredients:
Instructions:
Nutrition Facts:
| Calories | 399 kcal |
|---|---|
| Protein | 6.2 g |
| Fat | 29.1 g |
| Carbs | 28.8 g |
| Fiber | 0.5 g |
| Sugar | 19.2 g |
| Sodium | 245 mg |
