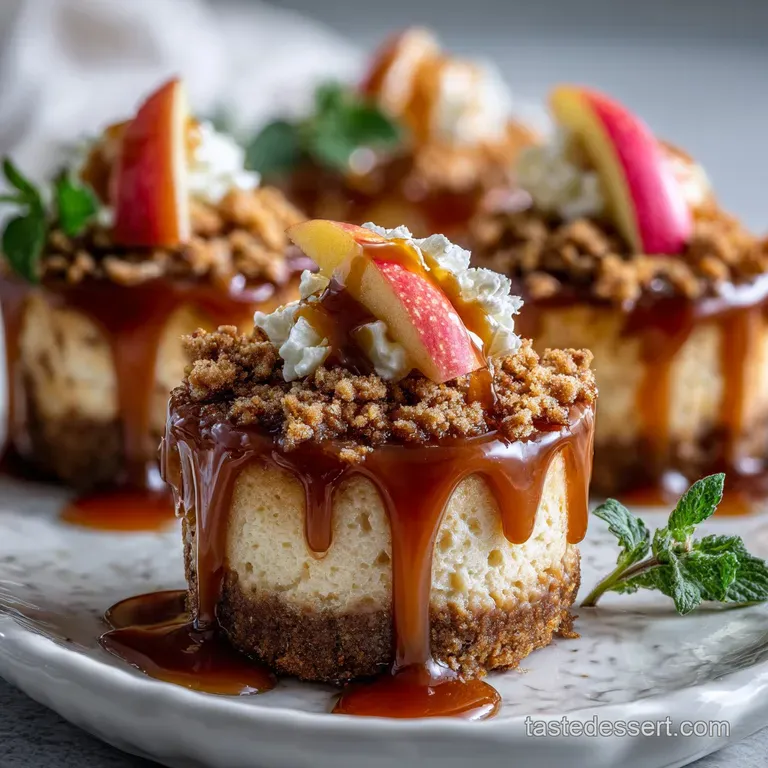
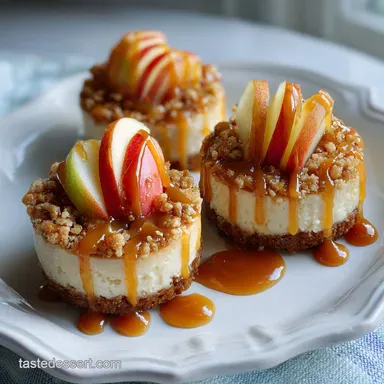
Apple Crisp Mini Cheesecakes
- Time: Active 25 minutes, Passive 22 minutes, Total 47 minutes
- Flavor/Texture Hook: Velvety cheesecake topped with a shattering oat crumble
- Perfect for: Thanksgiving dessert tables, cozy dinner parties, or weekend meal prep
- Make the Best Apple Crisp Mini Cheesecakes
- Essential Metrics for the Perfect Small Batch Bake
- The Essential Components for a Velvety Fruit Filling
- Tools Needed to Ensure Your Crust Never Sticks
- The Step-by-Step Flow for Assembling Each Mini Layer
- Pro Techniques to Prevent Cracking and Sogginess
- Creative Ways to Adapt Your Spices and Flavors
- Proper Cooling and Long-Term Storage for Fresh Bites
- Delightful Pairings to Complete Your Dessert Table Platter
- Recipe FAQs
- 📝 Recipe Card
Make the Best Apple Crisp Mini Cheesecakes
The scent of brown sugar bubbling with butter in a small skillet is my favorite autumn alarm clock. Last October, I tried making a full sized version of this recipe for a family gathering, and it was a total disaster the center didn't set properly and the oat topping turned into a soggy mess after sitting out for an hour.
That was the moment I realized that miniaturizing the process wasn't just cute; it was a total necessity for texture control.
We've all been there, hovering over a springform pan, praying it doesn't crack, but these individual portions are much more forgiving. You get that satisfying "thwack" of the graham cracker crust being pressed into the tin, followed by the silky smooth pour of the cream cheese batter.
It is a process that feels therapeutic rather than stressful, and the payoff is a dessert that looks like it came from a high end bakery.
I've tinkered with the apple to batter ratio more times than I care to admit. If the apple chunks are too big, they sink; if they are too small, they vanish into the cream cheese. This version finds the sweet spot where the fruit stays tender and distinct, nestled right under a crown of golden, toasted oats.
Trust me, once you hear that first "shatter" of the topping as you take a bite, you'll never go back to the full sized cake.
Essential Metrics for the Perfect Small Batch Bake
Success in the kitchen often comes down to the numbers we track when we aren't looking. For these apple heavy treats, precision with temperature and timing ensures the filling stays creamy rather than rubbery. If you are looking for more traditional fruit desserts to round out your spread, I highly recommend checking out The Proper Job recipe for a standard crisp that uses similar warming spices.
The Physics of the Crust Crumble: Pre baking the crust for exactly five minutes at a high heat creates a moisture barrier. This prevents the cheesecake batter from soaking into the crumbs, keeping the base sturdy and crisp.
| Preparation Method | Total Time | Texture Outcome | Best For |
|---|---|---|---|
| Stovetop Sautéed Apples | 8 minutes | Jammy and caramelized | Maximum flavor depth |
| Raw Oven Baked Apples | 22 minutes | Slightly firm and tart | Quick prep / Less cleanup |
| Microwave Steamed | 3 minutes | Soft and consistent | Uniform texture |
There is a distinct difference in how the fruit behaves depending on how much heat you apply before it hits the oven. Sautéing the apples with the brown sugar and cinnamon helps release the juices early, which prevents the cheesecake from becoming watery during the final bake.
This extra step transforms the Granny Smith cubes into little nuggets of gold that stay suspended in the velvety batter.
The Essential Components for a Velvety Fruit Filling
Every ingredient here plays a specific role in balancing the tang of the cheese with the sweetness of the fruit. I’ve found that skipping the sour cream is a mistake many beginners make, but it is the secret to that signature New York style tang that cuts through the heavy butter.
| Component | Science Role | Pro Secret |
|---|---|---|
| Full fat Cream Cheese | Structural fat base | Use bricks, never the tub variety |
| Granny Smith Apple | Acidic balance | Dice to 1/4 inch for even suspension |
| Large Eggs | Protein binder | Beat them last to avoid air bubbles |
| Cornstarch | Moisture stabilizer | Prevents apple juices from weeping |
The Role of Temperature
Using room temperature ingredients is the hill I will die on. If your cream cheese is even slightly cold, you will end up with tiny white lumps that no amount of whisking can fix. I usually set my 16 oz of cream cheese and 2 large eggs on the counter at least two hours before I plan to start.
If you're in a rush, place the eggs in a bowl of warm water for ten minutes; it's a lifesaver.
Tools Needed to Ensure Your Crust Never Sticks
You don't need a pantry full of gadgets, but a few specific items make the process seamless. A standard 12 cup muffin tin is the star of the show here. I prefer using paper liners because they make removal a breeze, but if you want that clean, professional look, you can grease the tin heavily and use a thin knife to pop them out once they are fully chilled.
- Standard Muffin Tin: Ensures even heat distribution for all 12 servings.
- Small Skillet: Essential for pre cooking the apples to a jammy consistency.
- Pastry Cutter or Fork: Used to cut the 2 tbsp of cold butter into the oat topping.
- Hand Mixer: A KitchenAid or similar mixer helps achieve a lump free batter without over aerating.
Chef's Tip: Use the bottom of a small shot glass or a spice jar to press the graham cracker crumbs into the muffin tin. This creates a perfectly flat, compacted base that won't crumble when you peel away the paper liner.
The step-by-step Flow for Assembling Each Mini Layer

- Prep the Base: Mix 1.5 cups graham cracker crumbs, 3 tbsp sugar, 5 tbsp melted butter, and 0.5 tsp cinnamon.
- Form Crusts: Press 1.5 tablespoons of the mixture into each lined muffin cup until firmly packed and level.
- Initial Bake: Bake the crusts at 350°F for 5 minutes until fragrant and slightly darkened.
- Sauté Apples: Cook the diced Granny Smith apple with 1 tbsp brown sugar, 0.5 tsp cinnamon, and 0.5 tsp cornstarch in a skillet for 4 minutes until tender but not mushy.
- Cream the Cheese: Beat 16 oz softened cream cheese and 0.5 cup sugar until silky and completely smooth. Note: Stop every minute to scrape the bottom of the bowl.
- Add Wet Ingredients: Mix in 0.25 cup sour cream and 1 tsp vanilla, then add 2 eggs one at a time on low speed until just combined.
- Assemble Layers: Fill each crust 3/4 full with batter, then spoon a teaspoon of apples on top.
- Make Topping: Rub 2 tbsp cold butter into 0.25 cup oats, 0.25 cup flour, and 3 tbsp brown sugar until pea sized crumbs form.
- Final Bake: Sprinkle topping over the apples and bake for 22 minutes until the edges are set and the center slightly wobbles.
- Cool and Drizzle: Chill for 4 hours, then top with 2 tbsp salted caramel sauce until the caramel pools slightly in the center.
Pro Techniques to Prevent Cracking and Sogginess
The biggest hurdle with any cheesecake, even the mini ones, is the dreaded surface crack. This usually happens because of trapped air or a sudden temperature drop. When you beat the eggs into the batter, do it on the lowest setting.
High speeds incorporate air bubbles that expand in the heat and then collapse, leaving a canyon in your dessert.
Why Your Cheesecake Might Sink
A slight dip in the center is actually normal for this recipe because the weight of the apples and oats pushes down on the batter. However, if the whole thing collapses, it usually means the oven was too hot or the cakes were pulled out too early.
They should still have a slight "jiggle" in the very center when you turn off the oven; they will finish setting as they cool on the counter.
| Original Ingredient | Substitute | Why It Works |
|---|---|---|
| Graham Cracker Crumbs | Gingersnap Crumbs | Adds a spicy, seasonal ginger kick |
| Sour Cream | Plain Greek Yogurt | Similar acidity but slightly denser |
| Granny Smith Apple | Honeycrisp Apple | Sweeter flavor. Note: Stays firmer during baking |
Common Mistakes Checklist
- ✓ Using "spreadable" cream cheese from a tub (it contains too much water and won't set).
- ✓ Over beating the eggs, which leads to a "soufflé" effect where the cakes rise and then crash.
- ✓ Forgetting to let the crusts cool before adding the batter (this can melt the fats prematurely).
- ✓ Skipping the chill time; four hours is the minimum to allow the proteins to firm up.
- ✓ Using warm apples on cold batter; let the sautéed fruit reach room temperature first.
Creative Ways to Adapt Your Spices and Flavors
One of the best parts about this recipe is how easily it adapts to your pantry. If you are a fan of traditional fall flavors, you might want to look at The Classic Apple recipe for inspiration on how to blend nutmeg and cloves into your fruit filling. Sometimes I'll even swap the cinnamon in the crust for a pinch of ground cardamom to give it a more "scandinavian" vibe.
For those who want a bit more crunch, adding chopped pecans or walnuts to the oat topping is a game changer. The fats in the nuts toast beautifully alongside the oats, creating a savory contrast to the sweet caramel drizzle.
If you find the caramel too sweet, try a dollop of unsweetened whipped cream with a pinch of sea salt instead.
Proper Cooling and Long Term Storage for Fresh Bites
Cheesecake is a marathon, not a sprint. Once they come out of the oven, let them sit in the muffin tin for at least 30 minutes. If you try to remove them while they are hot, the structure hasn't set, and they will likely fall apart. After they reach room temperature, move them to the fridge.
Storage: Keep the cheesecakes in an airtight container in the refrigerator for up to 5 days. They actually taste better on day two because the apple juices have had time to meld with the cream cheese.
Freezing: These freeze surprisingly well! Wrap them individually in plastic wrap and place them in a freezer bag for up to 3 months. To serve, thaw them in the fridge overnight. Don't add the caramel drizzle until you are ready to eat, as it can get sticky and messy during the freezing process.
Zero Waste: If you have leftover apple filling, don't toss it! It makes an incredible topping for oatmeal the next morning or a quick mix in for plain yogurt. Even the extra graham cracker crumbs can be saved in a jar and used as a topping for vanilla ice cream later in the week.
Delightful Pairings to Complete Your Dessert Table Platter
When I'm serving these at a party, I like to lean into the "mini" theme. They look stunning on a wooden board surrounded by fresh apple slices, cinnamon sticks, and maybe a small bowl of extra salted caramel for dipping. Because they are quite rich, a tart accompaniment is usually best.
A hot cup of black coffee or a spicy chai latte provides the perfect bitter balance to the sugary oat topping. If you're serving these in the evening, a glass of tawny port or a crisp hard cider works beautifully.
The acidity in the cider echoes the Granny Smith apples inside the cheesecake, making the whole experience feel cohesive.
The Perfect Serving Temp
While some people like their cheesecake straight from the fridge, I find that letting these sit on the counter for 15 minutes before serving makes the texture much more "velvety." It allows the butter in the crust to soften just enough to melt in your mouth, rather than being a hard puck of crumbs.
It's a small detail, but it’s the difference between a good dessert and a memorable one.

Recipe FAQs
Can I make these ahead of time?
Yes, they can be assembled and baked up to two days in advance. Allow them to cool completely before refrigerating in an airtight container.
Why is my cheesecake cracking?
Cracking is often due to trapped air or rapid temperature changes. Ensure eggs are beaten on low speed and avoid opening the oven door frequently during baking. A slight dip is normal for this recipe.
How do I prevent a soggy crust?
Pre-baking the crust for five minutes at 350°F creates a moisture barrier. This helps keep the base sturdy and crisp, preventing the cheesecake batter from soaking in.
What's the best way to prepare the apples?
Sautéing the diced apples with brown sugar and cinnamon for about 4 minutes yields the best texture. This caramelizes them slightly and prevents them from releasing too much moisture into the cheesecake batter.
Can I use a different type of apple?
Yes, Honeycrisp apples can be substituted for Granny Smith. They will remain slightly firmer during baking, offering a different textural contrast, similar to how fruit holds its shape in a Homemade Apple Hand Pies.
What is the secret to a smooth, velvety cheesecake filling?
Use room temperature ingredients, especially the cream cheese. Beat the cream cheese until silky and completely smooth before adding other ingredients, and add eggs one at a time on low speed to avoid incorporating too much air.
How should these be stored?
Refrigerate in an airtight container for up to 5 days. They taste even better on the second day as the flavors meld. For longer storage, freeze individually wrapped cheesecakes for up to 3 months.
Apple Crisp Mini Cheesecakes
Ingredients:
Instructions:
Nutrition Facts:
| Calories | 358 kcal |
|---|---|
| Protein | 4.7 g |
| Fat | 23.2 g |
| Carbs | 34.6 g |
| Fiber | 1.1 g |
| Sugar | 22.4 g |
| Sodium | 184 mg |
