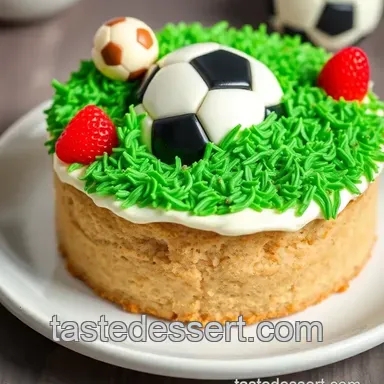
Soccer Cake with Sweet Buttercream Joy for 16 Servings

- Time: 45 min active + 30 min baking + 110 min chilling/cooling
- Flavor & Texture: Classic vanilla sponge with a smooth and silky buttercream
- Perfect for: Birthday parties for sports fans and game day celebrations
Soccer Cake with Sweet Buttercream Joy
Your kitchen will smell like sugar and vanilla as you prepare this traditional sponge. Beyond its appearance, this dessert prioritizes sturdy layers and sharp black-and-white contrast. It is a classic choice that elevates any birthday party to a professional sports-level celebration.
Creating a flat, round cake doesn't require specialized tools; a serrated knife or basic cake leveler is sufficient. Success depends on managing the temperature of both the cake and frosting to ensure the design remains secure.
This Soccer Cake with Sweet Buttercream Joy succeeds through specific structural techniques. A crumb coat serves as the essential primer, while incorporating cocoa powder into the black icing creates a rich foundation that masks the bitterness of food dyes.
Cold Base: Letting the white frosting chill for 30 minutes produces a stable surface. This prevents the black sections from smudging into the white areas.
Cocoa Foundation: Starting with Dutch process cocoa prior to adding black gel ensures a saturated hue. This reduces the amount of coloring needed and eliminates any chemical flavor.
Flat Layers: Slicing off the cake domes ensures the tops are flat. This keeps the "ball" from tilting or shifting during assembly.
Minimal Tools Needed
No professional studio is required to achieve these results. While a stand mixer is convenient, a handheld mixer works perfectly well.
The key tools include a serrated knife for leveling the cakes and an offset spatula to smooth the buttercream. For the detailing, a piping bag fitted with a small round tip (#3 or #4) is essential for achieving those crisp lines.
What Each Ingredient Does
The balance of fat and sugar here creates a tender crumb that can support the weight of a heavy buttercream.
| Component | Purpose | Substitute Notes |
|---|---|---|
| Unsalted Butter | Adds richness and structure | Use high-fat European style for more flavor |
| Powdered Sugar | Stabilizes the frosting | Must be sifted to avoid lumps |
| Dutch process Cocoa | Provides deep brown base | Natural cocoa is lighter and more acidic |
| All-Purpose Flour | Main structure of the cake | Cake flour makes it softer but less stable |
Ingredients and Swaps
For the Vanilla Cake Layers
- 280 g all-purpose flour, sifted
- 8 g baking powder
- 3 g fine salt
- 170 g unsalted butter, softened Why this? Provides a classic, nostalgic flavor
- 300 g granulated sugar
- 3 large eggs (150 g), at room temperature
- 10 ml pure vanilla extract
- 240 ml whole milk, at room temperature
For the White Buttercream
- 227 g unsalted butter, softened
- 480 g powdered sugar, sifted
- 30 ml whole milk
- 5 ml pure vanilla extract
- pinch of salt
For the Black Buttercream
- 113 g unsalted butter, softened
- 240 g powdered sugar, sifted
- 30 g Dutch process cocoa powder
- 15 ml whole milk
- 2.5 ml pure vanilla extract
- 1 tsp (5 ml) black gel food coloring
While some might opt for a quicker method, preparing the buttercream from scratch allows for much better precision with the coloring.
| Original Ingredient | Substitute | Why It Works |
|---|---|---|
| Whole Milk | Heavy Cream | Much higher fat content than whole milk. Note: Makes the cake slightly denser |
| Unsalted Butter | Vegan Butter | Similar fat ratio. Note: Check for salt content |
| Dutch process Cocoa | Dark Chocolate Melted | Richer flavor. Note: May soften the frosting |
To save time, store-bought frosting works for the white base, but the black accents must be made by hand to achieve that deep ink shade.
| Method | Flavor | Control |
|---|---|---|
| Homemade Buttercream | Rich and creamy | Full control over color |
| store-bought Frosting | Very sweet | Limited color options |
From Prep to Plate

Prep: Set Up the Oven and Pans
Set your oven to 180°C (350°F). Grease two 9 inch (23 cm) round cake pans and line the bottoms with parchment paper. Sift the salt, baking powder, and flour together into a bowl and set them aside.
Cooking: Mix and Bake the Layers
Cream the butter and sugar on medium speed for 3 to 4 minutes until the mixture is pale and fluffy. Beat in the eggs one by one, mixing well after each addition. Stir in the vanilla.
Add the flour mixture in three separate parts, alternating with the milk, ensuring you start and end with the flour. Mix just until the batter is smooth. Pour the batter evenly into the two pans and level the tops.
Bake for 25 to 30 minutes until the edges are golden, the cake springs back when lightly touched, and a toothpick inserted in the center comes out clean.
Cooking: Cool Completely
Allow the layers to rest in their pans for 10 minutes. Transfer them to a wire rack to cool fully, which takes about 1 hour. Trim the tops of the cooled cakes with a serrated knife to make them level.
Finishing: Whip the White Buttercream
Beat 227 g of softened butter on medium speed for 2 minutes until creamy. Gradually stir in the sifted powdered sugar on low, then mix in the vanilla, milk, and a pinch of salt. Whip on medium for 3 minutes until the frosting is smooth and grit-free.
Finishing: Assemble and Crumb Coat
Place one cake layer on a serving board and spread about ¾ cup of white buttercream over it. Set the second layer on top, cut side down.
Apply a thin crumb coat of white buttercream over the top and sides. Chill in the refrigerator for 30 minutes until the surface is firm to the touch. Spread the remaining white buttercream as a final smooth layer, leveling the top and sides with an offset spatula.
Finishing: Mix the Black Buttercream
Beat 113 g of softened butter on medium speed for 1 minute. Gradually add the cocoa and powdered sugar, followed by the vanilla and milk. Beat for about 2 minutes until smooth.
Stir in the black gel color a little at a time until the frosting reaches a deep black shade. Let it rest for 10 minutes, then check the color and add more gel if necessary.
Finishing: Pipe the Soccer Pattern
Use a toothpick to lightly sketch the design onto the chilled white frosting: a central pentagon on top, with a surrounding ring of pentagons and hexagons on the sides.
Fill a piping bag fitted with a small round tip (#3 or #4) with the black buttercream. Pipe the outline of each patch, then fill them in. Use short, steady strokes and keep the piping bag cool.
Let the cake set for 15 minutes to allow the patches to firm up. Cut into 16 slices and serve.
Pro Tips and Pitfalls
Black Frosting Turning Gray
This usually happens when the base is too light or you use liquid coloring. The cocoa powder is the most important part here, as it creates a dark brown foundation. If it looks gray, let the frosting rest for 10 minutes, then add another small drop of gel.
Patches Bleeding Into White
If the black ink runs into the white, the cake wasn't cold enough. The white buttercream needs to be fully set before you start piping. If the room is warm, pop the cake back in the fridge for another 15 minutes before adding the patches.
Cake Layers Domed or Cracked
Overbaking or opening the oven door too often can cause the center to rise and crack. Use a serrated knife to slice off the dome once the cake is completely cold. This ensures your stack stays straight and doesn't wobble.
Sizing Your Cake
To make a half-batch, use 140 g flour, 85 g butter, 150 g sugar, 5 ml vanilla, and 120 ml milk. For the eggs, whisk 2 eggs together and measure out 75 g. Use one 9 inch pan and bake for a shorter time, checking doneness at 20 minutes.
For a double batch, use 560 g flour, 340 g butter, 600 g sugar, 6 eggs (300 g), 20 ml vanilla, and 480 ml milk. Use four 9 inch pans to keep the layers thin and easy to bake.
Keep the baking temperature at 180°C (350°F). Since the depth of the cake remains the same in separate pans, the bake time stays around 25 to 30 minutes.
Storing Leftovers
Keep this cake in a sealed tub in the refrigerator for up to 4 days. Because of the heavy buttercream, it stays moist and holds its shape well in the cold.
To serve, let a slice sit at room temperature for 20 minutes. This softens the butter in the sponge and the frosting, bringing back that classic, nostalgic flavor.
This cake freezes well if you wrap individual slices in plastic wrap and then foil. Thaw them in the fridge overnight before bringing them to room temperature.
Easy Swaps and Add-Ins
If you want a different flavor profile, try adding 1 tsp of lemon zest to the cake batter for a bright, citrusy contrast to the sweet buttercream. For a more decadent version, spread a thin layer of raspberry jam between the cake layers before frosting.
If you need another celebration idea, a Patriotic Sheet Cake is a great option for larger crowds.
For a lower-sugar option, replace 50 g of the granulated sugar in the sponge with a small amount of unsweetened applesauce. This keeps the cake moist while reducing the sugar content slightly.
Perfect Complements
This cake is rich, so it pairs well with something tart. Fresh strawberries or raspberries on the side cut through the sweetness of the buttercream.
For a different kind of dessert on a family gathering, an Applesauce Cake recipe offers a warm, spiced contrast to this vanilla treat.
A cold glass of milk or a hot cup of tea balances the sweetness perfectly, making the experience feel like a classic afternoon tea.
Recipe FAQs
How to achieve a deep black color for the frosting?
Add the black gel food coloring a little at a time to the cocoa-based buttercream. Let the frosting rest for 10 minutes before checking the shade and adding more gel if necessary.
Can I use a different method to get a flat cake surface?
Yes, you can level the cooled layer tops using a serrated knife. This ensures the cake stays stable and the buttercream remains smooth across the top.
Why is a crumb coat necessary for this design?
A thin layer of buttercream seals in loose crumbs and provides a firm base. Refrigerating this layer for 30 minutes prevents crumbs from mixing into the final white frosting.
How to ensure the cake layers are moist?
Bake for 25 to 30 minutes until the edges are golden and a toothpick comes out clean. Avoid overbaking to maintain the tender texture of the sponge.
Where should I store the finished cake?
Keep this cake in a sealed tub in the refrigerator for up to 4 days. The buttercream helps the cake hold its shape and moisture while chilled.
What is the best way to serve chilled slices?
Let a slice sit at room temperature for 20 minutes before eating. This softens the butter in both the frosting and the sponge for a better flavor.
Soccer Cake with Sweet Buttercream Joy