Berry Jello Lasagna: No-Bake Summer Delight
- Time: Active 20 minutes, Passive 4 hours, Total 4 hours 20 mins
- Flavor/Texture Hook: Shatter crisp crust meets velvety clouds and snappy, fruit filled jello
- Perfect for: Summer cookouts, patriotic holidays, or beginner friendly entertaining
- Mastering Your Refreshing Berry Jello Lasagna
- Planned Success for Cold Desserts
- Selecting Your Layered Ingredients
- Recommended Tools for Cold Assembly
- Execution Steps for Perfect Layers
- Fixing Texture and Setting Problems
- Flavor and Texture Variations
- Fresh Storage and Reuse Methods
- Plating and Serving Techniques
- Debunking Cold Dessert Beliefs
- Recipe FAQs
- 📝 Recipe Card
Mastering Your Refreshing Berry Jello Lasagna
I still remember the first time I brought a tray of this Berry Jello Lasagna to a neighborhood block party. It was one of those humid July afternoons where the air feels like a damp wool blanket, and everyone was hovering near the cooler.
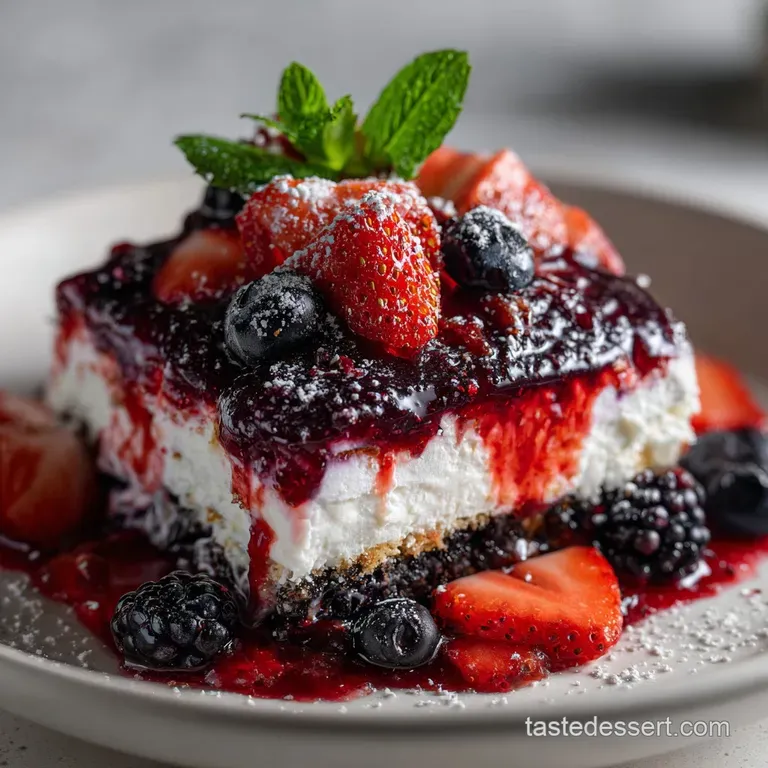
When I pulled this out, the sunlight caught the ruby red gelatin and the deep indigo of the blueberries suspended inside. The tray was empty in ten minutes flat, and I spent the rest of the evening scribbling the method on paper napkins for three different neighbors.
The magic of this dish isn't just in the colors, though it certainly looks like a masterpiece. It is the contrast of textures that really gets people. You get that initial "shatter" from the Golden Oreo base, followed immediately by a velvety, tangy cream layer, and finished with the cool, snappy burst of the fruit filled topping.
It is incredibly satisfying to eat, and honestly, even more satisfying to watch people’s faces when they take that first bite.
We are going to walk through exactly how to get those clean, professional looking layers without the colors bleeding into each other. I've made the mistake of rushing the chill time before, resulting in a pink, soupy mess that tasted fine but looked like a disaster.
We will ensure your version is sturdy enough to slice like a dream while keeping that light as-air mouthfeel that makes a summer dessert truly refreshing.
Planned Success for Cold Desserts
Gelatin Lattice Formation: When you dissolve the mix in boiling water, the protein chains loosen; the ice cold water then forces them to quickly tangle back together, trapping the liquid.
Fat Based Barrier: The high fat content in the cream cheese layer acts as a sealant, preventing the liquid jello from soaking into the cookie crust and making it soggy.
Emulsification Stability: Whipped topping contains stabilizers that keep the cream cheese aerated and firm even after the sugar pulls moisture from the cheese.
| Feature | Stovetop Method (Standard) | Quick Chill Shortcut | Outcome Difference |
|---|---|---|---|
| Set Time | 4 hours minimum | 2 hours with ice | Traditional set is firmer |
| Texture | Uniformly smooth | Occasional fruit "pockets" | Minimal difference in taste |
| Layer Definition | Sharp, distinct lines | Slightly blurred edges | Stovetop is more "pro" |
Selecting Your Layered Ingredients
Component Analysis
| Ingredient | Science Role | Pro Secret |
|---|---|---|
| Golden Oreos | Structural Foundation | Pulse to a fine sand for the tightest, most stable base |
| Full fat Cream Cheese | Moisture Barrier | Always use brick style, never the tub style spread |
| Strawberry Jello | Binding Agent | Bloom the powder fully in boiling water before adding ice |
- 36 Golden Oreo cookies (approx. 430g): These provide a vanilla forward crunch.
- Substitute: Graham crackers. Why this? Offers a more rustic, honey toned flavor but requires slightly more butter.
- 1/2 cup (115g) Unsalted butter, melted: Bonds the crumbs together.
- Substitute: Salted butter (omit the extra salt). Why this? Adds a savory note that balances the sugar.
- 1/4 tsp Sea salt: Sharpens the flavor of the crust.
- 16 oz (450g) Full fat cream cheese: Provides the tangy, velvety middle.
- Substitute: Mascarpone. Why this? Offers a richer, more buttery flavor with less tang.
- 1 cup (120g) Powdered sugar, sifted: Sweetens without adding grit.
- 1 tsp Pure vanilla extract: Rounds out the dairy notes.
- 16 oz (450g) Whipped topping, divided: Adds airy volume.
- Substitute: Stabilized whipped cream. Why this? Higher quality fat but can be trickier to keep fluffy.
- 6 oz (170g) Strawberry Jello mix (2 small boxes): The colorful setting agent.
- 2 cups (475ml) Boiling water: Dissolves the gelatin crystals.
- 1 cup (240ml) Ice cold water with ice cubes: Triggers the flash set.
- 1 cup (150g) Fresh strawberries, hulled and diced: Fresh fruit pop.
- 1 cup (150g) Fresh blueberries: Adds a deep color contrast.
- 1/2 cup (60g) Fresh raspberries: Provides a tart, bright finish.
- 5 leaves Fresh mint: For a refreshing, aromatic garnish.
Much like the layering technique used in my Creamy Chicken Lasagna recipe, the success of this dessert depends on the integrity of each level. You want that white layer to be thick and stable enough to support the weight of the fruit and gelatin without caving in.
Recommended Tools for Cold Assembly
You don't need a furnace for this one, but you do need some specific gear to get the textures right. A food processor is your best friend for the crust; you want a uniform crumb that mimics wet sand. If you don't have one, a heavy rolling pin and a sturdy freezer bag will work, but prepare for a bit of a workout.
The pan choice is also vital. I highly recommend a 9x13-inch glass baking dish. Glass allows you to see those beautiful red, white, and golden layers from the side, which is half the fun of serving a Jello Lasagna.
Avoid metal pans if you can, as they can sometimes react with the acidity in the fruit and berries, slightly altering the flavor over time.
Finally,, make sure you have a fine mesh sieve. Sifting the powdered sugar might seem like an extra, annoying step, but it is the difference between a gritty filling and one that is truly velvety. When you're folding in the whipped topping, use a wide silicone spatula to keep as much air in the mixture as possible.
Execution Steps for Perfect Layers

Phase 1: The Quick Press Base
- Crush cookies. Pulse 36 Golden Oreos in a food processor until they resemble fine, uniform sand. Note: Large chunks will make the crust crumble when sliced.
- Bind crumbs. Drizzle in 1/2 cup melted butter and 1/4 tsp sea salt, pulsing until the mixture looks like wet beach sand.
- Compress crust. Press the mixture firmly into a 9x13 dish. Note: Use the bottom of a flat measuring cup to pack it tight.
- Chill base. Place the dish in the freezer for 15 minutes until the butter has completely solidified.
Phase 2: The Aerated Cream Filling
- Cream cheese prep. Beat 16 oz softened cream cheese until no lumps remain and it looks silky.
- Sweeten mixture. Add 1 cup sifted powdered sugar and 1 tsp vanilla, mixing until the texture is light and fluffy.
- Fold topping. Gently fold in 8 oz of whipped topping using a spatula until the color is consistent and no white streaks remain.
- Layer cream. Spread the mixture over the chilled crust until it reaches the very edges of the pan. Note: This creates the "seal" for the next layer.
Phase 3: The Flash Set Berry Layer
- Dissolve jello. Whisk 6 oz Jello mix into 2 cups boiling water until the powder is completely invisible.
- Flash chill. Stir in 1 cup ice cold water (with ice cubes) until the mixture starts to thicken slightly. Note: Remove any unmelted ice chunks before the next step.
- Suspend fruit. Fold in 1 cup diced strawberries, 1 cup blueberries, and 1/2 cup raspberries until they are evenly distributed in the liquid.
- Final assembly. Pour the berry mixture over the cream layer and refrigerate 4 hours until the top doesn't wobble when shaken. Top with the remaining 8 oz whipped topping and mint leaves before serving.
Chef's Tip: To get those sharp, clean lines between the white cream and the red jello, make sure the cream layer is leveled perfectly with an offset spatula. If there are "hills" in the cream, the jello will pool unevenly, making the slices look messy.
Fixing Texture and Setting Problems
Why Your Layers Are Running
If you find that your Jello is seeping down into the crust, it usually means the cream layer wasn't spread all the way to the edges of the dish. This creates a gap where the liquid can bypass the "seal." Another common issue is the cream cheese being too warm; it needs to be set in the fridge for at least 30 minutes before you pour the warm Jello on top.
| Problem | Root Cause | Solution |
|---|---|---|
| Soggy Crust | Warm Jello melted the cream seal | Ensure Jello is "flash chilled" with ice before pouring |
| Lumpy Cream | Cream cheese was too cold when mixing | Let cheese sit at room temp for 2 hours before beating |
| Crumbly Base | Not enough compression or butter | Use a heavy glass to pack the crumbs into a solid sheet |
If you are a fan of traditional structures but want to try something different, the principles here are very similar to a Butternut Squash Lasagna recipe, where each layer must be distinct to maintain the overall integrity of the bite.
Common Mistakes Checklist
- ✓ Never use "lite" or tub cream cheese; the water content is too high for a stable set.
- ✓ Don't skip the "ice water" step; pouring hot Jello directly onto the cream will melt your hard work.
- ✓ Avoid frozen berries if possible; they release too much juice and will thin out your gelatin.
- ✓ Always sift your powdered sugar to prevent tiny white lumps in your velvety filling.
- ✓ Give the dessert the full 4 hours to set; a premature slice will result in a "slump."
Flavor and Texture Variations
If you want to change the profile, this recipe is incredibly adaptable. While the Strawberry Jello is a classic, you can easily swap it for Raspberry or even Black Cherry to lean into a deeper flavor profile.
For a "Blueberry Jello Lasagna" twist, use Berry Blue jello and double up on the fresh blueberries while omitting the strawberries. It makes for a striking monochrome look that is perfect for ocean themed parties.
For those watching their sugar intake, you can use sugar-free gelatin and a sugar-free whipped topping. However, be aware that sugar-free gelatin sets a bit firmer and faster, so you'll need to work quickly once the ice water is added.
If you want a more "grown up" version, try adding a tablespoon of lemon zest to the cream cheese layer to cut through the sweetness.
If you want X, do Y
- For a tarter bite: Add 2 tablespoons of fresh lemon juice to the cream cheese mixture.
- For a richer base: Swap the Golden Oreos for shortbread cookies and add 1/4 cup of toasted pecans.
- For a holiday look: Use lime Jello and top with pomegranate arils instead of strawberries.
Fresh Storage and Reuse Methods
This dessert is a champion of make-ahead planning. In fact, it actually tastes better after sitting for about 12 hours because the flavors have a chance to meld. Keep it covered tightly with plastic wrap in the fridge for up to 3 days.
Beyond that, the cookies start to lose their "shatter" and become a bit soft, though it’s still perfectly safe to eat.
Freezing isn't recommended for this specific dish. Gelatin has a tendency to break down and become "weepy" when thawed, which ruins that beautiful velvety texture of the cream layer.
If you have leftovers that are looking a bit sad, you can actually scoop them into a blender with a splash of milk and some vanilla ice cream for the most incredible "berry cheesecake" milkshake you've ever had.
Plating and Serving Techniques
To get those professional, clean slices you see in bakeries, there is one simple trick: heat your knife. Run a long, thin knife under hot water, wipe it dry, and then make your cut. The heat will glide through the gelatin and the cream cheese without dragging or tearing.
Wipe the knife clean and reheat it between every single cut.
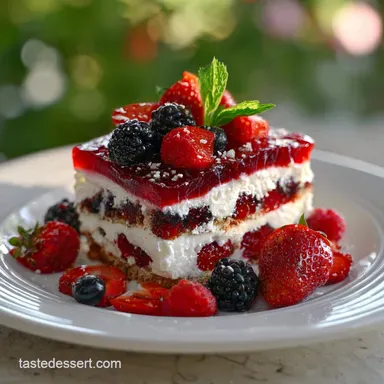
When serving, I love to add a tiny sprig of fresh mint and one whole berry on top of each square. It signals the fresh ingredients inside and adds a pop of green that makes the reds and blues sing.
If you're hosting a party, you can even make these in individual mason jars for a "grab and-go" version that looks stunning on a dessert table.
For another decadent layered treat that focuses on comfort, you might enjoy checking out this Lasagna Recipe which applies these same stacking principles to a savory classic.
Debunking Cold Dessert Beliefs
Fresh Pineapple Rule: You might have heard you can't put fresh pineapple in Jello. This is actually true! Fresh pineapple contains an enzyme called bromelain that breaks down protein, meaning your gelatin will never set.
Always use canned pineapple if you want that flavor, as the heating process in canning kills the enzyme.
Gelatin "Expiration": Many people think Jello mix lasts forever. While it has a long shelf life, the gelatin proteins can lose their "strength" over years, resulting in a weak, watery set. Always check the box if it’s been sitting in the back of your pantry since the last presidency.
Whipped Topping vs. Cream: There is a myth that they are interchangeable. While you can use real whipped cream, it is much less stable than whipped topping.
If you use real cream, you must add a stabilizer like unflavored gelatin or a "whip fix" powder, or your lasagna will deflate within a few hours.

Recipe FAQs
Can I use frozen berries in my Berry Jello Lasagna?
No, stick with fresh. Frozen berries release moisture and bleed color into the gelatin, making your layers murky. This can also prevent the gelatin from setting properly, impacting the overall texture and appearance.
How do I prevent the Jello from bleeding into the cream cheese layer?
Ensure the cream cheese layer is fully set and firm. Chill the cream cheese layer in the refrigerator for at least 30 minutes before pouring the Jello mixture over it. This creates a stable barrier that prevents the liquid from seeping down.
What is the best way to get clean, sharp layers?
Chill each layer thoroughly before adding the next. Rushing the setting time is the main culprit for blurred layers. For the jello layer, using ice water to rapidly cool and thicken it before pouring helps maintain distinct separation.
Can I substitute the Golden Oreos for another cookie in the crust?
Yes, graham crackers or shortbread cookies work well. If you use graham crackers, you might need a touch more butter to bind them, similar to how you'd bind crumbs in other no-bake desserts. This slight variation can offer a different flavor profile to your base.
Why did my Jello not set properly?
Likely, the Jello was not given enough time to set, or an ingredient interfered. Ensure you used the correct ratio of water to Jello mix and that you didn't add fresh pineapple, which contains an enzyme that prevents setting.
Also, make sure the cream cheese layer was adequately chilled before adding the Jello.
How long does Berry Jello Lasagna need to chill before serving?
A minimum of 4 hours is recommended for a firm set. For optimal flavor and texture, letting it chill for 6-8 hours or even overnight allows the flavors to meld and ensures the dessert is perfectly stable for slicing.
Can I make this dessert ahead of time?
Yes, it's a great make-ahead dessert. You can assemble the entire Berry Jello Lasagna up to 24 hours in advance and store it covered in the refrigerator. This allows the flavors to meld, making it even more delicious.
Berry Jello Lasagna
Ingredients:
Instructions:
Nutrition Facts:
| Calories | 575 kcal |
|---|---|
| Protein | 3.8 g |
| Fat | 34.3 g |
| Carbs | 58.8 g |
| Fiber | 1.4 g |
| Sugar | 45.2 g |
| Sodium | 345 mg |
