The Ultimate Chewy Brownbutter Chocolate Chip Cookies
The Quest for the Quintessential Chocolate Chip Cookie Texture
Right then, pull up a chair, dust off that apron, and let’s talk about the undisputed heavyweight champion of the cookie tin: the Chocolate Chip Cookie. Forget those dry, crumbly disappointments you sometimes encounter; we’re aiming for that perfect balance chewy in the middle, crisp around the edges, and absolutely dripping with molten chocolate.
Think of this outline as the blueprint for your new favourite teatime treat. We’re going for the gold standard here, the sort of cookie that makes you feel like you’ve just popped over to Mary Berry’s kitchen for a natter!
This Chewy Chocolate Chip Cookies Recipe isn't just about following steps; it's about understanding the transformation happening in your oven.
This recipe elevates the classic Chocolate Chip Cookie by incorporating the nutty depth of browned butter a game changer, trust me! We’re aiming for a cookie with beautifully crisp edges, a delightfully soft and deeply flavoured centre, and pools of melted chocolate.
It’s a slightly more involved process than just stirring everything together, but the resulting flavour complexity is worth every single second. It tastes like a holiday hug in baked form!
Setting the Stage: Our Aspiration for the Perfect Chew
Achieving that elusive, perfect texture the hallmark of the Best Cookie Recipes —requires attention to detail often overlooked in rushed baking projects.
We are targeting a specific behaviour: we want the cookie to spread just enough to achieve a thin, brittle edge, but the centre must remain thick enough to trap moisture during the bake.
This delicate balance is what separates a forgettable bake from a memorable one, establishing this as a truly Gourmet Cookies experience made right in your kitchen.
The Secret Ingredient That Elevates Every Batch
The profound shift in flavour profile in this Chocolate Chip Cookies from Scratch approach comes from the butter. We aren't just melting it; we are taking the time to brown it.
This simple addition transforms the usual fatty base into something nutty, complex, and deeply caramelised, enriching the final product far beyond what simple creaming can achieve. It’s this foundational step that guarantees a superior depth of flavour in every bite.
Defining Success: Edges That Snap, Centers That Melt
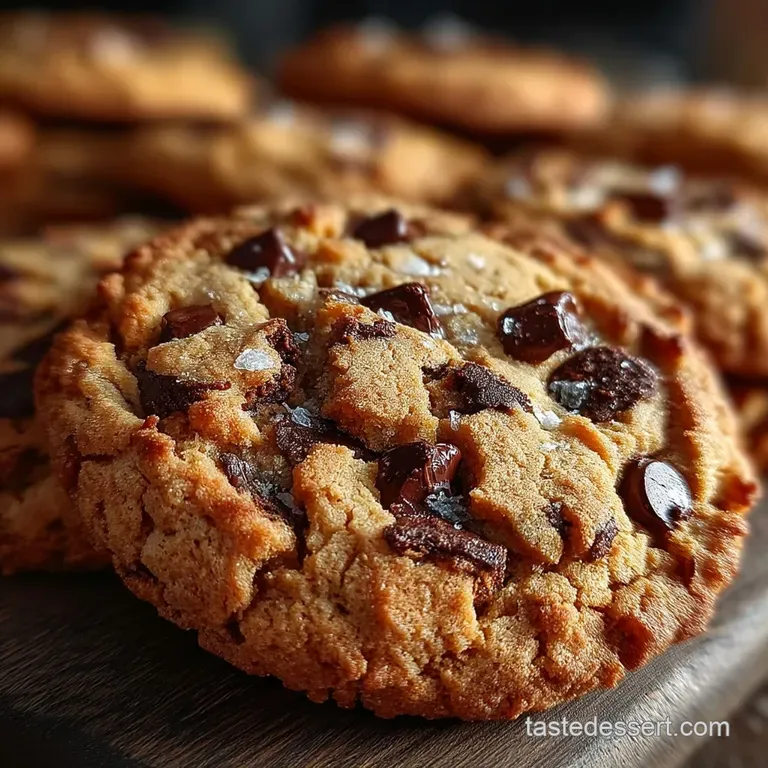
When you pull these cookies from the oven, success isn't judged by colour alone. The ideal result features edges that have set firmly enough to offer a satisfying, slight snap when broken, contrasting beautifully with the gooey, almost underbaked centre that yields immediately.
The visible pockets of melted chocolate should look like glossy puddles, not solidified lumps. This visual and textural duality is the goal of this specific Chip Cookie Recipe .
Assembling the Foundation: A Deep Dive into Component Quality
Baking is chemistry, and the quality of your raw materials directly dictates the outcome of your efforts. For this recipe, yielding approximately 18 large cookies, precision in measuring is crucial, although a digital scale is always recommended for foolproof results.
We will be using 1 cup (2 sticks or 226g) of unsalted butter, 2 large room temperature eggs, 2 teaspoons of high-quality vanilla extract, 2 1/4 cups (280g) of all-purpose flour, 1 teaspoon each of baking soda and fine sea salt, and a generous two cups of chocolate a mix of chips and chopped bars for textural variety.
Mastering the Fat: The Art of Browning Your Butter
The first and perhaps most critical step in this Easy Cookie Recipes variation involves browning the butter. Melt 1 cup of unsalted butter in a medium saucepan over medium heat.
Continue cooking, stirring gently and occasionally, watching closely for the milk solids to sink and then turn amber brown, accompanied by a rich, nutty aroma this takes about 5 to 8 minutes.
Immediately pour the browned butter into a heatproof bowl to halt the cooking process, ensuring those precious brown bits are scraped in too. Allow this to cool slightly, perhaps for 15 minutes, before proceeding.
Sugar Ratios Explained: Why Both Granulated and Brown Matter
The interplay between the two sugars is foundational to achieving Chewy Chocolate Chip Cookies . We employ 1 cup of packed light brown sugar and 1/2 cup of granulated sugar.
The brown sugar, being slightly acidic and rich in molasses, contributes moisture and chewiness, while the granulated sugar aids in creating those desirable crisp edges and promotes spread during baking. It’s this specific ratio that guides the texture development.
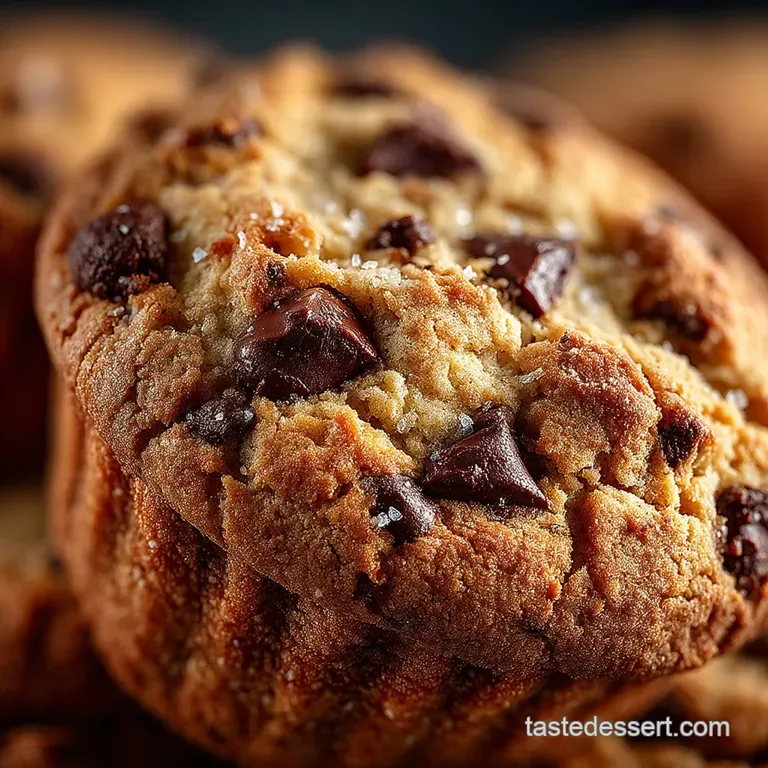
Choosing Your Chocolate Arsenal: Chips vs. Chopped Bars
To truly secure a spot among the Best Cookie Recipes , one must appreciate chocolate diversity. While 1 cup of semi sweet chocolate chips provides reliable melt points, incorporating 1 cup of roughly chopped dark chocolate (70% cocoa or higher) ensures those glorious, irregular molten pools appear throughout the cookie, elevating the experience from standard to spectacular.
Related Recipes Worth Trying
- The Ultimate Brown Butter Pretzel MM Cookies Recipe — Upgrade your cookie game These addictive Brown Butter Pretzel MM Cookies feature nutty depth and perfect saltysweet crunch Get the foolproof method
- The Ultimate Fudgy Chocolate Cookie Recipe Pub Style Chew — Stop baking sad flat biscuits This easy chocolate cookie recipe creates substantial deeply fudgy cookies that are satisfyingly chewy Get the secret to...
- Easy White Chocolate Covered Pretzel Cookies Recipe — These White Chocolate Covered Pretzel Cookies blend salty crunch with buttery shortbreadthe perfect Salty Sweet Cookies for any occasion Get the simple recipe
The Technique Breakdown: From Creaming to Chilling
Once your base fats are prepared, the subsequent mixing technique must be gentle yet thorough to properly incorporate air without developing excess gluten.
The Gentle Marriage: Creaming Butter and Sugars Correctly
Take your slightly cooled brown butter and combine it with the 1 cup of brown sugar and 1/2 cup of granulated sugar. Whisk this mixture vigorously either by hand or using a stand mixer until it becomes lighter in colour and texture, indicating good aeration.
Following this, beat in the two room temperature eggs, one at a time, followed by the vanilla extract, ensuring each is fully emulsified before adding the next.
Next, in a separate bowl, whisk together your flour, baking soda, and salt to ensure the leavening agent is evenly distributed. Gradually add these dry components to the wet mixture, mixing on low speed just until the last streaks of flour vanish. Stop immediately!
Overmixing at this stage develops gluten too aggressively, leading to tough, cakey Chocolate Chip Cookies instead of the tender crumb we desire. Finally, gently fold in your chosen chocolate blend using a rubber spatula.
Hydration Halt: The Mandatory Rest Period for Flavor Development
If you are aiming for truly complex flavour and superior texture in your Chocolate Chip Cookies from Scratch , the chilling process is non-negotiable. Cover the finished dough tightly and refrigerate for a minimum of 24 hours, though 48 to 72 hours is genuinely transformative.
This mandatory rest allows the flour to fully hydrate and the flavours especially the nutty brown butter to deepen and meld throughout the dough structure.
Oven Placement and Temperature Calibration for Golden Results
When ready to bake, preheat your oven to 375° F ( 190° C). Line baking sheets with parchment paper or silicone mats for even heat transfer.
Using a cookie scoop (approximately 3 tablespoons of dough) ensures consistency, placing the dough balls about two inches apart on the prepared sheets. Bake for 10 to 13 minutes.
The key indicator here is visual: the edges should appear set and golden brown, but the very centre of the cookie should still look slightly puffy and perhaps a touch underbaked.
Troubleshooting and Advanced Batch Customization
Even with the best techniques, variables like humidity or oven calibration can cause slight deviations. If your cookies spread too thin, it often means the butter was too warm when combined with the sugar, or you skipped the chilling phase. If they are too cakey, you likely overmixed the flour.
Variations on a Theme: Salt Enhancements and Flavor Infusions
To push these cookies further into the realm of Gourmet Cookies , consider enhancing the salty counterpoint. A truly inspired addition is sprinkling a tiny pinch of flaky sea salt (like Maldon) over the tops of the cookies immediately after they emerge from the oven.
This enhances the chocolate's intensity. For flavour depth, consider whisking 1 teaspoon of instant espresso powder into your dry ingredients for a sophisticated mocha undertone that complements the brown butter wonderfully.
The Chill Factor: How Dough Temperature Impacts Cookie Spread
The temperature of your dough directly controls spread. Cold dough melts and sets slower, resulting in thicker, chewier results the hallmark of perfect Chewy Chocolate Chip Cookies .
If you find your dough is too stiff straight from a 72-hour chill, let it sit at room temperature for about 15 to 20 minutes, just enough to make scooping manageable without losing the cold structure entirely.
Shelf Life Secrets: Storing Your Baked Masterpieces
To preserve the peak flavour of your homemade treats, store the fully cooled cookies in an airtight container at room temperature. For maximum longevity and to keep them tasting freshly baked, place a slice of white bread in the container; the cookies will absorb moisture from the bread, keeping them soft.
Properly stored, these treasures will maintain excellent quality for up to five days, though honestly, they rarely last that long!

Recipe FAQs
My Chocolate Chip Cookies always spread out into thin puddles. What am I doing wrong?
This is usually down to two things: your butter being too warm, or skipping the chill time. If the butter is too soft when you mix the dough, the cookies will spread before they set.
Make sure your brown butter is cooled down nicely before creaming with the sugars, and crucially, chill the dough for at least 24 hours this firms up the fats so they hold their shape beautifully in the oven.
How do I get those lovely, chewy centres that are almost gooey, like the ones from the fancy bakeries?
The secret here lies in both the sugar ratio and the baking time. Our recipe uses a higher proportion of brown sugar, which contains molasses and retains moisture, ensuring chewiness.
More importantly, pull the cookies out of the oven when the edges look done but the centres still look slightly puffy and underbaked; they will continue to cook on the hot tray.
Can I make these Chocolate Chip Cookies ahead of time, and how should I store them?
Absolutely, and I highly recommend it! Once the dough is made, you can cover it tightly and keep it in the fridge for up to 72 hours; the flavour only gets better. For storage after baking, keep cooled cookies in an airtight container at room temperature for up to five days.
For longer storage, you can freeze the baked cookies or the unbaked dough balls.
I don't fancy browning the butter it sounds like too much fuss. Can I just use regular melted butter?
You can certainly substitute with regular melted butter if you’re in a rush, but you’ll miss out on the rich, nutty complexity that makes this recipe special it adds a lovely depth, almost like toffee.
If you swap it, make sure the butter is just melted, not hot, and don't worry about the extra time in the fridge for chilling if you skip the browning step entirely.
Why is chilling the dough for 24-72 hours such a big deal in this recipe?
Chilling is vital because it allows the flour time to fully hydrate with the fats and sugars, which results in a chewier cookie that doesn't spread too much. Furthermore, resting the dough in the cold allows the flavours to meld and deepen it’s essentially letting the dough mature, giving you that complex, almost butterscotch note that you just can't rush!
Brown Butter Cookies 2

Ingredients:
Instructions:
Nutrition Facts:
| Calories | 212 kcal |
|---|---|
| Protein | 2.0 g |
| Fat | 8.6 g |
| Carbs | 22.9 g |
| Fiber | 0.4 g |
| Sodium | 5550 mg |
