Chocolate Peanut Butter Fudge Recipe
- Time: Active 10 minutes, Passive 2 hours, Total 2 hours 10 mins
- Flavor/Texture Hook: Silky, dense, and melt in-your mouth texture
- Perfect for: Last minute holiday gifts, bake sales, or late night cravings
- Mastering This Chocolate Peanut Butter Fudge
- Science of the Smooth Set
- Molecular Components of Fudge
- Ingredients for Fudgy Success
- Tools for Minimalist Bakers
- Foolproof Step-by-Step Guide
- Solving Common Fudge Problems
- Adjusting Batch Sizes Safely
- Debunking Traditional Confectionery Lore
- Storage and Zero Waste
- Creative Serving Ideas
- Recipe FAQs
- 📝 Recipe Card
Mastering This Chocolate Peanut Butter Fudge
The kitchen was quiet, save for the low hum of the refrigerator, when I realized I’d completely forgotten about the neighborhood block party. It was 8:00 PM, and I needed something impressive that didn't involve three hours of chilling or a trip to the store.
I pulled out a dusty bag of semi sweet chips and that lone can of sweetened condensed milk sitting at the back of the pantry. As the chocolate began to melt, the aroma rich, dark, and slightly floral from the vanilla filled the room, and I knew I was onto something special.
I remember the first time I tried making a layered treat like this. I rushed the cooling process, and the layers bled together into a muddy (though still tasty) swirl. It taught me that patience is the most important ingredient in the kitchen.
Now, I wait for that chocolate base to lose its high gloss sheen and become slightly tacky before I even think about spreading the peanut butter mixture on top. It’s those little moments of waiting that transform a simple snack into a professional looking confection.
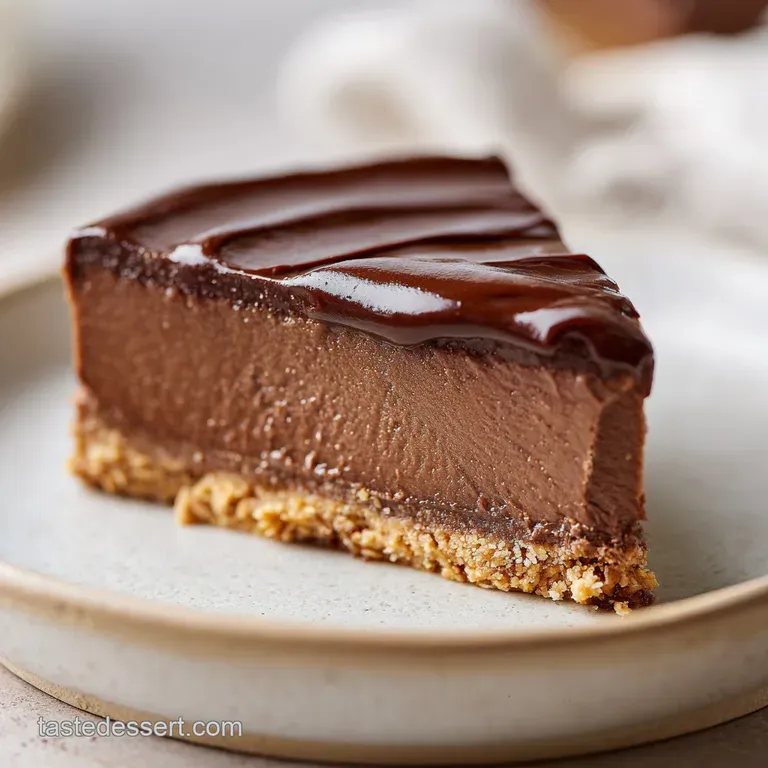
We’ve all been there staring at a recipe that demands "soft ball stage" temperatures and precise sugar crystallization. This version skips the stress. It’s the kind of recipe you can whip up while chatting with a friend, resulting in a dense, velvety crumb that shatters slightly when you bite into a cold square, then immediately turns into a creamy pool of cocoa and nut butter on the tongue.
Trust me, once you see how those two distinct layers sit perfectly on top of each other, you'll never go back to the basic stirred together versions.
Science of the Smooth Set
- Sugar Saturation: Sweetened condensed milk is a concentrated solution where much of the water has been evaporated, leaving behind a stable milk solid and sugar matrix that prevents the chocolate from seizing.
- Fat to Solid Ratio: Adding extra butter to the peanut butter layer increases the fat content, ensuring that it remains pliable and creamy rather than crumbly once the confectioners' sugar is folded in.
- Emulsification Stability: The lecithin found in commercial chocolate chips acts as a natural binder, helping the fats from the peanut butter and the milk solids from the condensed milk stay bonded in a smooth, non greasy suspension.
- Crystallization Control: By avoiding boiling the mixture, we prevent the sugar from forming large crystals, which is the primary reason some fudge ends up feeling like eating wet sand.
| Cooking Method | Active Time | Texture Outcome | Best For |
|---|---|---|---|
| Stovetop | 8 minutes | Ultra glossy, very smooth | Beginners who want total control |
| Microwave | 4 minutes | Denser, sets faster | Busy weeknights and quick fixes |
| Slow Cooker | 1 hours | Deeply caramelized notes | Large batches for holiday gifting |
When you choose the stovetop method, you are actively watching the proteins in the milk interact with the cocoa solids. This gradual heat prevents the fats from separating, which can happen if a microwave "hot spot" scorches the mixture. If you've ever tried my Proper Job Chewy recipe, you know I'm a fan of controlled heat to get that perfect bite every single time.
Molecular Components of Fudge
| Ingredient | Science Role | Pro Secret |
|---|---|---|
| Sweetened Condensed Milk | Provides the liquid base and sugar structure | Heat it slightly before adding chocolate to prevent temperature shock |
| Semi Sweet Chocolate Chips | Structural backbone via cocoa butter | Use chips with at least 60% cacao for a sophisticated, less cloying flavor |
| Creamy Peanut Butter | Flavor profile and lipid softness | Avoid "natural" stir style brands here as the oil separation ruins the set |
| Unsalted Butter | Enhances mouthfeel and gloss | Add it at the very end of the melting process for a silkier finish |
The interaction between the confectioners' sugar and the peanut butter is particularly interesting. Unlike granulated sugar, the finely milled nature of the powdered version allows it to dissolve into the fats of the peanut butter without needing high heat.
This creates a "fudge" texture that is actually a stable suspension of solids in fat, rather than a traditional cooked sugar syrup.
Ingredients for Fudgy Success
To get that iconic look and taste, you'll need to gather these specific items. Don't worry if you're missing one; I've included the best swaps that I've tested in my own kitchen over the years.
- 14 oz sweetened condensed milk (divided): This is the glue that holds everything together. Why this? It provides instant creaminess and sweetness without the risk of grainy sugar crystals.
- Substitute: Coconut condensed milk works for a dairy-free twist, though it adds a slight tropical note.
- 12 oz semi sweet chocolate chips: Use a high-quality brand like Ghirardelli for the best results. Why this? Semi sweet balances the high sugar content of the milk perfectly.
- Substitute: Bittersweet chocolate chips (70% cacao) for those who prefer a more intense, adult flavor profile.
- 1 tsp pure vanilla extract: A small amount goes a long way in rounding out the cocoa.
- Substitute: Almond extract for a "Marzipan like" aftertaste.
- 1/4 tsp fine sea salt: Essential for cutting through the richness.
- Substitute: Kosher salt, but double the amount as the grains are larger.
- 3/4 cup creamy peanut butter: Stick to the classic shelf stable brands. Why this? The emulsifiers in standard PB ensure the layers don't separate.
- Substitute: Almond butter, provided it is the smooth, well emulsified kind.
- 2 tbsp unsalted butter: This adds a velvety sheen to the top layer.
- 1/2 cup confectioners' sugar (sifted): This provides the structure for the top layer.
Tools for Minimalist Bakers
You don't need a kitchen full of gadgets to make a "Masterclass" level dessert. In fact, keeping it simple often leads to better results because you can focus on the textures in the pan.
- 8x8 inch square baking pan: This is the "Goldilocks" size for this recipe not too thin, not too thick.
- Parchment paper: A total non negotiable for me. It allows you to lift the entire block of fudge out for clean slicing.
- Medium heavy bottomed saucepan: A thick base distributes heat evenly, preventing the chocolate from scorching on the edges.
- Heat resistant silicone spatula: Perfect for scraping every last bit of gold out of the pan and smoothing the layers.
- Fine mesh sieve: For sifting the powdered sugar. Even small lumps will be visible in the final fudge.
Chef's Tip: Freeze your butter for 10 minutes before adding it to the peanut butter mixture. The sudden temperature drop when it hits the warm milk helps create a tighter emulsion, leading to a much smoother finish.
Foolproof step-by-step Guide
- Prep the pan. Line your 8x8 pan with parchment paper, leaving a 2 inch overhang on at least two sides. Note: These "handles" make removing the chilled fudge incredibly easy later.
- Melt the chocolate base. Combine 1 cup of the sweetened condensed milk with the 12 oz semi sweet chocolate chips in your saucepan over low heat.
- Stir until glossy. Stir constantly until the chips are completely melted and the mixture looks like liquid velvet. This usually takes about 3 to 5 minutes.
- Finish the first layer. Remove from heat and stir in the 1 tsp vanilla and 1/4 tsp sea salt.
- Spread and set. Pour the chocolate mixture into the prepared pan, smoothing the top with your spatula. Let this sit at room temperature for about 15 minutes until it looks matte rather than shiny.
- Mix the peanut butter base. In a clean saucepan (or microwave safe bowl), combine the remaining sweetened condensed milk, 3/4 cup creamy peanut butter, and 2 tbsp unsalted butter over low heat.
- Incorporate the sugar. Once melted and smooth, remove from heat and whisk in the 1/2 cup sifted confectioners' sugar until no white streaks remain and the mixture is tacky.
- Layer the flavors. Gently dollop the peanut butter mixture over the chocolate base. Spread it carefully to the edges. Note: If you press too hard, you'll displace the chocolate layer below.
- Final chill. Refrigerate the pan for at least 2 hours until the center feels firm when pressed lightly with a fingertip.
- Slice and serve. Lift the fudge out using the parchment handles and use a sharp, warm knife to cut into 36 even squares.
Solving Common Fudge Problems
Even with a simple recipe, things can occasionally go sideways. The most common issue I see is people trying to rush the melting process by turning up the heat. High heat is the enemy of chocolate; it causes the cocoa solids to clump and the fats to leak out, resulting in a grainy, oily mess.
If you find your fudge is looking a bit "broken" (oily on top), you can sometimes save it by vigorously whisking in a teaspoon of warm milk to re emulsify the fats.
Another trick involves the slicing. If your fudge is sticking to the knife and creating messy edges, it’s likely too warm. Give it another 30 minutes in the freezer.
I always keep a tall glass of hot water nearby; I dip the knife, wipe it dry, and make one clean "shatter inducing" cut before repeating the process. It's the secret to those sharp, professional corners you see in high end candy shops.
Fixing Grainy Texture Issues
| Problem | Root Cause | Solution |
|---|---|---|
| Grainy Texture | Sugar crystallized or chocolate scorched | Melt over lower heat; avoid boiling the condensed milk |
| Layers Separating | Bottom layer was too cold or too oily | Wait until the first layer is "tacky," not fully set, before adding the second |
| Fudge is Too Soft | Not enough confectioners' sugar or under chilled | Add an extra 1/4 cup sugar next time; chill for a full 4 hours |
Understanding the "why" behind the set is similar to the technique used in The OldFashioned Peanut recipe. While that recipe uses a more traditional boiling method, the principle of fat stabilization remains the same here.
Common Mistakes Checklist
- ✓ Never let a single drop of water touch the melting chocolate (it will cause it to "seize" into a hard lump).
- ✓ Sift the confectioners' sugar to avoid white "polka dots" in your peanut butter layer.
- ✓ Use a heavy bottomed pan to prevent the bottom of the fudge from burning before the top is melted.
- ✓ Resist the urge to use "natural" peanut butter with oil sitting on top; the fudge will never fully firm up.
- ✓ Let the fudge sit at room temperature for 10 minutes before slicing to prevent the chocolate from cracking.
Adjusting Batch Sizes Safely
If you’re making this for a big party, you might be tempted to just double everything. However, sweets can be finicky. When doubling the recipe for a 9x13 pan, I recommend only increasing the salt and vanilla to 1.5x the original amount.
For some reason, these flavors can become overwhelming when doubled perfectly. The cook time will also increase by about 3 to 4 minutes because the larger volume of cold ingredients takes longer to reach the melting point.
For those cooking for just one or two, you can easily halve this recipe and use a standard loaf pan. When halving, the mixture will be much shallower in the saucepan, so you must be extra vigilant about the heat. It will melt nearly twice as fast, so don't walk away from the stove!
Debunking Traditional Confectionery Lore
One of the biggest myths is that you absolutely need a candy thermometer to make "real" fudge. While that's true for old-fashioned boiled sugar recipes, the invention of sweetened condensed milk changed the game.
The milk is already a stable sugar solution, so we don't need to reach the "soft ball" stage (235°F) to achieve a set. We are essentially creating a thick ganache, not a crystalline candy.
Another misconception is that you should grease the pan with butter before lining it. Honestly, don't even bother. If you use quality parchment paper, the fudge will release perfectly without the extra grease, which can sometimes make the outer edges of the fudge taste slightly rancid if stored for more than a few days.
The fats already present in the chocolate and peanut butter provide more than enough lubrication for a clean break.
Storage and Zero Waste
Storage Guidelines: Keep your squares in an airtight container with layers separated by parchment paper. In the fridge, this fudge stays fresh and velvety for up to 2 weeks. If you prefer a room temperature treat, it will last about 5 days on the counter, though it will be much softer.
For long term storage, you can freeze the entire block or individual squares for up to 3 months. Just wrap them tightly in plastic wrap and then foil to prevent freezer burn.
Zero Waste Tips: If you find yourself with a few "ugly" end pieces or crumbs after slicing, don't throw them away! I love chopping those scraps into tiny bits and folding them into softened vanilla bean ice cream.
You can also melt the scraps down with a splash of heavy cream to create an incredible "fudge sauce" for waffles or pancakes. If you have leftover condensed milk in the can, stir it into your morning coffee it’s a decadent sweetener that beats any store-bought creamer.
Creative Serving Ideas
Presentation is where you can really let your personality shine. For a sophisticated look, I love topping the wet peanut butter layer with a handful of crushed pretzels or a sprinkle of flaky Maldon sea salt before it goes into the fridge. The crunch provides a brilliant contrast to the velvety interior.
If you're hosting a brunch, try serving small cubes of this fudge alongside a platter of fresh strawberries and tart green apples. The acidity of the fruit cuts right through the richness of the peanut butter. It also pairs beautifully with a strong dark roast coffee, much like the flavors found in the Amish Peanut Butter recipe.
- If you want a Reese's vibe
- Use milk chocolate chips instead of semi sweet for a sweeter, more nostalgic flavor.
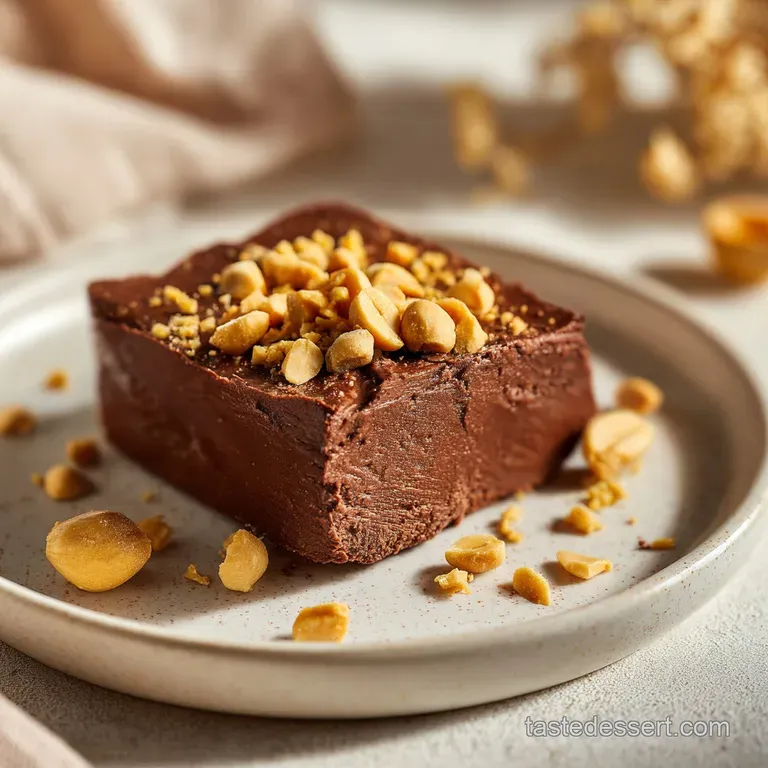
- If you want a crunchy texture
- Fold 1/2 cup of roasted, salted peanuts into the chocolate layer before pouring.
- If you want a marbled effect
- Instead of two distinct layers, dollop the peanut butter mixture onto the chocolate and use a knife to swirl them together aggressively.
Right then, you're all set to dominate the next bake sale or simply treat yourself to something spectacular. This Chocolate Peanut Butter Fudge is proof that you don't need to be a professional chocolatier to make something that looks and tastes like a million bucks.
Just remember: keep the heat low, use the good chocolate, and wait for that matte finish before layering. You've got this!

Recipe FAQs
What is the secret to perfect fudge?
Patience and temperature control are key. The secret lies in avoiding high heat, which prevents the chocolate from seizing and keeps the sugar from crystallizing into a grainy texture.
Can you mix melted chocolate and peanut butter directly?
Yes, you can, but it requires stabilization. Simply mixing them results in a thick, oily spread; using sweetened condensed milk provides the necessary stabilizers to achieve a firm, velvety fudge set.
What are the common mistakes when making fudge?
The most common error is using high heat, which causes scorching and graininess. Another mistake is not waiting for the first chocolate layer to become tacky before spreading the peanut butter layer, which causes them to bleed together.
Do condensed milk and chocolate make fudge?
Yes, sweetened condensed milk is the foundation of this easy fudge style. It replaces the need for traditional sugar boiling by providing a pre-sweetened, stable milk solid matrix that sets upon cooling.
How do I prevent the fudge layers from separating or cracking?
Ensure the bottom layer is slightly tacky, not fully set, before adding the top layer. This slight tackiness allows the two fats to adhere chemically rather than just sit physically on top of each other, preventing a clean break.
Can I skip the parchment paper when making this fudge?
No, do not skip the parchment paper for easy removal. Lining the pan allows you to lift the entire chilled block out cleanly, which is essential for making perfectly smooth, professional looking slices, similar to how we manage delicate dough in our Knead to Chill recipe.
Is it true you must use an 8x8 pan for this recipe?
No, but the pan size dictates the thickness and setting time. An 8x8 pan yields a perfect one-inch thick bar; using a larger pan, like a 9x13, will result in thinner fudge that sets much faster and might crumble if overcooked.
Chocolate Peanut Butter Fudge

Ingredients:
Instructions:
Nutrition Facts:
| Calories | 124 kcal |
|---|---|
| Protein | 2.5 g |
| Fat | 6.9 g |
| Carbs | 14.4 g |
| Fiber | 0.8 g |
| Sugar | 12.8 g |
| Sodium | 38 mg |
