Grandmas Secret Creamy Classic Peanut Butter Fudge
Grandma's Secret: Creamy, Classic Old-Fashioned Peanut Butter Fudge
Quick Hook
Right, hands up if you love proper sweets! I’m talking about that intense, smooth flavour that instantly takes you back to childhood fairgrounds and seaside holidays.
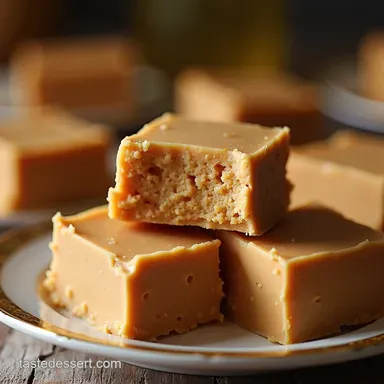
Today, we're tackling the king of confections: Old-Fashioned Peanut Butter Fudge . This isn't one of those modern, three ingredient cheats; this is the genuine article, promising that incredible, melt-in-the-mouth texture we all crave from a truly creamy peanut butter fudge.
Brief Overview
This classic Homemade Fudge is a true American staple, perfected over decades, and we are sticking to the traditional, boiled sugar method.
While the steps are simple, the process demands respect for temperature control. You absolutely need a reliable candy thermometer fudge recipe to hit that crucial soft ball stage precisely.
We rely on peanut butter fudge with evaporated milk here; it’s the secret weapon for that beautiful, rich flavour and stability.
This batch yields about 36 squares, perfect for gifting or serving alongside a massive mug of builder’s tea.
Main Benefits
The biggest benefit of doing this the old-fashioned way? Getting that texture exactly right. We’ll show you how to prevent grainy peanut butter fudge by meticulously controlling the cooling and beating process, achieving that signature velvety feel.
My biggest lesson learned over the years making this Peanut Butter Fudge Recipe is that patience is non-negotiable rushing the cool down leads straight to a gritty, sugary failure!
This fudge delivers unparalleled comfort food satisfaction, and when the mixture starts boiling, the nutty aroma that fills your kitchen is simply heavenly.
Now, before we get started, we must talk about ingredients. Forget the fancy health stuff for a minute for this specific recipe, trying to use natural peanut butter will leave you with an oily, separated mess.
We need stability!
Ready to get stuck in? Let's check the list.
Grandma's Secret: Getting Prepped for Creamy Fudge
Right, let's talk kit and caboodle for making the best Old-Fashioned Peanut Butter Fudge you’ve ever tasted. This isn't one of those quick, microwave jobs.
We are aiming for proper, creamy peanut butter fudge , the kind of Homemade Fudge that melts away instantly. Getting these core bits sorted first is crucial to avoiding that dreaded, sugar crunchy texture.
Main Ingredients
The core of this confection relies on a precise balance of fats, sugars, and liquid. We are using the classic method, which is why we rely on peanut butter fudge with evaporated milk .
You need 3 cups (600g) of Granulated Sugar and a full 12 oz (355 ml) can of Evaporated Milk . Use the full fat stuff; it brings the necessary stability and richness.
We also need 1/2 cup (113g) of Unsalted Butter , cut into chunks.
Now for the star: 1 cup (250g) of Smooth Peanut Butter . This is my biggest, hard learned lesson in the Peanut Butter Fudge Recipe : do not use Natural Peanut Butter that separates.
That oil layer messes with the sugar boiling chemistry and will leave you asking how to prevent grainy peanut butter fudge the answer is, don't start with that kind! Stick to the stabilized stuff (Skippy or Jif style).
Seasoning Notes
Fudge that’s just sweet is boring. A touch of salt elevates everything. We throw in 1/4 teaspoon of fine sea salt it doesn’t sound like much, but it makes the peanut flavour pop and cuts through the intense sugar.
The 1 teaspoon (5 ml) of Pure Vanilla Extract goes in right at the very end, adding that lovely aromatic warmth.
The Kit: Essential Gear
If you take away nothing else, remember this: this Candy thermometer fudge recipe requires serious precision.
- Heavy Saucepan: Essential for even heating. A thin pan will give you scorched sugar, which is instant ruin.
- 8x8 inch Pan: Lined with parchment paper. Leave an overhang (a "sling") for easy removal later.
- The Thermometer (Non-Negotiable): You cannot successfully eyeball the Fudge soft ball stage . Trying to test it in water is just a gamble. A reliable thermometer (digital is best) ensures we hit exactly 234– 238° F (112– 114° C) . Without it, you are gambling your time and ingredients. Spend the tenner!
- Sturdy Wooden Spoon: You will need serious elbow grease for the beating stage, or use a stand mixer if you have one.
Cooking Method: The Road to Perfectly Creamy Peanut Butter Fudge
Right, let’s get this gorgeous confection on the go. Making true Old-Fashioned Peanut Butter Fudge is a bit like driving a vintage car you need to respect the machinery and pay attention to the gauges.
Ignore the candy thermometer at your peril! This classic Peanut Butter Fudge Recipe relies entirely on precise temperature control for that smooth, velvety texture we’re aiming for.
Prep Steps
This stage is all about setting yourself up for success we call it mise en place , or basically, getting your gear sorted.
The absolute essential step for perfect, creamy peanut butter fudge is lining your 8x8 pan with parchment paper. Leave a generous overhang (a 'sling').
Trust me, wrestling hot fudge out of a sticky tin is nobody’s idea of a good time. Also, keep a small cup of warm water and a pastry brush nearby.
This is your secret weapon against crystallization. And lastly, have that candy thermometer fudge recipe instrument securely attached before you start boiling.
You won’t have time to faff around looking for it once the heat is on.
Step-by-step Process
This is where the magic happens, but we must be firm and disciplined, particularly once we hit the boil.
- Bring it up Slow: Combine the sugar, evaporated milk, butter, and salt in your heavy bottomed pot. Stir constantly over medium heat until the sugar dissolves completely. You shouldn’t feel any grit against the bottom of the pan. This is key to how to prevent grainy peanut butter fudge .
- Boil and Stop: Once it hits a full, rolling boil, stop stirring. Attach your thermometer and let it do its thing.
- Wash Down: Use that wet pastry brush to gently wipe down the sides of the pot. Any sugar splattered above the liquid line can fall back in and cause premature crystals.
- Hit the Target: Boil undisturbed until the mixture hits precisely 234– 238° F (112– 114° C) . This is the official fudge soft ball stage . If you go over, the fudge will be crumbly; under, and it won't set.
- Cooling Crisis: Immediately take the pot off the heat. Add the peanut butter and vanilla right on top of the hot mixture. Now, the absolute hardest part: DO NOT STIR . Let it cool passively until the thermometer reads 110– 120° F (43– 50° C) . I learned the hard way that stirring now ruins everything.
- Beat it! Once cool, start beating vigorously. Use a wooden spoon or stand mixer. The glossy sheen will disappear as the texture changes. It will suddenly look dull, stiffen up dramatically, and lose its glossiness that’s your cue!
- Transfer: Scrape the stiff fudge into the prepared pan and quickly spread it out.
Pro Tips
If you want truly perfect, professional level Homemade Fudge , keep these three things in mind.
- Peanut Butter Check: Please, for the love of all that is smooth, do not use Natural Peanut Butter here. The oils separate out when heated, leaving you with a greasy, grainy mess. Stick to a stabilized, commercial brand for this recipe.
- The Cooling Rule: Patience, mate. That passive cooling step (step 5) is non-negotiable. If you try to beat it when it’s too hot, those sugar crystals won't form properly, guaranteeing a sugary, disappointing texture.
- make ahead: This fudge is brilliant for gifting. It keeps wonderfully! Store it in an airtight container at room temperature for up to five days. It actually tastes better the day after it’s made, allowing the nutty flavour of the Peanut Butter Fudge to deepen.
Serving Suggestions

This creamy peanut butter fudge isn't just a hunk of sweetness; it’s an experience. For me, a square of truly great homemade fudge demands a proper cuppa.
Think strong, hot builder’s tea the sort that can handle a bit of milk and sugar. The tea's tannin cuts through the richness of the peanut butter beautifully.
Alternatively, a sharp black coffee works wonders too.
Presentation wise, this doesn't need much fuss. It looks beautifully rustic cut into small, generous squares. If you want to be extra fancy, sprinkle a few flakes of sea salt on top before it fully sets.
It looks smart and really enhances that crucial salty sweet dynamic we love about Old-Fashioned Peanut Butter Fudge .
Storage Tips
Once set, lift the fudge block out using your handy parchment sling and cut it into neat little squares. This fudge keeps brilliantly.
Store it in an airtight container. If you keep it at room temperature (providing your kitchen isn't roasting), it stays beautifully soft and pliable for about five days.
For longer life or if you live in a warm climate stick it in the fridge. It lasts up to two weeks chilled, but you might find the texture gets a tiny bit firmer.
If that happens, just let the squares sit on the counter for 30 minutes before serving. That little rest brings the texture right back to its creamy best.
I learned early on that refrigeration is the key to preventing sticky, sad fudge melt downs in the summer.
Variations
This classic Peanut Butter Fudge Recipe is lovely as is, but we can play around a bit. I often get asked about using Natural Peanut Butter .
Please, don't do it in this boiled sugar method! The natural oil separates and messes up the crystallization process. Trust me, if you want to know how to prevent grainy peanut butter fudge , stick to the stabilized, commercially prepared stuff.
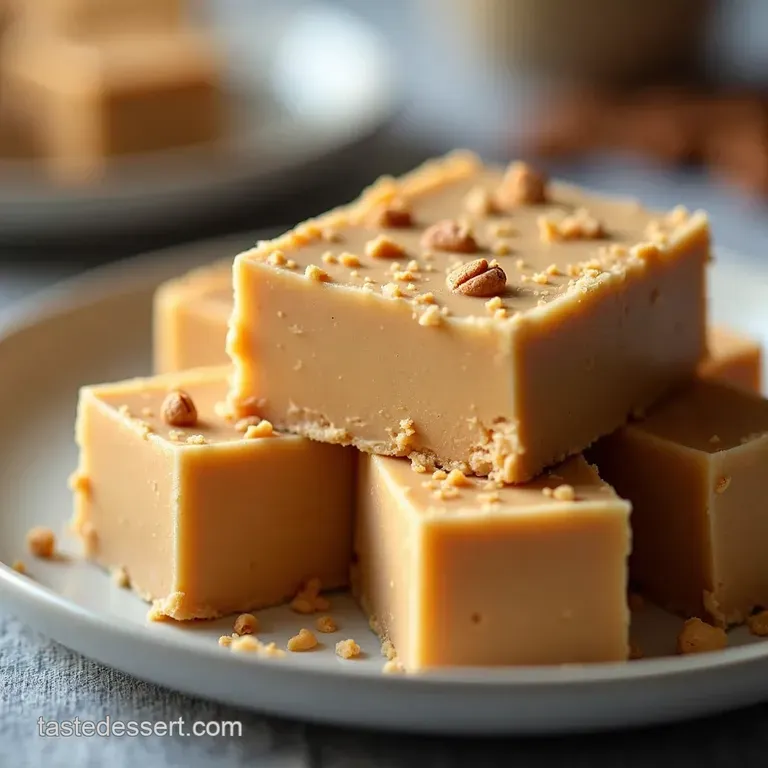
For a textural change, try folding in a small handful of chopped, salted peanuts right before you pour the fudge into the pan.
If you're feeling indulgent, try a marshmallow swirl: add a few dollops of Marshmallow Fluff along with the peanut butter, and only beat it a couple of times so you get streaks, not a blend.
Nutrition Basics
Right, let’s be honest: this classic treat is not kale salad. We're dealing with sugar, butter, and nuts! But look at the bright side: portion control is built-in.
You only need a small square to satisfy a serious craving. Peanut butter is full of healthy fats and protein, so while the calories are high, you are getting some solid nutrients alongside the delicious indulgence.
This is soul food, plain and simple.
Trust me, mastering the precise heat using that candy thermometer fudge recipe knowledge and getting the mixture just right is completely worth the effort.
Enjoy every perfect, velvety bite of your beautiful Old Fashioned Peanut Butter Fudge .
Frequently Asked Questions
Why does my fudge sometimes end up gritty or sugary, rather than perfectly smooth?
That frustrating graininess is usually caused by sugar crystals forming too early it’s a classic fudge disaster! To avoid this, ensure you meticulously "wash down" the sides of the pot with a wet pastry brush during the boil to dissolve stray crystals.
Most importantly, do not stir, fold, or even knock the pan during the vital passive cooling phase (110 120°F); premature agitation ruins the texture.
How long does this Old-Fashioned Peanut Butter Fudge stay fresh, and what’s the best way to store it?
If you keep this proper job stored correctly in an airtight container at room temperature, it will keep beautifully for about 5 to 7 days, making it perfect for gifting or sharing with an afternoon cuppa.
For longer keeping, you can wrap it tightly and refrigerate it for up to two weeks, but be sure to let it warm up slightly before serving for the best texture.
Can I use the natural, oily peanut butter I keep in the fridge instead of a commercial brand?
That’s a tricky one, mate, but generally speaking, no. For classic boiled fudge, stabilized, commercial peanut butter (like Jif or Skippy style) is essential. Natural varieties separate easily and introduce too much oil, which destabilizes the sugar mixture and results in a greasy, soft fudge that simply won't set to that desirable firm texture.
What happens if I overshoot the target temperature (238°F) when boiling the sugar syrup?
If you miss the mark and boil it too high, say past 240°F, you're heading straight for a fudge that’s too hard, crumbly, and potentially brittle it’ll be rock hard, not soft.
If you notice you’ve gone over, you can sometimes rescue it by adding a tablespoon or two of hot evaporated milk back into the pot and gently stirring it off the heat to try and lower the overall density before cooling.
Are there any easy variations, like adding crunch or chocolate, to the classic recipe?
Absolutely! Once the mixture is in the beating phase, you can introduce textural elements. Try switching to crunchy peanut butter, or for a decorative finish, drizzle 1/4 cup of melted dark chocolate over the fudge right as you transfer it to the pan and swirl lightly with a knife.
For maximum indulgence, stir in a handful of mini marshmallows during the beating stage.
Grandmas Secret Creamy Classic Peanut Butter Fud