The Quintessential Crosshatch Truly Classic Perfectly Chewy Peanut Butter Cookies
- Unlocking the Secret to Perfectly Crumbly Peanut Butter Cookies
- Why This Classic Recipe Stands Above the Rest
- Assembling Your Essential Baking Arsenal for PB Delights
- Ingredient Deep Dive: Selecting the Best Components
- Step-by-Step Journey to Golden Perfection
- Troubleshooting & Advanced Techniques for Cookie Excellence
- Extending the Joy: Storage and Freezing Strategies
- Recipe FAQs
- 📝 Recipe Card
Unlocking the Secret to Perfectly Crumbly Peanut Butter Cookies
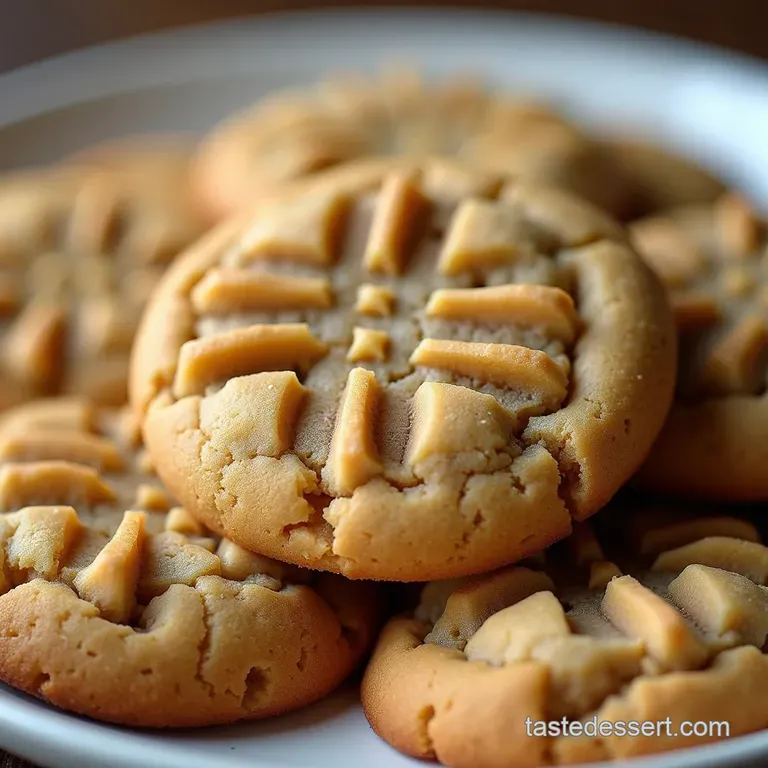
There is a quiet magic inherent in a perfectly baked Peanut Butter Cookie. It’s not flashy; it doesn’t require temperamental techniques or rare ingredients. It simply delivers that foundational, comforting hit of salty sweet roasted nuttiness, often crowned with the tell tale, unmistakable crosshatch fork pattern.
Many attempt this classic, but few achieve the sublime balance we’re chasing today: a cookie that manages to be simultaneously soft and delightfully crumbly. This definitive guide will walk you through mastering Peanut Butter Cookies Easy style, ensuring every batch earns the title of the Best Peanut Butter Cookies you’ve ever made.
Why This Classic Recipe Stands Above the Rest
This particular iteration moves beyond simple cookie preparation; it’s about honouring a time tested formula. We are striving for a texture that is tender throughout, rich in flavour, and possesses that satisfying slight resistance when you bite in.
A Tribute to Timeless Baking Traditions
This recipe focuses on time honoured ratios, utilizing a combination of white and brown sugars. This blend is crucial: the granulated sugar assists in achieving that delicate crispness around the edges, while the packed light brown sugar provides essential moisture, ensuring the final product remains Soft And Chewy Bakery style Peanut Butter Cookies rather than brittle snaps.
We are avoiding overly complex additions to focus purely on elevating the core peanut butter flavour profile.
The Definitive Texture: Achieving Peak Chewiness
Chewiness in cookies comes down to moisture retention and the interaction between fat and sugar during creaming. For this batch, we are using precisely the right amount of room temperature butter, creamed vigorously with both sugars to incorporate necessary air.
This structure, combined with the slight chilling process we’ll discuss later, locks in tenderness, preventing the cookies from flattening into dry discs. The goal here is a hybrid: achieving that Soft And Crunchy Peanut Butter Cookies contrast in every bite.
What Makes Our Crosshatch Iconic
That iconic crisscross pattern isn't just for show. When you press the fork down, you are flattening the dough ball slightly, which encourages even baking. More importantly, this flattening limits the cookie’s rise, ensuring the centre stays dense and chewy while the edges set up beautifully.
We will soon cover the trick to applying this mark without sticking!
Assembling Your Essential Baking Arsenal for PB Delights
Before we even think about preheating the oven, ensuring you have the right equipment ready will smooth out the entire baking process. While you don't need a professional kitchen, a few foundational tools make a huge difference, especially when tackling a batch intended to yield 24 medium cookies .
Related Recipes Worth Trying
- The Ultimate Swiss Meringue Buttercream Recipe for Flawless Frosting — Master the secret to silky smooth Swiss Meringue Buttercream This refined frosting is far less sweet than traditional optionsperfect for cupcakes
- The Ultimate Crispy Garlic Butter Shrimp Toasts Recipe — Make these irresistible Garlic Butter Shrimp Toastsperfect appetizers with a juicy shrimp topping and a satisfying crunch Foolproof Cantoneseinspired flavour
- MeltinYourMouth German Butter Cookies Recipe — Master the simple rich Butterplätzchen recipe for truly irresistible German Butter Cookies These easy holiday spritz cookies melt away instantly
Ingredient Deep Dive: Selecting the Best Components
The beauty of the classic Peanut Butter Cookies Recipe is its short list of staples. However, the quality and type of those staples dictate the final outcome, especially concerning texture and flavour concentration.
Measuring Mastery: Precision for Perfect Peanut Butter Cookies
Baking is chemistry, and precision matters significantly here. When measuring your 1 ½ cups of all-purpose flour , always use the spoon and-level method: gently spoon the flour into your measuring cup, then level the top with a straight edge.
Scooping directly from the bag compacts the flour, leading to overly dense cookies. Similarly, ensure your ½ cup of packed light brown sugar is properly compressed into the cup to guarantee the correct level of moisture.
Choosing Your Nut Butter: Creamy Versus Crunchy Showdown
For the most traditional and reliable results the kind that allows for the best crosshatch impression I strongly recommend using a standard, emulsified, creamy peanut butter (like Skippy or Jif).
These commercial spreads have added stabilizers (oils/fats) that prevent separation, which is vital for maintaining the dough’s structure. While you certainly can use crunchy for added texture, natural, oil-separated peanut butters tend to create a much softer, sometimes greasier dough that can spread too thin.
If you want to approach XL Bakery Style Peanut Butter Cookies , stick to the standard creamy variety for consistency.
Essential Tools: Beyond the Mixing Bowl
A stand mixer with a paddle attachment makes creaming the butter and sugars effortless, achieving that necessary airy base. However, a good sturdy whisk and a strong arm will work just as well for the Peanut Butter Cookies Easy version.
Crucially, you will need parchment paper or silicone baking mats. These prevent the high sugar dough from sticking to the baking sheet and ensure the bottoms bake evenly without burning.
step-by-step Journey to Golden Perfection
This process is remarkably straightforward, moving swiftly from combining ingredients to chilling and finally, baking. We are aiming for a total active preparation time under 20 minutes, plus a necessary chilling period to manage spread.
Creaming Butter and Sugars: The Foundation of Flavor
In your large mixing bowl, combine the ½ cup softened unsalted butter with the ½ cup granulated sugar and ½ cup packed light brown sugar .
Beat these together on medium speed for a full two to three minutes until the mixture is visibly lighter in colour and fluffy. This process whips tiny air pockets into the fat matrix, which expand in the oven, giving your cookies lift and lightness.
Next, incorporate the 1 cup of creamy peanut butter , ensuring it is fully mixed in before adding your 1 large room temperature egg and 1 teaspoon of vanilla extract .
Folding in Dry Goods Without Overmixing
In a separate bowl, quickly whisk together your dry components: 1 ½ cups of all-purpose flour , ½ teaspoon of baking soda , and ½ teaspoon of salt .
Add these dry ingredients to the wet mixture gradually, mixing only on low speed, or folding gently by hand with a rubber spatula, until just incorporated. As soon as you see no more streaks of dry flour, stop.
Overmixing develops gluten, leading to tough, cakey cookies instead of the Soft And Chewy Bakery style Peanut Butter Cookies we desire.
Achieving the Signature Fork Marks: Pressing Technique Explained
Once the dough is chilled for at least 30 minutes (which prevents excessive spreading), roll it into uniform balls, about 1.5 tablespoons each, and place them two inches apart on your lined baking sheets.
Now for the iconic moment: Dip your fork into a small dish of granulated sugar before pressing it gently onto the top of the dough ball to create the first crosshatch line. Rotate the fork 90 degrees and press again to complete the grid.
Dipping the fork in sugar ensures it slides cleanly away without dragging the dough.
Baking Times and Visual Cues for Doneness
Preheat your oven to 375° F ( 190° C) . Bake the cookies for a relatively quick 10– 12 minutes .
The key visual cue here is not dryness, but structure: the edges should look set and lightly golden brown, but the very centre of the cookie should still appear slightly pale and puffed, almost underdone. They continue cooking rapidly on the hot baking sheet after removal.
Troubleshooting & Advanced Techniques for Cookie Excellence
Even with a simple recipe, occasional hiccups occur. Knowing how to adjust will guarantee success next time. For instance, if your cookies are spreading into flat puddles, it’s almost always due to butter that was too soft or skipping the essential chilling step.
If they are too crumbly straight out of the oven, they likely needed another minute of baking time.
Extending the Joy: Storage and Freezing Strategies
The enjoyment of these Peanut Butter Cookies shouldn’t end immediately after the batch cools. Proper storage maintains that wonderful texture.
FAQ: Common Pitfalls When Baking Peanut Butter Cookies
Q: Can I make Peanut Butter Cookies No Eggs? A: While the structure relies on the egg as a binder, you can substitute the single egg with a ‘flax egg’ (1 tablespoon ground flaxseed mixed with 3 tablespoons water, rested for 5 minutes) for a similar binding effect, though the chew may differ slightly.
Q: Are there variations on the classic? A: Absolutely! If you want to elevate this beyond the basic, try folding in ½ cup of semi sweet chocolate chips to create wonderful Peanut Butter Cookies With Chocolate Chips .
Alternatively, for a minimal effort, Peanut Butter Cookies 3 Ingredients versions exist using peanut butter, sugar, and egg, but they lack the depth provided by butter and flour.
Flavor Remix: Delicious Add-ins and Variations
Beyond the chocolate chip addition, consider sprinkling flaky sea salt on top immediately after the crosshatch press for an enhanced salty contrast. For those who love texture, substituting creamy peanut butter with crunchy peanut butter yields a more rustic, textured cookie.
If you’re looking for something truly indulgent, try making XL Bakery Style Peanut Butter Cookies by using a larger scoop (3 tablespoons) and adding 1 cup of finely chopped peanuts to the dough for extra body.
Cooling Secrets: Ensuring They Don't Stick or Crumble
Resist the urge to move the cookies immediately. Allow them to rest undisturbed on the hot baking sheet for a full 5 minutes. This critical resting period allows the soft centres to firm up enough to handle the transfer.
If you attempt to move them too early, the tender crumb structure, particularly if you are aiming for very soft cookies, will result in breakage.
Shelf Life and How to Revive Stale Treats
Stored correctly in an airtight container at room temperature, these Peanut Butter Cookies will maintain their ideal texture for about 4 to 5 days. If they begin to feel slightly dry after a week, you can quickly revive them.
Place a cookie on a microwave safe plate next to a small, damp paper towel. Microwave in 5-second bursts until the cookie is warm; the steam from the towel reintroduces just enough moisture to restore the soft chewiness beautifully.

Recipe FAQs
Why do my Peanut Butter Cookies spread out like a pancake in the oven?
This is usually down to the butter being too warm or skipping the chilling step, frankly! Make sure your butter is only softened, not melty, and always chill the dough for at least 30 minutes that’s the secret handshake for thick cookies.
Using conventional peanut butter instead of natural, oily varieties also helps stop the spread.
Can I use crunchy peanut butter instead of creamy in this recipe?
Absolutely, you can! Swapping creamy for crunchy is a cracking idea if you fancy a bit more texture in your bite. Just swap them cup-for-cup, and don’t worry about adjusting anything else; you'll just get a chunkier result, which is rather nice, if you ask me.
My cookies came out really hard; how do I make them chewier?
Hard cookies usually mean they’ve been overbaked or you mixed the flour in for too long. For chewiness, pull them out when the centres still look a bit pale and soft they firm up beautifully on the tray afterwards.
Also, ensure you're using brown sugar, as its molasses content keeps things delightfully moist.
How long can I store these Peanut Butter Cookies, and what's the best way?
These store brilliantly, much better than some fancier bakes. Keep them in an airtight container at room temperature, and they should be grand for up to a week, though they rarely last that long! Avoid the fridge, as it can sometimes dry them out a tad too quickly.
I don't have time to chill the dough; can I skip that step?
While you can skip the chilling, I strongly advise against it if you want that classic, thick shape. If you're in a dreadful hurry, pop the dough balls in the freezer for about 15 minutes instead of the fridge for 30; this firming-up period is crucial for structure!
Classic Chewy Peanut Butter Cookies
Instructions:
Nutrition Facts:
| Calories | 170 kcal |
|---|---|
| Fat | 9g |
| Fiber | 1g |
