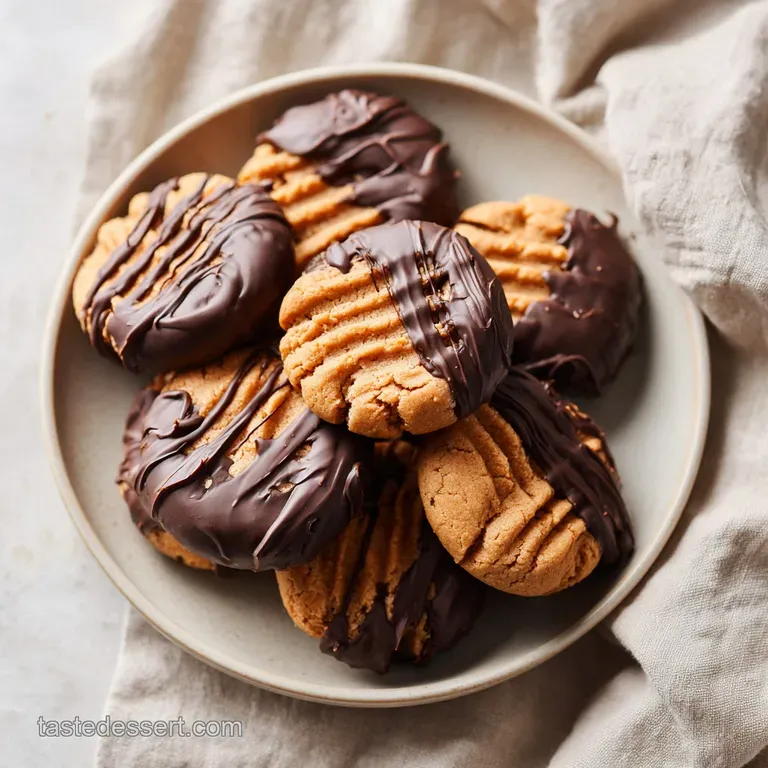
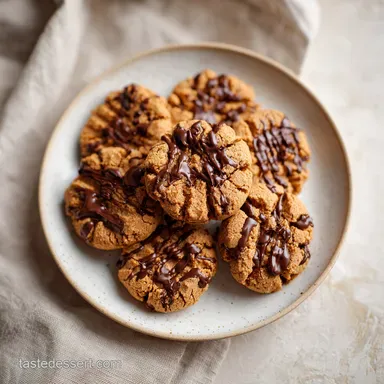
Crispy Peanut Butter Cookies: Shatter Crisp Edges
- Time: Active 15 minutes, Passive 12 minutes, Total 27 minutes
- Flavor/Texture Hook: Shatter crisp edges with a toasted, salty sweet finish
- Perfect for: Afternoon snacking, lunchbox surprises, or a quick bake sale win
- Master the Ultimate Crispy Peanut Butter Cookies
- The Science Behind Better Crunch
- Ingredient Deep Dive Analysis
- The Practical Shopping List
- Tools for the Busy Cook
- Key Steps for Success
- Solving Cookie Baking Problems
- Flavor Variations to Explore
- Common Baking Myths
- Storage and Zero Waste
- Best Pairing Ideas
- Recipe FAQs
- 📝 Recipe Card
Master the Ultimate Crispy Peanut Butter Cookies
I still remember the first time I tried to make a truly crispy peanut butter cookie. I was at my grandmother's house, and her kitchen always smelled like toasted nuts and vanilla. I wanted that specific sound - that audible "crack" when you break a cookie in half.
My first few attempts were either too soft or just plain rock hard, but then I realized the secret was all in the sugar choice and the fork pressed pattern.
These aren't your average soft baked pillows. When you pull these out of the oven, the aroma of roasted peanuts fills every corner of the room. It's a warm, inviting scent that makes you want to stand by the oven door just to catch the first whiff.
The edges turn a beautiful dark gold, and as they cool, they firm up into the most satisfying crunch you've ever experienced.
We're going to skip the complicated chilling times and get straight to the baking. I've found that using natural peanut butter and coconut sugar creates a unique depth of flavor that standard white sugar just can't touch.
It’s about getting that perfect balance of moisture evaporation so you get a cookie that shatters when you bite it, rather than one that crumbles into sand.
The Science Behind Better Crunch
Understanding how these ingredients interact is the difference between a soggy disc and a crisp masterpiece. When we bake, we're basically managing a tiny chemical reaction in the oven. If you've tried my Proper Job Chewy recipe, you know how moisture creates chew - here, we're doing the opposite.
- Hygroscopic Balance: Coconut sugar is less hygroscopic than brown sugar, meaning it attracts less moisture from the air, helping the cookie stay firm after cooling.
- Starch Structure: The all purpose flour provides the necessary gluten framework that sets firmly as the oven heat dries out the dough.
- Fat Aeration: Creaming natural peanut butter creates tiny air pockets that expand and then set, giving the cookie a light but crisp internal structure.
- Surface Area Increase: The traditional fork pressed crosshatch pattern increases the surface area exposed to heat, ensuring even drying and a uniform snap.
| Method | Time | Texture | Best For |
|---|---|---|---|
| Standard Oven | 12 minutes | Shatter crisp edges | Classic snacking and dipping |
| Toaster Oven | 10 minutes | Very dark, toasted bottom | Small batches for one person |
| Air Fryer | 8 minutes | Extra crunchy exterior | Quick fixes with high airflow |
Since we are focusing on that specific crunch, the way the heat hits the dough is vital. An air fryer might give you a faster result, but the steady, dry heat of a traditional oven at 180°C (350°F) is still the gold standard for getting that even, golden brown finish all the way through the center.
Sweetener Ratios for Crunch
The combo of coconut sugar and maple syrup is a bit of a secret weapon. The syrup adds a hint of caramel like flavor, while the coconut sugar provides the structure. Unlike honey, which can make cookies soft and sticky, maple syrup dries out more effectively during the 12 minute bake.
Natural Peanut Butter Emulsification
Using natural peanut butter means we aren't dealing with a bunch of hydrogenated oils. This allows the natural peanut oils to toast the flour as it bakes, almost like a "frying" effect within the dough. This is why these cookies have such a distinct, deep roasted flavor compared to those made with processed spreads.
The Cross Hatch Aeration Method
Don't think of the fork marks as just a decoration. By flattening the dough, you are ensuring the heat penetrates the center quickly. If the cookies were left in balls, the middle would stay soft and cakey while the edges burned. We want the whole cookie to reach that "glassy" state of crispness.
Ingredient Deep Dive Analysis
| Ingredient | Science Role | Pro Secret |
|---|---|---|
| Natural Peanut Butter | Primary fat and protein | Use the "stir well" kind for a more intense roasted nut profile. |
| Coconut Sugar | Structural sweetener | Granules are larger, which helps create a more textured, crispy crumb. |
| Maple Syrup | Flavor enhancer | Adds a complex sweetness without the cloying nature of corn syrup. |
| Baking Soda | Leavening and browning | It raises the pH, which speeds up the Maillard reaction for a darker gold color. |
Selecting the right components makes the process so much smoother. I always recommend using a high-quality sea salt because those little flakes provide a sharp contrast to the rich peanut butter, making every bite pop.
The Practical Shopping List
- 1.5 cups All purpose flour: Why this? Provides the gluten structure needed for a firm, crispy snap.
- Substitute: 1:1 gluten-free baking blend (Note: result may be slightly more fragile).
- 1 tsp Baking soda: Why this? Encourages browning and a slight lift.
- Substitute: 3 tsp Baking powder (Note: cookies will be puffier and less crisp).
- 0.5 tsp Sea salt: Why this? Enhances the nuttiness and balances the sugar.
- Substitute: 0.5 tsp Table salt (use slightly less if very fine).
- 1 cup Natural creamy peanut butter: Why this? Provides authentic flavor and natural oils.
- Substitute: Almond butter or sunflower seed butter.
- 0.5 cup Coconut sugar: Why this? Keeps the cookies crisp without excessive moisture.
- Substitute: Granulated white sugar.
- 0.25 cup Maple syrup: Why this? Adds depth and helps the edges caramelize.
- Substitute: Agave nectar or brown rice syrup.
- 1 Large egg: Why this? Binds everything together so the cookies don't crumble.
- Substitute: 1 flax egg (1 tbsp ground flax + 3 tbsp water).
- 1 tsp Pure vanilla extract: Why this? Rounds out the flavors.
- Substitute: Almond extract for a different nutty profile.
- 0.5 cup Dark chocolate chips: Why this? Adds bitter sweet pockets of flavor.
- Substitute: Chopped dark chocolate bar.
- 0.25 cup Crushed roasted peanuts: Why this? Adds extra textural "pop" and visual appeal.
- Substitute: Chopped walnuts or pecans.
Tools for the Busy Cook
You don't need a kitchen full of gadgets for this. A simple large mixing bowl and a sturdy wooden spoon or spatula will do the trick. If you have a stand mixer, feel free to use it, but I often find it's just more dishes to wash for a simple batch of 24 cookies.
A standard baking sheet (or two) is essential. I prefer using parchment paper or a silicone mat to prevent sticking and to ensure the bottoms don't get too dark too quickly. The only "specialty" tool you really need is a fork for that iconic crosshatch pattern.
Chef's Tip: If your natural peanut butter has separated, turn the jar upside down for 24 hours before you plan to bake. The oil will travel back through the jar, making it much easier to stir into a smooth consistency.
Key Steps for Success

- Preheat the oven to 180°C (350°F). Note: A fully preheated oven is vital for setting the cookie's shape immediately.
- Whisk the 1.5 cups flour, 1 tsp baking soda, and 0.5 tsp sea salt in a small bowl.
- Cream the 1 cup peanut butter and 0.5 cup coconut sugar in a large bowl until smooth. Mix for at least 2 minutes until the mixture looks slightly lighter in color.
- Beat in the 1 large egg, 0.25 cup maple syrup, and 1 tsp vanilla extract. Note: This creates the "wet" base that holds the dry ingredients.
- Fold the dry ingredients into the wet mixture slowly. Stop as soon as no white streaks remain to avoid overworking the gluten.
- Stir in the 0.5 cup dark chocolate chips and 0.25 cup crushed peanuts.
- Scoop rounded tablespoons of dough and roll them into balls. Note: You should have roughly 24 balls.
- Press each ball with a fork in a crosshatch pattern. Flatten them to about 1 cm thickness for maximum crispiness.
- Bake for 12 minutes. Watch for the edges to turn a deep golden brown and the centers to look set.
- Cool on the baking sheet for 5 minutes. This allows the structure to firm up before you move them to a wire rack.
Solving Cookie Baking Problems
Sometimes things go sideways in the kitchen, but most cookie issues are easy to fix once you know what to look for. If your cookies aren't as crunchy as you'd like, it's usually a matter of oven temperature or cooling time.
Cookies Stay Too Soft
If your cookies come out soft and stay that way even after cooling, they likely needed another minute or two in the oven. Every oven is different, and "12 minutes" is a guide. If they aren't golden brown on the edges, they haven't finished drying out.
Dough is Too Crumbly
This often happens if the flour was packed too tightly into the measuring cup. If the dough won't hold together when you try to roll it into a ball, add a teaspoon of maple syrup or water to bring it back to life.
| Problem | Root Cause | Solution |
|---|---|---|
| Cookies spread too thin | Butter/PB was too warm | Chill the dough balls for 15 minutes before baking. |
| Burnt bottoms | Oven rack is too low | Move the baking sheet to the center or upper third of the oven. |
| Bland flavor | Not enough salt | Sprinkle a tiny pinch of flaky salt on top immediately after baking. |
Common Mistakes Checklist:
- ✓ Ensure your baking soda is fresh; old soda won't help with browning or lift.
- ✓ Don't skip the "rest" on the hot pan it's essentially a secondary slow bake that finishes the crisping process.
- ✓ Measure your flour using the "spoon and level" method rather than scooping directly with the cup.
- ✓ Make sure the egg is at room temperature so it emulsifies properly with the fats.
- ✓ Avoid using "low-fat" peanut butter; the lack of oil will result in a dry, sandy texture.
Flavor Variations to Explore
Once you've mastered the base recipe, it's fun to play with the add ins. You can swap the dark chocolate for white chocolate chips for a sweeter, creamier contrast. Or, if you're a fan of different textures, try a Amish Peanut Butter recipe approach by adding a layer of peanut butter frosting between two of these crispy cookies to make a "sandwich."
- The Vegan Crunch Swap: Use a flax egg and ensure your chocolate chips are dairy-free. The coconut sugar and maple syrup are already plant based.
- Salted Chocolate Twist: Use 0.5 cup of mini chocolate chips so you get a bit of chocolate in every single bite, and finish with a heavy hand of Maldon salt.
Decision Shortcut
- If you want a deeper color, use dark coconut sugar.
- If you want a flatter cookie, press the crosshatch firmer.
- If you want extra crunch, don't skip the crushed peanuts.
Common Baking Myths
One big myth is that you must use butter to get a crispy cookie. In this recipe, the natural oils in the peanut butter do all the heavy lifting. Butter adds moisture (water content), which can actually lead to a softer, more cake like cookie if not balanced correctly.
By using just the peanut butter, we're maximizing the fat to flour ratio for that snap.
Another misconception is that the dough needs to chill for hours. While chilling helps with flavor development in some recipes, it can actually make these cookies harder to press thin. For the best "crispy peanut butter cookies" results, bake the dough immediately while it's still pliable and easy to flatten.
Storage and Zero Waste
To keep that crunch, store these in an airtight container at room temperature. They will stay perfectly crisp for up to 5 days. If they do start to soften due to humidity, you can "revive" them by popping them back into a 150°C (300°F) oven for 3-4 minutes.
If you have leftover crushed peanuts or a few stray chocolate chips, don't throw them away. Toss them into your morning oatmeal or save them in a small jar for a quick ice cream topping. You can even freeze the unbaked dough balls for up to 3 months.
Just thaw them for 10 minutes, press with a fork, and bake as usual!
Best Pairing Ideas
There is nothing quite like a cold glass of almond milk or regular dairy milk to wash down these treats. The saltiness of the peanut butter makes it a perfect companion for something creamy. If you're feeling indulgent, crumble a few of these over The Fudge Brownie recipe for a multi layered dessert experience that covers every texture from fudgy to crunchy.
For an adult version, try dipping these into a hot cup of espresso. The bitter notes of the coffee pull out the toasted flavors of the coconut sugar and peanuts in a way that feels incredibly sophisticated for such a simple cookie. Trust me, once you start dipping, you won't be able to stop at just one.

Recipe FAQs
What is the secret to a crunchy cookie?
Lower moisture content and proper sugar ratios. Evaporating water during baking is key; using less hygroscopic sugars like coconut sugar helps the cookie set firmly and maintain that snap after cooling.
What makes crunchy peanut butter crunchy?
This recipe uses creamy peanut butter, but the crunch comes from added texture. We incorporate finely crushed roasted peanuts in the dough to provide distinct, audible pieces within the crisp matrix.
What factors cause a cookie to be crisp?
Higher fat-to-flour ratio combined with ample surface area exposure. Flattening the dough with a fork increases surface area for drying, while the fat content allows the structure to bake into a brittle, rather than soft, state.
Why are my peanut butter cookies crispy instead of soft?
You correctly balanced the liquid ingredients with higher setting structural components. Specifically, the lack of brown sugar (which retains moisture) and the use of coconut sugar ensures maximum moisture evaporation during the 12-minute bake time.
How do I prevent my crispy cookies from becoming soft overnight?
Store them in a truly airtight container away from humidity. If they soften, revive them by baking at 300°F for 4 minutes; this process of dry heat removes reabsorbed moisture.
Is it true I must use butter for a good texture?
No, this is a common misconception for this style of cookie. Peanut butter acts as the primary fat source here, delivering intense flavor and helping create a brittle structure because it contains less water than butter does.
How do I get that deep, toasted flavor in the cookie?
Bake until the edges are deep golden brown, not light tan. This level of color indicates proper Maillard reaction, which develops deep, roasted peanut flavors, similar to the deep toasting you achieve when making homemade Peanut Milk recipe.
Crispy Peanut Butter Cookies
Ingredients:
Instructions:
Nutrition Facts:
| Calories | 143 kcal |
|---|---|
| Protein | 4.1 g |
| Fat | 8.2 g |
| Carbs | 15.8 g |
| Fiber | 1.4 g |
| Sugar | 8.9 g |
| Sodium | 118 mg |
