Taco Dip the Ultimate Nocook 7Layer Fiesta Party Dip
- The Ultimate Edible Centrepiece: Mastering the 7 Layer Taco Dip
- Why a Chilled Dip Always Wins the Party
- Essential Components for a Next and Level Fiesta Dip
- Preparing Your Mise en Place: Tools and Fresh Prep
- Step and by-Step Assembly: Building the Perfect Dip Mountain
- The Art of the Layer: Sequential Guide to Flavour Stacking
- Maximizing Shelf Life and Safe Serving Practices
- Adaptations and Creative Twists on the Classic Taco Dip Formula
- Recipe FAQs
- 📝 Recipe Card
The Ultimate Edible Centrepiece: Mastering the 7 Layer Taco Dip
Listen, when you are hosting be it for the Super Bowl, a casual summer BBQ, or just a Tuesday night where you decide to invite everyone you know over you need a reliable, high and impact appetizer that doesn’t require you to fire up the oven. You need this taco dip.
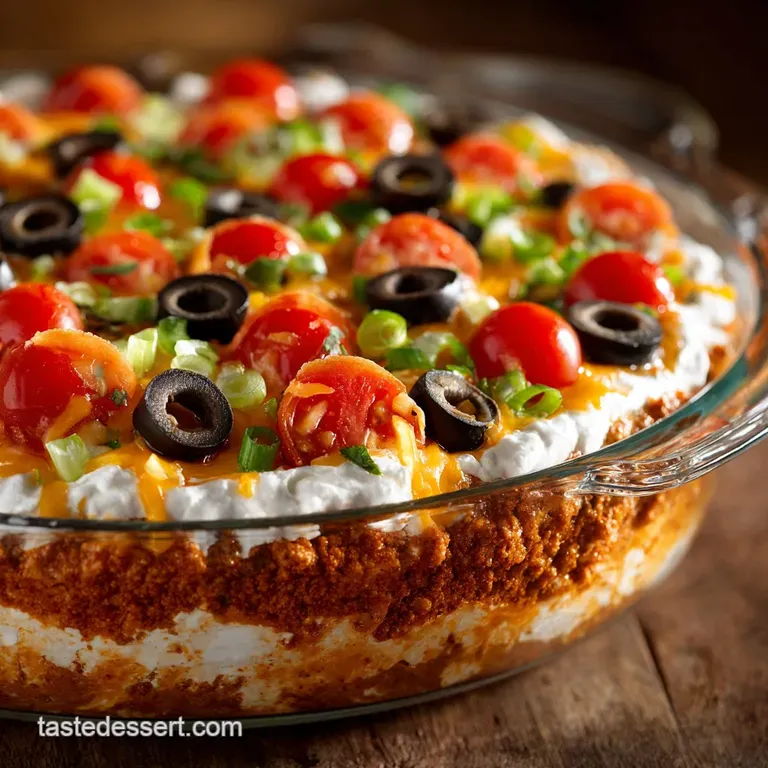
Forget those sad, watery versions you see sometimes. We are building a fortress of flavour here. It’s cool. It’s creamy. It’s got crunch. And honestly, nothing looks better on a platter than those seven vibrant layers. It's the edible centrepiece that immediately screams: "This is a party."
I once tried to make a baked taco dip... what a mistake. It turned into a greasy, curdled mess. This chilled approach? It’s genius. It respects the integrity of the ingredients, and crucially, you make it ahead of time.
Why a Chilled Dip Always Wins the Party
It really comes down to math and timing, right? If you’re busy grilling or managing the main course, the last thing you want is a fussy starter. Chilled dips are your best friend because they are designed to improve after an hour or two in the fridge.
That resting time lets the lime juice do its work and allows the spices to bloom.
Achieving Perfect Texture: The Cool and Creamy Base
The key to a good dip is contrast. We need the soft layers (the refried beans, the guac, and the whipped cream base) to be silky smooth, so they act like mortar for the crunchier toppings (the cheese, the olives, the crisp chips you're scooping with).
I use full and fat everything in the base, and I’m not apologizing for it. Honestly, don't even bother with low and fat sour cream here. It just doesn't deliver the luscious, rich mouthfeel we need to balance the sharp, acidic salsa and lime.
Decoding the Layer Strategy for Maximum Flavour Depth
You can’t just chuck everything in a bowl. Layering is strategic. We put the heavier, denser layers (beans and guacamole) on the bottom to give the chips something sturdy to push against. Then comes the fluffy, whipped cream layer. Why? Because it acts as a buffer.
It protects the creamy layers underneath from the moisture bomb that is the salsa and fresh toppings above. Every single scoop should capture a little bit of the tang, the cream, and the crunch.
A High and Volume Appetizer for Stress and Free Entertaining
This recipe scales beautifully. Need to feed thirty people? Grab a couple of those massive foil catering trays and triple the ingredients. It’s cheap, it’s colourful, and it's substantial enough that folks won't immediately devour all the proper dinner food out of sheer hunger.
It’s a brilliant way to buy yourself an extra hour before the main event.
Essential Components for a Next and Level Fiesta Dip
We are aiming for high and quality, but practical, party food. You don't need fancy components, but you do need to manage moisture. That’s the real secret to avoiding a soggy dip disaster. I always preach using good, chunky salsa just remember to drain it first. And please, use fresh limes.
That tiny bottle of preserved juice? It tastes like regret.
Preparing Your Mise en Place: Tools and Fresh Prep
Preparation is probably 80% of this recipe. Get everything chopped, drained, and mixed into its proper bowl before you start the layering process. Trust me, trying to chop tomatoes while you’re holding a spatula covered in refried beans is a messy business.
Sourcing the Freshest Toppings: Olives, Tomatoes, and Scallions
The fresh stuff is what elevates this from ‘standard buffet dip’ to ‘oh my god, what is this.’ For the tomatoes, use grape or cherry tomatoes, and here is a non and negotiable tip: seed them .
Cut them in half, scoop out the watery insides, and then dice the remaining flesh. This one step reduces the amount of watery seepage onto the cheese layer by about 90%. I’m a fan of using just the green parts of the spring onions (scallions) for colour and a sharp bite.
The Foundation: Selecting the Right Bean and Cream Cheese Bases
For the beans, any standard canned refried beans work, but look for the traditional or black bean style, not the ones that already have lard or cheese added (they can be too runny). Most important is the cream cheese. Take it out of the fridge hours before you start.
If you try to spread cold, stiff cream cheese, it will tear into the guacamole and beans, making the whole thing look like a muddled landscape.
Kitchen Arsenal: Must and Have Tools for Seamless Layering
You don't need much, but you absolutely need one thing:
I cannot stress this enough: invest in a cheap offset spatula. It looks like a tiny trowel. It is the only way to gently spread the white cream layer over the green guacamole layer without mixing them into an unappetizing beige and green mess.
You also need a sturdy serving dish, preferably glass, so people can admire your gorgeous layers from the side.
Customizing the Heat: Choosing Your Salsa and Pepper Level
This is purely personal preference. I stick to a mild or medium chunky salsa because it pleases everyone. But if you know your crowd loves heat, mix a couple of dashes of adobo sauce into your refried beans, or use a truly spicy salsa like a fire and roasted chipotle blend.
For maximum kick, add a thin ring of finely diced pickled jalapeños right under the cheese layer.
Related Recipes Worth Trying
- Peanut Butter Dip The Ultimate Creamy Fluff 10Minute Recipe — Our incredible Peanut Butter Dip is irresistibly rich and velvety perfect for dunking apples or pretzels This easy cream cheese peanut butter dip is a sweet...
- Greek Tzatziki Fish Tacos Mediterranean Crunch with Zesty Tzatziki — This vibrant Greek Tzatziki Fish Tacos recipe swaps the usual salsa for creamy zesty homemade Tzatziki Sauce Enjoy crispy light Mediterranean Recipes ready...
- Crock Pot Chicken Taco Chili Easy SetItandForgetIt Dinner — This Crock Pot Chicken Taco Chili is the ultimate easy loweffort meal Get smoky tender Slow Cooker Shredded Chicken Taco Chili ready for dinner with just 15...
Step and by-Step Assembly: Building the Perfect Dip Mountain
Right then. Everything is chopped, drained, and waiting. Let’s build. Remember to work gently, especially with the middle layers. We are aiming for architectural integrity here.
The Art of the Layer: Sequential Guide to Flavour Stacking
Phase One: Whipping the Tangy Cream Cheese Base
First, take the softened cream cheese and whip it until it’s light and fluffy. Now, blend in the sour cream, garlic powder, and a dash of hot sauce. You want this base to be easy to spread, almost like icing. Set aside. Next, mix your beans with taco seasoning and a splash of lime juice.
Spread this seasoned bean mixture across the bottom of your dish first. This is the bedrock.
Spreading the Refried Beans and Seasoned Ground Meat
(Since some people do the meat layer, I will speak to the consistency needed for this foundation.) If you are subbing the beans for ground beef (which you should cook, drain heavily, and season thoroughly), make sure that beef is completely cool before layering, otherwise, it will melt the layers above.
If using beans (my preferred method), ensure they are flat and even, reaching right up to the edges of the platter. Next, gently spoon and spread your fresh guacamole over the beans. Brush the top with a bit of extra lime juice this is the final defence against the dreaded oxidation (browning).
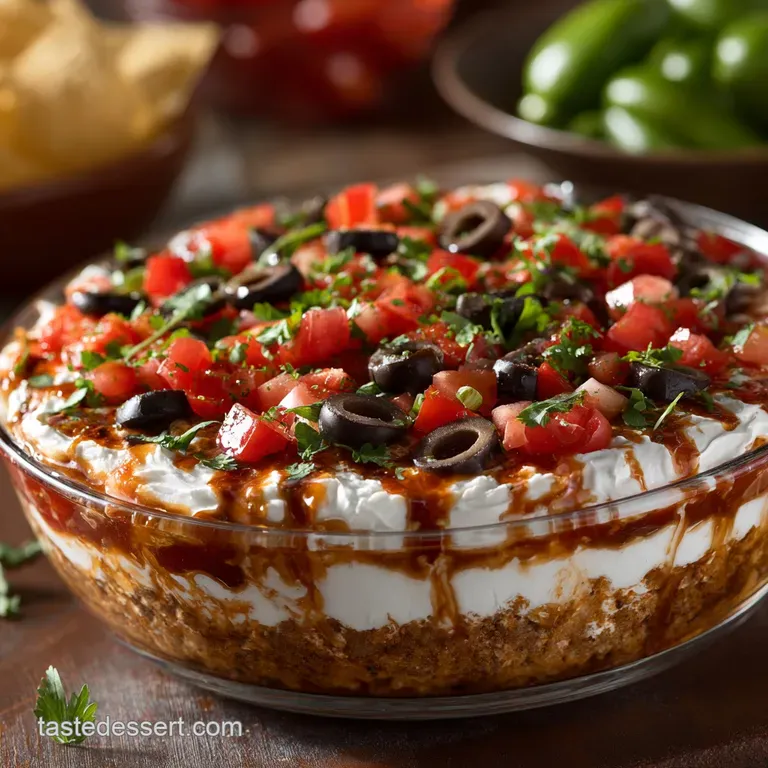
The Salsa Swirl: Achieving Even Coverage Without Mixing
Now for the tricky part. Use the offset spatula to carefully place dollops of the cream mixture over the guacamole layer. Gently, gently spread outward from the centre. Do not drag the spatula all the way down to the green layer! Once the white layer is set, grab that salsa you drained earlier.
Spoon it lightly over the cream. Then, apply your thick layer of shredded cheese.
Final Touches: Decorating and Setting the Fiesta Platter
The dip needs time to chill. Wrap it tight and give it at least 60 minutes. This is critical. Why? It firms up the cream base and allows the layers to settle, which makes it much easier for people to scoop without dragging everything across the plate.
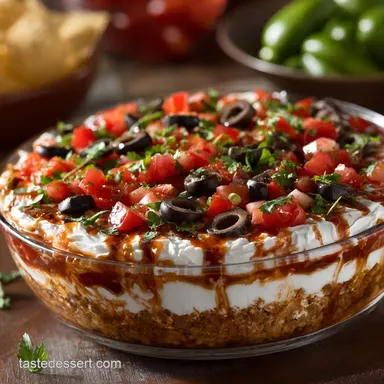
Only when you are ready to serve (five minutes before your guests arrive, ideally) should you scatter those freshly diced, seeded tomatoes, the sliced olives, and the green onions on top. Visual appeal is key.
Maximizing Shelf Life and Safe Serving Practices
This is a chilled dip. It does not like sitting out in the sun. If you are serving this outdoors on a hot day, place the serving platter inside a larger bowl filled with ice. A creamy, sour and cream based dip should really not be left at room temperature for more than two hours.
If it's been out for three hours, sadly, you need to toss it.
Adaptations and Creative Twists on the Classic Taco Dip Formula
This recipe is inherently flexible. Once you master the basic layer structure, you can riff on it endlessly.
Can I Make This Ahead? Optimal Chilling and Storage Guidelines
Yes, you can absolutely make this ahead, but only up to a point. Assemble everything except the tomatoes, olives, and spring onions (Layers 6 and 7). Store the partially finished dip, tightly covered, in the fridge for up to 24 hours.
The day you plan to serve, let it sit out for about 15 minutes before adding those final fresh layers.
Ingredient Swaps: Vegetarian, Keto, and Vegan Friendly Layers
| Dietary Goal | Layer Swap/Adjustment |
|---|---|
| Keto/Low Carb | Skip the refried beans (Layer 1). Replace with a layer of seasoned, cooled ground beef mixed with cream cheese for binder. |
| Vegan | Use vegan sour cream/cream cheese alternatives. Use a cashew and based queso for the cheese layer, or nutritional yeast mixed into the cream base for flavour. |
| Higher Protein | Swap 1/2 the sour cream (Layer 3) for plain, full and fat Greek yoghurt. |
Perfect Pairings: What to Serve Alongside Your Cold Taco Dip
You need sturdy dippers. Skip the flimsy, salted restaurant and style tortilla chips. They will break. Look for thick, robust corn chips or the scoop and style chips.
- Dippers: Sturdy tortilla chips, pita chips, pre and made taco bowls (mini version), carrot and celery sticks.
- Drinks: Cold Mexican lager with a lime wedge, or a crisp, dry white wine like Sauvignon Blanc.
Troubleshooting: Preventing a Soggy or Watery Dip
The main culprit is always moisture from the fresh ingredients. We already talked about draining the salsa and seeding the tomatoes, but here are two more ways to guarantee success:
- Pat the Lettuce: If you are adding a lettuce layer (I usually skip it to prevent sliminess, but if you must), wash it, spin it completely dry, and then pat it down with paper towels.
- The Paper Towel Trick: After spreading your salsa layer (Layer 4), gently lay a clean paper towel over the salsa for about 15 seconds. Blot, remove, and proceed. You will be shocked by how much excess liquid that towel pulls up, and your dip will thank you for it.

Recipe FAQs
Can I make this brilliant Taco Dip ahead of time, or will it go soggy?
Yes, absolutely! Assemble the dip completely up to the cheese layer (Layer 5) up to 24 hours in advance and keep it covered tightly in the fridge; only add the fresh, delicate toppings like tomatoes and olives just before the party kicks off.
I worry about my guacamole layer turning that depressing shade of brown; any genius tricks for keeping it green?
The key to preventing oxidation (browning) is creating a barrier; brush the finished guacamole layer with a thin, extra film of fresh lime juice before adding the cream cheese spread, sealing it off from the air.
My layered dip always seems to go a bit watery what’s the trick to keeping the layers shipshape?
Watery dips are usually caused by liquid leaching from the salsa and tomatoes; drain your chunky salsa thoroughly using a sieve for at least 15 minutes, and feel free to gently blot the finished salsa layer with a paper towel before adding the cheese.
I fancy keeping things a bit lighter; can I swap the full fat sour cream for something else?
Certainly! Full fat Greek yoghurt is a cracking substitute, as it offers the same creamy texture with a nice tangy kick, though you may need to increase the chilling time to ensure the layer sets up properly.
What are the best dippers and garnishes to serve with this magnificent spread?
You’ll want sturdy dippers that won’t snap under the weight look for robust 'scoop' tortilla chips, and for a lighter option, carrot sticks, celery, and cucumber slices are always a winner; for a fun variation, mix some dry Ranch seasoning into the cream layer.
Easy 7layer Taco Dip
Ingredients:
Instructions:
Nutrition Facts:
| Calories | 116 kcal |
|---|---|
| Protein | 7.0 g |
| Fat | 7.0 g |
| Carbs | 7.0 g |
