Easy Biscuit Recipe

- Time: Active 10 minutes, Passive 12 minutes, Total 22 minutes
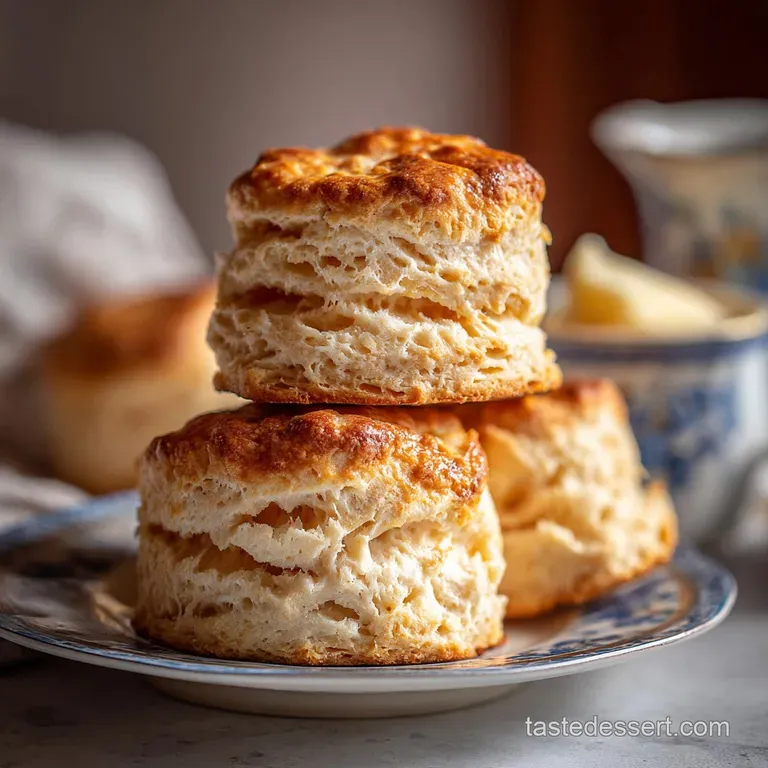
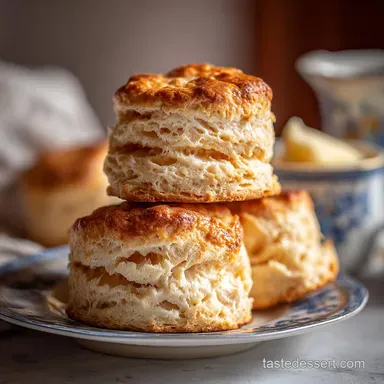
- Flavor/Texture Hook: Shatter crisp golden crust with a velvety, honeycomb layered interior
- Perfect for: Slow weekend mornings or a quick weeknight dinner side
- Bake Fluffy Clouds With This Easy Biscuit Recipe
- The Science of Why it Works
- Comparing Speedy Results vs Traditional Methods
- Identifying Key Components for the Best Rise
- Gathering Your Simple Homemade Pantry Staples
- Essential Tools for Flaky Success
- Bringing Your Golden Flaky Biscuits to Life
- Fixing Common Dough and Baking Issues
- Adjusting the Yield for Any Crowd
- Debunking Biscuit Preparation Myths
- Creative Flavor Variations to Try
- Proper Storage and Repurposing Scraps
- How to Serve and Enjoy
- Recipe FAQs
- 📝 Recipe Card
Bake Fluffy Clouds With This Easy Biscuit Recipe
There is absolutely nothing like the scent of browning butter and toasted flour wafting through the kitchen on a Saturday morning. You know that specific aroma, right? It's warm, yeasty, and promises a breakfast that makes everything feel right with the world.
For years, I struggled with biscuits that turned out more like leaden hockey pucks than airy pastries, and honestly, it was because I was overthinking the process.
We have all been there, staring at a bowl of flour wondering if the butter is "pea sized" enough or if we've already ruined the dough by touching it. I used to think you needed some secret Southern grandma magic to get that iconic rise.
It turns out, the secret isn't magic at all, it's just physics and one very cold grater.
This specific easy biscuit recipe is my absolute favorite because it cuts out the guesswork. We are going to use a frozen butter technique that preserves those precious pockets of fat without the arm workout.
Whether you're topping these with gravy or a drizzle of honey, you're about to become the person everyone asks for the recipe.
The Science of Why it Works
Steam Expansion: When the high heat of the oven hits the frozen butter shreds, the water in the butter evaporates instantly. This rapid phase change creates pockets of steam that physically lift the layers of flour, creating that coveted flaky "shatter" texture.
Gluten Control: Using cold buttermilk and minimal handling keeps the proteins in the flour from bonding too tightly. This prevents the dough from becoming tough or bread like, ensuring the crumb remains tender and velvety.
Comparing Speedy Results vs Traditional Methods
| Method | Prep Time | Texture Result | Skill Level |
|---|---|---|---|
| Frozen Grated Butter | 10 minutes | Maximum flakes and height | Beginner |
| Cubed "Rubbed" Butter | 20 minutes | Crumbly and shortcrust like | Intermediate |
| Drop Style | 5 minutes | Soft and cake like | Beginner |
It is a common mistake to think that more work equals a better biscuit. In reality, the less you do to this dough, the better it behaves. I once spent forty minutes meticulously cutting in butter by hand only to produce the flattest biscuits of my life because the warmth of my kitchen melted the fat before it ever hit the oven.
The frozen butter trick solves this by keeping the fat solid until the very last second. This is the same principle used in high end puff pastry, but we're doing it in a fraction of the time. If you’re looking for a sweet pairing for these, they taste incredible when split open and drizzled with my English Toffee Sauce recipe.
Identifying Key Components for the Best Rise
| Ingredient | Science Role | Pro Secret |
|---|---|---|
| Frozen Butter | Provides structure and steam | Grate it directly into the flour to keep it cold |
| Buttermilk | Activates leavening and adds tang | Use full fat for the most tender, silky crumb |
| Baking Powder | Primary chemical leavener | Ensure it's fresh (less than 6 months old) |
Gathering Your Simple Homemade Pantry Staples
- 2.5 cups all purpose flour (312g): Why this? Provides the perfect protein balance for structure without being too tough.
- Substitute: Pastry flour for an even more delicate, cake like texture.
- 1 tablespoon baking powder: Why this? This is the engine that drives the massive rise we want.
- Substitute: 1 teaspoon baking soda + 1 tablespoon lemon juice (add to milk).
- 1 teaspoon fine sea salt: Why this? Sharpens the buttery flavor and balances the hint of honey.
- Substitute: Kosher salt (use 1.5 teaspoons).
- 0.5 cup unsalted butter, frozen (113g): Why this? Frozen fat is non negotiable for those distinct flaky layers.
- Substitute: Salted butter (just reduce the added salt by half).
- 1.06 cups cold buttermilk (255ml): Why this? The acidity reacts with the leavener for a light, airy interior.
- Substitute: 1 cup whole milk + 1 tablespoon white vinegar (let sit 5 mins).
- 1 tablespoon honey: Why this? Adds a faint floral sweetness and helps the crust brown beautifully.
- Substitute: Granulated sugar or maple syrup.
Essential Tools for Flaky Success
You don't need a professional bakery setup to pull off this easy biscuit recipe. A standard box grater is actually your best friend here. If you have a pastry cutter, you can use it, but honestly, I find the grater gives much more consistent results for beginners.
A heavy duty baking sheet is also key. If your pans are thin, the bottoms of the biscuits might burn before the middles are cooked through. I love using a cast iron skillet for these as well, as the high heat capacity helps the bottoms get that incredible "fried" crunch.
Bringing Your Golden Flaky Biscuits to Life
- Preheat the oven. Set your oven to 425°F (218°C) and line a baking sheet with parchment. Note: A hot oven is vital for that immediate steam burst.
- Whisk dry ingredients. Combine 2.5 cups flour, 1 tablespoon baking powder, and 1 teaspoon salt in a large bowl.
- Grate the frozen butter. Use the large holes of a box grater to shred the 0.5 cup frozen butter directly into the flour. Work quickly until the butter looks like wood shavings.
- Toss the fat. Use a fork to gently coat the butter shreds in flour so they don't clump together.
- Add liquids. Whisk 1 tablespoon honey into 1.06 cups cold buttermilk, then pour it into the flour mixture.
- Form a shaggy dough. Stir with a spatula until the flour is just moistened and looks messy. Stop before it becomes smooth!
- Laminate the dough. Turn the dough onto a floured surface. Pat into a rectangle, fold it in half, turn it 90 degrees, and repeat 5 times. Note: This creates the physical layers.
- Cut the rounds. Pat the dough to 1 inch thickness. Use a 2.5 inch cutter to press straight down. Do not twist the cutter or you will seal the edges and prevent the rise.
- Bake to perfection. Place biscuits on the tray so they are just touching. Bake for 12 minutes until the tops are deeply golden and the kitchen smells like a bakery.
- Brush with butter. Optional but highly recommended, brush the tops with extra melted butter immediately after removing from the oven.
Fixing Common Dough and Baking Issues
Why Your Biscuits Turned Out Heavy and Dense
If your biscuits didn't rise and feel more like stones, the culprit is usually overworking the dough. When you knead the dough too much, you develop gluten. While gluten is great for chewy sourdough, it is the enemy of a tender biscuit. Another common issue is using old baking powder.
If that tin has been in your pantry since the last presidency, throw it out and buy a new one!
Why Your Biscuits Tipped Over While Baking
This usually happens because the dough was too warm or the cutter was twisted during the shaping process. When you twist a biscuit cutter, you "smear" the layers of flour and butter together at the edges, effectively sealing them shut.
The steam can't escape upward, so the biscuit tries to expand sideways, leading to a "slumped" look.
| Problem | Root Cause | Solution |
|---|---|---|
| Tough texture | Over mixing the dough | Stop stirring as soon as the flour disappears |
| No layers | Butter was too warm | Freeze butter for 30 mins before grating |
| Burnt bottoms | Dark baking sheet | Use parchment paper or a light colored pan |
Common Mistakes Checklist
- ✓ Always use frozen butter - room temp fat will make a flat biscuit.
- ✓ Never twist the cutter - press straight down and lift straight up.
- ✓ Keep your buttermilk in the fridge until the exact moment you need it.
- ✓ Place biscuits close together on the pan - they help each other climb higher.
- ✓ Check your oven temp with a thermometer - 425°F is the "sweet spot" for steam.
Adjusting the Yield for Any Crowd
If you are cooking for a larger group, you can easily double this recipe. However, I recommend working in batches for the folding process. If the dough sits out too long while you're cutting 16 biscuits, the butter will start to soften.
For a smaller batch, you can halve the ingredients, but since the recipe calls for 1.06 cups of buttermilk, just use a slightly generous 1/2 cup.
When baking a double batch, keep the second tray of cut biscuits in the fridge while the first tray bakes. This maintains the temperature of the fat. This technique is similar to how I handle the dough in my Chicken and Dumplings recipe, where temperature control ensures the dumplings don't dissolve into the broth.
Debunking Biscuit Preparation Myths
"You must use a wooden bowl to make good biscuits." This is a lovely sentiment, but it's not based on science. While wood doesn't conduct heat as fast as metal, a cold stainless steel bowl works just as well. The temperature of the ingredients matters far more than the material of the bowl.
"Sifting flour is mandatory for a light biscuit." Sifting can help remove lumps, but modern all purpose flour is quite consistent. Simply fluffing your flour with a fork before measuring is usually enough to prevent "packing" the measuring cup and getting too much flour in the mix.
Creative Flavor Variations to Try
Savory Herb and Cheese Biscuits
Add 1/2 cup of sharp cheddar cheese and a teaspoon of dried chives to the dry ingredients. This version is incredible for breakfast sandwiches. It's almost as comforting as a big bowl of my John Wayne Casserole recipe.
Transitioning to an Easy Drop Biscuit Recipe
If you are in a massive hurry, you can add an extra 2 tablespoons of buttermilk to this recipe. Instead of rolling and folding, just use a large spoon to "drop" mounds of dough onto the baking sheet.
You'll lose the distinct layers, but you'll gain a beautiful, craggy, rustic texture that's perfect for soaking up stews.
Proper Storage and Repurposing Scraps
Storage: These are best eaten within 20 minutes of leaving the oven. However, you can store them in an airtight container at room temperature for up to 2 days. To reheat, wrap them in foil and pop them in a 350°F oven for 5 minutes.
Avoid the microwave, as it will make the crust chewy and tough.
Zero Waste: Never throw away the scraps after cutting your rounds! Gently push the remaining dough bits together (don't knead them) and cut one or two "ugly" biscuits. They might not be as pretty, but they taste just as good.
Alternatively, bake the scraps as "biscuit fries" and serve them with jam for the kids.
How to Serve and Enjoy
The best way to eat these is split open while they're still steaming, with a thick slab of salted butter melting into the crannies. If you're feeling fancy, a dollop of strawberry preserves or a drizzle of spicy honey takes this easy biscuit recipe to a whole new level.
I also love using these as a base for strawberry shortcake. Since there is a hint of honey in the dough, they pair beautifully with sweetened whipped cream and macerated berries. Whatever you do, make sure you eat at least one while it's still warm enough to melt the butter on contact. That's the cook's reward!

Recipe FAQs
What is the secret to a good biscuit?
Keep the fat cold and handle the dough minimally. Cold butter creates steam pockets for flakiness, and overworking develops gluten, leading to tough biscuits. If you enjoyed mastering temperature control here, apply it to our Best Homemade Vanilla Bean Ice Cream Recipe French: Velvety Smooth.
How do you make 3 ingredient biscuits with self rising flour?
Mix 2 cups of self rising flour with 1 cup of heavy cream until just combined. This creates a very wet dough that is then spooned onto a baking sheet and baked at 425°F (218°C) for 12-15 minutes.
What ingredients do I need for biscuits?
You'll need all-purpose flour, baking powder, salt, cold butter, and cold buttermilk. A touch of honey is optional but recommended for browning and subtle sweetness.
Can I turn pancake mix into biscuits?
Yes, but it requires adding fat and liquid. Whisk in cold butter (cubed or grated) and cold milk or buttermilk to the pancake mix until a dough forms, then proceed as with a standard biscuit recipe.
Why are my biscuits tough?
You've likely overmixed the dough or used butter that was too warm. Overworking develops gluten, making them chewy. Warm butter melts before baking, preventing the steam pockets that create flakiness. If you enjoyed controlling dough texture here, see how we adapt similar techniques in our Easy NoKnead Focaccia Crispy Outside Fluffy Dough.
How do I get tall, flaky biscuits?
Use very cold, grated butter and fold the dough multiple times. Grating frozen butter ensures small, distinct pieces that create steam pockets during baking. Folding the dough, similar to puff pastry, builds the layers. This is the key principle for that signature rise.
Can I use milk instead of buttermilk for biscuits?
Yes, but you should add an acid to create a similar tenderizing effect. Mix 1 cup of whole milk with 1 tablespoon of white vinegar or lemon juice and let it sit for 5 minutes before using.
Easy Biscuit Recipe
Ingredients:
Instructions:
Nutrition Facts:
| Calories | 264 kcal |
|---|---|
| Protein | 5.1 g |
| Fat | 12.1 g |
| Carbs | 33.3 g |
| Fiber | 1.1 g |
| Sugar | 3.6 g |
| Sodium | 475 mg |
