Homemade Butterscotch Fudge: Velvety and Rich
- Time: Active 10 minutes, Passive 5 minutes, Total 15 minutes
- Flavor/Texture Hook: Deeply buttery, salted caramel notes with a velvety, melt away finish
- Perfect for: Holiday gifting, last minute dessert platters, or beginner sugar work
- The Ultimate Creamy Butterscotch Fudge Recipe
- Reasons This Texture Stays Silky
- Component Analysis for Better Baking
- Selecting Your Key Ingredients
- Essential Tools for Smooth Melting
- Steps for Velvety Butterscotch Fudge
- Solving Common Fudge Problems
- Creative Twists and Ingredient Swaps
- Debunking Popular Fudge Myths
- Keeping Your Fudge Fresh Longer
- Best Ways to Serve Fudge
- Recipe FAQs
- 📝 Recipe Card
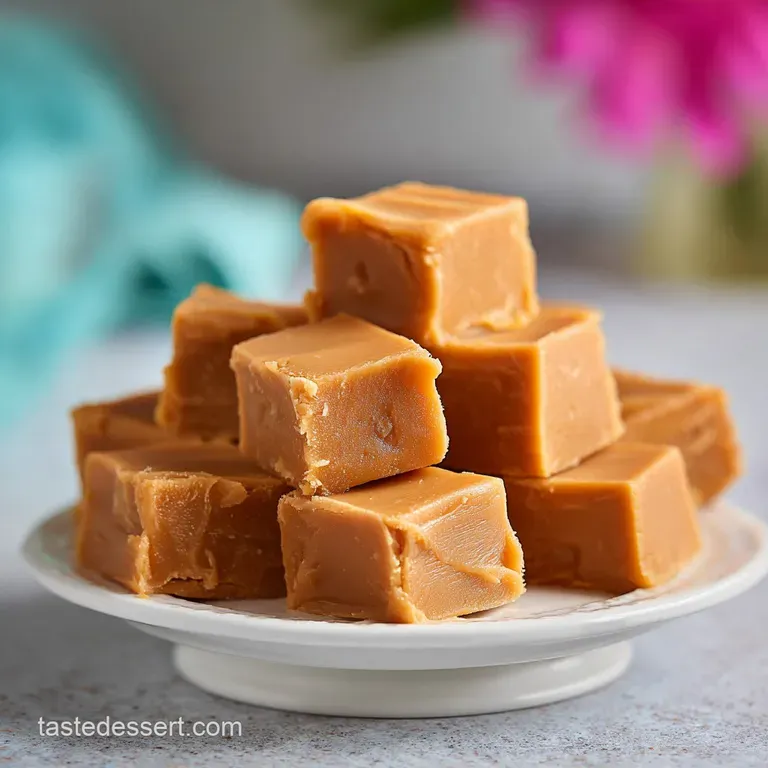
The Ultimate Creamy Butterscotch Fudge Recipe
The second the butter hits the pan and meets those butterscotch chips, the kitchen transforms into a warm, sugary hug. I still remember the first time I tried making this. I was so worried about the "seizing" everyone talks about with melting chips, but then I saw that first swirl of gold turning into a shimmering, silky pool of liquid gold.
It is one of those rare kitchen moments where the payoff feels way higher than the effort you actually put in. You aren't standing over a boiling pot of sugar for forty minutes, praying to the candy thermometer gods.
Instead, we are looking at a 15 minute total time commitment that delivers a fudge so smooth it practically glows. This isn't that crumbly, dry fudge that leaves you reaching for a glass of water after one bite.
It is soft, rich, and has that specific "shatter" on the edges when you first bite in, followed by a buttery interior that just melts. We are going for a quick win here, but one that tastes like you spent the entire afternoon hovering over the stove.
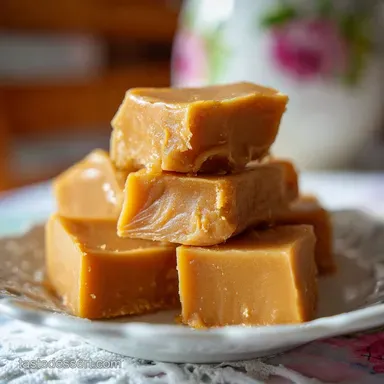
You'll love how this sets up. There is no guessing game. If you follow the low and slow heat rule, you are guaranteed a batch that slices into neat, sharp squares every single time. It is wonderful for when you need a "wow" gift but your schedule is already packed.
Honestly, once you see how easy this is, you might never go back to the old-fashioned boiling method again. Let's get into what makes this specific technique so reliable.
Reasons This Texture Stays Silky
Fat Stabilization: The butter and sweetened condensed milk create a heavy fat to liquid ratio that prevents the sugar in the chips from recrystallizing into a grainy mess.
The Marshmallow Matrix: Marshmallow creme acts as a "doctoring agent," introducing corn syrup and gelatinous proteins that physically block sugar crystals from binding together.
Temperature Control: By staying below a simmer, we avoid breaking the emulsion, which ensures the fats stay suspended in the sugar for a silky mouthfeel.
Moisture Balance: Sweetened condensed milk has already had its water content reduced, meaning the fudge stays stable without needing to boil off excess liquid.
| Method | Time | Texture | Best For |
|---|---|---|---|
| This Quick Method | 15 minutes | Velvety and soft | Busy weeknights and gifting |
| Classic Boiled | 45 minutes | Firm and slightly crumbly | Traditionalists with thermometers |
| Microwave Version | 10 minutes | Very soft/variable | Absolute emergencies only |
This table shows why we are sticking to the stovetop melt method today. It gives you the best balance of professional texture without the high stress environment of boiling sugar. While the microwave is faster, it often creates "hot spots" that can scorch the butterscotch chips, ruining that delicate, toasted sugar flavor we are after.
Component Analysis for Better Baking
| Ingredient | Science Role | Pro Secret |
|---|---|---|
| Butterscotch Chips | Primary flavor and structure | Choose chips with real cocoa butter or milk solids for a smoother melt. |
| Condensed Milk | Emulsifier and sweetener | Never substitute with evaporated milk; the sugar content here is vital for the set. |
| Marshmallow Creme | Crystallization inhibitor | Keep it at room temperature so it folds in without cooling the fudge too fast. |
| Unsalted Butter | Gloss and mouthfeel | Use high-quality butter with 82% fat to ensure the fudge looks shimmering. |
When you are choosing your ingredients, remember that the quality of your chips defines the final flavor. Some cheaper brands use mostly palm oil, which can feel a bit waxy on the roof of your mouth. Looking for a bag that mentions "real butter" or "milk solids" will give you that authentic, old-fashioned taste.
Selecting Your Key Ingredients
To get this right, you need 3 cups (510g) of high-quality butterscotch chips. Why this? They provide the base flavor and the essential fats for the solid set. You'll also need 1 can (396g) of sweetened condensed milk to act as your binder.
For that signature rich finish, we use 1/2 cup (115g) of unsalted butter. Don't forget 1 tsp (5ml) of pure vanilla extract and 1/4 tsp (1.5g) of fine sea salt to balance the sweetness.
The secret to the "cloud like" bite is 1 jar (198g) of marshmallow creme. If you want a bit of a crunch, 1/2 cup (60g) of toasted pecans or walnuts works beautifully, though it's optional.
Finally, a pinch of flaky sea salt for the top is the "chef's kiss" that makes this look and taste like it came from a high end confectionery.
- Butterscotch Chips (510g): Swap for peanut butter chips if you want a different flavor profile.
- Sweetened Condensed Milk (396g): There is no direct dairy-free swap that sets exactly the same, though coconut condensed milk is the closest attempt.
- Unsalted Butter (115g): Salted butter works too, just omit the extra fine sea salt in the recipe.
- Marshmallow Creme (198g): You can use 2 cups of mini marshmallows melted down, but the creme results in a smoother finish.
- Pecans (60g): Try toasted macadamia nuts for a tropical twist.
- Vanilla Extract (5ml): Bourbon or dark rum adds a wonderful depth if you're feeling adventurous.
Essential Tools for Smooth Melting
You don't need a pantry full of gadgets for this, but a heavy bottomed saucepan is your best friend. A thin pan will have hot spots that can burn the sugar before the chips even finish melting. You also want a silicone spatula.
It’s better than a wooden spoon because it can scrape every last bit of that sticky marshmallow creme from the sides of the bowl, ensuring your ratios stay perfect.
An 8x8-inch square baking pan is the standard size here. If you go larger, your fudge will be thin like a bark; if you go smaller, it might be too thick to bite through easily. Lining it with parchment paper is non negotiable.
I like to leave a little "overhang" on the sides think of them as handles so you can just lift the whole block of fudge out once it's set. It makes slicing so much cleaner.
Steps for Velvety Butterscotch Fudge

- Line your 8x8-inch pan with parchment paper. Note: Lightly greasing the paper with butter ensures the fudge peels away without any tearing.
- Combine the 510g butterscotch chips, 396g condensed milk, and 115g butter in your saucepan over medium low heat.
- Stir constantly for about 5 minutes until the mixture is uniform and shimmering.
- Watch for the chips to fully disappear into the liquid. until no lumps remain and the texture is silky.
- Remove the pan from the heat immediately. Note: Overheating after the melt can cause the oils to separate.
- Gently fold in the 198g marshmallow creme, vanilla, and fine sea salt until the white streaks completely vanish.
- Stir in the 60g of toasted nuts if you are using them.
- Pour the mixture into the prepared pan and smooth the top until the surface is flat and glossy.
- Sprinkle with flaky sea salt while the surface is still slightly tacky.
- Chill in the refrigerator for 2 hours until the fudge is firm to the touch.
Solving Common Fudge Problems
Why Your Fudge Feels Oily
If you see beads of oil sitting on top of your fudge as it cools, the heat was likely too high during the melting phase. When the fats in the butter and the chips get too hot, they break away from the sugar solids. It's like a broken vinaigrette.
You can sometimes save this by stirring vigorously off the heat for a minute to try and force the emulsion back together before pouring it into the pan.
Grainy or Sandy Texture
This usually happens if the sugar in the condensed milk or the chips crystallizes. It can also happen if you scrape the sides of the saucepan too aggressively where sugar might have dried out. To avoid this, keep your heat low and ensure every single chip has melted into the liquid before you add the marshmallow creme.
The creme is your "insurance policy" against graininess, so make sure it's fully incorporated.
| Problem | Root Cause | Solution |
|---|---|---|
| Soft/Gooey Set | Too much liquid or under chilled | Ensure you used a full 14oz can and chill for at least 2 hours. |
| Burnt Bottom | Heat was too high | Use a heavy bottomed pan and keep the flame on medium low. |
| Separated Oil | Temperature shock | Add the marshmallow creme slowly to temper the mixture. |
A quick note on the temperature: we aren't looking for a boil. If you see big bubbles popping, turn it down! You just want enough heat to turn solids into liquids.
Common Mistakes Checklist - ✓ Don't walk away from the stove; butterscotch can scorch in seconds. - ✓ Use a "low and slow" approach to prevent the butter from separating. - ✓ Avoid using "low-fat" condensed milk; the fat is necessary for the structure.
- ✓ Toast your nuts beforehand to ensure they stay crunchy inside the soft fudge. - ✓ Let the fudge sit at room temperature for 10 minutes before slicing for the cleanest cuts.
Creative Twists and Ingredient Swaps
If you want to change things up, the base of this recipe is incredibly forgiving. I once tried adding a splash of bourbon instead of vanilla, and the result was incredible. It gave the butterscotch a smoky, adult depth that paired perfectly with the sea salt. If you love the texture but want something nuttier, my Peanut Butter Fudge is a massive hit with a very similar "quick set" method.
For those who love a bit of drama in their dessert, try marbling. You can melt 1/2 cup of dark chocolate chips and swirl them through the butterscotch just before it sets. The contrast between the bitter chocolate and the sweet butterscotch is stunning.
If you find the recipe a bit too sweet, increasing the salt to 1/2 tsp or adding some chopped pretzels can provide a salty crunch that cuts right through the richness.
| Servings | Chips (g) | Butter (g) | Pan Size |
|---|---|---|---|
| 18 (Half) | 255g | 57g | 9x5 Loaf Pan |
| 36 (Standard) | 510g | 115g | 8x8 Square |
| 72 (Double) | 1020g | 230g | 9x13 Rect. |
When scaling up, remember that the "melt time" will increase. A double batch might take 8-10 minutes to become fully smooth rather than the standard 5 minutes. Don't rush it by turning up the heat; just be patient with the stirring.
Debunking Popular Fudge Myths
One of the biggest myths is that you absolutely need a candy thermometer to make "real" fudge. While that's true for the old school sugar and milk boiling method, modern stabilizers like marshmallow creme and condensed milk do the heavy lifting for us.
You are creating a stable emulsion rather than a specific crystalline structure, which is much more forgiving for home cooks.
Another misconception is that you can't use "chips" for high-quality fudge. People think chips are just for cookies, but when melted correctly with extra fat (butter) and protein (milk solids), they create a texture that is indistinguishable from fudge made with professional couverture.
The trick is simply not overheating them, as they contain stabilizers that can become grainy if scorched.
Keeping Your Fudge Fresh Longer
This fudge is a powerhouse when it comes to shelf life. Because of the high sugar and fat content, it doesn't spoil easily. At room temperature in an airtight container, it will stay velvety for about 5 to 7 days. However, for the best "snap" when you bite into it, I recommend keeping it in the fridge.
It will stay perfectly fresh for up to 2 weeks there. Just make sure to put parchment paper between the layers so they don't stick together.
If you find yourself with leftover crumbs or small "end pieces" after slicing, don't throw them away! Those little butterscotch nuggets are gold. I love to freeze the scraps and then toss them into a blender with vanilla bean ice cream for a "fudge swirl" milkshake. You can also press the crumbs into a pie crust for a hidden layer of sweetness under a chocolate silk pie. These squares are wonderful on a dessert board next to some Dark Chocolate Truffles.
Best Ways to Serve Fudge
When you're ready to serve, don't just pull the pan out of the fridge and start hacking away. Let it sit on the counter for about 15 minutes. This allows the fats to soften just enough that the knife glides through like butter.
Use a long, sharp knife and wipe it clean with a warm, damp cloth between every single cut. This is how you get those sharp, professional edges that look like they came from a fancy candy shop.
Pairing this fudge is all about balance. Since it's quite sweet, it goes beautifully with a very dark, bitter espresso or a strong black tea. If you're putting together a holiday platter, place the butterscotch squares next to something tart, like dried cranberries or fresh raspberries.
The acidity of the fruit cuts through the heavy butteriness of the fudge, making you want to go back for a second (or third) square. Trust me, it disappears fast!

Recipe FAQs
What is the secret to good fudge?
Constant, gentle stirring is the key. By maintaining a uniform, shimmering texture over medium low heat, you ensure the fats remain properly emulsified rather than separating.
What is the real difference between caramel and butterscotch?
Butterscotch relies on butter and brown sugar, while caramel uses white sugar. If you enjoyed mastering the sugar fat balance in this recipe, see how the same principles of flavor depth apply to our Sticky Toffee Pudding.
What not to do when making fudge?
Avoid using high heat. Excess heat will cause the fats to separate, leading to a grainy, oily texture instead of the intended velvety finish.
What happens when you add sweetened condensed milk to melted butterscotch chips?
It creates a stable, creamy suspension. The sugars in the condensed milk bind with the fats in the chips to form a smooth, sliceable fudge once chilled.
How to ensure the fudge releases easily from the pan?
Line the 8x8-inch pan with parchment paper, leaving an overhang on two sides. Lightly greasing the parchment with butter provides an extra layer of insurance for clean, tear free removal.
How to achieve the best texture?
Refrigerate the mixture for at least 2 hours. This resting period is critical for the emulsion to set completely, resulting in the perfect density for your 36 squares.
Is it true I should stir in the marshmallow creme while the pan is still on the heat?
No, this is a common misconception. You must remove the saucepan from the heat immediately after the butterscotch mixture is uniform before folding in the marshmallow creme to maintain the proper consistency.
Easy Homemade Butterscotch Fudge
Ingredients:
Instructions:
Nutrition Facts:
| Calories | 151 kcal |
|---|---|
| Protein | 1.2 g |
| Fat | 7.5 g |
| Carbs | 20.1 g |
| Fiber | 0.1 g |
| Sugar | 18.2 g |
| Sodium | 31 mg |
