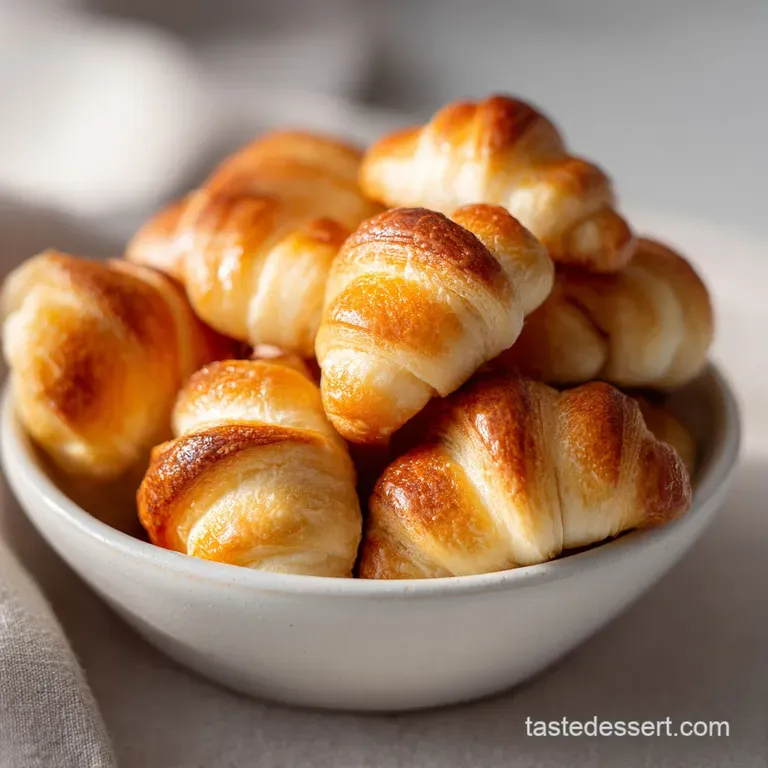
Flaky Homemade Crescent Rolls

- Time: Active 30 minutes, Passive 135 minutes, Total 165 minutes
- Flavor/Texture Hook: Flaky, honey kissed layers with a velvety, cloud like center
- Perfect for: Holiday centerpieces, luxurious brunch spreads, or elevating a weeknight dinner
- Sculpting the Most Aesthetic Crescent Rolls
- Why the Layers Stay Separate
- Component Deep Dive for Flawless Texture
- Essential Tools for Your Bread Canvas
- Precise Steps for Rolling Golden Masterpieces
- Navigating Potential Baking Obstacles and Fixes
- Playful Palette Swaps and Creative Variations
- Maintaining the Shattering Crust and Softness
- Elevating Your Presentation with Plating Levels
- Classic Method vs Accelerated Results
- Debunking Common Dough Myths
- Recipe FAQs
- 📝 Recipe Card
Sculpting the Most Aesthetic Crescent Rolls
The first time I pulled a tray of these from the oven, the kitchen transformed into a whimsical workshop of golden light and the intoxicating scent of toasted honey. I remember watching the steam swirl from the mahogany peaks, each roll looking like a tiny, edible sculpture.
There is something profoundly artistic about the way a simple triangle of dough transforms into a graceful, tiered crescent. It's not just baking, it's a slow, rhythmic dance of patience and precision that yields a texture so velvety it practically melts the moment it hits your tongue.
We've all seen those canisters in the grocery store that pop with a startling thud, but those cannot capture the ethereal lightness of a dough made by hand. When you make these from scratch, you're in control of the richness.
You see the yeast bloom into a frothy, living foam and feel the gluten develop into a silky, elastic ribbon beneath your fingers. This recipe is my favorite way to bring a touch of gallery worthy elegance to the table, proving that the most beautiful art is often the kind you can tear apart and share with friends.
This isn't about rushing to the finish line, it's about the process of creation. From the moment the raw honey meets the warm water to the final sprinkle of flaky sea salt, every step is a brushstroke on your culinary canvas.
You'll learn how to handle the dough so it stays tender, how to laminate with softened butter for those signature "shatter" layers, and how to achieve a crust that gleams like polished amber. Let's create something beautiful together.
Why the Layers Stay Separate
Understanding the internal architecture of your bread is the first step toward mastery. It isn't magic, it's a playful interaction between temperature and fat that creates that coveted, airy interior we all crave.
- Fat Barrier Technique: Spreading softened butter between the layers creates a physical wall that prevents the dough from fusing back into a solid mass during the second rise.
- Honey Hydration: Raw honey acts as a natural humectant, pulling moisture into the crumb to ensure the rolls stay velvety even hours after they leave the heat.
- Yeast Vitality: Keeping the water between 105°F and 110°F ensures the yeast wakes up energetically without being scalded, leading to a more dramatic, airy lift.
- Milk Protein Softening: The fats and proteins in whole milk interfere with long gluten strands, resulting in a bite that is tender rather than chewy or bread like.
| Servings | Flour Amount | Butter for Filling | Pan Size | Total Bake Time |
|---|---|---|---|---|
| 8 Rolls | 1.87 cups | 2 tbsp | 9 inch Round | 15 minutes |
| 16 Rolls | 3.75 cups | 4 tbsp | Half Sheet Pan | 15 minutes |
| 32 Rolls | 7.5 cups | 8 tbsp | Two Sheet Pans | 18 minutes |
When you're scaling this recipe up for a large gathering, remember that the dough will take slightly longer to knead because of the increased volume. If you're making 32 rolls, work in two separate batches for the rolling and shaping phase to prevent the dough from over proofing on the counter while you work.
The beauty of this recipe is its adaptability, whether you're hosting an intimate tea for two or a grand festive feast.
Component Deep Dive for Flawless Texture
Every element in this recipe serves a visual and structural purpose, contributing to the final masterpiece. We aren't just tossing things in a bowl, we're selecting a palette of high-quality ingredients that work in harmony.
| Ingredient | Science Role | Pro Secret |
|---|---|---|
| Active Dry Yeast | Leavening agent | Always bloom with honey first to check for "bubbles of life" before adding flour. |
| Grass Fed Butter | Flavor & Fat | Use high fat butter (like Kerrygold) for a deeper yellow hue and a richer, silkier mouthfeel. |
| Raw Honey | Moisture & Color | Honey caramelizes faster than white sugar, giving the rolls that signature mahogany glow. |
| Unbleached AP Flour | Structural Frame | Provides enough protein for height while keeping the layers delicate enough to shatter. |
Choosing the right flour is vital for the "shatter" effect. If you use bread flour, the rolls might become too sturdy, almost like a bagel. Stick to unbleached all purpose flour for that whimsical, cloud like interior that pairs so well with a crisp exterior. For a different texture profile that's a bit more robust, you might enjoy experimenting with the techniques found in my Homemade Kaiser Rolls, which focus on a different style of crust development.
Essential Tools for Your Bread Canvas
You don't need a gallery full of gadgets to make stunning bread, but a few specific tools will make the process feel much more like an art project than a chore.
- Stand Mixer: A KitchenAid or similar mixer with a dough hook is your best friend here, as it handles the "development knead" with consistent power, ensuring a silky finish.
- Pizza Cutter: Forget a knife for the triangles, a sharp pizza wheel creates clean, precise edges that help the rolls keep their shape as they expand.
- Parchment Paper: This ensures the bottoms of your rolls don't get too dark and allows for an easy release so the delicate points don't tear.
- Pastry Brush: A silicone brush is perfect for painting on that final honey butter wash without deflating the proofed dough.
- Digital Thermometer: Precision is key. Use it to check that your water is exactly 105°F-110°F to keep the yeast happy.
Precise Steps for Rolling Golden Masterpieces
- In your stand mixer bowl, combine 1/2 cup warm water, 2 tbsp raw honey, and 2 1/4 tsp active dry yeast. Note: Let it sit for 5–8 minutes until a frothy foam forms, proving the yeast is alive.
- Add 1/2 cup whole milk (room temp), 4 tbsp melted grass fed butter, one lightly beaten egg, and 1 tsp fine sea salt.
- Gradually incorporate 3.75 cups all purpose flour. Knead with the dough hook until silky and pulling away from the sides.
- Transfer the dough to a lightly greased glass bowl. Cover it and let it rise in a warm, draft free spot for 2 hours until doubled in size and airy.
- Gently punch down the dough to release large air bubbles. Roll it out on a lightly floured surface into a large, thin, perfectly round circle.
- Spread 4 tbsp of softened unsalted butter evenly across the entire surface. Note: This is the secret to the internal lamination.
- Using a pizza cutter, divide the dough into 16 equal triangles. Roll each triangle tightly from the wide base toward the point.
- Place rolls on a lined baking sheet with the "tail" tucked underneath. Bake at 375°F (190°C) for 12–15 minutes until the crust is golden brown and mahogany colored.
- Brush with additional honey butter wash while sizzling hot.
- Sprinkle with 1 tsp flaky sea salt until the crystals sparkle against the dark crust.
Navigating Potential Baking Obstacles and Fixes
Even the most seasoned artist runs into a smudge now and then. If your rolls aren't behaving, it's usually a small environmental factor that needs a quick adjustment.
Why Your Crescent Rolls Feel Heavy
If your rolls turn out more like hockey pucks than clouds, the culprit is usually the temperature of your liquid or the age of your yeast. Yeast is a living organism; if the water is too cold, it stays dormant. If it's too hot, you've essentially scalded it. Also, ensure you aren't adding too much flour.
The dough should be slightly tacky to the touch, not dry and stiff.
| Problem | Root Cause | Solution |
|---|---|---|
| Dough won't rise | Water was too hot | Keep liquids under 110°F. If it's too hot, start over. |
| Rolls unrolling | Tail not tucked | Always place the point of the triangle underneath the roll on the pan. |
| Bottoms burning | Dark baking sheet | Use a light colored pan or double up the parchment paper to insulate. |
Common Mistakes Checklist
- ✓ Ensure the egg and milk are at room temperature to avoid shocking the yeast.
- ✓ Don't skip the 2 hour rise; this is where the whimsical, airy structure is built.
- ✓ Pat the dough gently when punching down; you want to deflate it, not bruise it.
- ✓ Keep the butter for spreading "softened," not melted, so it stays in place during rolling.
- ✓ Check your oven temperature with a separate thermometer to ensure a true 375°F.
Playful Palette Swaps and Creative Variations
The beauty of this dough is that it acts as a neutral canvas for your imagination. Once you've mastered the classic, you can start playing with colors, scents, and textures to suit any mood.
- For a Savory Herb Twist: Mix 1 tbsp of dried rosemary and thyme into the flour before kneading for an earthy, garden fresh aroma.
- To Make It Vegan Friendly: Swap the butter for a high-quality vegan block (like Miyoko's), use agave instead of honey, and replace the milk with full fat oat milk.
- For a Whole Grain Boost: Replace 1 cup of AP flour with white whole wheat flour. Note: This adds a nutty flavor but results in a slightly denser, heartier roll.
- Spiced Dessert Rolls: Add a teaspoon of cinnamon to the softened butter before spreading it on the dough for a whimsical, churro like experience.
If you find yourself loving the process of shaping individual portions of dough, you might also enjoy making my Pumpkin Dinner Rolls, which use a similar enrichment technique but bring in the warmth of autumn spices. Both recipes rely on that perfect balance of fat and flour to achieve a show stopping result.
| Original Ingredient | Substitute | Why It Works |
|---|---|---|
| Raw Honey | Maple Syrup | Similar sugar profile. Note: Adds a distinct woody sweetness. |
| Whole Milk | Heavy Cream | Higher fat content. Note: Creates an even richer, more decadent crumb. |
| All Purpose Flour | Bread Flour | Higher protein. Note: Makes the rolls chewier and more bread like. |
Maintaining the Shattering Crust and Softness
To keep your edible art in peak condition, you have to protect it from the elements. Oxygen is the enemy of a velvety crumb, so seal them up tight as soon as they have cooled to room temperature.
Storage: Keep your rolls in an airtight container or a heavy duty zip top bag for up to 3 days. If they lose their "shatter," a quick 5 minute stay in a 300°F oven will revive that golden crust beautifully.
Avoid the microwave if you can, as it tends to make the dough rubbery rather than soft.
Freezing: These are wonderful for meal prep. You can freeze the baked rolls for up to 2 months. To reheat, let them thaw at room temperature and then warm them in the oven. For a "zero waste" tip, if you have leftovers that have gone a bit stale, don't toss them!
They make the most incredible base for a savory bread pudding or can be pulsed into buttery breadcrumbs for topping a gratin.
Elevating Your Presentation with Plating Levels
Presentation is where the "art" of baking truly shines. Depending on the occasion, you can style these rolls to fit any aesthetic, from a rustic family gathering to a high end dinner party.
- Level 1: Simple & Rustic: Pile the rolls high in a wicker basket lined with a clean linen napkin. The overlapping crescents create a natural, unstudied beauty that invites people to dig in.
- Level 2: Polished & Elegant: Arrange the rolls in a circular pattern on a white marble slab. Place a small ramekin of honey butter in the center, topped with an extra pinch of flaky salt and a single sprig of fresh parsley for a pop of color.
- Level 3: Restaurant Style: Serve each roll on a small individual bread plate. Using a sifter, lightly dust the top with a tiny amount of "flour snow" (or just leave the honey glaze to shine) and serve alongside a quenelle of whipped brown butter.
| Plating Tweak | Visual Effect | Best For |
|---|---|---|
| Linen Basket | Warm & Cozy | Sunday Roast |
| Marble Slab | Modern & Chic | Cocktail Parties |
| Individual Plates | Sophisticated | Formal Holidays |
Classic Method vs Accelerated Results
Sometimes you have all afternoon to play with dough, and other times you need a golden roll on the table fast. While the classic 2 hour rise yields the most complex flavor, there are ways to speed things up if you're in a pinch.
| Feature | Classic Method | Accelerated Version |
|---|---|---|
| First Rise | 120 minutes | 45 minutes (use rapid rise yeast) |
| Texture | Velvety and layered | Softer, more "bun like" |
| Flavor | Deep, honey fermented | Mild and buttery |
If you want the best of both worlds speed and flavor try the "3 bullet decision shortcut": If you want maximum flakiness, stick to the 2 hour room temp rise to let the gluten relax.
If you want deeper flavor, let the dough rise in the fridge overnight; the cold fermentation develops incredible complexity. If you want extra height, place a pan of hot water on the rack below the rolls during their final proof to create a humid "proofer" environment.
Debunking Common Dough Myths
There are many "old wives' tales" in the world of bread making that can actually hinder your progress. Let's clear up a few misconceptions so you can bake with confidence.
One common myth is that you must "kill" the yeast if you add salt directly to it. While it's true that high concentrations of salt can inhibit yeast, in a standard recipe like this, it's perfectly fine to add them into the mix together. The flour acts as a buffer.
Another myth is that the more you knead, the better the bread. In reality, you can over knead dough, making it tough and leathery rather than whimsical and light. Once it looks silky and pulls away from the bowl, stop!
Finally,, many people believe that you need a "perfectly" warm house to rise bread. While 75°F is ideal, your dough will rise in a cooler room; it will just take longer. This slow rise often results in a better flavor profile. If you're interested in more bread logic, the fermentation process in these rolls is quite similar to the structured rise used in my Homemade Kaiser Rolls, though the final shaping is where the paths diverge. Trust the process, watch the dough, and let your senses guide your art.

Recipe FAQs
What is the secret to making perfect crescent rolls?
Patience during the 2-hour rise is the true secret. Allowing the dough to proof fully in a warm, draft free environment creates the airy, whimsical structure that defines a professional grade roll.
What are the ingredients in this crescent roll dough?
The dough consists of simple, high-quality staples. You will need warm water, active dry yeast, raw honey, room temperature whole milk, melted grass fed butter, one lightly beaten egg, fine sea salt, and unbleached all-purpose flour, with softened butter for the inner layers.
What is the difference between a croissant and a crescent roll?
A croissant relies on laminated butter layers, whereas a crescent roll is a softer, enriched yeast bread. If you enjoy the delicate structural work required for these rolls, you can apply similar dough handling techniques to create fluffy sweet rolls.
What are common crescent dough mistakes?
Using cold ingredients is a major error. Ensure your milk and egg are at room temperature to avoid shocking the yeast, which can stall the fermentation process and lead to dense, flat rolls.
How to achieve the signature mahogany colored crust?
Bake the rolls at 375°F for 12 to 15 minutes. Using a separate oven thermometer is the best way to verify your oven is hitting this precise temperature, ensuring the exterior browns perfectly without drying out the interior.
How to roll the dough triangles properly?
Start from the wide base and roll firmly toward the point. Keep your softened butter at a spreadable consistency so it doesn't melt away; this layer helps the internal coils separate beautifully during the bake.
Is it true I should let the yeast sit for longer than 8 minutes?
No, this is a common misconception. You only need to let the yeast, honey, and warm water sit for 5 8 minutes until a frothy foam forms, which indicates the yeast is active and ready to be incorporated into the flour.
Flaky Homemade Crescent Rolls

Ingredients:
Instructions:
Nutrition Facts:
| Calories | 175 kcal |
|---|---|
| Protein | 3.9 g |
| Fat | 6.8 g |
| Carbs | 24.6 g |
| Fiber | 0.8 g |
| Sugar | 2.9 g |
| Sodium | 156 mg |
