Fluffy Biscuits Recipe
- Time: Active 15 minutes, Passive 12 minutes, Total 27 minutes
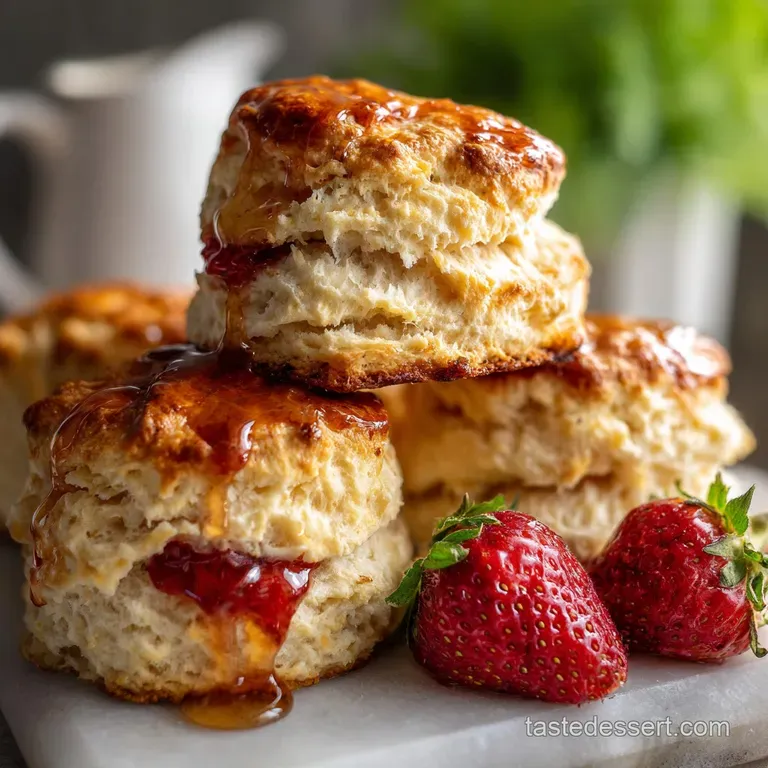
- Flavor/Texture Hook: Shatteringly crisp crust with pillowy, buttery layers
- Perfect for: Weekend brunch, emergency comfort food, or a side for hearty stews
- Master Your Next Homemade Biscuits Recipe
- The Science Behind Flaky Layers
- Precise Specs for Perfect Success
- Choosing the Best Quality Ingredients
- Tools for Professional Baking Results
- Step-by-Step Preparation and Baking
- Troubleshooting Your Baking Texture Issues
- Customizing Your Flavor Profiles Naturally
- Scaling the Recipe for Any Occasion
- Myths Regarding Biscuit Technique
- Storage and Waste Prevention Tips
- Pairing Suggestions for Every Meal
- Biscuit Recipe FAQs
- 📝 Recipe Card
Master Your Next Homemade Biscuits Recipe
There is a specific sound that defines a successful morning in my kitchen: the muffled "thump" of a cast iron skillet hitting the wooden trivet, followed by the faint crackle of steam escaping a golden brown crust.
For years, I chased that elusive skyscraper rise, often ending up with what my brother lovingly called "edible hockey pucks." They tasted fine, but they lacked that soul satisfying shatter that happens when you pull a warm biscuit apart.
I realized that the "secret" wasn't a secret at all; it was just physics. Most of us are taught to treat dough gently, but when it comes to a buttermilk biscuits recipe, you actually need a bit of strategic engineering.
We aren't just mixing; we are building a structural lattice of fat and flour that is destined to explode in the heat of the oven. Trust me, once you see those layers peel back like the pages of a well loved book, you’ll never go back to the stuff in the pressurized can.
The beauty of this method lies in its simplicity. You don't need a fancy stand mixer or a culinary degree. You just need very cold hands, a grating box, and the willingness to get a little flour on your apron.
We’re going to talk about why the temperature of your kitchen matters more than the brand of your flour and how a few simple folds can double the height of your bake. Let’s get into the nitty gritty of what actually works.
The Science Behind Flaky Layers
The Science of Why it Works: CO2 gas produced by the reaction between buttermilk acid and baking soda gets trapped within the gluten structure. Simultaneously, the frozen butter pieces melt rapidly, releasing steam that pushes the dough layers upward before the protein sets.
- Steam Injection: When the 170g of frozen butter hits the 218°C (425°F) oven, the water content in the butter vaporizes instantly, forcing the flour layers apart into "laminae."
- Acid Base Neutralization: The lactic acid in the buttermilk reacts with the 1/2 teaspoon of baking soda, creating an immediate bubbling effect that lightens the crumb.
- Gluten Inhibition: Using cold ingredients slows down gluten formation, ensuring the final texture remains tender rather than bread like or chewy.
- Starch Gelatinization: High initial heat causes the starches on the exterior to set quickly, creating a crisp, protective shell that supports the internal rise.
| Method | Time | Texture | Best For |
|---|---|---|---|
| Cast Iron Skillet | 12 minutes | Crunchy bottom, soft sides | Maximum "home style" feel |
| Baking Sheet | 12 minutes | Even browning, crisp edges | Batch cooking for crowds |
| Air Fryer | 8 minutes | Extra crispy all over | Small batches (2-4 biscuits) |
This comparison highlights how the vessel changes the heat distribution. A cast iron skillet retains massive amounts of thermal energy, which fries the bottom of the biscuit in the butter, much like the technique I use when preparing a Chicken and Dumplings recipe. If you prefer a more uniform, delicate crunch, the baking sheet is your best friend because it allows for better airflow around each individual round.
Precise Specs for Perfect Success
| Component | Science Role | Pro Secret |
|---|---|---|
| Frozen Butter | Provides structural steam | Grate it while frozen to keep pieces distinct and cold |
| Full Fat Buttermilk | Tenderizes via acidity | Shake the carton well to incorporate the thick solids |
| Baking Powder | Secondary chemical lift | Always check the expiration date for maximum "poof" |
Getting the measurements right is the difference between a biscuit that stands tall and one that slumps. I always weigh my 375g of flour because a "cup" can vary by 20% depending on how tightly you pack it.
If you don't have a scale, fluff the flour with a fork before spooning it into the measuring cup and leveling it off with a knife.
Choosing the Best Quality Ingredients
- 3 cups (375g) All Purpose Flour: Provides the perfect protein balance (around 10-11%) for structure without toughness.
- 1 tablespoon Baking Powder: The primary lifting agent that works twice once when wet and once when heated.
- 1/2 teaspoon Baking Soda: Why this? Reacts with buttermilk acidity to provide instant aeration and better browning.
- 1 tablespoon Granulated Sugar: Why this? Feeds the Maillard reaction for a golden crust without making it "sweet."
- 1 1/2 teaspoons Fine Sea Salt: Enhances the buttery notes and prevents the dough from tasting flat.
- 3/4 cup (170g) Unsalted Butter, Frozen: Why this? Frozen fat is the key to creating distinct, flaky layers.
- 1 1/4 cups (300ml) Cold Full Fat Buttermilk: Provides moisture and the necessary acid for the leavening reaction.
- 1 tablespoon Melted Butter: For brushing the tops post bake to achieve a silky, professional finish.
If you find yourself without buttermilk, you can mimic the acidity by adding a tablespoon of lemon juice or white vinegar to regular whole milk and letting it sit for five minutes. It won't be quite as thick and velvety as the real deal, but it gets the job done in a pinch.
However, for that classic tang, nothing beats the real stuff.
Tools for Professional Baking Results
You don't need a kitchen full of gadgets, but two things are non negotiable: a box grater and a sharp biscuit cutter. I used to use a dull glass to cut my dough, but I learned the hard way that a blunt edge actually "seals" the sides of the dough together.
This prevents the layers from expanding upward, leaving you with a sad, squashed biscuit. A sharp stainless steel cutter acts like a guillotine, leaving the layers exposed and ready to climb.
A large metal bowl is also preferable to plastic or glass because it stays colder longer. If your kitchen is particularly warm, I even suggest throwing your mixing bowl in the freezer for ten minutes before you start.
It might sound like overkill, but in the world of biscuits, heat is the enemy until the very moment the tray hits the oven rack.
step-by-step Preparation and Baking
- Prep the heat. Preheat your oven to 218°C (425°F). Note: A hot oven is critical for that initial "oven spring."
- Mix dry base. Whisk the 375g flour, baking powder, baking soda, sugar, and salt in a large chilled bowl.
- Grate the butter. Using the large holes of a box grater, grate the 170g of frozen butter directly into the flour.
- Toss the fat. Gently toss the butter shreds with a fork until every piece is coated in flour. Note: Use your hands as little as possible to keep the fat frozen.
- Hydrate the dough. Make a well in the center and pour in the 300ml of cold buttermilk.
- Stir to combine. Use a spatula to fold the buttermilk into the flour until just moistened and shaggy.
- Laminate the dough. Turn the dough onto a floured surface and pat it into a rectangle. Fold it in half, turn 90 degrees, and repeat 5-6 times.
- Cut the rounds. Pat the dough to 2.5cm thickness and press the cutter straight down. Do not twist the cutter.
- Bake for height. Arrange the biscuits in a skillet or on a sheet, with sides touching. Bake 12 minutes until tops are golden and towering.
- Finish with shine. Brush the hot tops with the 1 tablespoon of melted butter immediately upon removal.
Achieve High Vertical Rise
The secret to the "skyscraper" effect is the stacking method. When you fold the dough over itself in step 7, you are physically creating layers of fat and flour. Every fold doubles the layers. By the time you’ve done five folds, you have over thirty microscopic layers of butter ready to expand.
Placing the biscuits so they touch each other in the pan also helps; they will push off one another to rise up instead of spreading out.
Create a Tender Crumb
The "shaggy" stage in step 6 is where most people go wrong. If the dough looks like a mess, you're doing it right. If it looks like smooth pizza dough, you've over mixed it and developed too much gluten. You want to see streaks of flour and lumps of butter.
This lack of uniformity is exactly what creates the irregular, airy pockets inside the finished bake.
Troubleshooting Your Baking Texture Issues
Fixing Dense Heavy Biscuits
If your biscuits feel like lead weights, the most likely culprit is warm butter. If the butter melts into the flour before it hits the oven, you lose the steam pockets. This often happens if you use your hands too much or if the buttermilk wasn't chilled.
| Problem | Root Cause | Solution |
|---|---|---|
| Biscuits are tough | Over handling the dough | Fold only 5-6 times; stop once it holds together |
| No layers visible | Butter was too soft | Use frozen butter and grate it; keep kitchen cool |
| Bottoms are burnt | Sugar content too high or low rack | Move the tray to the middle rack; use parchment |
Another common issue is "twisting" the cutter. I know it's tempting to twist to get a clean break, but that motion smashes the edges of the dough together, effectively "gluing" the layers shut. Press straight down, pull straight up.
Common Mistakes Checklist
- ✓ Ensure your baking powder hasn't been sitting in the pantry for three years.
- ✓ Never use room temperature buttermilk; it must be icy cold.
- ✓ Avoid the urge to add more liquid; the dough should be slightly sticky but manageable.
- ✓ Do not roll the dough with a rolling pin; patting with your hands preserves the air pockets.
- ✓ Keep the biscuits touching in the pan to force a vertical rise.
Fixing Pale Floury Tops
If your biscuits are cooked through but look ghostly white, your oven temperature might be inaccurate. Most home ovens run 10-15 degrees off. Use an oven thermometer to ensure you're actually at 218°C.
You can also brush the tops with a little extra buttermilk or an egg wash before baking to encourage that deep mahogany browning.
Customizing Your Flavor Profiles Naturally
While a classic buttermilk biscuits recipe is a masterpiece on its own, the dough is a fantastic canvas for experimentation. If you're feeling savory, folding in 50g of sharp cheddar and a tablespoon of chives during the "shaggy" stage creates a wonderful breakfast staple.
For a sweeter twist, add the zest of an orange and a handful of dried cranberries.
Savory Garlic Herb Variations
To get that "restaurant style" garlic biscuit, add 1/2 teaspoon of garlic powder to the dry mix. Once the biscuits come out of the oven, mix your 1 tablespoon of melted butter with a pinch of dried parsley and a brush of fresh minced garlic.
The residual heat will take the "bite" out of the raw garlic while keeping the flavor punchy and fresh.
Plant Based Vegan Alternatives
It is entirely possible to make these without animal products. Swap the butter for a high-quality vegan butter stick (ensure it is frozen) and replace the buttermilk with soy milk mixed with 1 tablespoon of apple cider vinegar.
The texture will be slightly less "shattering" due to the different melting points of plant fats, but the flavor remains excellent.
Scaling the Recipe for Any Occasion
When you're feeding a crowd, doubling this recipe is straightforward. I recommend working in two separate batches rather than one massive bowl of dough. Why? Because the time it takes to process a double batch often allows the butter to get too warm.
If you must do one large batch, keep the flour/butter mixture in the fridge while you prep your pans.
For a smaller household, you can easily halve the ingredients. Since the recipe calls for 1.25 cups of buttermilk, half would be 150ml. When scaling down, keep an eye on the bake time smaller batches in a larger oven can sometimes cook 1 or 2 minutes faster because of the increased air circulation. For a sweet treat to follow your meal, you might consider trying a New York Style recipe for dessert.
Myths Regarding Biscuit Technique
"You must use Southern soft wheat flour for good biscuits." This is a common misconception. While lower protein flour like White Lily is fantastic, all purpose flour works beautifully as long as you don't overwork it.
The "softness" of the biscuit comes more from the fat to flour ratio and the moisture from the buttermilk than the specific strain of wheat.
Another myth is that you need a specialized "biscuit bowl" or a wooden trough. While they are beautiful heirlooms, a standard stainless steel bowl works better for modern kitchens because it conducts cold efficiently. The most important "tool" is actually the speed at which you work.
The faster you get the dough into the oven, the better the result will be.
Storage and Waste Prevention Tips
- Storage: Keep baked biscuits in an airtight container at room temperature for 2 days, or in the fridge for 5 days.
- Freezing: Freeze unbaked rounds on a tray, then transfer to a bag. Bake directly from frozen, adding 3-4 minutes to the timer.
- Zero Waste: Don't throw away the odd shaped scraps after cutting! Bake them alongside the rounds as "cook's treats." Alternatively, pulse stale biscuits in a food processor to create a base for a cobbler topping or a binder for meatballs, similar to how you would use an Italian Bread Crumbs recipe.
To reheat, avoid the microwave it turns the crust into rubber. Instead, wrap the biscuits in foil and pop them into a 175°C (350°F) oven for 5-7 minutes. This restores the exterior crunch while gently warming the center.
Pairing Suggestions for Every Meal
These biscuits are the ultimate utility player in the kitchen. For breakfast, split them open and load them with a crispy fried egg and thick cut bacon. For dinner, they are the perfect vehicle for mopping up gravy or the juices from a slow roasted pot roast.
I personally love them with a simple swipe of honey butter and a sprinkle of flaky salt.
If you have leftovers (rare, I know!), they make an incredible base for a "biscuit bread pudding." Simply cube the biscuits, toss them with a custard of eggs, milk, and cinnamon, and bake until set. The buttery layers create a texture that is far superior to standard bread.
Whether you're serving them with a savory stew or a sweet jam, the key is to serve them warm. There is something truly magical about a biscuit that is still steaming when you break it open.

Biscuit Recipe FAQs
What is the secret to a good biscuit?
Using very cold butter and not overworking the dough. Cold butter creates steam pockets during baking, leading to flaky layers. Minimal handling prevents gluten development, keeping the biscuits tender.
What are the ingredients for biscuits?
Flour, leavening (baking powder/soda), salt, fat (butter/shortening), and liquid (buttermilk/milk). Sugar is often added for browning and flavor balance. The ratio and quality of these ingredients significantly impact the final texture and taste.
Are biscuits better with butter or crisco?
Butter generally offers superior flavor, while Crisco (vegetable shortening) can yield a more tender and flaky texture. Many bakers opt for a combination of both to get the best of both worlds. If you enjoyed mastering the texture in our French Cruller Doughnut Recipe, you'll appreciate how fat choice impacts structure here too.
Are biscuits better with all-purpose or self rising flour?
For recipes specifically calling for it, self rising flour is best as it contains leavening agents and salt. If using all-purpose flour, you'll need to add baking powder and salt separately. All-purpose flour offers more control over the leavening.
How do I make my biscuits taller?
Handle the dough as little as possible and ensure your butter is frozen. Fold the dough several times before cutting to create layers, and bake them close together so they push each other upwards. This technique is similar to how we build layers in Homemade Naan.
Why are my biscuits tough?
Toughness usually comes from overworking the dough, which develops too much gluten. Try to mix until just combined, and avoid excessive kneading or rolling. Minimal handling is key to a tender biscuit.
How should I store leftover biscuits?
Store cooled biscuits in an airtight container at room temperature for up to 2 days. For longer storage, they can be frozen unbaked or baked. Reheat gently in the oven, not the microwave, to preserve crispness.
Fluffy Biscuits Recipe
Ingredients:
Instructions:
Nutrition Facts:
| Calories | 243 kcal |
|---|---|
| Protein | 4.2 g |
| Fat | 13.6 g |
| Carbs | 26 g |
| Fiber | 0.8 g |
| Sugar | 2.2 g |
| Sodium | 475 mg |
