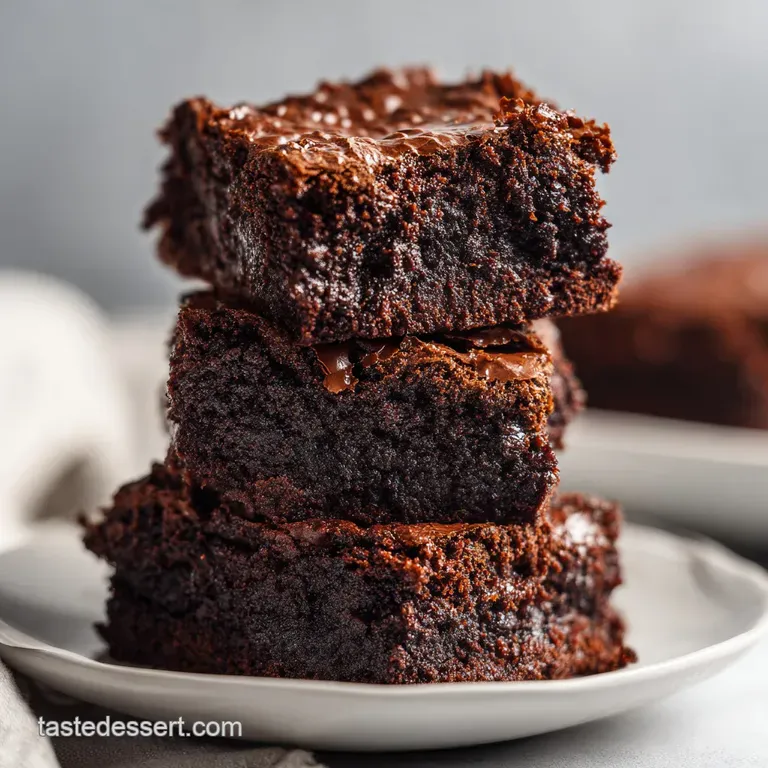
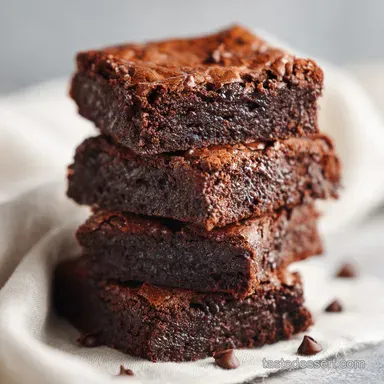
Fudgy Pumpkin Brownies with Velvety Swirl
- Time: Active 15 minutes, Passive 30 minutes, Total 45 minutes
- Flavor/Texture Hook: Fudgy chocolate with a velvety pumpkin swirl
- Perfect for: Fall bake sales, budget-friendly holiday parties, or cozy weekend baking
- Creating the Ultimate Fudgy Pumpkin Brownies
- Why This Harvest Treat Works So Well
- Technical Recipe Specs for Success
- Gathering Your Essential Pantry Staples
- Basic Tools for Better Baking
- Step-by-Step Path to Fudgy Bliss
- Solving Common Brownie Baking Problems
- Dietary Swaps for Every Guest
- Storing and Reheating Your Squares
- Plating and Garnishing Your Dessert
- Recipe FAQs
- 📝 Recipe Card
Creating the Ultimate Fudgy Pumpkin Brownies
I’ll never forget the first time I tried to marry chocolate and pumpkin in a single pan. I was standing in my tiny first apartment, the air thick with the smell of scorched cocoa because I’d tried to get fancy with a double boiler I didn't need.
The result was a soggy, sad mess that looked more like a swamp than a dessert. But that failure taught me everything about how pumpkin behaves in a batter. It’s heavy, it’s wet, and if you don't treat it with respect, it will turn your brownies into a sponge.
Right then, I went back to basics. I realized the secret isn't more flour it’s about balancing the moisture of the pumpkin purée with the fat of the butter. When you get it right, you get this incredible contrast: a dark, almost bitter chocolate base that hits your tongue first, followed by the warm, maple sweetened pumpkin swirl that feels like a hug.
It’s the kind of traybake that makes your kitchen smell like a high end bakery without requiring a single specialty ingredient.
We’ve all seen those recipes that demand five different types of sugar or rare chocolate bars. Honestly, don't even bother with that. We’re going to use standard pantry staples to create something that feels gourmet.
We're talking about a crackling top that will shatter under your fork and a center so dense it practically sticks to the roof of your mouth in the best way possible. Let's crack on and get these into the oven.
Why This Harvest Treat Works So Well
The magic of these brownies lies in the physics of the swirl and the chemistry of the cocoa. Most people think pumpkin and chocolate are a weird match, but they are actually flavor soulmates when you manage the sugar levels correctly.
- The Physics of the Swirl: By keeping the pumpkin layer slightly denser with maple syrup, it stays suspended on top of the chocolate rather than sinking to the bottom.
- Starch Gelatinization: Using Dutch process cocoa provides a neutral pH that allows the flour to set quickly, trapping the pumpkin moisture before it can migrate.
- Fat to Flour Ratio: High fat content from the melted butter ensures a fudgy interior rather than a cakey one by inhibiting excessive gluten development.
- Sugar Saturation: Dissolving the granulated sugar into the warm butter creates that signature shiny, paper thin crust on top.
| Method | Cook Time | Texture Outcome | Best For |
|---|---|---|---|
| Standard Oven | 30 minutes | Crisp edges, fudgy center | The classic experience |
| Convection (Fan) | 25 minutes | Thicker crust, even rise | Those who love the corner pieces |
| Toaster Oven | 32 minutes | Very soft center | Small batches or quick fixes |
If you're looking for more harvest flavors to fill up your kitchen, you'll love my Spiced Pumpkin Dream recipe. It uses many of the same spices we're working with here, so nothing goes to waste.
Technical Recipe Specs for Success
When we talk about baking, precision is our best friend. I’ve made the mistake of "eyeballing" pumpkin before, and trust me, an extra tablespoon can be the difference between a brownie and a pudding.
The Science of the Structure
| Ingredient | Science Role | Pro Secret |
|---|---|---|
| Dutch process Cocoa | Provides color and depth | Sift it twice to avoid bitter clumps |
| Pumpkin Purée | Adds moisture and fiber | Blot it with a paper towel if it looks watery |
| Melted Butter | Inhibits gluten | Use it warm, not boiling, to keep the egg from curdling |
| Pure Vanilla | Flavor carrier | Add it to the fat to disperse the aroma better |
Understanding how these parts move together is how you go from a "maybe" baker to a "wow" baker. The butter doesn't just add flavor; it coats the flour particles. This prevents the water in the pumpkin from reacting too much with the wheat proteins. If we had too much gluten, we’d have bread.
We want the opposite of bread. We want decadence.
Gathering Your Essential Pantry Staples
This is where the budget smart angle really shines. You don't need to go to a specialty store. You probably have 90% of this in your cupboard right now.
- 1/2 cup (115g) unsalted butter, melted: Why this? Provides the fat base for that fudgy texture. (Substitute: Salted butter, just skip the extra sea salt).
- 1 cup (200g) granulated sugar: Why this? Creates the structural sweetness and the shiny top. (Substitute: Light brown sugar for a chewier, moister bite).
- 1 tablespoon (13g) pure vanilla extract: Why this? Bridges the gap between chocolate and pumpkin. (Substitute: Vanilla bean paste for fancy flecks).
- 1 large (50g) egg, room temperature: Why this? Binds everything together without making it cakey. (Substitute: Flax egg for a vegan ish twist).
- 2/3 cup (60g) Dutch process cocoa powder, sifted: Why this? Darker, richer flavor that stands up to pumpkin. (Substitute: Natural cocoa powder plus 1/8 tsp baking soda).
- 3/4 cup (95g) all purpose flour: Why this? Just enough structure to hold the fat. (Substitute: 1 to-1 gluten-free flour blend).
- 1/2 teaspoon (3g) sea salt: Why this? Cuts through the sugar and makes chocolate pop. (Substitute: Table salt, but use slightly less).
- 1/2 cup (120g) pumpkin purée: Why this? The star of the show. (Substitute: Mashed sweet potato for a similar vibe).
- 1 teaspoon (2g) pumpkin pie spice: Why this? Cinnamon, ginger, and nutmeg warmth. (Substitute: Equal parts cinnamon and ginger).
- 1 tablespoon (20g) maple syrup: Why this? Adds a complex sweetness to the swirl. (Substitute: Honey or agave).
If you find yourself with leftover pumpkin after this, don't let it sit in the fridge until it grows a beard. You can use it in my Libbys Pumpkin Muffins recipe, which is a fantastic way to use up those last few tablespoons in the can.
Basic Tools for Better Baking

You don't need a stand mixer for this. In fact, I prefer doing this by hand. It gives you a better "feel" for the batter, and you're less likely to overmix it. Overmixing is the enemy of the fudgy brownie.
- 8x8 inch Square Baking Pan: This is the gold standard for brownies. It gives you the right thickness.
- Parchment Paper: Don't skip this. Leave an overhang so you can lift the whole block out once cooled.
- Whisk and Rubber Spatula: Whisk for the initial mixing, spatula for folding in the flour.
- Two Mixing Bowls: One for the main chocolate batter, one smaller one for the pumpkin swirl.
- Sifter: Cocoa powder is notoriously lumpy. Sifting is non negotiable here.
Chef's Tip: Grease the pan before putting the parchment paper down. The grease acts like glue, keeping the paper from sliding around while you're trying to spread the thick chocolate batter.
step-by-step Path to Fudgy Bliss
Preparation is half the battle. Get your oven preheated to 350°F (180°C) and line that pan. If your oven takes a while to heat up, start this 20 minutes before you want to bake.
- Melt the butter. Let it cool for 5 minutes so you don't cook the egg on contact.
- Whisk the sugar and butter. Do this for about 2 minutes until the mixture looks slightly pale.
- Add the egg and vanilla. Whisk vigorously until the batter looks glossy and smooth.
- Sift in the cocoa powder. Fold it in gently with your spatula until no large dry streaks remain.
- Add flour and salt. Fold just until combined. Stop as soon as the white streaks disappear. Note: Overworking the flour makes brownies tough.
- Prep the pumpkin layer. In your smaller bowl, stir together the pumpkin purée, pumpkin pie spice, and maple syrup until velvety and uniform.
- Layer the batter. Pour about 3/4 of the chocolate batter into the pan. Drop spoonfuls of the pumpkin mixture on top.
- The Swirl. Dollop the remaining chocolate batter in the gaps. Use a knife or skewer to drag through the layers until a marbled pattern emerges.
- Bake. Place in the center of the oven for 30 minutes until the edges are firm and the center barely jiggles.
- Cool completely. This is the hardest step. If you cut them hot, they will fall apart. Wait at least 1 hour for the structure to set.
Solving Common Brownie Baking Problems
We’ve all been there the timer goes off, you look in the oven, and things don't look quite right. Don't panic. Most brownie issues are easily fixed or, at the very least, explained so you can nail it next time.
Why Your Squares Are Mushy
If your brownies feel like raw dough even after the cooling period, the most likely culprit is the pumpkin moisture. Did you use "Pumpkin Pie Filling" instead of "Pumpkin Purée"? The filling has added water and sugar which throws off the balance.
If they are already baked and mushy, try chilling them in the fridge for 2 hours. Cold fat firms up and can save a soft brownie.
Why the Swirl Disappeared
If your beautiful orange marble turned into a muddy brown mess, you likely over swirled. You only need 4 or 5 passes with the knife. The batter is thick, so it doesn't need much encouragement to move. Also, ensure your pumpkin layer isn't too runny; if it is, it will just soak into the chocolate.
| Problem | Root Cause | Solution |
|---|---|---|
| Greasy surface | Butter was too hot when adding egg | Whisk butter and sugar longer next time |
| Cakey texture | Too much flour or over beaten egg | Weigh your flour and stop mixing sooner |
| Dry and crumbly | Overbaked | Pull from oven when the center still has a slight wobble |
Common Mistakes Checklist
- ✓ Sift the cocoa powder (lumps will stay bitter even after baking)
- ✓ Use room temperature eggs (cold eggs can seize the melted butter)
- ✓ Don't over swirl the pumpkin (keep those distinct orange ribbons)
- ✓ Let them cool in the pan (they continue to cook from residual heat)
- ✓ Use a sharp, hot knife for clean cuts (wipe it between every slice)
Dietary Swaps for Every Guest
Baking for a crowd often means navigating allergies or preferences. Luckily, this base recipe is quite forgiving because the pumpkin provides so much natural moisture.
Making it Vegan
You can replace the egg with a "flax egg" (1 tbsp ground flaxseed meal + 3 tbsp water, let sit for 5 mins). For the butter, use a high-quality vegan butter stick. Avoid liquid oils if possible, as they change the fudgy density.
The maple syrup in the pumpkin layer is already vegan friendly, which is a win!
Going gluten-free
I have had great success with a 1 to-1 gluten-free flour blend (like King Arthur or Bob’s Red Mill). Because this recipe doesn't rely on a high rise, you don't miss the gluten structure as much as you would in a sponge cake. The pumpkin helps keep the GF flour from feeling "gritty" or dry.
| Premium | Budget | Flavor Impact | Savings |
|---|---|---|---|
| Real Vanilla Bean | Vanilla Extract | Very minimal in a chocolate base | Save $4-6 |
| High fat European Butter | Store Brand Butter | Slightly less creamy, still fudgy | Save $3 |
| Valrhona Cocoa | Dutch process Store Brand | Still dark and delicious | Save $5 |
Storing and Reheating Your Squares
Brownies are actually better on day two. The flavors have time to meld, and the moisture from the pumpkin migrates through the chocolate, making the whole thing even more velvety.
Storage: Keep them in an airtight container at room temperature for up to 3 days. If you live in a very humid climate, the fridge is better, where they’ll last for 6 days.
Just be aware that refrigeration can make them a bit firmer, so let them sit out for 10 minutes before eating.
Freezing: These freeze beautifully. Wrap individual squares in plastic wrap, then put them in a freezer bag. They’ll stay fresh for 3 months. To eat, just thaw at room temperature for an hour.
Zero Waste Tip: If you somehow end up with dry brownie edges, don't toss them! Crumble them over vanilla ice cream or fold them into a milkshake. You can also toast the crumbs and use them as a "soil" for a fall themed pudding cup.
Plating and Garnishing Your Dessert
Presentation is where you can really make a budget recipe look like it cost $40 at a boutique bakery. A little bit of effort goes a long way here.
For a decadent twist, I love serving these slightly warm with a scoop of cinnamon ice cream. If you want to keep it simple, a light dusting of powdered sugar across the top highlights the dark chocolate and bright orange swirl perfectly. If you're hosting a dinner party, try serving them alongside The Fudge Brownie recipe for a "duo of chocolate" platter.
Another great trick is to sprinkle a few flakes of sea salt on top immediately after they come out of the oven. The salt hits the maple syrup in the pumpkin and creates a salted caramel adjacent flavor that is absolutely addictive. Whatever you do, make sure you use a sharp knife for those clean, professional edges.
Trust me, the "first square" is always the chef's snack don't worry if it's not perfect!

Recipe FAQs
Can you add pumpkin to a brownie mix?
Yes, but it requires adjusting liquid. Simply dumping purée into a box mix will result in a cakey, under baked mess because the mix relies on specific moisture levels. You need to reduce other liquids like oil or water to compensate for the wetness of the pumpkin.
What is in a Killer brownie?
A "Killer brownie" typically implies extreme fudginess and richness. This is achieved by maximizing the fat-to-flour ratio, often by using melted butter instead of softened, and sometimes by incorporating extra egg yolks for density.
If you master the fat ratio here, you'll achieve that desirable texture in our pumpkin version.
What does pumpkin replace in brownies?
Pumpkin primarily replaces some of the necessary fat and moisture. When added to a standard recipe, the purée substitutes for some of the oil or butter needed to keep the final product from drying out.
This is why you must use less added fat when incorporating it to maintain the desired dense, fudgy structure.
What is the most popular dessert made from pumpkins?
Pumpkin pie is historically the most popular dessert in North America. However, contemporary trends show that pumpkin bread, muffins, and specialized treats like these brownies are rapidly gaining popularity due to their ease and comforting spice profile.
How do I prevent my pumpkin layer from sinking to the bottom?
Make the pumpkin swirl layer slightly denser than the chocolate batter. Ensure you are using pure pumpkin purée, not the sugary pie filling, and whisk in your maple syrup to maintain viscosity. If you need a similar flavor balance using a thinner base, see how acid is used to stabilize emulsions in our Red Velvet Marble recipe.
Should I use Dutch process or natural cocoa powder for the best flavor contrast?
Use Dutch process cocoa powder for the deepest, richest chocolate flavor. Dutch process cocoa is chemically treated to be less acidic, which results in a darker color and a smoother taste that beautifully contrasts the warm, spiced notes of the pumpkin swirl.
How can I ensure the top develops that classic shiny, crackly crust?
Completely dissolve the sugar into the melted butter and eggs first. The characteristic shiny top forms when the sugar melts fully into the wet ingredients and crystallizes as the batter bakes and dries out on the surface. Mastering this surface tension is similar to how we manage the crust on a classic Homemade Kaiser Rolls recipe.
Fudgy Pumpkin Brownies Swirl
Ingredients:
Instructions:
Nutrition Facts:
| Calories | 143 calories |
|---|---|
| Protein | 1.8g |
| Fat | 6.7g |
| Carbs | 20.8g |
| Fiber | 1.6g |
| Sugar | 13.6g |
| Sodium | 78mg |
