Funfetti Dip: Creamy and Whimsical
- Time: Active 10 minutes, Passive 2 minutes, Total 12 minutes
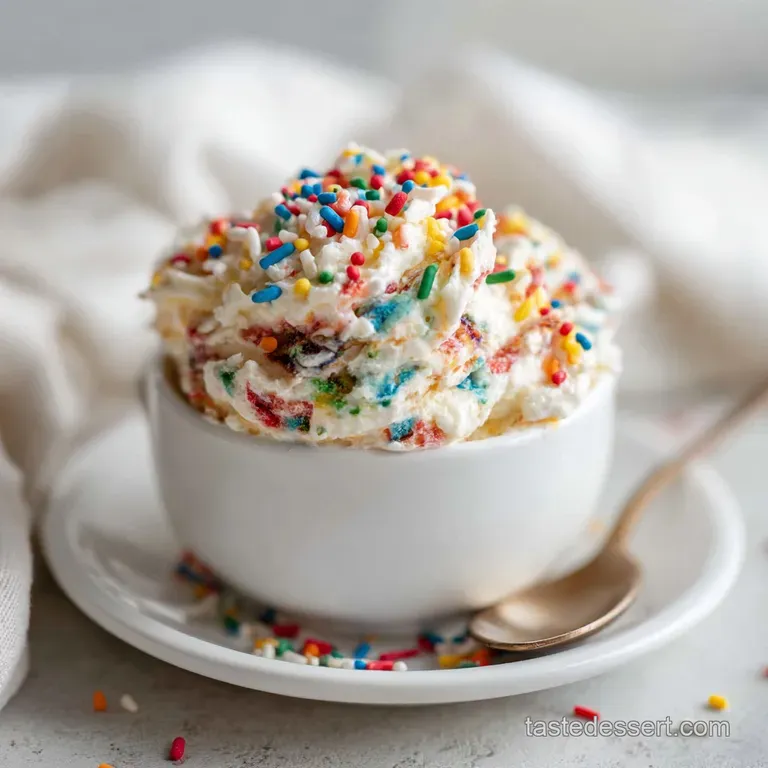
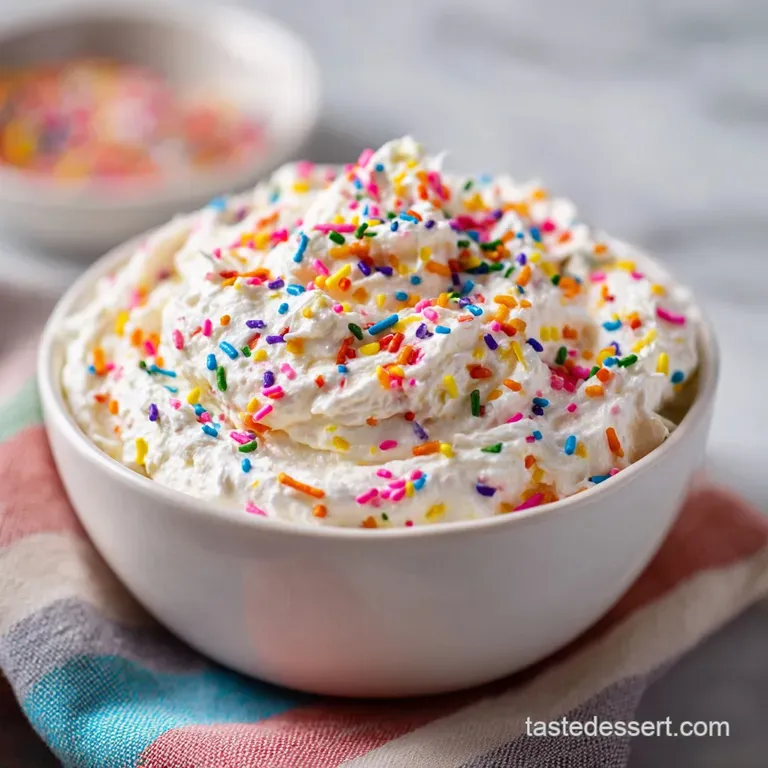
- Flavor/Texture Hook: Silky vanilla cream with a nostalgic cake batter finish and crunchy sprinkle pops
- Perfect for: Last minute birthday parties, festive brunch spreads, or whimsical movie nights
- Mastering Funfetti Dip Colorful Party Dessert Dip
- Core Stats and Timing
- How the Clouds Stay Fluffy
- Essential Ingredients and Substitutions
- Necessary Kitchen Tools
- Step-by-Step Culinary Process
- Fixing Common Dip Problems
- Creative Flavor Variations
- Storage and Waste Reduction
- Artistic Serving Suggestions
- Kitchen Truths and Folklore
- Recipe FAQs
- 📝 Recipe Card
Mastering Funfetti Dip Colorful Party Dessert Dip
The first time I served this funfetti dip colorful party dessert dip, it wasn't even for a birthday. It was a rainy Tuesday, and my kitchen was a disaster of half finished projects. I needed something that felt like a celebration without the four hour commitment of a tiered cake.
As I swirled the rainbow sprinkles into the ivory cream, the kitchen filled with that distinct, sugary aroma of vanilla and almond the kind that instantly transports you back to being seven years old.
Watching the colors streak through the velvety base felt like painting on a fresh canvas. When my friends arrived, they didn't just eat it; they hovered around the bowl, graham crackers in hand, catching the light on every neon speck. It’s the kind of dish that turns a mundane gathering into an event.
It isn't just about the sugar; it’s about that whimsical, playful energy that only a shower of rainbow sprinkles can provide.
We’ve all seen "cake batter" recipes that leave a gritty film on the roof of your mouth. I spent a few chaotic afternoons figuring out how to bypass that. The secret isn't just mixing; it’s the way we treat the dry ingredients and the specific timing of the aeration.
This isn't just a bowl of frosting; it’s a light, airy masterpiece that balances the richness of cream cheese with the nostalgia of a boxed mix.
Core Stats and Timing
| Method | Total Time | Texture Outcome | Best Occasion |
|---|---|---|---|
| Fast Method | 12 minutes | Light and airy | Last minute guests |
| Classic Fold | 25 minutes | Dense and fudgy | Formal dessert board |
| Chilled Set | 2 hours | Mousse like | Summer outdoor parties |
Choosing the right approach depends on how much time you have before the guests arrive. The fast method, which we are focusing on today, prioritizes immediate fluffiness. If you have extra time, letting the dip sit in the fridge for an hour after mixing allows the flavors to meld further, though the "velvety" texture is at its peak right after the whipped topping is folded in.
How the Clouds Stay Fluffy
Understanding why this recipe stays so light rather than turning into a heavy brick of sugar is the key to mastering it. Most people just stir, but we are going to build a structure.
- Aeration Stability: Beating the butter and cream cheese for a full 3 minutes creates a network of tiny air bubbles that support the heavier cake mix.
- Starch Transformation: Sifting the heat treated mix removes the lumps that cause a sandy mouthfeel, ensuring every bite is as smooth as silk.
- Fat Suspension: Using full fat cream cheese provides the structural integrity needed to keep the whipped topping from collapsing into a liquid mess.
| Component | Science Role | Pro Secret |
|---|---|---|
| Cream Cheese | Structural base | Use the block, never the tub variety |
| Cake Mix | Flavor & Thicker | Heat treat to 165°F for food safety |
| Whipped Topping | Aeration agent | Fold gently to keep the air trapped |
| Almond Extract | Flavor depth | It provides that "authentic" bakery scent |
The interaction between the chilled whipped topping and the room temperature cream cheese base is a delicate dance. If the base is too hot, the topping melts. If the base is too cold, you get lumps. Finding that middle ground where everything is "softened" but not "liquid" is where the magic happens.
Essential Ingredients and Substitutions
To make this funfetti dip colorful party dessert dip, you need items that provide both flavor and stability. Don't skimp on the fat content here; the "light" versions of these ingredients often contain more water, which will turn your dip into a puddle within twenty minutes.
- 15.25 oz Funfetti Cake Mix: The soul of the dish. Why this? It contains specific emulsifiers that give that classic "cake" taste.
- 8 oz Full fat Cream Cheese: Softened to room temp. Why this? Provides the tang and the backbone for the fluff.
- 0.5 cup Unsalted Butter: Also softened. Why this? Adds a rich, silky mouthfeel that oil based dips lack.
- 1 tsp Pure Vanilla Extract: For warmth.
- 0.25 tsp Almond Extract: The "secret" ingredient. Why this? This is what makes it taste like a professional bakery.
- 8 oz Thawed Whipped Topping: Use the stuff in the tub.
- 2 tbsp Whole Milk: For consistency.
- 0.5 cup Rainbow Sprinkles: Extra for the visual pop.
| Original Ingredient | Substitute | Why It Works |
|---|---|---|
| Whipped Topping | Stabilized Whipped Cream | Uses gelatin to hold air. Note: Less sweet than the original. |
| Cream Cheese | Mascarpone | Higher fat content, much creamier and less tangy. |
| Whole Milk | Heavy Cream | Adds even more richness and a thicker finish. |
As much as I love a colorful dessert platter, this dip is the easiest way to feed a crowd without having to bake a single thing. It's essentially a shortcut to a party. If you're looking for something with a bit more tradition, you might enjoy my luscious Warbat dessert, but for a pure whimsical vibe, nothing beats the sprinkles.
Necessary Kitchen Tools
You don't need a professional bakery setup to make this work, but a few specific items will make your life much easier. A microwave safe bowl is non negotiable for the safety step, and a fine mesh sifter is what stands between you and a "gritty" dip.
For the mixing, a stand mixer such as a KitchenAid is the gold standard because it can beat enough air into the butter cream cheese mixture without your arm falling off. However, a sturdy hand mixer works perfectly well if you're willing to put in the time.
A silicone spatula is your best friend for the final fold; you need something flexible that can scrape the bottom of the bowl without deflating all those precious air bubbles you just worked so hard to create.
step-by-step Culinary Process
1. Ensuring Safe Flour Consumption
Place the 15.25 oz dry cake mix in a microwave safe bowl. Heat in 30 second intervals, stirring thoroughly between each burst, until the mixture reaches 165°F on a digital thermometer.
Note: This kills any lingering bacteria in the raw flour. Once heated, immediately pass the mix through a fine mesh sifter into a separate bowl to remove any heat induced clumps.
2. Beating the Creamy Base
In a large mixing bowl, combine the 8 oz softened cream cheese and 0.5 cup unsalted butter. Beat on medium high speed for 3 minutes until the mixture is pale, fluffy, and aerated. This step is vital for the structure.
3. Adding Flavor Accents
Lower the mixer speed and pour in the 1 tsp vanilla and 0.25 tsp almond extract. Continue beating for another 30 seconds until the aromas are fully released and the liquid is incorporated.
4. Adding the Cake Mix
Keeping the mixer on low, gradually add the sifted cake mix about a half cup at a time. Once all the powder is absorbed, increase the speed to medium for 30 seconds until the texture looks uniform and velvety.
5. Adjusting the Consistency
Check the thickness of your base. If it feels like heavy dough rather than a dip, add the 2 tbsp whole milk one tablespoon at a time until it reaches a spreadable, soft peak consistency.
6. The Gentle Final Fold
Swap your beaters for a silicone spatula. Gently add the 8 oz thawed whipped topping using a "cut and fold" motion slice through the center, scrape the bottom, and flip over the top. Repeat until no white streaks remain and the volume has doubled.
7. The Visual Pop
Scatter 0.5 cup rainbow sprinkles over the top of the fluffy mixture. Fold them in with exactly 2 or 3 strokes. Stop immediately once they are distributed to prevent the dye from bleeding into the white cream.
8. The Final Presentation
Transfer the dip to a whimsical serving bowl. Top with a few extra sprinkles and serve immediately or chill for a firmer texture.
Fixing Common Dip Problems
Even a simple dessert dip can go sideways if the temperatures aren't quite right or if the folding technique is too aggressive. Most issues stem from the cream cheese not being truly "room temperature," which leads to the dreaded "lumpy dip."
Solving Gritty Texture Issues
If your dip feels like there's sand in it, the cake mix wasn't sifted properly or the sugar in the mix hasn't had a chance to hydrate. You can sometimes fix this by letting the dip sit at room temperature for 20 minutes and then giving it one more very gentle fold.
This allows the moisture from the cream cheese to soften the sugar crystals.
| Problem | Root Cause | Solution |
|---|---|---|
| Soupy/Runny Dip | Over mixing the whipped topping | Chill for 1 hour to let the fats re solidify. |
| Lumpy Base | Cold cream cheese | Use a warm water bath under the bowl while mixing. |
| Color Bleeding | Low quality sprinkles | Use "jimmies" (long bits) rather than "nonpareils" (tiny balls). |
Common Mistakes Checklist
- ✓ Always heat treat your cake mix; raw flour is a safety hazard and tastes "dusty."
- ✓ Don't skip the sifting step; heat treating often creates small, hard pebbles of flour.
- ✓ Use the "cut and fold" method for the whipped topping to maintain the maximum height.
- ✓ Avoid nonpareils (the tiny round balls) inside the dip as they bleed color instantly.
- ✓ Ensure the butter is soft enough that a finger leaves an indent without sliding through.
Creative Flavor Variations
Once you have the base of this funfetti dip colorful party dessert dip down, you can treat it as a canvas for other themes. The basic structure of cake mix + cream cheese + whipped topping is incredibly versatile.
- Protein Boosting Swap: Replace half of the cream cheese with 115g of thick Greek yogurt. This adds a sharper tang and increases the protein content, though the dip will be slightly softer.
- Cookie Dough Variation: Use a yellow cake mix instead of funfetti, omit the almond extract, and fold in 0.5 cup of mini chocolate chips. It tastes exactly like the nostalgic "dunkable" snack from the 90s.
- Lemon Cloud: Use a lemon cake mix and add a teaspoon of fresh lemon zest for a bright, citrusy version that pairs beautifully with fresh blueberries.
Storage and Waste Reduction
This dip is best served fresh, but it can handle a bit of time in the fridge if handled correctly. Since it contains both dairy and a whipped element, temperature control is your biggest priority.
Storage: Keep any leftover dip in an airtight container in the refrigerator for up to 3 days. The whipped topping will slowly lose its air over time, so you might find the dip becomes a bit denser on day two. Give it a very gentle stir before serving to redistribute the moisture.
Freezing: You can actually freeze this dip! Store it in a freezer safe container for up to 1 month. To thaw, move it to the fridge overnight. Do not microwave it to thaw, or the whipped topping will turn into a liquid puddle.
Zero Waste: If you find yourself with a small amount of leftover dip that isn't enough for a party, use it as a filling for cupcakes or spread it between two graham crackers and freeze them for "funfetti ice cream sandwiches." You can also stir a dollop into your morning oatmeal for a very decadent,
"birthday cake" breakfast.
Artistic Serving Suggestions
Presentation is where you can really lean into the whimsical nature of this dish. I like to think of the serving platter as a piece of art. Don't just put a bowl on a plate; create a world of color around it.
The Birthday Platter Layout
Surround your bowl with a variety of textures. I suggest a mix of salty and sweet: salty pretzel thins, honey graham crackers, vanilla wafers, and fresh strawberries. The contrast between the salt of the pretzels and the sugary dip is what keeps people coming back for more.
Portioned Party Servings
For a more "covid safe" or formal gathering, pipe the dip into small clear plastic cups using a large star tip. Top each with a single maraschino cherry and a tiny dusting of sprinkles.
This makes the funfetti dip colorful party dessert dip look like a professional mousse and prevents the "double dipping" drama at a crowded table.
Kitchen Truths and Folklore
There are a lot of myths floating around about using boxed mixes in "raw" applications. Let's clear some of those up so you can cook with confidence.
"Cake mix is safe to eat straight from the box." False. Raw flour is an agricultural product and hasn't been treated to kill bacteria like E. coli or Salmonella. That is why we heat treat the mix to 165°F. It’s a 2 minute step that prevents a very bad night for your guests.
"You must use a stand mixer." False. While it’s easier, a whisk and a bit of elbow grease will get the job done. The goal is aeration. If you can beat enough air into the butter and cheese by hand, the result will be the same.
"Homemade whipped cream is always better." Not in this case. While I usually advocate for from scratch ingredients, the stabilizers in commercial whipped topping (like Cool Whip) are what keep this dip fluffy for hours.
Real whipped cream will deflate much faster once it hits the sugar and acid of the cream cheese.

Recipe FAQs
Why is it necessary to heat treat the cake mix?
Yes, heat treating is essential for food safety and flavor. Raw flour can contain bacteria, and heating it to 165°F ensures the dip is safe to eat while removing that raw, "dusty" taste.
How to ensure the texture stays light and airy?
Use a 'cut and fold' motion when incorporating the whipped topping. If you enjoyed mastering this gentle folding technique, you can apply the same principle when making our creamy French dessert delight to keep your base delicate.
Is it true I can use nonpareils for the rainbow effect?
No, this is a common misconception. Nonpareils are notorious for bleeding their colors immediately, so stick to standard rainbow sprinkles to keep your dip looking vibrant.
How to handle clumps after heating the cake mix?
Sift the mixture thoroughly into a separate bowl after it cools. Heat treating often creates small, hard flour pebbles that must be removed to ensure a smooth, creamy dip consistency.
How to properly store leftover dip?
Seal the dip in an airtight container and refrigerate for up to 3 days. Because it contains whipped topping, it will naturally lose some air over time, so give it a very gentle stir before serving again.
How to adjust the consistency if the dip feels too thick?
Add whole milk one tablespoon at a time. Stir the mixture after each addition until you reach a spreadable, dippable consistency that satisfies your preference.
Can I freeze this dessert dip?
Yes, you can freeze this dip successfully. Simply store it in a freezer safe container, and allow it to thaw slowly in the refrigerator before giving it a gentle stir to restore its original texture.
Funfetti Cake Batter Dip

Ingredients:
Instructions:
Nutrition Facts:
| Calories | 343 kcal |
|---|---|
| Protein | 2.8 g |
| Fat | 21.8 g |
| Carbs | 34.8 g |
| Fiber | 0.5 g |
| Sugar | 22.4 g |
| Sodium | 255 mg |
